ckEditor使用经验
第一步 下载ckeditor 进入官网https://ckeditor.com/ckeditor-4/download/点击Release notes选择4.8.0版本点击Download.Zip下载
第二步 加入ckeditor文件夹到项目下 引入
描述:
上面的js中description可以是id也可以是name
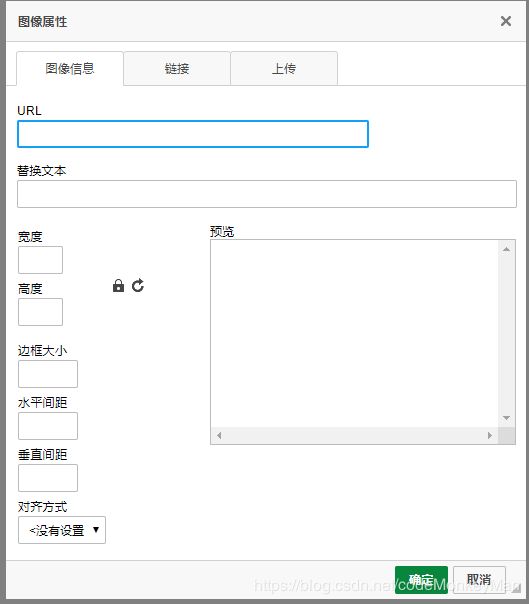
第三步 就是设置图片上传 ckeditor文件夹下的config.js中添加:
//设置预览页面为空
config.image_previewText=’ ';
//设置上传路径
config.filebrowserUploadUrl='/f/cms/util/uploadImage';
//设置高和宽
config.width=500;
config.height =380;
/**
* 富文本编辑器图片上传
* @param file
* @return
*/
@RequestMapping(value = “/uploadImage”, method = RequestMethod.POST)
public void uploadImage(@RequestParam(“upload”)MultipartFile[] file, HttpServletResponse response,HttpServletRequest request,HttpSession session) {
response.setCharacterEncoding(“UTF-8”);
PrintWriter out = null;
// CKEditor提交的很重要的一个参数 ,回调函数的序号
String callback = request.getParameter(“CKEditorFuncNum”);
try {
out = response.getWriter();
} catch (IOException e1) {
e1.printStackTrace();
}
UploadFileEntity fileInfo = null;
//上传目录地址
// String uploadDir = session.getServletContext().getRealPath("/") + “upload/”;
filePath = “D:\dpicmsUploadFile\imagesForAll\”;
下面的100就是去找的filePath
String uploadDir = UidUtil.getFilePath(100);
//如果目录不存在,自动创建文件夹
File dir = new File(uploadDir);
try {
List uploadFileEntityList = null;
try {
uploadFileEntityList = UidUtil.springUpload(request,100);
} catch (IOException e) {
e.printStackTrace();
}
if (null != uploadFileEntityList && uploadFileEntityList.size() > 0) {
boolean isSuccess = utilService.saveUploadFileList(uploadFileEntityList);
if (!isSuccess){
System.out.println(“上传成功”+uploadFileEntityList.get(0).getNewFileName());
}
}
// 返回"图像"选项卡并显示图片 request.getContextPath()为web项目名 4.8.0使用
out.println("
你可能感兴趣的:(学习经验)
- 【Python】edge文件转csv文件
海轰Pro
唯有努力Pythonpython开发语言
目录简介问题场景解决方案结语简介Hello!非常感谢您阅读海轰的文章,倘若文中有错误的地方,欢迎您指出~ଘ(੭ˊᵕˋ)੭昵称:海轰标签:程序猿|C++选手|学生简介:因C语言结识编程,随后转入计算机专业,获得过国家奖学金,有幸在竞赛中拿过一些国奖、省奖…已保研学习经验:扎实基础+多做笔记+多敲代码+多思考+学好英语!唯有努力本文仅记录自己感兴趣的内容问题场景存在一个类型为edge的文件需要转化为格
- #每天一本书+一页笔记# 1588《新东方名师这样学英语》
May终身阅读者
#一生一万本计划#10000/1588【阅读日期】20220722【书名】新东方名师这样学英语【作者】《新东方英语》编辑部【关键词】英语学习经验【分类】学习方法,英语【简评】本书由新东方出品,书中文章精选自《新东方英语.中学生》杂志,是一本新东方名师英语学习经验的合集。全书分为两大部分,前半部分主要分享多位老师学英语的经历和经验,后半部分分享听说读写语法等单项学习经验。全书平实真诚,有思路,有方法
- apk开发教程!安卓资深架构师分享学习经验及总结,技术详细介绍
安卓开发程序员
程序员Android
前言之前我有个学弟,应届毕业生,秋招拿了一些offer,这几天非常纠结。offer要考虑的因素太多了,盲目地搜索了几天,网上各种各样的声音都有,收获不多。为此咨询我一下,面对这种情况应该如何选择,我相信这个情况不仅仅是我学弟一人有,所以写了这篇文章,是我选择简历是一些新的,希望能帮到大家(一个案例哦!)JetPack里的组件上图就是JetPack中包含的组件列表,每个组件都是相对独立的,可以被单独
- C语言解析json数据结构分析与教程
陆 仁 嘉
c语言json源码
写在前面的话:本文档旨在归纳总结个人的学习经验与成果,记录自己的成长,随便给大家分享自己解决的思路,为在这方面有需要的朋友提供一个参考。本人能力有限水平一般,文中难免会有一些错误,希望大家抱着辩证客观的态度来阅读,有错误还请各位海涵包容并予以批评指正。大家要是没兴趣看教程可以直接下载代码测试使用:https://download.csdn.net/download/qq_33784286/1493
- 经验笔记:Ajax学习
漆黑的莫莫
计算机网络笔记ajax
Ajax学习经验笔记引言随着Web技术的发展,用户对于Web应用的交互性和响应速度提出了更高的要求。Ajax(AsynchronousJavaScriptandXML)作为一种可以改善用户体验的技术,通过异步的方式与服务器通信,使得网页可以在不刷新整个页面的情况下更新部分内容,极大地提升了Web应用的性能和用户体验。Ajax概述Ajax并不是一种新的编程语言,而是一种使用现有Web技术的新方法,主
- 纠错本的试用
017db7495a49
小学生纠错本也是错题集,就是要求学生准备一本较厚的笔记本,把平时作业及考试中出现典型性错误抄下来并整理编辑在笔记本上,分析错误,并找到产生错误的原因,避免以后再犯类似的错误,同时要正确理解并做出答案。教师也可善加利用,提高学生的作业质量。纠错本既是学生积累学习经验和学习资料的宝库,又是教师改进教学,探索规律,研究学生的重要依据,更是提高教学质量的有效措施。1、准备专用纠错本,规范纠错本要求先准备一
- 看见、感动,收获、成长在白云分校---第四次青少年心理工作研讨小组
芸汐心理
2020年12月19日,韦志中心理网校广州白云分校举办了第四次青少年心理工作研讨小组活动,上午9:30成员们如约来到现场。成员们经过一周的思考和在小组中学习经验的总结,对怎样改善亲子关系列出了具体的计划,成员之间互相交流、支持与鼓励,大家都信心满满。这一期的主题主要是讨论积极心理学在亲子关系中的运用,刘芸汐校长就积极心理学的定义、核心理念、内容以及工作的途径、方式方法做了阐述。接下来小组成员们讨论
- 自律(十八)育儿:孩子安全是大事,教孩子正确辨别坏人
泡泡糖育儿说
育儿经验分享:1、主动向小孩子寻求帮助的陌生人2、让小孩子帮着保守秘密的成年人3、让孩子害怕,感到不舒服的陌生人4、给孩子东西吃让孩子跟他走的陌生人重新起号不容易,希望各位老朋友、新朋友能够一如既往的支持我,你们的一个小赞就是对我最大的支持,谢谢各位的支持!日常工作更新:接触运营自媒体并坚持更新180天,再看结果,今日第41天,剩余139天,学习经验、累积经验,有想探讨的简友可以去评论区探讨。会员
- 深度学习学习经验——强化学习(rl)
Linductor
深度学习学习经验深度学习学习人工智能
强化学习强化学习(ReinforcementLearning,RL)是一种机器学习方法,主要用于让智能体(agent)通过与环境的互动,逐步学习如何在不同情况下采取最佳行动,以最大化其获得的累积回报。与监督学习和无监督学习不同,强化学习并不依赖于已标注的数据集,而是通过智能体在环境中的探索和试错来学习最优策略。强化学习的主要特点:基于试错学习:强化学习中的智能体通过与环境的互动,不断尝试不同的行动
- 深度学习学习经验——什么是深度学习
Linductor
深度学习学习经验深度学习学习人工智能
什么是深度学习?深度学习是机器学习的一个子领域,它使用多层神经网络来自动从大量数据中学习和提取特征。深度学习尤其适合处理大规模的数据,如图像、语音和文本等。基本概念:神经网络:深度学习模型的核心是神经网络,灵感来源于人脑的结构和功能。神经网络由大量的节点(神经元)组成,这些节点通过连接(权重)相互传递信息。层:神经网络通常由多个层级组成。每一层对输入数据进行处理并将结果传递给下一层。最常见的层有输
- 深度学习学习经验——变换器(Transformer)
Linductor
深度学习学习经验深度学习学习transformer
变换器(Transformer)变换器(Transformer)是一种用于处理序列数据的深度学习模型,与循环神经网络(RNN)不同,它不依赖于顺序处理数据,而是依靠一种称为注意力机制(AttentionMechanism)的技术来捕捉序列中的依赖关系。Transformer的核心组件包括自注意力(Self-Attention)和多头注意力(Multi-HeadAttention),这些机制使Tra
- 又是一年开学季(二)
梧桐雨_
林局长说新学年办学总纲将新教育学校的老师定位为“学习教练”,要拥有的特质是:特别爱笑,特别爱学,特别能放手。现在已进入后喻时代,信息智能时代,让学生在入学前已经拥有了学习技能,甚至掌握了不少学习经验。所以,我们现在新时代的教师,不再以拥用丰富的知识而高高在上,而应以一个与孩子一起学习成长的心态来教学。想办法激励学生的学习潜能,根据学生具体情况,用专业视角指导学生挖掘出自己的学习热情与潜质,最大限度
- 深度学习学习经验——深度学习名词字典
Linductor
深度学习学习经验深度学习学习人工智能
深度学习名词字典1.张量(Tensor)2.神经网络(NeuralNetwork)3.损失函数(LossFunction)4.优化器(Optimizer)5.激活函数(ActivationFunction)6.前向传播(ForwardPropagation)7.反向传播(BackwardPropagation)8.批量(Batch)9.欠拟合(Underfitting)10.过拟合(Overfit
- 深度学习学习经验——循环神经网络(RNN)
Linductor
深度学习学习经验深度学习学习rnn
循环神经网络(RecurrentNeuralNetwork,RNN)循环神经网络(RecurrentNeuralNetwork,RNN)是一种适合处理序列数据的神经网络,它能够利用历史信息来预测当前输出,适用于时间序列预测、自然语言处理等任务。RNN的关键在于它具有“记忆”功能,可以将前一时刻的信息传递到下一时刻。RNN的这种特性主要体现在它的隐藏状态(HiddenState)和时间步长(Time
- 富士X-T20入手记录
开心小璇
新手,摄影小白,无单反使用经验,无摄影学习经验。先前多方了解后,准备入手富士X-T100,这款微单相机。因为不是专业的摄影师,也没有单反拍摄的需求,不喜欢笨重的设备,就出行,旅游拍拍微单比较合适。富士的机子,通常说是以色彩出名,排的好的照片可以直出,不用后期调色,想着自己的修图功力也一般,便选了富士的相机。T100价格相对优惠,某东搭配15-45的镜头3999可入手。选好设备一直处于观望状态,正好
- 【幸福课栈】如何制定学习计划?
幸福课栈
一日之计在于晨,一年之计在于春,学习计划很重要,有了计划才能有条不紊的做好接下来的学习工作。“凡事预则立不预则废”。学习计划是成为一个学霸的第一步,今天我们就来学习一下如何制定适合自己的学习计划吧!先来看看学霸的学习计划表1.每天6:10起床。打开收音机边听英语边洗漱吃饭。2.到校后利用课前时间多看看今天要讲什么,回顾昨天的内容。3.充分利用每堂课,认真听讲、不懂就问,多和周围同学交流学习经验和解
- HRD 必须知晓的 OKR 与持续绩效管理
fofoyu
管理大师德鲁克断言:知识已成为生产力/竞争力和经济成就的关键因素;知识已成为最主要的工业,这个工业向经济提供生产需要的重要中心资源。作为企业的HRD负责人人力资源发展(HRD)指一套有组织的学习经验,由雇主在一定期间提供,目的在促进绩效改进与个人成长。人力资源发展有三个活动领域:训练、教育以及发展。训练:强调受训者在目前工作上的学习。教育:强调受训者对未来工作的学习。发展:学习未特别强调的或为针对
- 我是自考毕业生,谈谈自己自考课程《复变函数与积分变换》,这门自考课程知识的学习经验和心得。
卧龙05学长国涛
我是参加的自考本科,已经毕业好几年了。当时报考的院校是山东大学机电一体化专业,需要学习十五门自考课程,其中就有《复变函数与积分变换》这门课程的学习。客观来讲,这门课程的知识学习难度还是比较大的,当时有很多自考的朋友都考了好几次,最后才通过这门课程的考试。当时为了能够学好这门课程,并且一次性通过考试,我也是花费了不少的时间和精力。我自己买了这门课程配套的辅导书籍以及历年真题,平时我会先把课本上的基础
- 「HTML+CSS」--自定义加载动画【013】
海轰Pro
前言Hello!小伙伴!首先非常感谢您阅读海轰的文章,倘若文中有错误的地方,欢迎您指出~哈哈自我介绍一下昵称:海轰标签:程序猿一只|C++选手|学生简介:因C语言结识编程,随后转入计算机专业,有幸拿过国奖、省奖等,已保研。目前正在学习C++/Linux(真的真的太难了~)学习经验:扎实基础+多做笔记+多敲代码+多思考+学好英语!效果展示css-自定义加载动画9a.gifDemo代码HTMLDocu
- Ant Design 组件学习经验
zhulichao
Tree组件参考TreeSelect异步加载数据使用redux时,TreeSelect异步加载数据需要通过触发action调用后台获取数据,根据reducer更新的state显示出加载的数据。需添加loadData属性,值为一个方法,如onLoadData,内容如下。这个函数的返回值好像必须是一个Promise对象,如果不这么写,会报UncaughtTypeError:Cannotreadprop
- 纠错本的使用
1bfe21120117
小学生纠错本也是错题集,就是要求学生准备一本较厚的笔记本,把平时作业及考试中出现典型性错误抄下来并整理编辑在笔记本上,分析错误,并找到产生错误的原因,避免以后再犯类似的错误,同时要正确理解并做出答案。教师也可善加利用,提高学生的作业质量。纠错本既是学生积累学习经验和学习资料的宝库,又是教师改进教学,探索规律,研究学生的重要依据,更是提高教学质量的有效措施。1、准备专用纠错本,规范纠错本要求先准备一
- 一线Linux专家学习经验谈—再谈如何学习Linux
西瓜泰郎
记得最早接触linux是在2000年,那个时候,还在上大学,一个同学从荷兰回来,带回来了一个Linux的拷贝版,记得版本还是Redhat6.2。曾经为安装一个系统让我们忘记疲劳,挑灯夜战,不亦乐乎。那时Linux的学习资料还很少,能够学习的书籍也不多,网上Linux技术社区也很少,就凭着Redhat6.2自带的几页使用说明开始了学习linux的生涯。转眼间,10几年过去了,我也与Linux相伴了1
- 2021-07-25
KATrinA111
“红色宣讲承薪火,志愿服务献党心”暑期实践团队召开工作面谈会2021年7月25日,湖州学院人文学院“红色宣讲承薪火,志愿服务献党心”暑期实践团队在湖州学院人文学院明知楼教师发展中心召开团队领导面谈会。在2021年“关爱青少年、系好第一粒扣子”暑期公益培训班活动正式开展前,“红色宣讲承薪火,志愿服务献党心”暑期实践团队就以及切实做好提前准备工作,提前与龙溪街道协商,向浙江大学实践团队学习经验。龙溪街
- 你想要的都会来~
清风徐来95
自从某一天决定换一个角度看世界的时候,神奇的事发生了,一路过来遇到的都是超级nice的人,在星巴克遇到的Rob(英语讲出了nativespeaker的感觉),给我分享了很多奇闻趣事以及自己的学习经验;瑜伽教练利奥小姐姐,讲话如沐春风,身材一级棒(所以我也决定回去练个马甲线);生涯认识的亮哥,超级认真热心,简直就是我的人生导师;我的生涯咨询师梁姐,十分努力敢想敢干的宝妈…还有最近在考场认识的小姐姐,
- 2022-03-05
李元艳
今天和女儿一大早去心时代总部学习学习力,当走到总部那一刻,犹如回到家的感觉,看到小伙伴们是那样的亲切。女儿也非常开心的和大宫老师聊着近期的学习,和生活情况等等。9点钟的时候学生差不多都到了,孩子们在互相交流了解彼此,家长们则是在另一个会议室聊天,谈学习心得,交流学习经验。时间过的真快,不一会12点就在不知不觉中到了,孩子们也下课了。我们家长们也依依不舍的分手了,其实人生也正如院长说的人生旅途是不断
- Android入门教程 | TextView简介(宽高、文字、间距)
上马定江山
androidflutterandroidstudio开发语言
TextView简介文字,是我们传达信息的一种常见方式。在安卓应用上显示文字,我们通常使用TextView。之前我们已经知道如何获取到layout中的TextView,也知道setText()方法可以修改显示的文字。结合我们实际的生活和学习经验,写字的时候,有哪些方面是可以由我们来控制的?文本内容;文字颜色;大小;背景等等。最简单的TextView:得益于as强大的提示功能,我们在layout中输
- 2021:乐早起|遇见更好的自己(277/365)Ⅰ善于从别人的失败中学习经验
梦想加油站
经典语录-29接收批评,做更优秀的自己。导语早起已经很多年,以前早起没有固定的时间点,有的时候会四点起来,有的时候会六点起来,虽然都在“早起”,但早起的效率和质量并不如所愿。2020年09月20日开始,自己发起“在路上”早起习惯养成圈子,经过一系列实践和调整,最终把自己的早起时间点定为04:00。我发起的早起圈子,注重的是早起之后做什么,也就是说,每个人都有一个适合自己的早起点。根据自己的早起点,
- 年终总结!你的代码可以换一本书啦!
菜鸟窝
image.png活动名称:《代码换书》日期:即日起至1月21日24时奖品:100元购书基金。(任意指定购买一本≤100元书)或者300元的课程抵用券这里是直接链接通道↓↓↓年终总结!你的代码可以换一本书啦!无论你是在校的学生,还是已经工作10年的编程大牛,都可以分享你的项目/学习经验,分享是走向成功的捷径。你的2018是怎样的,分享下你的技术成长吧!我要了.gif
- 一中学姐:我的中考成绩比一模高了60多分...
小象学习助手
优秀的学生都有独特过人之处,这次爻老师邀请到来自一中高一的学姐跟大家分享她的升学感受和学习经验。希望对各位正在努力的初中同学、刚上高中迷茫的同学有所帮助。也希望家长更了解孩子们内心真正的想法。注:爻老师仅作排版修改,内容全部来自该同学。(公众号ID:yaoxiang345)一、一模对我的打击很大说到一模,不得不说,一模对于自信心的打击可不止一点两点。我记得当初一模成绩发下来之后,我整个人被吓懵了,
- 2021-12-03
叶儿飞飞
今天下午,我们校全体师生聚集在一起,隆重召开期中考试总结表彰大会。期中考试是对老师的教学情况和同学们的学习情况的检查和总结,是学习态度、学习作风、学习效果、学习经验、学习方法的检查,期中考试起到了加油站、检修站的作用。希望孩子们在下半学期里不骄不躁,不断进取,现创佳绩,也希望其他同学向优秀同学学习,顽强拼搏,勇于争先,珍惜个人及班集体荣誉,人人树立“班荣我荣,班耻我耻”的观念,积极开展“我为班级增
- java责任链模式
3213213333332132
java责任链模式村民告县长
责任链模式,通常就是一个请求从最低级开始往上层层的请求,当在某一层满足条件时,请求将被处理,当请求到最高层仍未满足时,则请求不会被处理。 就是一个请求在这个链条的责任范围内,会被相应的处理,如果超出链条的责任范围外,请求不会被相应的处理。 下面代码模拟这样的效果: 创建一个政府抽象类,方便所有的具体政府部门继承它。 package 责任链模式; /** *
- linux、mysql、nginx、tomcat 性能参数优化
ronin47
一、linux 系统内核参数 /etc/sysctl.conf文件常用参数 net.core.netdev_max_backlog = 32768 #允许送到队列的数据包的最大数目 net.core.rmem_max = 8388608 #SOCKET读缓存区大小 net.core.wmem_max = 8388608 #SOCKET写缓存区大
- php命令行界面
dcj3sjt126com
PHPcli
常用选项 php -v php -i PHP安装的有关信息 php -h 访问帮助文件 php -m 列出编译到当前PHP安装的所有模块 执行一段代码 php -r 'echo "hello, world!";' php -r 'echo "Hello, World!\n";' php -r '$ts = filemtime("
- Filter&Session
171815164
session
Filter HttpServletRequest requ = (HttpServletRequest) req; HttpSession session = requ.getSession(); if (session.getAttribute("admin") == null) { PrintWriter out = res.ge
- 连接池与Spring,Hibernate结合
g21121
Hibernate
前几篇关于Java连接池的介绍都是基于Java应用的,而我们常用的场景是与Spring和ORM框架结合,下面就利用实例学习一下这方面的配置。 1.下载相关内容: &nb
- [简单]mybatis判断数字类型
53873039oycg
mybatis
昨天同事反馈mybatis保存不了int类型的属性,一直报错,错误信息如下: Caused by: java.lang.NumberFormatException: For input string: "null" at sun.mis
- 项目启动时或者启动后ava.lang.OutOfMemoryError: PermGen space
程序员是怎么炼成的
eclipsejvmtomcatcatalina.sheclipse.ini
在启动比较大的项目时,因为存在大量的jsp页面,所以在编译的时候会生成很多的.class文件,.class文件是都会被加载到jvm的方法区中,如果要加载的class文件很多,就会出现方法区溢出异常 java.lang.OutOfMemoryError: PermGen space. 解决办法是点击eclipse里的tomcat,在
- 我的crm小结
aijuans
crm
各种原因吧,crm今天才完了。主要是接触了几个新技术: Struts2、poi、ibatis这几个都是以前的项目中用过的。 Jsf、tapestry是这次新接触的,都是界面层的框架,用起来也不难。思路和struts不太一样,传说比较简单方便。不过个人感觉还是struts用着顺手啊,当然springmvc也很顺手,不知道是因为习惯还是什么。jsf和tapestry应用的时候需要知道他们的标签、主
- spring里配置使用hibernate的二级缓存几步
antonyup_2006
javaspringHibernatexmlcache
.在spring的配置文件中 applicationContent.xml,hibernate部分加入 xml 代码 <prop key="hibernate.cache.provider_class">org.hibernate.cache.EhCacheProvider</prop> <prop key="hi
- JAVA基础面试题
百合不是茶
抽象实现接口String类接口继承抽象类继承实体类自定义异常
/* * 栈(stack):主要保存基本类型(或者叫内置类型)(char、byte、short、 *int、long、 float、double、boolean)和对象的引用,数据可以共享,速度仅次于 * 寄存器(register),快于堆。堆(heap):用于存储对象。 */ &
- 让sqlmap文件 "继承" 起来
bijian1013
javaibatissqlmap
多个项目中使用ibatis , 和数据库表对应的 sqlmap文件(增删改查等基本语句),dao, pojo 都是由工具自动生成的, 现在将这些自动生成的文件放在一个单独的工程中,其它项目工程中通过jar包来引用 ,并通过"继承"为基础的sqlmap文件,dao,pojo 添加新的方法来满足项
- 精通Oracle10编程SQL(13)开发触发器
bijian1013
oracle数据库plsql
/* *开发触发器 */ --得到日期是周几 select to_char(sysdate+4,'DY','nls_date_language=AMERICAN') from dual; select to_char(sysdate,'DY','nls_date_language=AMERICAN') from dual; --建立BEFORE语句触发器 CREATE O
- 【EhCache三】EhCache查询
bit1129
ehcache
本文介绍EhCache查询缓存中数据,EhCache提供了类似Hibernate的查询API,可以按照给定的条件进行查询。 要对EhCache进行查询,需要在ehcache.xml中设定要查询的属性 数据准备 @Before public void setUp() { //加载EhCache配置文件 Inpu
- CXF框架入门实例
白糖_
springWeb框架webserviceservlet
CXF是apache旗下的开源框架,由Celtix + XFire这两门经典的框架合成,是一套非常流行的web service框架。 它提供了JAX-WS的全面支持,并且可以根据实际项目的需要,采用代码优先(Code First)或者 WSDL 优先(WSDL First)来轻松地实现 Web Services 的发布和使用,同时它能与spring进行完美结合。 在apache cxf官网提供
- angular.equals
boyitech
AngularJSAngularJS APIAnguarJS 中文APIangular.equals
angular.equals 描述: 比较两个值或者两个对象是不是 相等。还支持值的类型,正则表达式和数组的比较。 两个值或对象被认为是 相等的前提条件是以下的情况至少能满足一项: 两个值或者对象能通过=== (恒等) 的比较 两个值或者对象是同样类型,并且他们的属性都能通过angular
- java-腾讯暑期实习生-输入一个数组A[1,2,...n],求输入B,使得数组B中的第i个数字B[i]=A[0]*A[1]*...*A[i-1]*A[i+1]
bylijinnan
java
这道题的具体思路请参看 何海涛的微博:http://weibo.com/zhedahht import java.math.BigInteger; import java.util.Arrays; public class CreateBFromATencent { /** * 题目:输入一个数组A[1,2,...n],求输入B,使得数组B中的第i个数字B[i]=A
- FastDFS 的安装和配置 修订版
Chen.H
linuxfastDFS分布式文件系统
FastDFS Home:http://code.google.com/p/fastdfs/ 1. 安装 http://code.google.com/p/fastdfs/wiki/Setup http://hi.baidu.com/leolance/blog/item/3c273327978ae55f93580703.html 安装libevent (对libevent的版本要求为1.4.
- [强人工智能]拓扑扫描与自适应构造器
comsci
人工智能
当我们面对一个有限拓扑网络的时候,在对已知的拓扑结构进行分析之后,发现在连通点之后,还存在若干个子网络,且这些网络的结构是未知的,数据库中并未存在这些网络的拓扑结构数据....这个时候,我们该怎么办呢? 那么,现在我们必须设计新的模块和代码包来处理上面的问题
- oracle merge into的用法
daizj
oraclesqlmerget into
Oracle中merge into的使用 http://blog.csdn.net/yuzhic/article/details/1896878 http://blog.csdn.net/macle2010/article/details/5980965 该命令使用一条语句从一个或者多个数据源中完成对表的更新和插入数据. ORACLE 9i 中,使用此命令必须同时指定UPDATE 和INSE
- 不适合使用Hadoop的场景
datamachine
hadoop
转自:http://dev.yesky.com/296/35381296.shtml。 Hadoop通常被认定是能够帮助你解决所有问题的唯一方案。 当人们提到“大数据”或是“数据分析”等相关问题的时候,会听到脱口而出的回答:Hadoop! 实际上Hadoop被设计和建造出来,是用来解决一系列特定问题的。对某些问题来说,Hadoop至多算是一个不好的选择,对另一些问题来说,选择Ha
- YII findAll的用法
dcj3sjt126com
yii
看文档比较糊涂,其实挺简单的: $predictions=Prediction::model()->findAll("uid=:uid",array(":uid"=>10)); 第一个参数是选择条件:”uid=10″。其中:uid是一个占位符,在后面的array(“:uid”=>10)对齐进行了赋值; 更完善的查询需要
- vim 常用 NERDTree 快捷键
dcj3sjt126com
vim
下面给大家整理了一些vim NERDTree的常用快捷键了,这里几乎包括了所有的快捷键了,希望文章对各位会带来帮助。 切换工作台和目录 ctrl + w + h 光标 focus 左侧树形目录ctrl + w + l 光标 focus 右侧文件显示窗口ctrl + w + w 光标自动在左右侧窗口切换ctrl + w + r 移动当前窗口的布局位置 o 在已有窗口中打开文件、目录或书签,并跳
- Java把目录下的文件打印出来
蕃薯耀
列出目录下的文件文件夹下面的文件目录下的文件
Java把目录下的文件打印出来 >>>>>>>>>>>>>>>>>>>>>>>>>>>>>>>>>>>>>>>> 蕃薯耀 2015年7月11日 11:02:
- linux远程桌面----VNCServer与rdesktop
hanqunfeng
Desktop
windows远程桌面到linux,需要在linux上安装vncserver,并开启vnc服务,同时需要在windows下使用vnc-viewer访问Linux。vncserver同时支持linux远程桌面到linux。 linux远程桌面到windows,需要在linux上安装rdesktop,同时开启windows的远程桌面访问。 下面分别介绍,以windo
- guava中的join和split功能
jackyrong
java
guava库中,包含了很好的join和split的功能,例子如下: 1) 将LIST转换为使用字符串连接的字符串 List<String> names = Lists.newArrayList("John", "Jane", "Adam", "Tom");
- Web开发技术十年发展历程
lampcy
androidWeb浏览器html5
回顾web开发技术这十年发展历程: Ajax 03年的时候我上六年级,那时候网吧刚在小县城的角落萌生。传奇,大话西游第一代网游一时风靡。我抱着试一试的心态给了网吧老板两块钱想申请个号玩玩,然后接下来的一个小时我一直在,注,册,账,号。 彼时网吧用的512k的带宽,注册的时候,填了一堆信息,提交,页面跳转,嘣,”您填写的信息有误,请重填”。然后跳转回注册页面,以此循环。我现在时常想,如果当时a
- 架构师之mima-----------------mina的非NIO控制IOBuffer(说得比较好)
nannan408
buffer
1.前言。 如题。 2.代码。 IoService IoService是一个接口,有两种实现:IoAcceptor和IoConnector;其中IoAcceptor是针对Server端的实现,IoConnector是针对Client端的实现;IoService的职责包括: 1、监听器管理 2、IoHandler 3、IoSession
- ORA-00054:resource busy and acquire with NOWAIT specified
Everyday都不同
oraclesessionLock
[Oracle] 今天对一个数据量很大的表进行操作时,出现如题所示的异常。此时表明数据库的事务处于“忙”的状态,而且被lock了,所以必须先关闭占用的session。 step1,查看被lock的session: select t2.username, t2.sid, t2.serial#, t2.logon_time from v$locked_obj
- javascript学习笔记
tntxia
JavaScript
javascript里面有6种基本类型的值:number、string、boolean、object、function和undefined。number:就是数字值,包括整数、小数、NaN、正负无穷。string:字符串类型、单双引号引起来的内容。boolean:true、false object:表示所有的javascript对象,不用多说function:我们熟悉的方法,也就是
- Java enum的用法详解
xieke90
enum枚举
Java中枚举实现的分析: 示例: public static enum SEVERITY{ INFO,WARN,ERROR } enum很像特殊的class,实际上enum声明定义的类型就是一个类。 而这些类都是类库中Enum类的子类 (java.l