编译安装MySQL
转载地址:http://blog.csdn.net/u010257584/article/details/51315438
1.前言
本文测试环境:
CentOS release 6.4(Linux version 2.6.32-358.el6.x86_64)
MySQL 5.7.12
本节用到的相关安装包下载地址如下:
mysql源码安装包:http://dev.mysql.com/doc/refman/5.7/en/source-installation.html
cmake安装包:https://cmake.org/download/
boost安装包:http://sourceforge.net/projects/boost/files/boost/1.59.0/boost_1_59_0.tar.gz
2.安装前准备
1)安装必要的组件
- [root@nn ~]# yum install bison
- [root@nn ~]# yum install cmake
- [root@nn ~]# yun install boost
或者下载对应的安装包再解压安装(本文的方法):
- Cmake下载安装
- [root@nn ~]# cd /home/MySql/
- [root@nn MySql]# tar zxvf cmake-3.5.2.tar.gz
- [root@nn MySql]# cd cmake-3.5.2/
- [root@nn cmake-3.5.2]# ./bootstrap
- CMake has bootstrapped. Now run gmake.
- [root@nn cmake-3.5.2]# make && make install
- [root@nn cmake-3.5.2]# cmake --version
- cmake version 3.5.2
- CMake suite maintained and supported by Kitware (kitware.com/cmake).
- Boost下载安装
- [root@nn MySql]# wget --no-check-certificate http://sourceforge.net/projects/boost/files/boost/1.59.0/boost_1_59_0.tar.gz
- [root@nn MySql]# tar -zxvf /home/MySql/boost_1_59_0.tar.gz -C /usr/local
- [root@nn MySql]# /usr/local
- [root@nn local]# mv boost_1_59_0 boost
- [root@nn local]# cd boost/
- [root@nn boost]# ./bootstrap.sh
- Building Boost.Build engine with toolset gcc... tools/build/src/engine/bin.linux x86_64/b2
- Detecting Python version... 2.6
- Detecting Python root... /usr
- Unicode/ICU support for Boost.Regex?... not found.
- Generating Boost.Build configuration in project-config.jam...
- Bootstrapping is done. To build, run:
- ./b2
- To adjust configuration, edit 'project-config.jam'.
- Further information:
- - Command line help:
- ./b2 --help
- - Getting started guide:
- http://www.boost.org/more/getting_started/unix-variants.html
- - Boost.Build documentation:
- http://www.boost.org/build/doc/html/index.html
- [root@nn boost]# ./b2 install
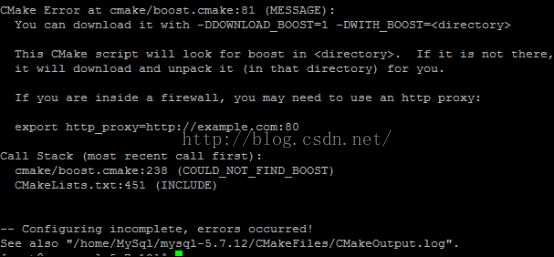
不安装boost,那么用cmake安装MySQL时会出现如下的错误:
2)添加MySQL用户组及用户
- [root@nn ~]# groupadd mysql
- [root@nn ~]# useradd -r -g mysql -s /bin/false mysql
- [root@nn ~]# mkdir -p /usr/local/mysql
4) 创建数据库数据文件目录
- [root@nn ~]# mkdir -p /home/mysql
- [root@nn ~]# mkdir -p /home/mysql/data
- [root@nn ~]# mkdir -p /home/mysql/logs
- [root@nn ~]# mkdir -p /home/mysql/temp
5) 添加MySQL PATH路径并开放3306端口
- [root@nn ~]# vi /etc/profile
- # use for mysql
- export PATH=/usr/local/mysql/bin:/usr/local/mysql/lib:$PATH
- [root@nn ~]# source /etc/profile
防火墙的3306端口默认没有开启,若要远程访问,需要开启这个端口
- [root@nn ~]# vi /etc/sysconfig/iptables
- -A INPUT -m state --state NEW -m tcp -p tcp --dport 3306 -j ACCEPT
- [root@nn ~]# /etc/init.d/iptables restart
- 或者service iptables restart
3.安装
1)解压
- [root@nn ~] cd /home/MySql/
- [root@nn MySql]# tar -zxvf mysql-5.7.12.tar.gz
- [root@nn MySql]# cd mysql-5.7.12
2)使用cmake编译并安装MySQL
3)修改目录所有者
- [root@nn mysql-5.7.12]# cmake \
- > -DCMAKE_INSTALL_PREFIX=/usr/local/mysql \
- > -DMYSQL_UNIX_ADDR=/usr/local/mysql/mysql.sock \
- > -DDEFAULT_CHARSET=utf8 \
- > -DDEFAULT_COLLATION=utf8_general_ci \
- > -DWITH_MYISAM_STORAGE_ENGINE=1 \
- > -DWITH_INNOBASE_STORAGE_ENGINE=1 \
- > -DWITH_ARCHIVE_STORAGE_ENGINE=1 \
- > -DWITH_BLACKHOLE_STORAGE_ENGINE=1 \
- > -DWITH_MEMORY_STORAGE_ENGINE=1 \
- > -DWITH_READLINE=1 \
- > -DENABLED_LOCAL_INFILE=1 \
- > -DMYSQL_DATADIR=/home/mysql/data \
- > -DMYSQL_USER=mysql \
- > -DMYSQL_TCP_PORT=3306 \
- > -DENABLE_DOWNLOADS=1 \
- > -DDOWNLOAD_BOOST=1 \
- > -DWITH_BOOST=/usr/local/boost
- [root@nn mysql-5.7.12]# make && make install --该步骤时间比较久,耐心等待
- [root@nn mysql-5.7.12]# chown -R mysql:mysql /usr/local/mysql
- [root@nn mysql-5.7.12]# chown -R mysql:mysql /home/mysql
4)初始化配置
- [root@nn mysql-5.7.12]# cd /usr/local/mysql
- [root@nn mysql]# bin/mysqld --initialize --basedir=/usr/local/mysql --datadir=/home/mysql/data --user=mysql
以root初始化操作时要加--user=mysql参数,生成一个随机密码(注意保存登录时用),在初始化时如果加上 -initial-insecure,则会创建空密码。
5)配置文件my.cnf
在启动MySQL服务时,会按照一定次序搜索my.cnf,先在/etc目录下找,找不到则会搜索"$basedir/my.cnf",在本例中就是 /usr/local/mysql/my.cnf,这是新版MySQL的配置文件的默认位置!注意:在CentOS 6.4版操作系统的最小安装完成后,在/etc目录下会存在一个my.cnf,需要将此文件更名为其他的名字,如:/etc/my.cnf.bak,否则,该文件会干扰源码安装的MySQL的正确配置,造成无法启动。在使用"yum update"更新系统后,需要检查下/etc目录下是否会多出一个my.cnf,如果多出,将它重命名成别的。否则,MySQL将使用这个配置文件启动,可能造成无法正常启动等问题。(摘自网络)
将默认生成的my.cnf备份
- [root@nn mysql]# mv /etc/my.cnf /etc/my.cnf.bak
拷贝配置文件模板为新的mysql配置文件
- [root@nn mysql]# cp /usr/local/mysql/support-files/my-default.cnf /etc/my.cnf
6)启动设置可按需修改新的配置文件选项,不修改配置选项,mysql则按默认配置参数运行。
7)重置密码
- [root@nn mysql]# cp support-files/mysql.server /etc/init.d/mysql
- [root@nn mysql]# chkconfig mysql on
- [root@nn mysql]# service mysql start
- Starting MySQL. SUCCESS!
在步骤4的初始化步骤中生成了MySQL的原始密码,实际使用中需要修改密码。
8)验证查询原始密码:
修改原始密码:
- [root@nn bin]# cat /root/.mysql_secret
- # Password set for user 'root@localhost' at 2016-05-04 09:42:42 Sf/v-P5g:o+X
- [root@nn bin]# mysqladmin -h localhost -uroot password "123456" -p'Sf/v-P5g:o+X'--socket=/usr/local/mysql/mysql.sock
- mysqladmin: [Warning] Using a password on the command line interface can be insecure.
- mysqladmin: connect to server at 'localhost' failed
- error: 'Access denied for user 'root'@'localhost' (using password: YES)'
出错,试试用改密码登录MySQL:
解决方法:
- [root@nn bin]# mysql -uroot -p
- Enter password:
- ERROR 1045 (28000): Access denied for user 'root'@'localhost' (using password: NO)
- [root@nn bin]# service mysqld stop
- [root@nn bin]# mysqld_safe --skip-grant-tables & mysql -uroot -p
- mysql>use mysql;
- mysql> update mysql.user set authentication_string=password("123456")where user="root";
- Query OK, 1 row affected, 1 warning (0.00 sec)
- Rows matched: 1 Changed: 1 Warnings: 1
- mysql> flush privileges;
- Query OK, 0 rows affected (0.00 sec)
- mysql> quit
- Bye
- [2]+ Exit 1 mysqld_safe --skip-grant-tables
- [root@nn bin]# service mysqld restart
- Shutting down MySQL..2016-05-04T06:57:15.267695Z mysqld_safe mysqld from pid file /home/mysql/data/nn.pid ended
- SUCCESS!
- Starting MySQL. SUCCESS!
- [1]+ Done mysqld_safe --user=mysql --skip-grant-tables --skip-networking
- [root@nn bin]# mysql -uroot -p
- Enter password:
- Welcome to the MySQL monitor. Commands end with ; or \g.
- Your MySQL connection id is 2
- Server version: 5.7.12
- Copyright (c) 2000, 2016, Oracle and/or its affiliates. All rights reserved.
- Oracle is a registered trademark of Oracle Corporation and/or its affiliates. Other names may be trademarks of their respectiveowners.
- Type 'help;' or '\h' for help. Type '\c' to clear the current input statement.
- mysql> show variables like 'character%';
- +--------------------------+------------------------+
- | Variable_name | Value |
- +--------------------------+-------------------------+
- | character_set_client | utf8 |
- | character_set_connection | utf8 |
- | character_set_database | utf8 |
- | character_set_filesystem | binary |
- | character_set_results | utf8 |
- | character_set_server | utf8 |
- | character_set_system | utf8 |
- | character_sets_dir | /usr/local/mysql/share/charsets/|
- +--------------------------+-------------------------+
- 8 rows in set (0.00 sec)
- mysql> GRANT ALL PRIVILEGES ON *.* TO root@"%" IDENTIFIED BY "root";
- Query OK, 0 rows affected, 1 warning (0.00 sec)
- mysql> flush privileges;
- Query OK, 0 rows affected (0.00 sec)
另外,对于生产服务器,建议运行:
- [root@nn ~]# /usr/local/mysql/bin/mysql_secure_installation