源码安装nagios-4.2 (centos 6.8)
官方文档
https://assets.nagios.com/downloads/nagioscore/docs/nagioscore/4/en/quickstart-fedora.html
依赖软件
安装nagios之前,需要先安装apache、php、gcc、gd-devel,可以通过yum安装。
本文是基于源码搭建的LAMP架构(搭建LAMP-http://blog.csdn.net/dinglinux/article/details/53926545)来部署nagios监控,apache的安装目录、配置文件目录等会与yum安装的有所不同。
安装过程
1.创建nagios相关用户和组
$ groupadd nagios
$ groupadd nagcmd
$ useradd -g nagios -G nagcmd nagios
$ passwd nagios
2.下载nagios核心包和插件包,解压
$ cd /usr/local/src
$ wget http://prdownloads.sourceforge.net/sourceforge/nagios/nagios-4.2.1.tar.gz
$ wget http://www.nagios-plugins.org/download/nagios-plugins-2.1.3.tar.gz
$ tar zxf nagios-4.2.1.tar.gz
$ tar zxf nagios-plugins-2.1.3.tar.gz
3.编译安装nagios核心
$ cd nagios-4.2.1
$ ./configure \
-prefix=/usr/local/nagios \
--with-command-group=nagcmd
$ make all
$ make install
$ make install-init
$ make install-config
$ make install-commandmode
“make all”编译成功后,会有提示后续如何安装,下面便摘自其中,是“make install*”的注释。
make install
     - This installs the main program, CGIs, and HTML files

make install-init
     - This installs the init script in /etc/rc.d/init.d

make install-commandmode
     - This installs and configures permissions on the directory
       for holding the external command file

make install-config
     - This installs *SAMPLE* config files in /usr/local/nagios/etc
       You'll have to modify these sample files before you can
       use Nagios.  Read the HTML documentation for more info
       on doing this.  Pay particular attention to the docs on
       object configuration files, as they determine what/how
       things get monitored!

make install-webconf
     - This installs the Apache config file for the Nagios
       web interface
“make install-webconf”用于安装nagios web端配置文件,适用于yum安装的apache httpd。如果是源码安装的httpd,会出现下面的错误:
$ make install-webconf
/usr/bin/install -c -m 644 sample-config/httpd.conf /etc/httpd/conf.d/nagios.conf
/usr/bin/install: cannot create regular file `/etc/httpd/conf.d/nagios.conf': No such file or directory
make: *** [install-webconf] Error 1
替代操作是复制nagios解压目录下的sample-config/httpd.conf到apache安装目录下的/conf/extra/目录,改名为nagios.conf。在apache主配置文件中使用Include指令使该配置文件生效。
$ cp /usr/local/src/nagios-4.2.1/sample-config/httpd.conf /usr/local/apache2/conf/extra/nagios.conf$ vim /usr/local/apache2/conf/httpd.conf
# 添加下行
Include conf/extra/nagios.conf4.设置报警邮箱
$ vim /usr/local/nagios/etc/objects/contacts.cfg
# 示例 (email)
define contact{
        contact_name                    nagiosadmin
        use                             generic-contact
        alias                           Nagios Admin
        email                           xxxx@163.com
        }
5.设置web端用户控制
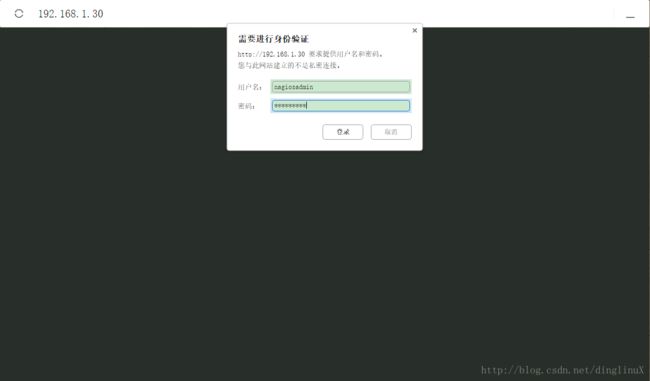
$ htpasswd -c /usr/local/nagios/etc/htpasswd.users nagiosadmin用户文件默认为/usr/local/nagios/etc/htpasswd.users,需要与nagios.conf中保持一致。设置后,访问nagios监控web界面需要输入合法用户名和相应的密码。
6.编译安装nagios插件
$ cd /usr/local/src/nagios-plugins-2.1.3
$ ./configure \
--with-nagios-user=nagios \
--with-nagios-group=nagios
$ make
$ make install
7.设置nagios开机启动
$ chkconfig --add nagios
$ chkconfig nagios on
“make install-init”已经将启动脚本放在了/etc/rc.d/init.d/目录下。
8.关闭防火墙
$ iptables -F
$ service iptables save
$ vim /etc/selinux/config
# 更改下行为:
SELINUX=disabled
9.重启apache,启动nagios
$ apachectl -t
$ apachectl graceful

$ /usr/local/nagios/bin/nagios -v /usr/local/nagios/etc/nagios.cfg
$ service nagios start

$ ps aux | grep nagios
10.web端登录
windows浏览器输入 http://ip/nagios/,通过用户认证,即可查看监控信息,开始只监控nagios服务器。

