前言
随着团队人员的增多,开发人员的编码风格不一致带来的开发效率的低下,以及编写代码中容易犯错的一些问题,尽管在人工code review 的能够发现并且解决,但是效率将会大大降低,而且依靠人工来保证项目代码质量本身就不牢靠。我们必须在编码阶段,打包交付测试前就发现编写代码的潜在问题,并且解决这些问题来提高工程代码质量。
本文就是笔者在实际项目中运用OCLint对整个项目进行的一次实践,记录在实践过程中的思路和所遇到的坑点,分享给大家。
笔者的所使用的开发工具和和开发环境如下:
Mac系统版本:macOS Mojave 10.14.5
ruby版本:2.6.3p62
gem版本:3.0.3
Xcode版本: 10.2.1
OCLint版本: 0.13
xcpretty版本: 0.3.0 # 这个是在项目文件夹下使用gem配置了的本地ruby环境安装的,后面会说明为啥不安装在系统默认的ruby环境下
笔者使用OCLint所做的codereview是结合Xcode在编码开发阶段进行的,ocline结合xcode的配置教程,这么做的优点是:能够在在开发阶段发现编写代码的潜在问题,把问题提前暴露出来。缺点就是会:延长开发编译时长,降低开发效率。
再讲如何安装OCLint和使用之前,我先讲一下衡量代码质量的几个指标:
代码质量衡量指标
- Cyclomatic Complexity:循环复杂度(又叫圈复杂度),用来表示程序的复杂度,圈复杂度越高,代码就越难复杂难维护。OCLint给的默认阈值是10。
复杂度计算:M = E − N + 2P,其中 E 为图中边的个数,N 为图中节点的个数,P 为连接组件的个数。
简单程序的控制流图。此程序由红色的节点开始运行,然后进入循环(红色节点下由三个节点组成),离开循环后有条件分支,最后运行蓝色节点后结束,此控制流图中,E = 9, N = 8, P = 1,因此其循环复杂度为 9 - 8 + (2*1) = 3。
具体可见维基百科介绍 和 这篇文章的计算方法。
下面我用例子介绍一个简单的计算方式:如下
例子:下面这段代码的 M = 2(if) + 1(for) + 1(for) + 2(if) + 2(if) + 2(if) + 1 = 11.
- (UIBezierPath *)pathForRect:(CGRect)rect {
    UIBezierPath *path = [[UIBezierPath alloc] init];
    if (self.width < 1.0) {
        self.width = self.segments.firstObject?self.segments.firstObject.width:1;
    }

    NSArray *segments = [_segments copy];
    xxxxxSegment *lastSegment = nil;
    xxxxxPoint *lastPoint = nil;
    for (xxxxxSegment *segment in segments) {
        xxxxxPoint *firstPoint = nil;
        for (xxxxxPoint *point in segment.points) {
            if (!firstPoint) {
                firstPoint = point;
                if (!lastSegment) {
                    [path moveToPoint:CGPoint(point)];
                    [path addLineToPoint:CGPoint(point)];
                } else {
                    xxxxxPoint *lastPoint = lastSegment.points.lastObject;
                    if (![lastPoint isEqual:firstPoint]) {
                        [path addLineToPoint:CGPoint(lastPoint)];
                        [path moveToPoint:CGPoint(firstPoint)];
                    } else {
                        [path addQuadCurveToPoint:MID_CGPoint(lastPoint, firstPoint) controlPoint:CGPoint(lastPoint)];
                    }
                }
            } else {
                NSAssert(lastPoint, @"last point should not be nil");
                [path addQuadCurveToPoint:MID_CGPoint(lastPoint, point) controlPoint:CGPoint(lastPoint)];
            }
            lastPoint = point;
        }
        lastSegment = segment;
    }

    if (lastPoint) {
        [path addLineToPoint:CGPoint(lastPoint)];
    }

    return path;
}
- NPath Complexity:NPath复杂度,用来表示一个方法所有可能执行路径的总和。OCLint给的默认阈值是200。NPath复杂度越高,代码越难以被理解。
例子:下面的例子NPath复杂度为4。
void example()
{
    if (xx)              // 1
    {
    }
    else                // 2
    {
    }

    if (xx)              // 1
    {
    }
    else                // 2
    {
    }
}
- Non Commenting Source Statements:除去空语句,注释代码之后的源代码行数。OCLint给方法的默认阈值是30,给一个类文件的默认阈值是1000。当NCSS过高,代码的维护成本就会提高,此时就得考虑方法和类的瘦身,进行拆分和重构。
例子:
void example()          // 1
{
    if (1)              // 2
    {
    }
    else                // 3
    {
    }
}
- Statement Depth:语句嵌套深度。OCLint给方法的默认阈值是5。
例子:
if (1)
{                // 1
    {           // 2
        {       // 3
        }
    }
}
为什么选择则OCLint
iOS静态代码分析工具对比:
- Xcode自带的Analyzer,使用方式超级简单Product > Analyze或者快捷键shift + command + B。
能够进行以下的问题检测,支持的语言包括C, C++ 和 Objective-C,不可进行自定义;
•逻辑缺陷,例如访问未初始化的变量和解除引用空指针;
•内存管理缺陷,例如内存泄漏;
•未使用的变量;
•由于不遵循项目使用的框架和库所需的策略而导致的API使用缺陷。 - Facebook开源的Infer,使用方式用command line,可以持续集成
能够检查的bug类型比Analyzer丰富,具体见官方文档。 - OCLint, 优点是可检查的规则最多,并且具有高可定制性,缺点是集成到Xcode中进行检测效率低。官方定义的支持的检查规则有71条,详见官方规则。
以上三个工具的底层原理都类似,都需要用到Clang进行码编译后的产物,然后进行分析。
综上比较,因OCLint的可定制化最高,并且可以和Xcode无缝结合,所以我们团队选择使用OCLint可以非常方便和统一的进行项目工程代码质量检测并且修改。
OCLint安装
官方文档上提供了三种安装方式了,分别是:Homebrew、下载安装包安装、源代码编译安装;
如果需要自定义检测规则,则必须使用第三种安装方式:源代码编译安装。不过笔者尚未尝试过,到后期根据团队的项目实际需要,如果需自定义则会尝试使用。
笔者使用的是最简单的Homebrew安装方式:
brew tap oclint/formulae
brew install oclint
有以下信息则表示安装成功
$ oclint
oclint: Not enough positional command line arguments specified!
Must specify at least 1 positional arguments: See: oclint -help
xcpretty安装
由于笔者使用方式是直接在xcode的Build Pahses添加的Run Script脚本,在使用gem install xcpretty的安装方式在系统的ruby环境安装会在编译的时候会报错,xcpretty command not found,原因就是xcode和teminal的环境不一样,尽管在terminal上能很好工作但是在xcode就会报找不到xcprrety的错误。当时找到的一种解决方式直接在sh脚本中将xcpretty写为绝对路径(找到安装的绝对路径就是which xcpretty),但是这种方式的弊端就是组内成员没法协同开发,毕竟比无法保证其他伙伴安装的xcpretty的绝对路径和你的保持一致,座椅最终放弃这种方式。最后在询问团队其他人员的协助下找到了另一个解决方案:使用bundler在工程目录维护一个管理ruby gem,详细介绍见官方文档。
首先安装bundler,在终端执行如下命令:
gem install bundler
在xcode工程根目录写一个Gemfile,内容如下
source 'https://rubygems.org'
gem 'xcpretty', '0.3.0'
然后执行
bundle install
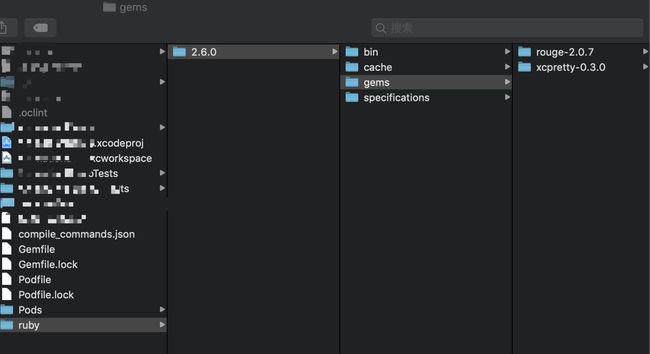
执行完成后,会有一个ruby文件夹的生成,这个就是本地的ruby环境,xcpretty就安装完成。
.oclint 规则配置文件编写
官方可配置的71条规则
在项目根目录编写一个.oclint文件,笔者的项目使用的规则内容如下:
rule-configurations:
  - key: CYCLOMATIC_COMPLEXITY # Cyclomatic complexity of a method 10
    value: 30
  - key: LONG_LINE
    value: 110
  - key: NCSS_METHOD # Number of non-commenting source statements of a method 30
    value: 50
  - key: LONG_VARIABLE_NAME
    value: 40
  - key: NESTED_BLOCK_DEPTH
    value: 6
  - key: MINIMUM_CASES_IN_SWITCH
    value: 2
  - key: SHORT_VARIABLE_NAME
    value: 1
  - key: TOO_MANY_METHODS
    value: 50
  - key: LONG_METHOD
    value: 100
disable-rules:
  - RedundantLocalVariable
  - SHORT_VARIABLE_NAME
  - LongVariableName
  - UnnecessaryElseStatement
  - RedundantNilCheck
  - RedundantIfStatement
  - InvertedLogic
  - AssignIvarOutsideAccessors
  - UseObjectSubscripting
  - BitwiseOperatorInConditional
  - PreferEarlyExit
  - UnusedMethodParameter
max-priority-1: 1000
max-priority-2: 1000
max-priority-3: 1000
enable-clang-static-analyzer: false
sh脚本编写
内容如下:
# Type a script or drag a script file from your workspace to insert its path.

export LC_CTYPE=en_US.UTF-8
set -euo pipefail # 脚本只要发生错误,就终止执行
# 删除DerivedData的build文件
#echo $(dirname ${BUILD_DIR})
rm -rf $(dirname ${BUILD_DIR})

# 1. 环境配置,判断是否安装oclint,没有则安装
if which oclint 2>/dev/null; then
echo 'oclint already installed'
else # install oclint
brew tap oclint/formulae
brew install oclint
fi

# 2.0 使用xcodebuild构建项目,并且使用xcprretty将便于产物转换为json
projectDir=${PROJECT_DIR}
prettyPath="${projectDir}/ruby/2.6.0/gems/xcpretty-0.3.0/bin/xcpretty" # 替换为你安装的本地路径
#echo ${prettyPath}
projectName="xxxxxxx" # 替换为你的project name
xcodebuild -scheme ${projectName} -workspace ${projectName}.xcworkspace clean && xcodebuild clean && xcodebuild -scheme ${projectName} -workspace ${projectName}.xcworkspace -configuration Debug -sdk iphonesimulator COMPILER_INDEX_STORE_ENABLE=NO | ${prettyPath} -r json-compilation-database  -o compile_commands.json

# 3.0 判断json是否
if [ -f ./compile_commands.json ]; then echo "compile_commands.json 文件存在";
else echo "-----compile_commands.json文件不存在-----"; fi

# 4.0 oclint分析json
oclint-json-compilation-database -e Pods -- -report-type xcode
然后command + B之后,去喝泡一杯咖啡,回来你就能够看到工程代码的warning然后修改代码。
Clang-format对团队代码进行风格统一
笔者使用的.clangformat的配置如下,具体见gist:
---
# Language:        ObjC
BasedOnStyle:  Google
AccessModifierOffset: 0
ConstructorInitializerIndentWidth: 4
SortIncludes: false

# 连续赋值时,对齐所有等号
# AlignConsecutiveAssignments: true
AlignAfterOpenBracket: true
AlignEscapedNewlinesLeft: true
AlignOperands: false
AlignTrailingComments: true

AllowAllParametersOfDeclarationOnNextLine: false
AllowShortBlocksOnASingleLine: false
AllowShortCaseLabelsOnASingleLine: false
AllowShortFunctionsOnASingleLine: false
AllowShortIfStatementsOnASingleLine: false
# AllowShortFunctionsOnASingleLine: All
AllowShortLoopsOnASingleLine: false

AlwaysBreakAfterDefinitionReturnType: false
AlwaysBreakTemplateDeclarations: false
AlwaysBreakBeforeMultilineStrings: false

BreakBeforeBinaryOperators: None
BreakBeforeTernaryOperators: false
BreakConstructorInitializersBeforeComma: false

BinPackArguments: true
BinPackParameters: true
ColumnLimit: 110
ConstructorInitializerAllOnOneLineOrOnePerLine: true
DerivePointerAlignment: false
ExperimentalAutoDetectBinPacking: false
IndentCaseLabels: true
IndentWrappedFunctionNames: false
IndentFunctionDeclarationAfterType: false
MaxEmptyLinesToKeep: 1 # 连续的空行保留几行
KeepEmptyLinesAtTheStartOfBlocks: false
NamespaceIndentation: Inner
ObjCBlockIndentWidth: 4
ObjCSpaceAfterProperty: true
ObjCSpaceBeforeProtocolList: true
PenaltyBreakBeforeFirstCallParameter: 10000
PenaltyBreakComment: 300
PenaltyBreakString: 1000
PenaltyBreakFirstLessLess: 120
PenaltyExcessCharacter: 1000000
PenaltyReturnTypeOnItsOwnLine: 200
PointerAlignment: Right
SpacesBeforeTrailingComments: 1
Cpp11BracedListStyle: true
Standard:        Auto
IndentWidth:     4
TabWidth:        4
UseTab:          Never
BreakBeforeBraces: Custom
BraceWrapping:
    AfterClass: true
    AfterControlStatement: false
    AfterEnum: false
    AfterFunction: false
    AfterNamespace: true
    AfterObjCDeclaration: false # ObjC定义后面是否换行
    AfterStruct: false
    AfterUnion: false
    BeforeCatch: false
    BeforeElse: false
    IndentBraces: false

SpacesInParentheses: false
SpacesInSquareBrackets: false
SpacesInAngles:  false
SpaceInEmptyParentheses: false
SpacesInCStyleCastParentheses: false
SpaceAfterCStyleCast: false
SpacesInContainerLiterals: true
SpaceBeforeAssignmentOperators: true

ContinuationIndentWidth: 4
CommentPragmas:  '^ IWYU pragma:'
ForEachMacros:   [ foreach, Q_FOREACH, BOOST_FOREACH ]
SpaceBeforeParens: ControlStatements
DisableFormat:   false
...
使用命令clang-format -i [files]