在vs2017中使用opencv4.0调用darknet框架模型
在vs2017中使用opencv4.0工具调用Darknet框架模型
- 前言
- VS2017的下载及安装
- 下载
- 安装
- opencv4.0的下载及安装
- opencv4.0调用darknet框架模型的实例
- 1. 在vs2017中创建项目
- 2. 配置属性表
- 3. 编写例子
- 结束语
前言
在Linux操作系统中,用Darknet框架已实现目标检测模型训练,同时希望在windows系统中用到已训练的模型并实现目标的检测,这时将用到vs2017和opencv两种工具。
本blog将书写vs2017的下载及安装,opencv4.0的下载及安装以及用简单的例子实现Darknet模型的调用。
VS2017的下载及安装
下载
VS2017很强大,不仅仅是C语言,Python,R,F#,ios,Android,Web,Node.js,Azure,Unity,HTML,JavaScript等开发都可以执行。
vs2017的下载网址:官网
历史版本

VS 2017 版本,细分为三个版本,分别是:
社区版(Community):免费提供给单个开发人员,给予初学者及大部分程序员支持,可以无任何经济负担、合法地使用。
企业版:为正规企业量身定做,能够提供点对点的解决方案,充分满足企业的需求。
专业版:适用于专业用户或者小团体。虽没有企业版全面的功能,但相比于免费的社区版,有更强大的功能。
安装
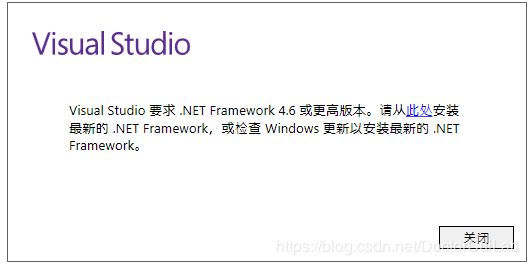
VS2017下载的exe(可执行程序)双击即可安装,若出现下图情况,需要自行安装版本较高的 .Net Framework 。建议直接下载 .Net Framework 4.6 安装包进行安装,速度较快。

VS2017的安装较为简单,没有坑,一路确定就行。
安装完成后,VS2017 会要求重启(注销)计算机,该保存的保存,按要求重启(注销)即可。
重启(注销)完成后,打开 “开始菜单”,会发现多了一个叫 “Visual Studio 2017” 的图标,证明你安装成功啦。

opencv4.0的下载及安装
下载地址:官网
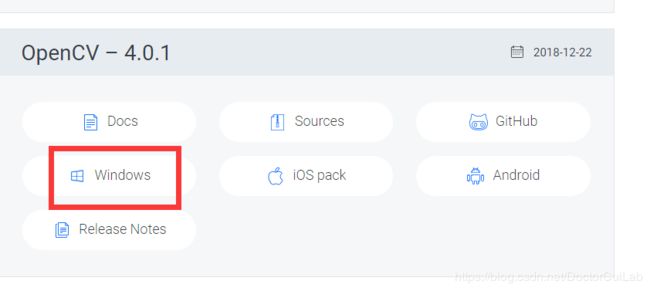
下载的可执行文件的名称为:opencv-4.0.1-vc14_vc15.exe,双击执行即可。选定合适的解压路径即可,无需安装。
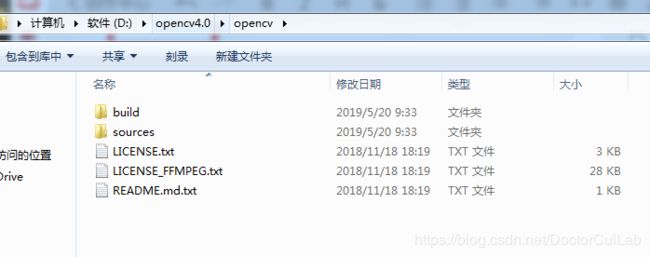
设计环境变量,重要!!!
将D:\opencv4.0\opencv\build\x64\vc15\bin 存放在环境变量Path中,即:
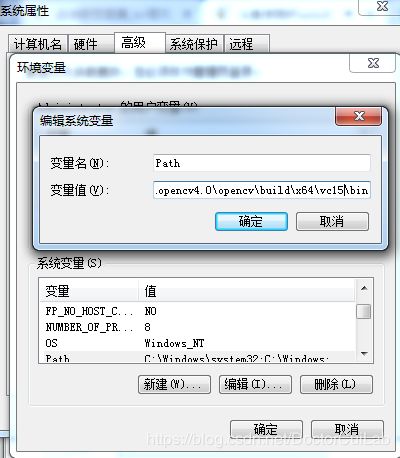
由于这里是vs的版本为2017,所以对应的vc版本为vc15。

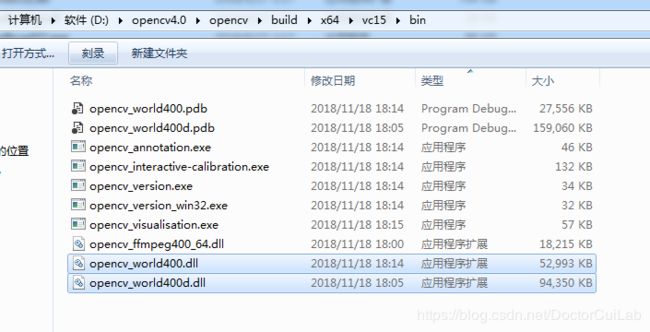
其中在上图的bin下的opencv_world400.dll和opencv_world400d.dll放在C:\Windows\SysWOW64
将opencv_ffmpeg400_64.dll放在C:\Windows\System32
opencv4.0调用darknet框架模型的实例
1. 在vs2017中创建项目
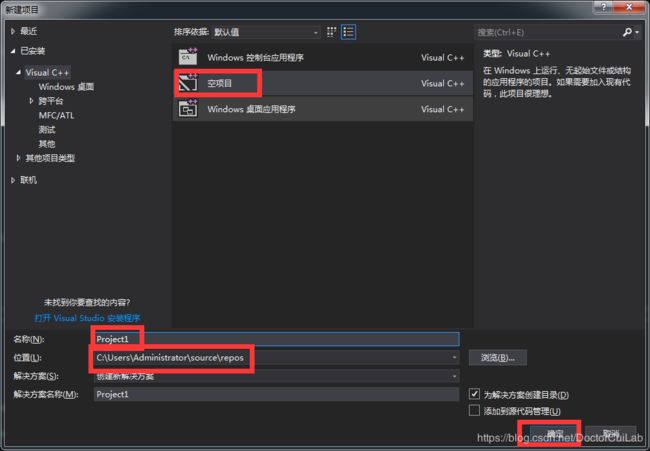
设置好上图中三个红框的中内容,项目创建完成。
给项目创建一个C++文件。
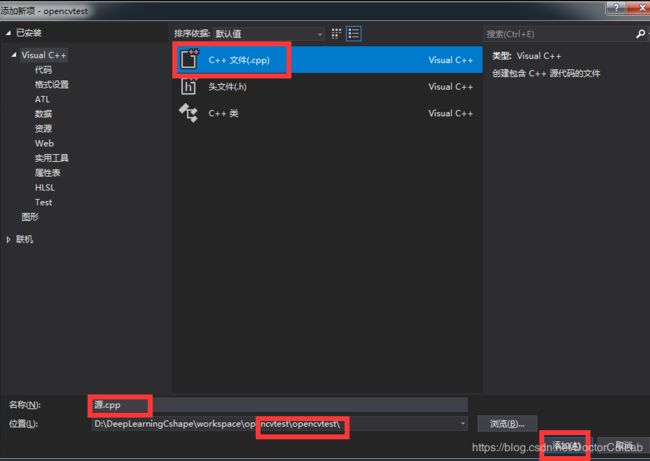
设置好三个红框的内容既可。
2. 配置属性表
在视图调出属性管理器的界面。
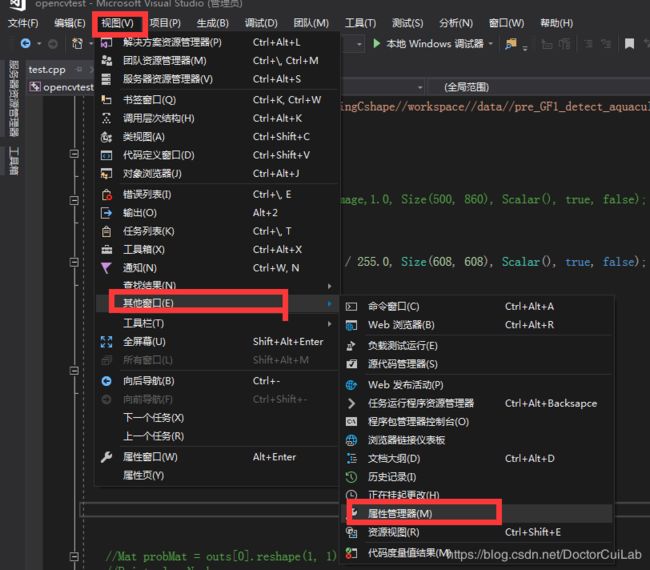
在打开的属性表中,点开Debug|64,对其中Microsoft.Cpp.x64.user的属性进行编辑,分别需要设置的有包含目录,库目录以及链接器中输入的附加依赖项。
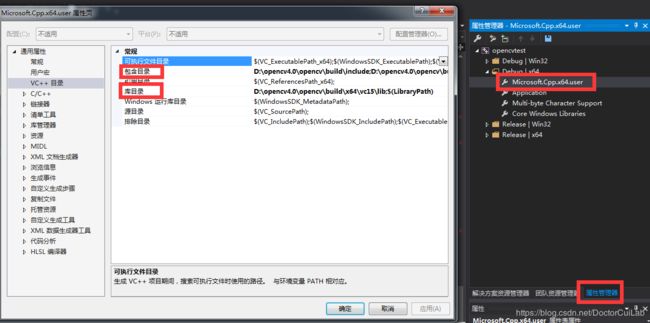
其中包含目录的路径分别为:D:\opencv4.0\opencv\build\include;D:\opencv4.0\opencv\build\include\opencv2
库目录的路径为:D:\opencv4.0\opencv\build\x64\vc15\lib

链接器中输入的附加依赖项为opencv_world400.lib和opencv_world400d.lib。
完成这个即可。
3. 编写例子
#include
#include

#include
#include
#include

#include
#include
#include

using namespace cv;
using namespace std;
using namespace dnn;

vector classes;

vector getOutputsNames(Net& net)
{
	static vector names;
	if (names.empty())
	{
		//返回加载模型中所有层的输入和输出形状(shape)
		vector outLayers = net.getUnconnectedOutLayers();

		//get the names of all the layers in the network
		vector layersNames = net.getLayerNames();

		// Get the names of the output layers in names
		names.resize(outLayers.size());
		for (size_t i = 0; i < outLayers.size(); ++i)
			names[i] = layersNames[outLayers[i] - 1];
	}
	return names;
}

// Draw the predicted bounding box 绘出框
void drawPred(int classId, float conf, int left, int top, int right, int bottom, Mat& frame)
{
	//Draw a rectangle displaying the bounding box 绘制矩形
	rectangle(frame, Point(left, top), Point(right, bottom), Scalar(0, 0, 255));

	//Get the label for the class name and its confidence
	string label = format("%.2f", conf);//分类标签及其置信度
	//若存在类别标签,读取对应的标签
	if (!classes.empty())
	{
		CV_Assert(classId < (int)classes.size());
		label = classes[classId] + ":" + label;
	}

	//Display the label at the top of the bounding box
	int baseLine;
	Size labelSize = getTextSize(label, FONT_HERSHEY_SIMPLEX, 0.5, 1, &baseLine);
	top = max(top, labelSize.height);
	//绘制框上文字
	putText(frame, label, Point(left, top), FONT_HERSHEY_SIMPLEX, 0.5, Scalar(255, 255, 255));
}

// Remove the bounding boxes with low confidence using non-maxima suppression
void postprocess(Mat& frame, const vector& outs, double confThreshold, double nmsThreshold)
{
	vector classIds;
	vector confidences;
	vector boxes;

	for (size_t i = 0; i < outs.size(); ++i)
	{
		// Scan through all the bounding boxes output from the network and keep only the
		// ones with high confidence scores. Assign the box's class label as the class
		// with the highest score for the box.
		float* data = (float*)outs[i].data;
		for (int j = 0; j < outs[i].rows; ++j, data += outs[i].cols)
		{
			int a = outs[i].cols;//中心坐标+框的宽高+置信度+分为各个类别分数=2+2+1+1
			int b = outs[i].rows;//框的个数1083
			Mat scores = outs[i].row(j).colRange(5, outs[i].cols);//取当前框的第六列到最后一列,即该框被分为80个类别,各个类别的评分
			Point classIdPoint;
			double confidence;
			// Get the value and location of the maximum score
			minMaxLoc(scores, 0, &confidence, 0, &classIdPoint);//找出最大评分的类别
			if (confidence > confThreshold)//置信度阈值
			{
				int centerX = (int)(data[0] * frame.cols);
				int centerY = (int)(data[1] * frame.rows);
				int width = (int)(data[2] * frame.cols);
				int height = (int)(data[3] * frame.rows);
				int left = centerX - width / 2;
				int top = centerY - height / 2;

				classIds.push_back(classIdPoint.x);
				confidences.push_back((float)confidence);
				boxes.push_back(Rect(left, top, width, height));
			}
		}
	}

	// Perform non maximum suppression to eliminate redundant overlapping boxes with
	// lower confidences
	vector indices;
	NMSBoxes(boxes, confidences, confThreshold, nmsThreshold, indices);//框、置信度、置信度阈值、非极大值抑制阈值、指标(输出)
	for (size_t i = 0; i < indices.size(); ++i)
	{
		int idx = indices[i];//框序号
		Rect box = boxes[idx];//框的坐标(矩形区域)
		//drawPred(classIds[idx], confidences[idx], box.x, box.y,
			//box.x + box.width, box.y + box.height, frame);
		//rectangle(frame, Rect(box.x, box.y, box.x + box.width, box.y + box.height), Scalar(0, 0, 255), 1.0);
		rectangle(frame, Rect(box.x, box.y, box.width, box.height), Scalar(0, 0, 255), 1.0);
	}

	imwrite("./output.jpg",frame);
}

int main() {

	//Mat src = imread("");
	//Mat src = imread("D://DeepLearningCshape//workspace//data//test1.jpg");
	//imshow("Src.jpg", src);

	/*Mat gray;
	cvtColor(src,gray,6);
	imshow("gray.jpg", gray);*/

	const char* darknet_weight_name = "D://DeepLearningCshape//workspace//darknet_model//YOLOv3//yolov3-416-train.backup";
	const char* darknet_cfg_name = "D://DeepLearningCshape//workspace//darknet_model//YOLOv3//yolov3-416-test.cfg";
	const char* darknet_data_name = "D://DeepLearningCshape//workspace//darknet_model//YOLOv3//aquaculture.names";

	classes.push_back("aquaculture");

	dnn::Net net_darknet = readNetFromDarknet(darknet_cfg_name, darknet_weight_name);
	if (net_darknet.empty()) {
		cout << "Can't load the net" << endl;
		return -1;
	}
	cout<< "Load the net successfully..." << endl;
	//dnn::blobFromImage


	/*要求网络在支持的地方使用特定的计算后端
	*如果opencv是用intel的推理引擎库编译的,那么dnn_backend_default意味着dnn_backend_interrusion_引擎
	*否则等于dnn_backend_opencv。*/

	net_darknet.setPreferableBackend(DNN_BACKEND_OPENCV);
	//要求网络对特定目标设备进行计算
	net_darknet.setPreferableTarget(DNN_TARGET_CPU);

	Mat testimage = imread("D://DeepLearningCshape//workspace//data//pre_GF1_detect_aquaculture.jpg");
	imshow("srcimage.jpg", testimage);

	//std::vector frames;
	//frames.push_back(testimage);

	/*Mat inputBlob = blobFromImage(testimage,1.0, Size(500, 860), Scalar(), true, false);
	imshow("blobimage.jpg", inputBlob);*/

	Mat inputBlob;
	blobFromImage(testimage, inputBlob, 1 / 255.0, Size(608, 608), Scalar(), true, false);  //不知道为什么这个Mat不能显示,存储数据不对
	//imshow("blobimage.jpg", inputBlob);
	//net_darknet.setInput(inputBlob, "data");
	net_darknet.setInput(inputBlob);

	//4.检测和显示
	//获得“dectection_out"的输出
	vector outs;
	net_darknet.forward(outs, getOutputsNames(net_darknet));

	//阈值置信度和nms阈值
	postprocess(testimage, outs, 0.4, 0.5);
	waitKey();
	Sleep(1000); //1000微妙,为1s
	return 0;
}
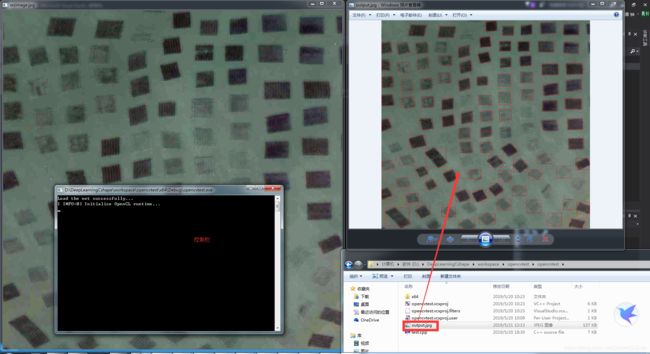
编写完毕后,执行Ctrl+F5快捷键既可实现的程序的调用,执行结果如下:
结束语
本blog介绍了vs2017的下载,安装及使用,opencv4.0的下载,安装及使用,同时编辑代码实现了在vs2017使用opencv对darknet框架模型的使用。
