Fence+Haproxy+Pacemaker实现高可用负载均衡
一、架构介绍
1、集群简介
Fence主要在架构的作用为防止二个服务器同时向资源写数据,破坏了资源的安全性和一致性从而导致脑裂的发生。通过Haproxy实现对web服务的负载均衡及健康检查,pacemaker实现haproxy的高可用。
2、Haproxy八种负载均衡算法(balance)
1.balance roundrobin          ###轮询,软负载均衡基本都具备这种算法
2.balance static-rr           ###根据权重
3.balance leastconn           ###最少连接数先处理
4.balance source              ###分局请求的IP
5.balance uri                 ###分局请求的uri
6.balance url_param           ###根据请求的URL参数
7.banlance hdr(name)          ###根据HTTP请求头来锁定每一次HTTP请求
8.balance rbp-cookie(name)    ###根据cookie来锁定hash每一次TCP请求
二、yum源及实验环境
1、yum源:
[rhel6.5]
name=rhel6.5
baseurl=http://10.10.10.250/rhel6.5
gpgcheck=0

[HighAvailability]
name=HighAvailability
baseurl=http://10.10.10.250/rhel6.5/HighAvailability
gpgcheck=0

[LoadBalancer]
name=LoadBalancer
baseurl=http://10.10.10.250/rhel6.5/LoadBalancer
gpgcheck=0

[ScalableFileSystem]
name=ScalableFileSystem
baseurl=http://10.10.10.250/rhel6.5/ScalableFileSystem
gpgcheck=0

[ResilientStorage]
name=ResilientStorage
baseurl=http://10.10.10.250/rhel6.5/ResilientStorage
gpgcheck=0
2、实验环境:
iptables和selinux off
| Hostname | IP | System | Service | Function |
|---|---|---|---|---|
| server1 | 10.10.10.1 | redhat6.5 | Haproxy+Pacemaker | 实现高可用(Pacemaker)及负载均衡(Haproxy) |
| server2 | 10.10.10.2 | redhat6.5 | Apache | 生成访问页面 |
| server3 | 10.10.10.3 | redhat6.5 | Apache | 生成访问页面 |
| server4 | 10.10.10.4 | redhat6.5 | Haproxy+Pacemaker | 实现高可用(Pacemaker)及负载均衡(Haproxy) |
| dream(真机) | 10.10.10.250 | redhat7.2 | Fence | 实现对虚拟机进行断电 |
三、Haproxy安装及配置
为了方便安装及快速配置,这里我们使用yum来安装,可以使用编译安装及RPM包安装,server2和server3的apache已安装并写好了默认发布文件
编译安装Haproxy:https://blog.csdn.net/dream_ya/article/details/80908603
1、安装Haproxy
[root@server1 ~]# yum install -y haproxy2、配置Haproxy
[root@server1 ~]# vim /etc/haproxy/haproxy.cfg
68     use_backend static          if url_static
69     default_backend             static               ###默认模块设置为static
70     bind                        10.10.10.1:80        ###绑定IP
71
72 #---------------------------------------------------------------------
73 # static backend for serving up images, stylesheets and such
74 #---------------------------------------------------------------------
75 backend static
76     balance     roundrobin                           ###轮询
###下面为轮询的2台服务器
77     server      web1 10.10.10.2:80 check
78     server      web2 10.10.10.3:80 check

[root@server1 ~]# /etc/init.d/haproxy restart
[root@server1 ~]# chkconfig haproxy on
3、测试
安装server2、3的Apache服务:
[root@server2 ~]# yum install -y httpd
[root@server2 ~]# echo "server2
" >/var/www/html/index.html
[root@server2 ~]# /etc/init.d/httpd restart
[root@server2 ~]# chkconfig httpd onhttp://10.10.10.1 ###可以发现自带健康检查(即停掉server2和server3其中一个apache不会报错)4、IP改为VIP
[root@server1 ~]# vim /etc/haproxy/haproxy.cfg
 70     bind                        10.10.10.100:80
5、在server4安装Haproxy
[root@server1 ~]# /etc/init.d/haproxy stop
[root@server4 ~]# yum install -y haproxy
[root@server4 ~]#scp [email protected]:/etc/haproxy/haproxy.cfg /etc/haproxy/
[root@server4 ~]# chkconfig haproxy on
注意:二台服务器的haproxy都不要启动,我们通过pacemaker控制haproxy!!!
四、Pacemaker搭建与配置
1、安装Pacemaker(server1、4)
Crm软件包链接: https://pan.baidu.com/s/1tMpLVQdgaGmFsYBE-SN6Iw 密码: yman
[root@server1 ~]# yum install -y pacemaker corosync
[root@server1 ~]# yum install -y crmsh-1.2.6-0.rc2.2.1.x86_64.rpm  pssh-2.3.1-2.1.x86_64.rpm     ###crm命令安装
2、配置corosync.conf
[root@server1 ~]# cp /etc/corosync/corosync.conf.example /etc/corosync/corosync.conf
[root@server1 ~]# vim /etc/corosync/corosync.conf
service {
     ver:0                                       ###指定版本,0 时自动启动 pacemaker
     name:pacemaker
}

aisexec {                                        ###指定启动 ais 功能时以那个用户的身份去运行,可不写
     user:root
     group:root
}

totem {
     version: 2
     secauth: off
     threads: 0
     interface {
         ringnumber: 0
         bindnetaddr: 10.10.10.0                      ###地址段
         mcastaddr: 226.94.1.1                        ###广播地址
         mcastport: 5405                              ###广播端口
         ttl: 1
     }
}

[root@server1 ~]# /etc/init.d/corosync restart
[root@server1 ~]# chkconfig corosync on
注意:server4同样的安装方式,配置文件不需要做任何改变,scp过去即可!!!
3、查询
(1)可以发现server1和server4都是处于online状态
[root@server1 ~]# crm status
Last updated: Sun Jul 29 15:57:25 2018
Last change: Sun Jul 29 15:55:47 2018 via crmd on server1
Stack: classic openais (with plugin)
Current DC: server1 - partition with quorum
Version: 1.1.10-14.el6-368c726
2 Nodes configured, 2 expected votes
0 Resources configured

Online: [ server1 server4 ]
(2)查看当前集群系统所支持的类:
 [root@server1 corosync]# crm ra classes
 lsb
 ocf / heartbeat pacemaker
 service
 stonith
4、禁用stonith:
注意:由于2个是实现同步的,所以我们在server1中进行的设置会自动同步到server4中,因此在2个中其中一个设置都可以
corosync 默认启用了 stonith,而当前集群并没有相应的 stonith 设备,由于默认配置是打开的,目前尚不可用!!!
通过如下命令验证:
[root@server1 ~]# crm_verify -L
Errors found during check: config not valid
 -V may provide more details

[root@server1 ~]# crm configure property stonith-enabled=false
[root@server1 ~]# crm_verify -L                                ###在执行此命令发现不会报错
5、Crm配置Haproxy
注意:关闭Haproxy,让Pacemaker来进行控制!!!
如果想删除配置crm resource到里面stop掉,然后在configure中执行delete+名字即可进行删除!!!
(1)配置crm
[root@server1 ~]# crm configure
crm(live)configure# primitive haproxy lsb:haproxy op monitor interval=30s
crm(live)configure# primitive vip ocf:heartbeat:IPaddr params ip=10.10.10.100 cidr_netmask=24 op monitor interval=30s     ###配置vip
crm(live)configure# group web vip haproxy                   ###配置组资源
crm(live)configure# commit
(2)查看加入的配置:
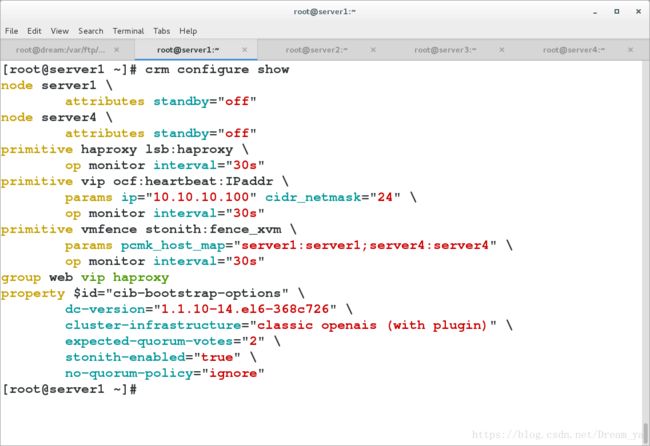
[root@server1 ~]# crm configure show
node server1
node server4
primitive haproxy lsb:haproxy \
    op monitor interval="30s"
primitive vip ocf:heartbeat:IPaddr \
    params ip="10.10.10.100" cidr_netmask="24" \
    op monitor interval="30s"
group web vip haproxy
property $id="cib-bootstrap-options" \
    dc-version="1.1.10-14.el6-368c726" \
    cluster-infrastructure="classic openais (with plugin)" \
    expected-quorum-votes="2" \
    stonith-enabled="false"
(3)查看集群配置:
[root@server1 ~]# crm_mon
Online: [ server1 server4 ]

 Resource Group: web
     vip        (ocf::heartbeat:IPaddr):        Started server1
     haproxy    (lsb:haproxy):  Started server1
6、测试
注意:现在在访问的话我们是通过VIP:10.10.10.100进行访问!!!
[root@server1 ~]# crm node standby
[root@server1 ~]# crm_mon -1              ###列出集群信息
恢复server1节点:
[root@server1 ~]# crm node online虽然节点挂掉可以实现转移,但是当服务器挂掉不能实现转移!!!我们可以用下面的命令来模拟内核崩溃:
[root@server4 ~]# echo c >/proc/sysrq-trigger 我们可以发现虽然server4挂掉了,但是VIP并没有转移到server1上去,因此下面我们加入Fence来实现即使是服务器挂了也可以实现VIP漂移!!!
五、Fence安装
1、安装fence_xvm
注意:server1和server4都进行安装!!!
[root@server1 ~]# stonith_admin -I
 fence_pcmk
 fence_legacy

[root@server1 ~]# yum install -y fence*
[root@server1 ~]# stonith_admin -I
 fence_xvm
 fence_virt
 fence_pcmk
 fence_legacy
2、生成fence_xvm.key
[root@dream ~]# yum install -y fence*
[root@dream ~]# mkdir /etc/cluster
[root@dream ~]# dd if=/dev/urandom of=/etc/cluster/fence_xvm.key bs=128 count=1             ###生成随机数key
3、key传给2个节点
[root@server1 ~]# mkdir /etc/cluster
[root@server4 ~]# mkdir /etc/cluster
[root@dream ~]# scp /etc/cluster/fence_xvm.key root@10.10.10.1:/etc/cluster/
[root@dream ~]# scp /etc/cluster/fence_xvm.key root@10.10.10.4:/etc/cluster/
4、Packet hash strength
[root@dream ~]# fence_virtd -c
Module search path [/usr/lib64/fence-virt]:

Available backends:
   libvirt 0.1
Available listeners:
   serial 0.4
   multicast 1.2

Listener modules are responsible for accepting requests
from fencing clients.

Listener module [multicast]:                                  ###模式

The multicast listener module is designed for use environments
where the guests and hosts may communicate over a network using
multicast.

The multicast address is the address that a client will use to
send fencing requests to fence_virtd.

Multicast IP Address [225.0.0.12]:                           ###广播地址

Using ipv4 as family.

Multicast IP Port [1229]:                                    ###端口,可以自行指定

Setting a preferred interface causes fence_virtd to listen only
on that interface.  Normally, it listens on all interfaces.
In environments where the virtual machines are using the host
machine as a gateway, this *must* be set (typically to virbr0).
Set to 'none' for no interface.

Interface [virbr0]: br0                                      ###此处根据自己的网卡名进行设置

The key file is the shared key information which is used to
authenticate fencing requests.  The contents of this file must
be distributed to each physical host and virtual machine within
a cluster.

Key File [/etc/cluster/fence_xvm.key]:

Backend modules are responsible for routing requests to
the appropriate hypervisor or management layer.

Backend module [libvirt]:

Configuration complete.

=== Begin Configuration ===
 backends {
   libvirt {
       uri = "qemu:///system";
   }

}

listeners {
    multicast {
        port = "1229";
        family = "ipv4";
        interface = "br0";
        address = "225.0.0.12";
        key_file = "/etc/cluster/fence_xvm.key";
    }
}

fence_virtd {
    module_path = "/usr/lib64/fence-virt";
    backend = "libvirt";
    listener = "multicast";
}

=== End Configuration ===
Replace /etc/fence_virt.conf with the above [y/N]? y                ###配置文件写在/etc/fence_virt.conf

[root@dream ~]# systemctl restart fence_virtd.service
5、配置fence_xvm
[root@server1 ~]# crm configure
crm(live)configure# property stonith-enabled=true           ###打开stonith
###pacemaker节点数需大于2,如果只有两个节点没有办法提供仲裁,忽略这个系统条件,要不然无法执行
crm(live)configure# property no-quorum-policy=ignore
###后面的server1和server4自定义,前面的是主机名
crm(live)configure# primitive vmfence stonith:fence_xvm params pcmk_host_map="server1:server1;server4:server4" op monitor interval=30s
crm(live)configure# commit

[root@server1 ~]# /etc/init.d/corosync restart
[root@server4 ~]# /etc/init.d/corosync restart
6、查看集群状态
[root@server1 ~]# crm_mon
Online: [ server1 server4 ]

 Resource Group: web
     vip        (ocf::heartbeat:IPaddr):        Started server1
     haproxy    (lsb:haproxy):  Started server1
vmfence (stonith:fence_xvm):    Started server4
7、测试
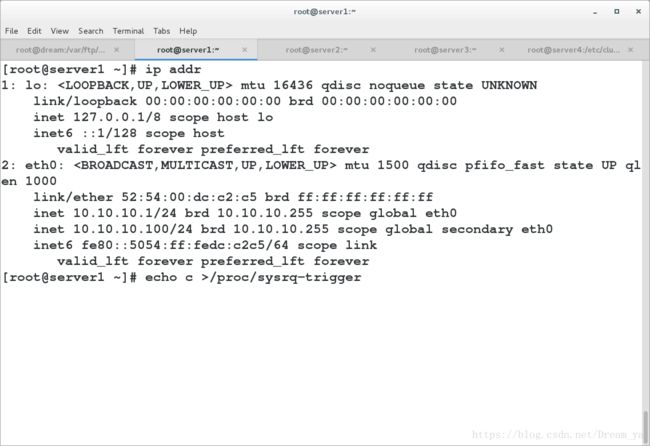
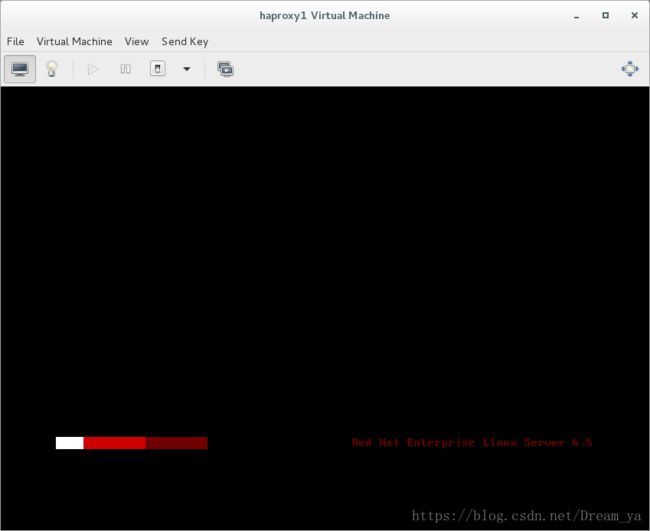
[root@server1 ~]# echo c >/proc/sysrq-trigger


