12、ffmpeg笔记-使用Android Studio编写第一个ffmpeg程序
所需材料
1、android studio 2.3
2、android-ndk-r13
3、ffmpeg编译结果(include,libs)
本文实例中需要使用到上次编译的ffmpeg头文件和静态库,如果没有的话,请参看上一篇文章。
本文使用Android Studio2.3 来开发,主要是考虑到Android Studio对NDK开发已经支持得很好了。
Android Sutdio 既可以支持ndk-build构建,又支持新的CMake构建,而且代码提示、单步调试等功能也大大提高了开发效率。
1、创建一个NDK工程
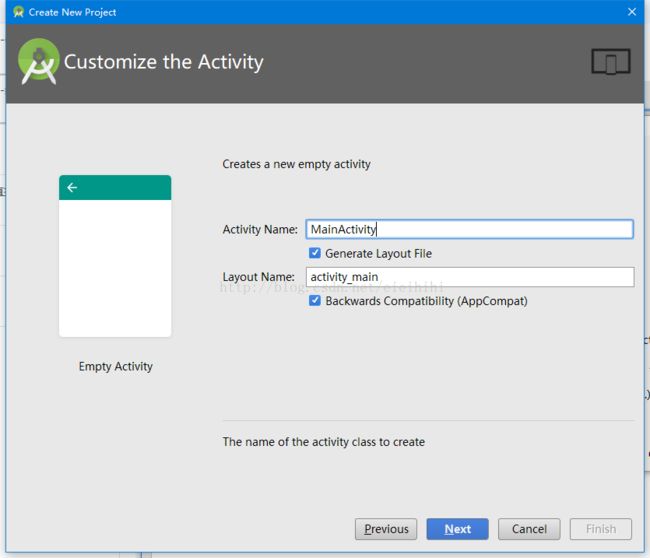
打开Android Studio,新建一个工程,勾选“Include C++support”,使工程支持C++开发。如下图:
下一步,
下一步,
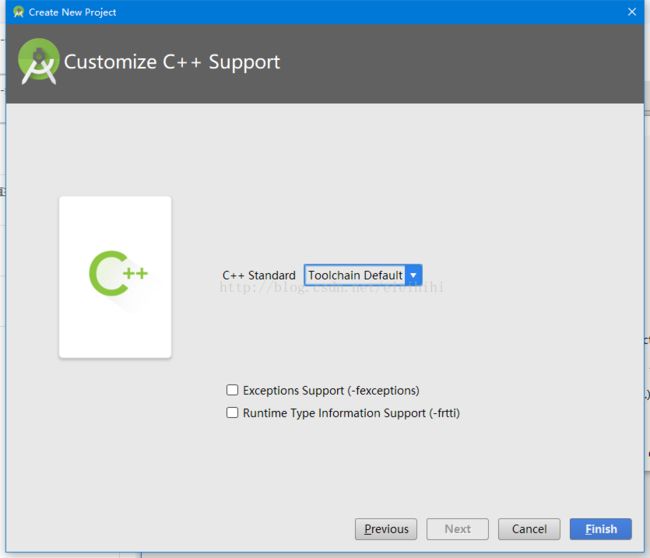
下一步,
C++编译选项采用默认的就可以了,以后可以在“build.gradle”里面进行更改。
完成工程的创建。
2、安装CMake
新建工程后,出现如下错误,原因是:新版本的Android Studio默认使用CMake进行构建,与以往使用mk和ndk-build不一样,需要下载CMake工具才行。
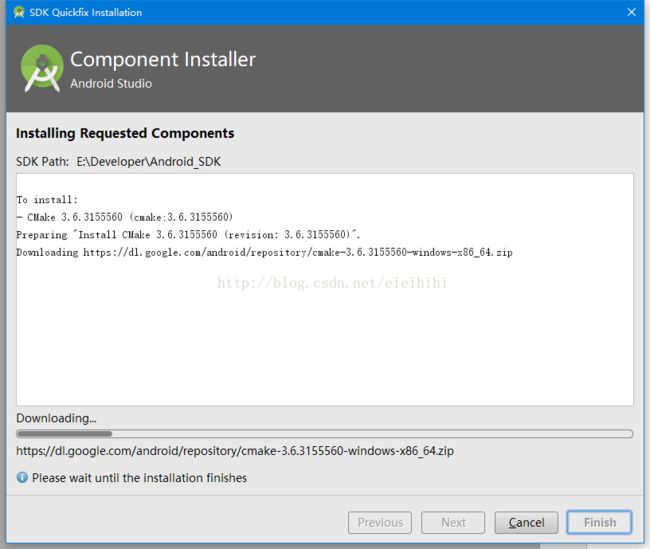
点击上面的链接“Install CMake and sync project”,自动下载所需的组件。
完成成后,点击“Finish”即可。
3、配置NDK
NDK没配置好的话,会提示下面的错误:
使用CMake构建C++程序的话,需要使用NDK>=12r,如果没有的话,请自行百度搜索下载。
打开工程中的“local.properties”文件,追加一行代码“ndk.dir=NDK的目录”,如下所示:
sync一下,即可解决NDK编译环境的问题。
4、导入ffmpeg编译结果
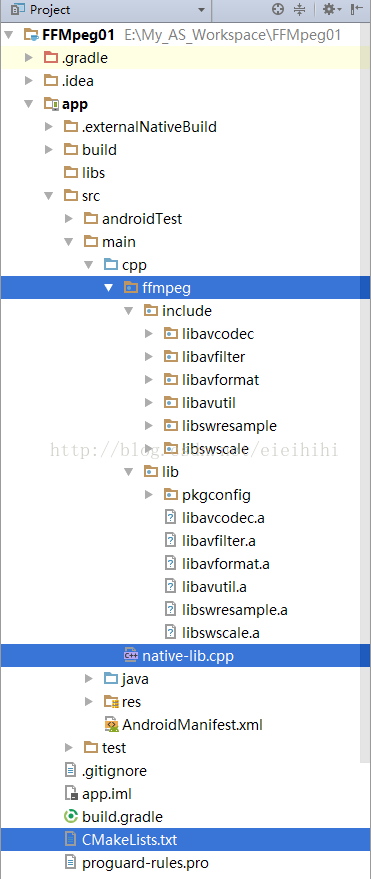
将前面编译的ffmpeg结果拷贝到工程目录中,路径“app/src/main/cpp/ffmpeg”,结构如下图所示:
其中“native-lib.cpp”是这个IDE自动生成的源文件,“CMakeLists.txt”是这个IED自动生成的构建脚本文件。
5、编写构建脚本
由于我们采用的是CMake构建,对应需要编写的构建脚本是“CMakeList.txt”,位于"
# For more information about using CMake with Android Studio, read the
# documentation: https://d.android.com/studio/projects/add-native-code.html

# Sets the minimum version of CMake required to build the native library.

cmake_minimum_required(VERSION 3.4.1)

# Creates and names a library, sets it as either STATIC
# or SHARED, and provides the relative paths to its source code.
# You can define multiple libraries, and CMake builds them for you.
# Gradle automatically packages shared libraries with your APK.

add_library( # Sets the name of the library.
             native-lib

             # Sets the library as a shared library.
             SHARED

             # Provides a relative path to your source file(s).
             src/main/cpp/native-lib.cpp )

#增加头文件搜索目录
include_directories(src/main/cpp/ffmpeg/include/)

# Searches for a specified prebuilt library and stores the path as a
# variable. Because CMake includes system libraries in the search path by
# default, you only need to specify the name of the public NDK library
# you want to add. CMake verifies that the library exists before
# completing its build.

find_library( # Sets the name of the path variable.
              log-lib

              # Specifies the name of the NDK library that
              # you want CMake to locate.
              log )

# Specifies libraries CMake should link to your target library. You
# can link multiple libraries, such as libraries you define in this
# build script, prebuilt third-party libraries, or system libraries.

target_link_libraries( # Specifies the target library.
                       native-lib

                       #增加ffmpeg库,注意顺序(具体看lib/pkgconfig的依赖关系)
                       ${CMAKE_SOURCE_DIR}/src/main/cpp/ffmpeg/lib/libavfilter.a
                       ${CMAKE_SOURCE_DIR}/src/main/cpp/ffmpeg/lib/libavformat.a
                       ${CMAKE_SOURCE_DIR}/src/main/cpp/ffmpeg/lib/libavcodec.a
                       ${CMAKE_SOURCE_DIR}/src/main/cpp/ffmpeg/lib/libswresample.a
                       ${CMAKE_SOURCE_DIR}/src/main/cpp/ffmpeg/lib/libswscale.a
                       ${CMAKE_SOURCE_DIR}/src/main/cpp/ffmpeg/lib/libavutil.a

                       #增加ffmpeg所需要的依赖库
                       -lm -lz

                       # Links the target library to the log library
                       # included in the NDK.
                       ${log-lib}
                       )
上面带有中文注释的语句是需要新增的,主要包括:
- 指定ffmpeg头文件的搜索路径;
- 将ffmpeg的静态库添加到构建中。
比较坑的一点时,一定要使用准确的依赖顺序才行,否则会报错。这个依赖关系可以在“ffmpeg/lib/pkgconfig”中找到。
6、编写代码
任何事情都需要从最简单的开始,这里我们就尝试调用ffmpeg的"avcodec_configuration()"方法来构建时的信息。
打开“native-lib.cpp”文件,修改为:
#include
#include "libavcodec/avcodec.h"
extern "C"
JNIEXPORT jstring JNICALL
Java_cn_bassy_ffmpeg01_MainActivity_stringFromJNI(JNIEnv* env, jobject /* this */) {
    return env->NewStringUTF(avcodec_configuration());
}
Android Studio 有代码提示功能,鼠标放在“”函数上面,可以看到相关注释。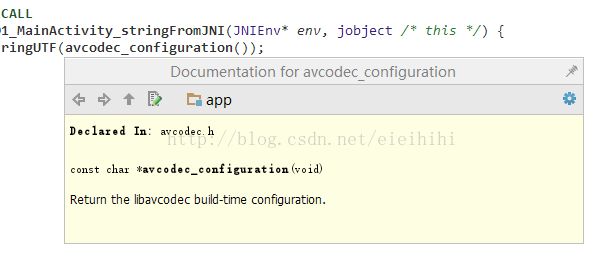
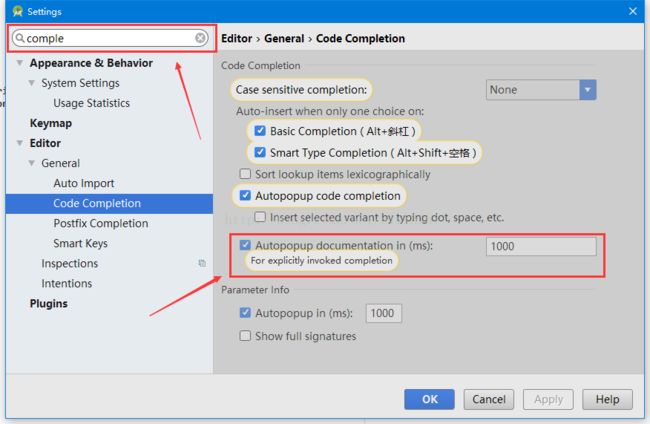
如果没有显示,请进入Settings配置,如下图所示。
7、编译程序
编译程序很简单,Android Studio已经集成了NDK开发,只需要点击“Run App”就可以了。
当然,肯定还会有很多错误的,所以下面给出了常见错误及解决方法。
8、错误问题及解决方法
注意,编译ffmpeg时所指定的Android Platform版本,与使用ffmpeg时指定的minSdkVersion有很大的关系,大部分错误都是因为minSdkVersion大于编译ffmpeg时指定的Android Platform版本所导致的!!
1)ffmpeg函数不能被识别
编译是出现" undefined reference to 'avcodec_register_all()"和“Error:(15) undefined reference to 'avcodec_configuration()”,错误如下:
Error:(15) undefined reference to 'avcodec_register_all()'
Error:(15) undefined reference to 'avcodec_configuration()'这是因为ffmpeg是一个纯C语言编写的库,使用C++调用C代码时候,需要使用“extern "C"”包围头文件“avcodec.h”和相关代码,如下:
#include
#include

#ifdef __cplusplus
extern "C" {
#endif

#include "libavcodec/avcodec.h"


JNIEXPORT jstring JNICALL
Java_cn_bassy_ffmpeg01_MainActivity_stringFromJNI(JNIEnv* env, jobject /* this */) {
    return env->NewStringUTF(avcodec_configuration());
}

#ifdef __cplusplus
};
#endif 其它类似的错误,都应该将ffmpeg的头文件使用“extern "C"”包围。
2)error:undefined reference to 'av_log' 错误:
出现如下错误:
Error:error: undefined reference to 'av_log'
Error:error: undefined reference to 'av_log'
Error:error: undefined reference to 'av_log'
Error:error: undefined reference to 'av_log'
Error:error: undefined reference to 'av_get_bytes_per_sample'
Error:error: undefined reference to 'av_crc'
Error:error: undefined reference to 'av_crc'
Error:error: undefined reference to 'av_crc'这是因为依赖顺序不对,正确的依赖顺序是(具体请看ffmpeg/lib/pkgconfig目录内容):
target_link_libraries( # Specifies the target library.
                       native-lib
                       #增加ffmpeg库,注意顺序(具体看lib/pkgconfig的依赖关系)
                       ${CMAKE_SOURCE_DIR}/src/main/cpp/ffmpeg/lib/libavfilter.a
                       ${CMAKE_SOURCE_DIR}/src/main/cpp/ffmpeg/lib/libavformat.a
                       ${CMAKE_SOURCE_DIR}/src/main/cpp/ffmpeg/lib/libavcodec.a
                       ${CMAKE_SOURCE_DIR}/src/main/cpp/ffmpeg/lib/libswresample.a
                       ${CMAKE_SOURCE_DIR}/src/main/cpp/ffmpeg/lib/libswscale.a
                       ${CMAKE_SOURCE_DIR}/src/main/cpp/ffmpeg/lib/libavutil.a
                       #增加ffmpeg所需要的依赖库
                       -lm -lz
                       # Links the target library to the log library
                       # included in the NDK.
                       ${log-lib}
                       )
3)posix_memalign 错误
出现“undefined reference to 'posix_memalign'”错误。
这是由于Android原来是不支持posix的,直到android-16才提供posix支持,所以,需要通过APP_PLATFORM指定版本为“android-16”及以上。
直接修改gradle文件,指定“minSdkVersion 16”,如:
defaultConfig {
        applicationId "cn.bassy.ffmpeg01"
        minSdkVersion 16
        targetSdkVersion 25
        versionCode 1
        versionName "1.0"
    }
如果使用ndk-build命令的话,需要修改Application.mk文件,通过APP_PLATFORM指定Android版本,如下:
APP_STL := gnustl_static
APP_PLATFORM := android-17
APP_ABI := armeabi
4)出现”UINT64_C“等错误
出现以下错误:
libavutil/common.h:30:2: error: missing -D__STDC_CONSTANT_MACROS
libavutil/common.h:205:28: error: use of undeclared identifier 'UINT64_C'解决方法,打开“ffmpeg\include\libavutil\common.h”追加以下内容:
#ifdef __cplusplus
#define __STDC_CONSTANT_MACROS
#ifdef _STDINT_H
#undef _STDINT_H
#endif
# include "stdint.h"
#endif


#ifndef INT64_C
#define INT64_C(c) (c ## LL)
#define UINT64_C(c) (c ## ULL)
#endif
9、运行效果
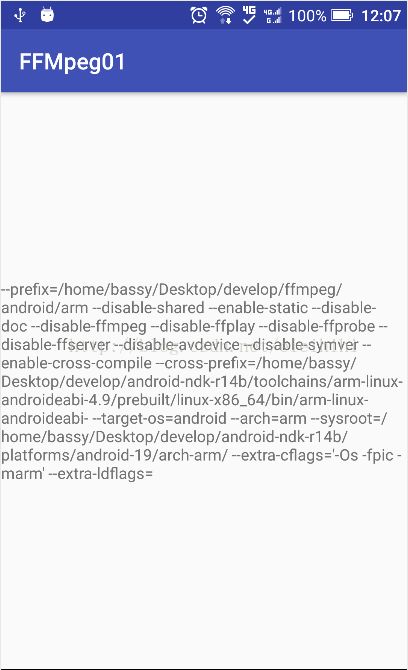
运行成功之后,会看到下面的结果。
恭喜,你的第一个ffmpeg程序已经成功跳起来!~~


