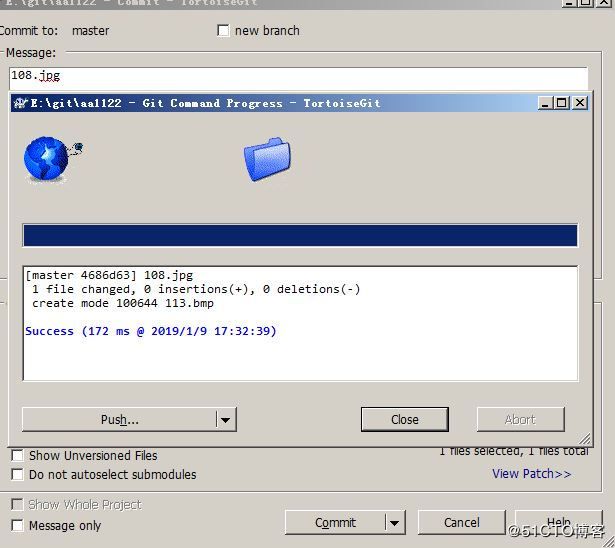
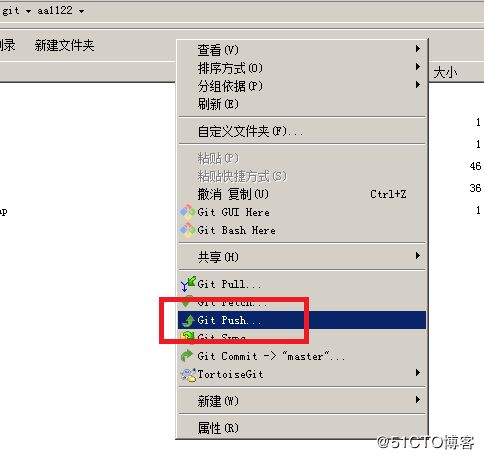
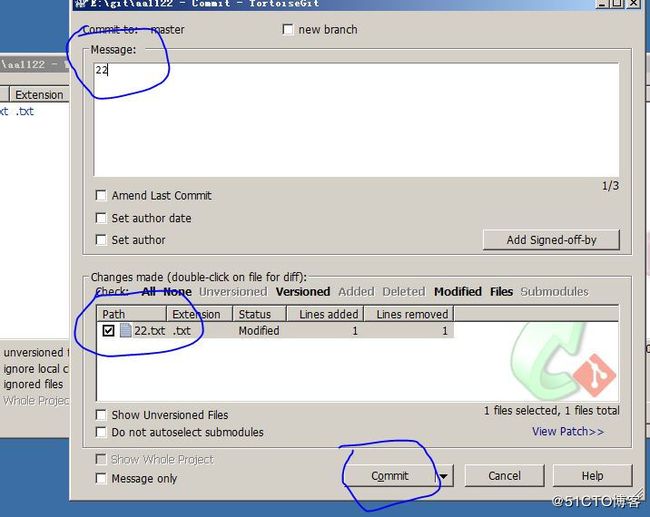
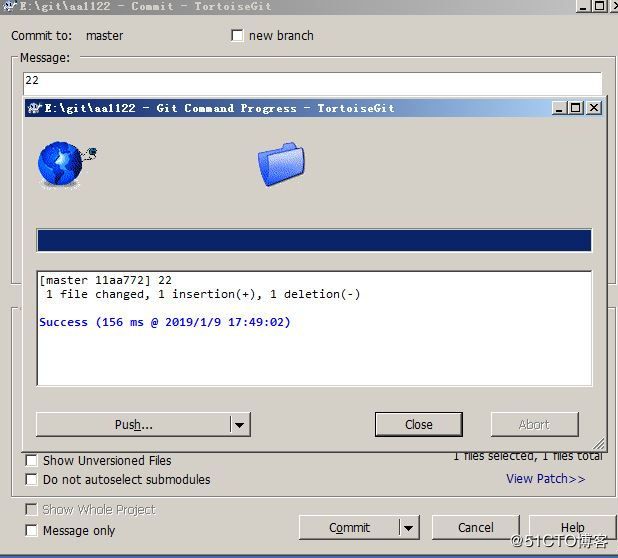
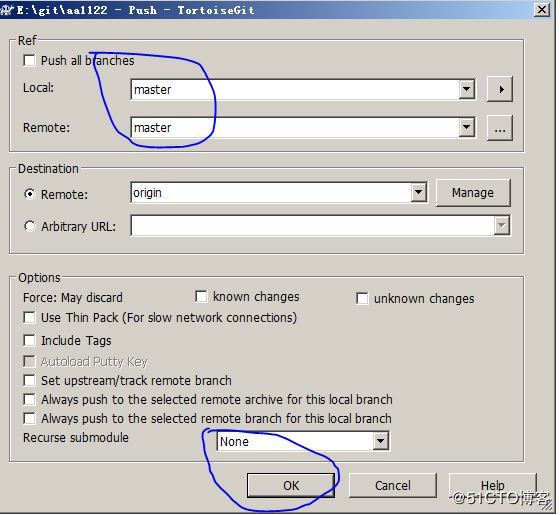
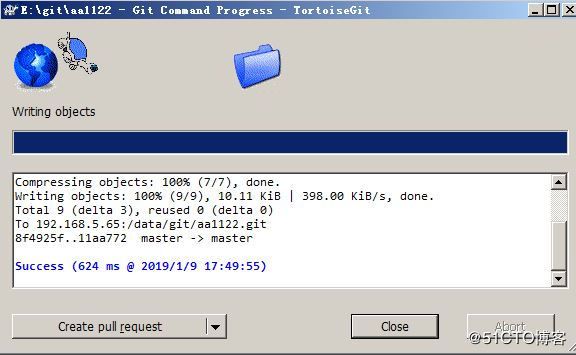
git使用的是代码仓库,git服务端有仓库,称为远端仓库,我们clone下来的,本地也有一个仓库称为本地仓库。我们commit的时候是把代码提交到了本地仓库,push时,是把代码提交到了远端仓库。pull的时候是把代码从远端仓库下载到本地仓库。
一、git服务器安装(CentOS 7.6)
1、依赖库安装
yum -y install curl-devel expat-devel gettext-devel openssl-devel zlib-devel gcc perl-ExtUtils-MakeMaker
2、卸载低版本的 Git
yum -y remove git
3、安装git
cd /opt
wget http://ftp.gnu.org/pub/gnu/libiconv/libiconv-1.15.tar.gz
tar -zxvf libiconv-1.15.tar.gz
cd libiconv-1.15
./configure --prefix=/usr/local/libiconv  &&  make  && make install
#创建一个软链接到/usr/lib
ln -s /usr/local/lib/libiconv.so /usr/lib
ln -s /usr/local/lib/libiconv.so.2 /usr/lib

cd /opt
wget https://github.com/git/git/archive/v2.20.1.tar.gz
tar -xzvf v2.20.1.tar.gz
cd git-2.20.1/
make configure
./configure --prefix=/usr/local/git --with-iconv=/usr/local/libiconv
make && make install
echo 'export PATH="/usr/local/git/bin:$PATH"' >> /etc/profile
source /etc/profile
[root@redis65 git-2.20.1]# git --version
git version 2.20.1
#将git设置为默认路径,不然后面克隆时会报错
ln -s /usr/local/git/bin/git-upload-pack /usr/bin/git-upload-pack
ln -s /usr/local/git/bin/git-receive-pack /usr/bin/git-receive-pack
#创建一个git用户组和用户,用来运行git服务
groupadd git
useradd git -g git
passwd git  #为git设置密码
#让git无密码sudo
echo "git ALL=(ALL) NOPASSWD: ALL" >> /etc/sudoers
#最好切换到git用户 不然后面新建的git仓库都要改权限
su - git
#初始化git仓库,这里我们选择/data/git/aa1122.git来作为我们的git仓库
sudo mkdir -p /data/git
sudo chown -R git:git /data/git
cd /data/git
git init --bare aa1122.git  #初始化仓库
sudo chown -R git:git /data/git/aa1122.git
#执行以上命令,会创建一个裸仓库,裸仓库没有工作区,因为服务器上的Git仓库纯粹是为了共享,所以不让用户直接登录到服务器上去改工作区,并且服务器上的Git仓库通常都以.git结尾。然后,把owner改为git
###创建证书登录
#将/etc/ssh/sshd_config中的RSA认证打开
RSAAuthentication yes
PubkeyAuthentication yes
AuthorizedKeysFile .ssh/authorized_keys
cd ~
sudo mkdir .ssh
sudo chmod 700 .ssh
sudo touch .ssh/authorized_keys
sudo chmod 600 .ssh/authorized_keys
ps:如果是小团队,把每个人的公钥收集起来放到/home/git/.ssh/authorized_keys文件里问题不大;如果团队较大或是有权限要求,这种方式就很不灵活了,这时可以用Gitosis来管理公钥(Gitosis后面再讲)
二、TortoiseGit 客户端安装(windows)
Git最新版下载地址:https://gitforwindows.org/
#TortoiseGit,Git客户端,32/64位最新版及对应的语言包下载地址:https://tortoisegit.org/download/
TortoiseGit使用扩展名为ppk的密钥,而不是ssh-keygen生成的rsa密钥。也就是说使用 ssh-keygen -t rsa -C "[email protected]"产生的密钥,TortoiseGit中不能用,用PuTTYgen将ssh-keygen生成的私钥进行转换,转成.ppk格式
1、git bash初始化全局设置
$ git config --global user.name 'git'
$ git config --global user.email '[email protected]'
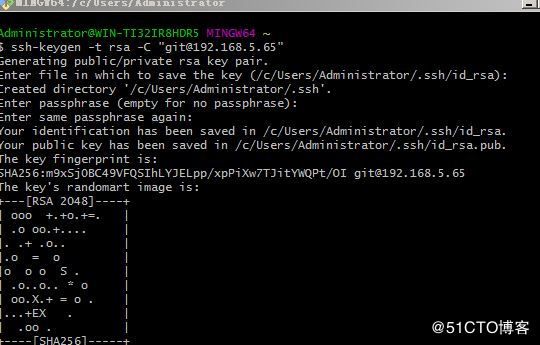
$ ssh-keygen -t rsa -C "[email protected]"
#将C:\Users\Administrator\.ssh目录下的id_rsa.pub内容写到[email protected]:.ssh/authorized_keys里面
#注:若服务器端SSH自定义端口,则需要在客户端~/.ssh/config下添加端口配置
$ echo "Port 65535" >> ~/.ssh/config
#测试SSH连接
ssh [email protected]
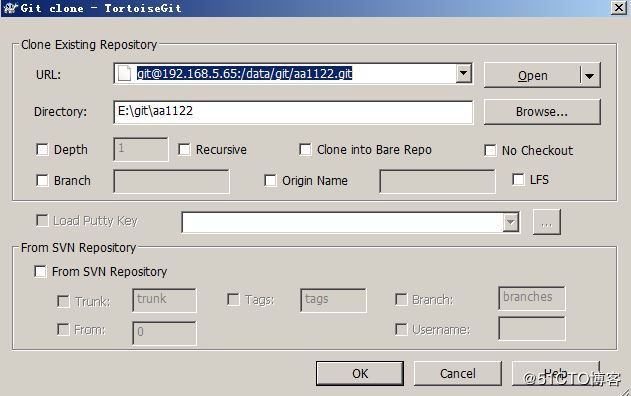
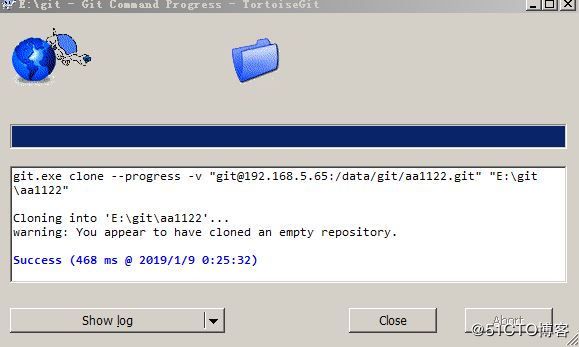
2、git clone
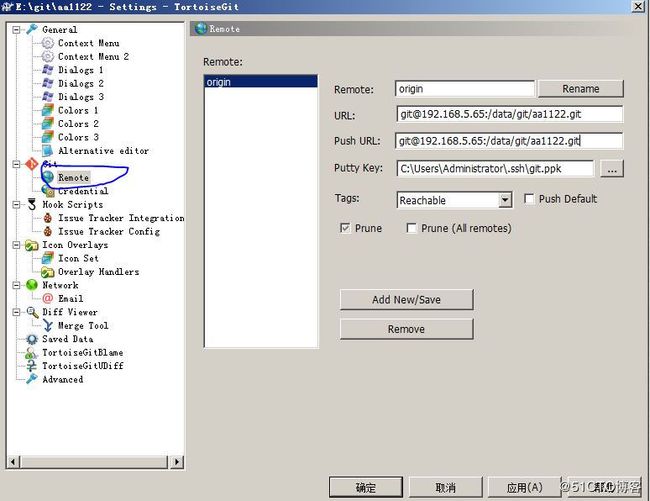
3、TortoiseGit setting(添加远程仓库)
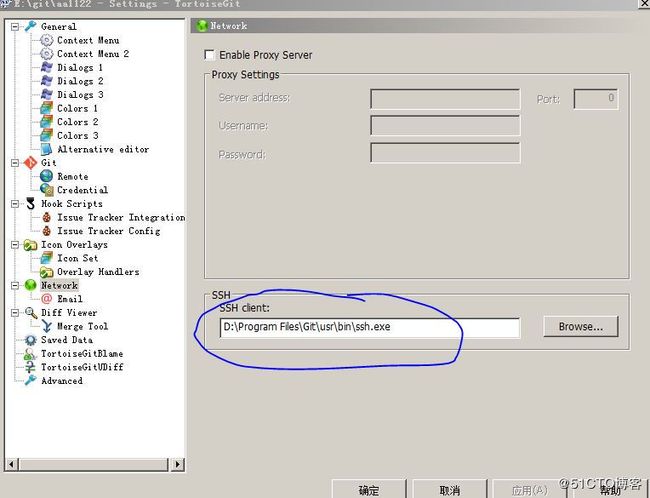
4、network中的ssh客户端用git/bin/ssh.exe
5、 用Git Bash手动push
Administrator@WIN-TI32IR8HDR5 MINGW64 ~
$ cd /e/git/aa1122
echo "jfowefjowfj" >> 11.txt
$ git add .
$ git commit -m "add 11.txt"
$ git push
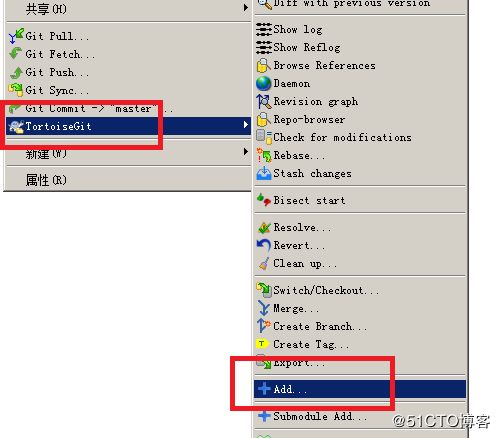
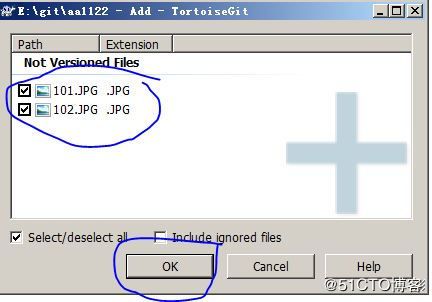
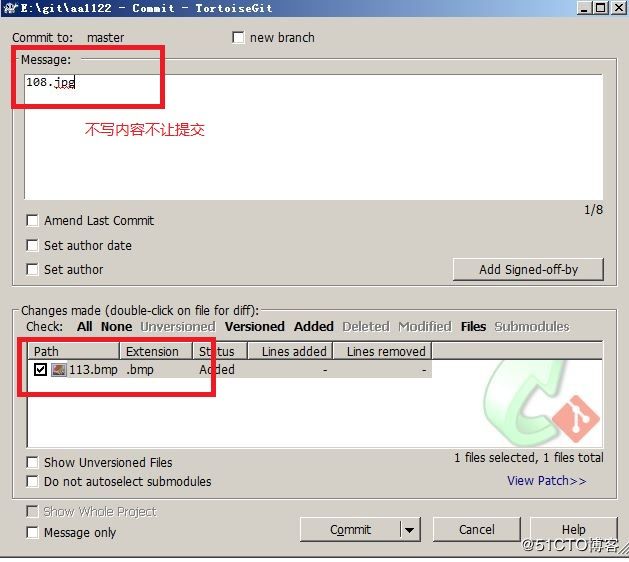
6、TortoiseGit新加文件提交(add --> commit --> push )
7、TortoiseGit修改文件提交(diff --> commit --> push)
三、git客户端(CentOS 7.6)
1、安装方法同git服务端安装
2、git帐户
useradd git
passwd git
#让git无密码sudo
echo "git ALL=(ALL) NOPASSWD: ALL" >> /etc/sudoers
mkdir -p /data/git
chown -R git:git /data/git
su - git
ssh-keygen -t rsa
#将id_rsa.pub公钥写入到[email protected]:.ssh/authorized_keys里面
scp -P 65535 id_rsa.pub [email protected]:.ssh/
#在git服务端操作
cd /home/git/.ssh
cat id_rsa.pub >> authorized_keys
3、git客户端clone
cd /data/git
git config --global user.name 'git'
git config --global user.email '[email protected]'
git clone ssh://[email protected]:65535/data/git/aa1122.git
4、git pull
git pull
