在iOS 开发中项目会集成推送功能, 推送的三方很多,如友盟,极光推送.他们的推送原理大致差不多,文档也写的很详细.因公司项目中用到了友盟推送,以实际项目为例进行总结,仅供参考.
1.推送原理:#####
*1.拿到device token - *** App注册推送 -> 通过设备向(APNS)苹果推送服务器请求device token (图中上半部分) -> APP 拿到token
2.通过token 发送推送 - 拿到 token 后,将token 发送到服务器 -> 要发送通知时,服务器将token 和 message 发送到APNS -> APNS 推送消息到APP(图中下半部分)
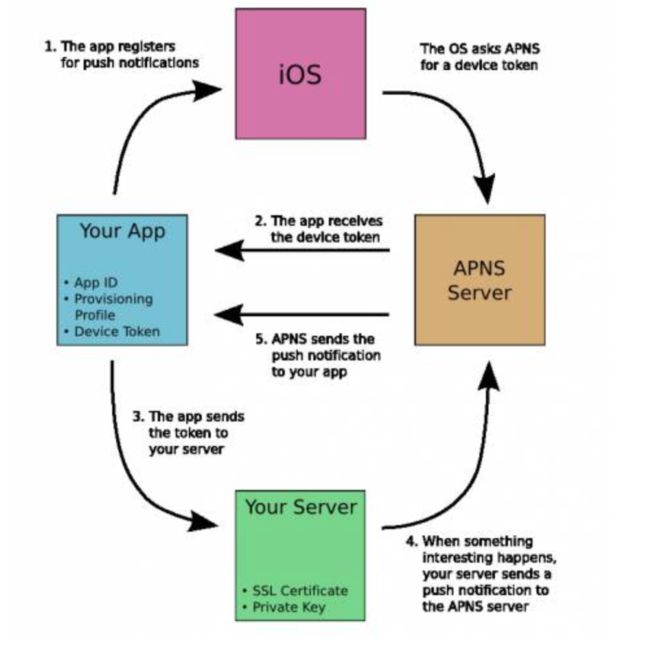
推送原理
2.配置证书:#####
证书这一块的话友盟推送文档中介绍的很详细,可参考 iOS证书配置指南.
与正常配置证书差不多,不同之处的话有一下三点:
1.创建APPid时,要点选Push Notification选项
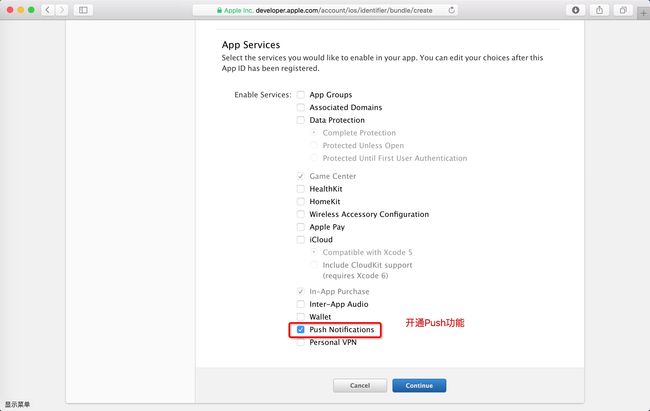
开启push 功能
2.创建推送证书,推送证书分为开发环境和生产环境
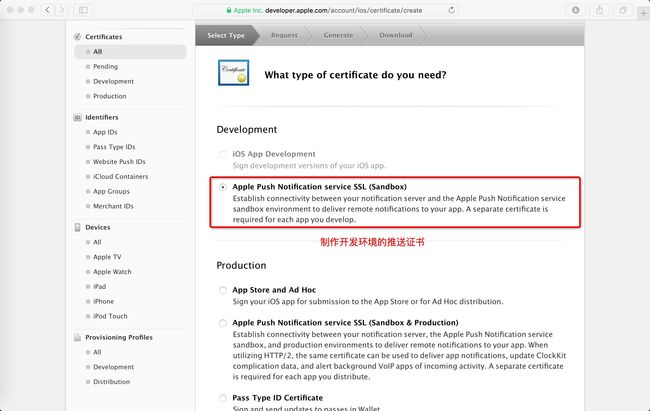
开发环境证书
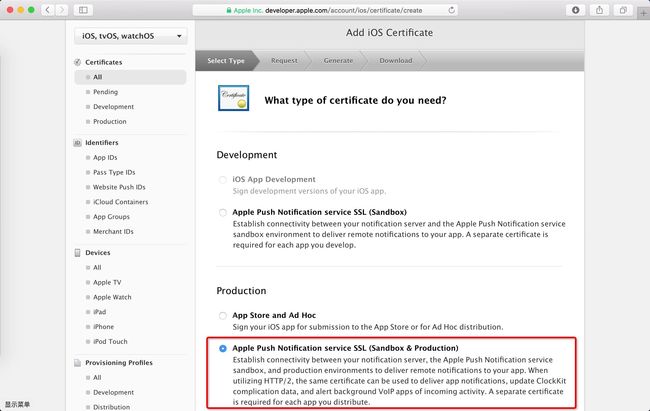
生产环境证书
3.导出p12文件,在友盟上传p12文件#####
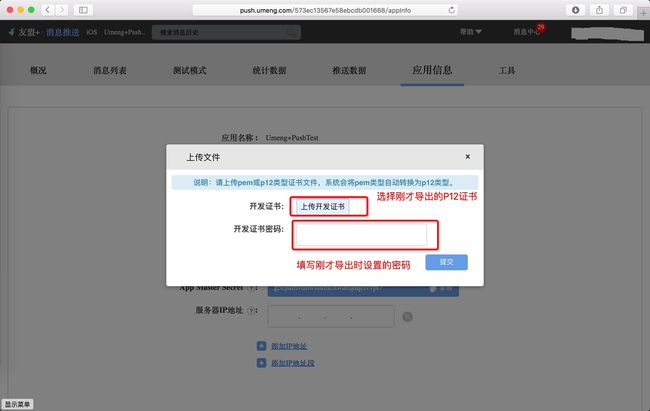
友盟上传p12文件
4.项目集成#####
1.导入SDK
2.引入库文件
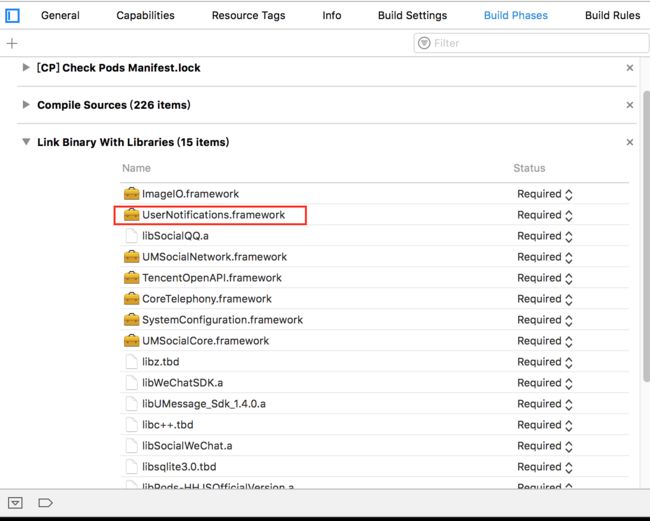
UserNotification.framework
3.配置(可选项)
SDK采用ARC管理内存,非ARC项目也是默认支持
用了-all_load,可能需要添加libz的库:
TARGETS -> Build Phases ->Link Binary With Libraries -> + ->libz.dylib
3.打开推送开关
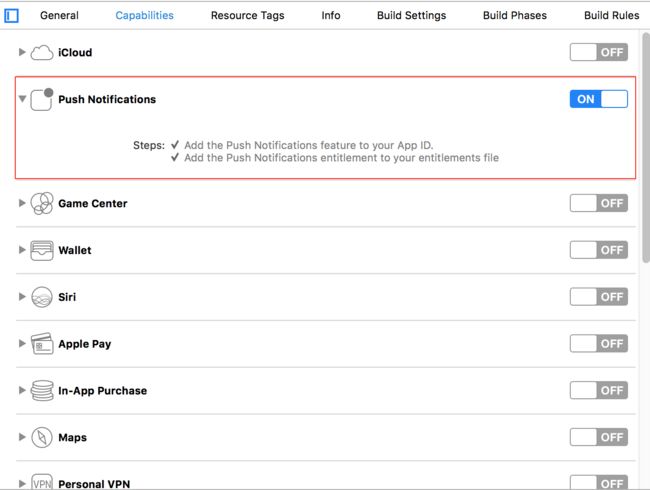
打开推送开关
5.添加代码#####
初始化 iOS 10.0以下
//初始化
[UMessage startWithAppkey:@"your appkey" launchOptions:launchOptions];
//注册通知
[UMessage registerForRemoteNotifications];
初始化 iOS 10.0
//初始化
[UMessage startWithAppkey:@"your appkey" launchOptions:launchOptions];
//注册通知
[UMessage registerForRemoteNotifications];
//iOS10必须加下面这段代码。
UNUserNotificationCenter *center = [UNUserNotificationCenter currentNotificationCenter];
    //设置代理
    center.delegate=self;
    //授权
UNAuthorizationOptions types10=UNAuthorizationOptionBadge|UNAuthorizationOptionAlert|UNAuthorizationOptionSound;
[center requestAuthorizationWithOptions:types10 completionHandler:^(BOOL granted, NSError * _Nullable error) {
        if (granted) {
            //点击允许

        } else {
            //点击不允许
        }
}];
为通知添加按钮 iOS 10.0以下
UIMutableUserNotificationAction *action1 = [[UIMutableUserNotificationAction alloc] init];
    action1.identifier = @"action1_identifier";
    action1.title=@"打开应用";
    action1.activationMode = UIUserNotificationActivationModeForeground;//当点击的时候启动程序

UIMutableUserNotificationAction *action2 = [[UIMutableUserNotificationAction alloc] init];  //第二按钮
    action2.identifier = @"action2_identifier";
    action2.title=@"忽略";
    action2.activationMode = UIUserNotificationActivationModeBackground;//当点击的时候不启动程序,在后台处理
    action2.authenticationRequired = YES;//需要解锁才能处理
    action2.destructive = YES;

UIMutableUserNotificationCategory *actionCategory1 = [[UIMutableUserNotificationCategory alloc] init];
    actionCategory1.identifier = @"category1";//这组动作的唯一标示
    [actionCategory1 setActions:@[action1,action2] forContext:(UIUserNotificationActionContextDefault)];
NSSet *categories = [NSSet setWithObjects:actionCategory1, nil];

[UMessage registerForRemoteNotifications:categories];
为通知添加按钮 iOS 10.0
        UNNotificationAction *action1_ios10 = [UNNotificationAction actionWithIdentifier:@"action1_ios10_identifier" title:@"打开应用" options:UNNotificationActionOptionForeground];
        UNNotificationAction *action2_ios10 = [UNNotificationAction actionWithIdentifier:@"action2_ios10_identifier" title:@"忽略" options:UNNotificationActionOptionForeground];
        //UNNotificationCategoryOptionNone
        //UNNotificationCategoryOptionCustomDismissAction  清除通知被触发会走通知的代理方法
        //UNNotificationCategoryOptionAllowInCarPlay       适用于行车模式

        UNNotificationCategory *category1_ios10 = [UNNotificationCategory categoryWithIdentifier:@"category101" actions:@[action1_ios10,action2_ios10]   intentIdentifiers:@[] options:UNNotificationCategoryOptionCustomDismissAction];
        NSSet *categories_ios10 = [NSSet setWithObjects:category1_ios10, nil];
        [center setNotificationCategories:categories_ios10];
接收通知 iOS 10.0以下
- (void)application:(UIApplication *)application didReceiveRemoteNotification:(NSDictionary *)userInfo
{
    //关闭友盟自带的弹出框
    [UMessage setAutoAlert:NO];
    [UMessage didReceiveRemoteNotification:userInfo];
      //userInfo 中存有接受通知的信息
       self.userInfo = userInfo;
       //判断APP的状态
      if([UIApplication sharedApplication].applicationState = UIApplicationStateActive) {

     }
}
接收通知 iOS 10.0
//处理前台收到通知的代理方法
-(void)userNotificationCenter:(UNUserNotificationCenter *)center willPresentNotification:(UNNotification *)notification withCompletionHandler:(void (^)(UNNotificationPresentationOptions))completionHandler{
    NSDictionary * userInfo = notification.request.content.userInfo;
  //判断是否为远程推送的通知类型
    if([notification.request.trigger isKindOfClass:[UNPushNotificationTrigger class]]) {
        //应用处于前台时的远程推送接受
        //关闭友盟自带的弹出框
        [UMessage setAutoAlert:NO];
        //必须加这句代码
        [UMessage didReceiveRemoteNotification:userInfo];

    }else{
        //应用处于前台时的本地推送接受
    }
    //当应用处于前台时提示设置,需要哪个可以设置哪一个
    completionHandler(UNNotificationPresentationOptionSound|UNNotificationPresentationOptionBadge|UNNotificationPresentationOptionAlert);
}

//iOS10新增:处理后台点击通知的代理方法
-(void)userNotificationCenter:(UNUserNotificationCenter *)center didReceiveNotificationResponse:(UNNotificationResponse *)response withCompletionHandler:(void (^)())completionHandler{
    NSDictionary * userInfo = response.notification.request.content.userInfo;
  //判断是否为远程推送的通知类型
    if([response.notification.request.trigger isKindOfClass:[UNPushNotificationTrigger class]]) {
        //应用处于后台时的远程推送接受
        //必须加这句代码
        [UMessage didReceiveRemoteNotification:userInfo];

    }else{
        //应用处于后台时的本地推送接受
    }

}
6.调试#####
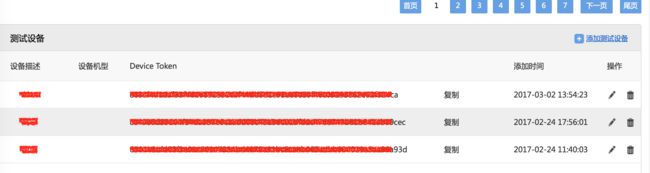
获取devicetoken,这个devicetoken 会在测试模式中添加设备使用
- (void)application:(UIApplication *)application didRegisterForRemoteNotificationsWithDeviceToken:(NSData *)deviceToken
{

    //用户可以在这个方法里面获取devicetoken
//    NSLog(@"%@",[NSString  stringWithFormat:@"%@",[NSData dataWithData:deviceToken]]);
    NSLog(@"%@",[[[[deviceToken description] stringByReplacingOccurrencesOfString: @"<" withString: @""]
                  stringByReplacingOccurrencesOfString: @">" withString: @""]
                 stringByReplacingOccurrencesOfString: @" " withString: @""]);
    NSString *deviceStr = [NSString stringWithFormat:@"%@",[[[[deviceToken description] stringByReplacingOccurrencesOfString: @"<" withString: @""]
                                                               stringByReplacingOccurrencesOfString: @">" withString: @""]
                                                              stringByReplacingOccurrencesOfString: @" " withString: @""]];
    NSLog(@"%@", deviceStr);
打印出这个devicetoken后,就可以进入友盟推送
1.进入友盟推送点击以添加好的设备
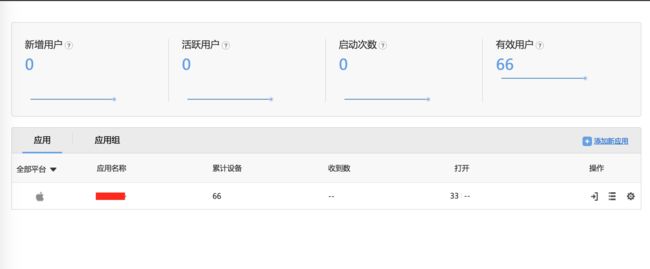
友盟推送登录页面
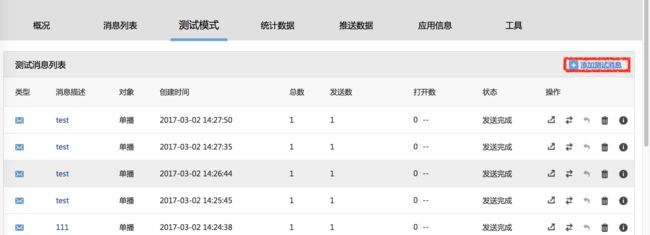
2.点击测试模式菜单,点击添加设备按钮添加设备
添加设备
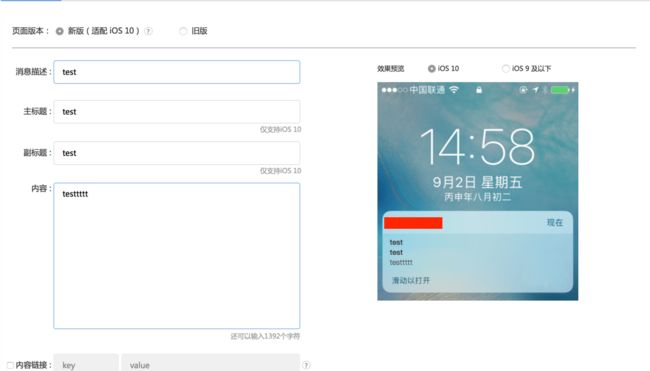
3.填写测试推送的内容
1
测试内容中的参数和设备推送按钮标识符,根据自己的项目填写就好
2634794-9c8adbb5a8147cf4.png
点击立即发送后的测试结果如下
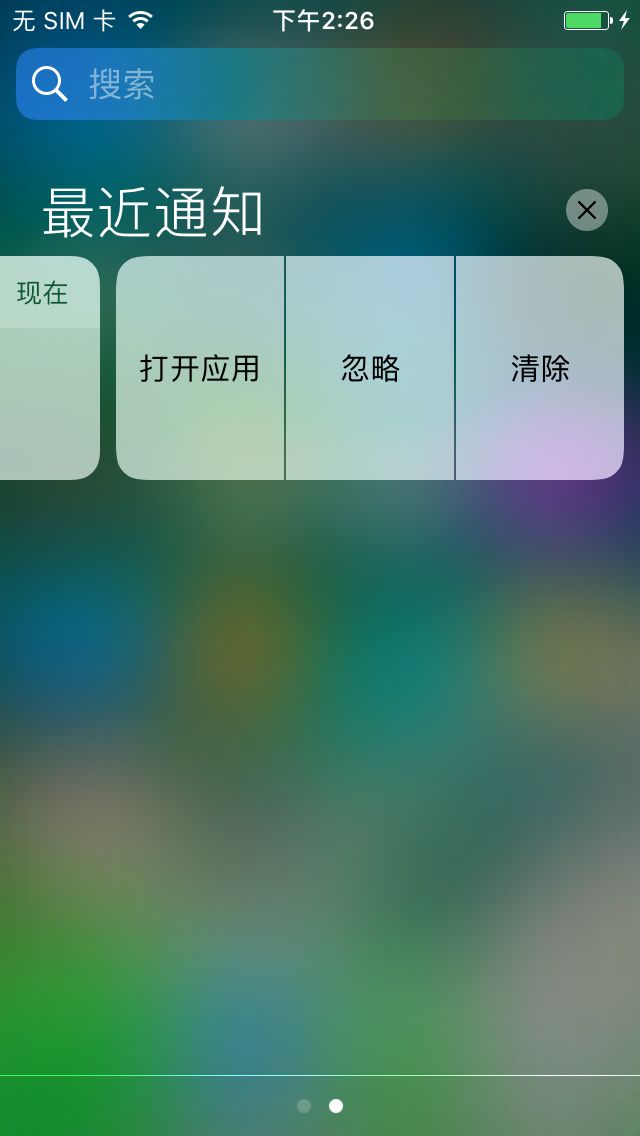
IMG_0002.PNG
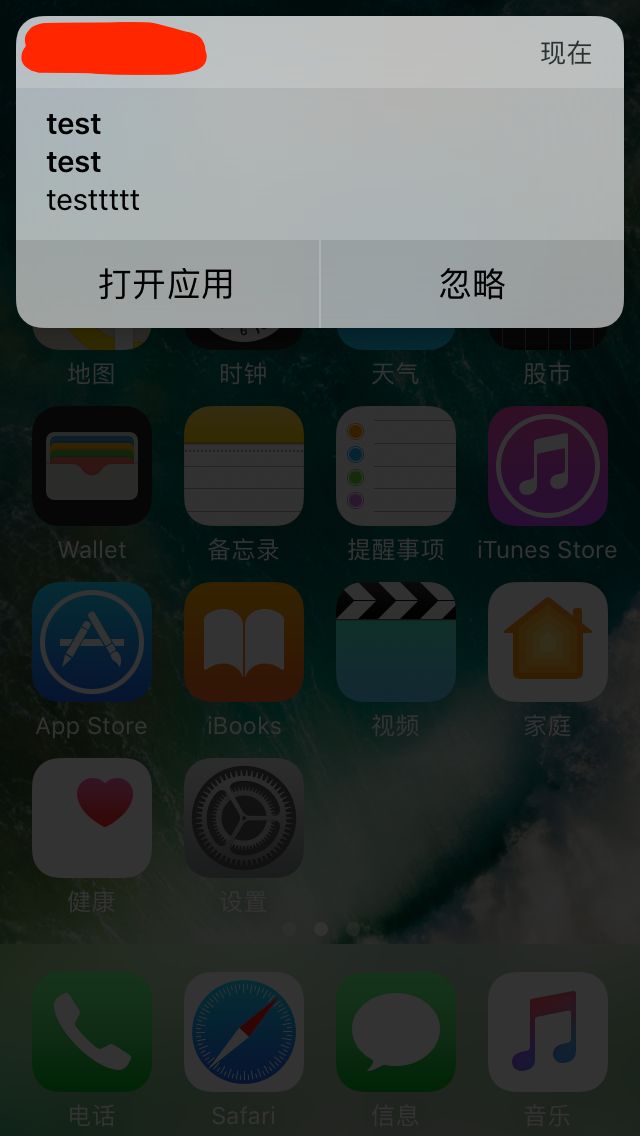
IMG_0004.PNG