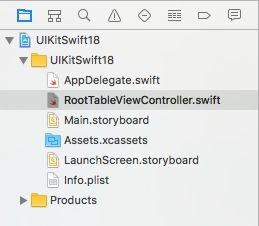
1.UITableViewController继承自UIViewController,自带一个tableview
2.self.view不是UIView而是UITableView
3.DataSource和Delegate默认都是self(UITableViewController)-不需要指定代理了
4.开发中只需要建立UITableViewController子类,就会帮我们实现dataSource和Dalagate协议中一些相关的方法,比如tableview编辑(增加,删除,移动),以及多少个分区,每个分区有多少个cell和返回cell视图的方法,当你需要的时候只需要打开相应的注释就可以了
tableView编辑的步骤:
1.让tableView处于编辑状态
2.设置那些cell可编辑
3.设置编辑样式(删除,插入)
4.提交编辑操作tableView移动步骤
1.先让tableview处于编辑状态
2.设置哪些cell可以移动
3.提交移动结果(只需要更新数据)
AppDelegate.swift代码如下:
import UIKit
/*
 一:UITableViewController继承自UIViewController,自带一个tableView
 二:self.view不是UIView而是UITableView
 三:DataSource和Delegate默认都是
 四:
*/
@UIApplicationMain
class AppDelegate: UIResponder, UIApplicationDelegate {

    var window: UIWindow?


    func application(_ application: UIApplication, didFinishLaunchingWithOptions launchOptions: [UIApplicationLaunchOptionsKey: Any]?) -> Bool {

        self.window = UIWindow(frame: UIScreen.main.bounds)
        self.window?.backgroundColor = #colorLiteral(red: 0.8931787501, green: 0.9535736618, blue: 1, alpha: 1)
        self.window?.makeKeyAndVisible()

        //1.创建导航视图控制器的根视图
        let rootVC = RootTableViewController()
        //2.创建导航视图控制器,并为他指定根视图控制器
        let navigation = UINavigationController(rootViewController: rootVC)
        //3.将导航视图控制器设置为window的根视图控制器
        self.window?.rootViewController = navigation
        return true
    }
RootTableViewController.swift代码如下:
import UIKit

class RootTableViewController: UITableViewController {

    //重用标识
    let identifier = "cell"

    //联系人字典属性  [String:[String]]
    var contactSource = ["W":["王哲磊","王浩","王乐","王晨阳"],"C":["陈杨","陈芮"],"B":["边文达","宝音"],"L":["李玲","刘二蛋","刘婧","刘福宏"]]
    //存放排好序的key
    var keysArray:[String]?

    override func viewDidLoad() {
        super.viewDidLoad()

        //取出字典contactSource中的key,排序后赋值给keyArray
        var keys = self.contactSource.keys
        //排序后赋值给keysArray
        keysArray = keys.sorted()

        //        print(keysArray!)
        //注册cell
        self.tableView.register(UITableViewCell.self, forCellReuseIdentifier: identifier)
        //1.让tableView处于编辑状态
        self.navigationItem.rightBarButtonItem = self.editButtonItem


    }

    override func didReceiveMemoryWarning() {
        super.didReceiveMemoryWarning()
        // Dispose of any resources that can be recreated.
    }

    // MARK: - Table view data source

    override func numberOfSections(in tableView: UITableView) -> Int {
        // #warning Incomplete implementation, return the number of sections
        //分组的个数 = 字典中健值对的个数
        //分组的个数 = 存放key值数组元素个数
        return contactSource.count
    }

    override func tableView(_ tableView: UITableView, numberOfRowsInSection section: Int) -> Int {
        // #warning Incomplete implementation, return the number of rows
        //先取出排好序key值数组对应分区的key值
        let key = keysArray?[section]

        let group = contactSource[key!]

        return (group?.count)!

        return 0
    }

    override func tableView(_ tableView: UITableView, cellForRowAt indexPath: IndexPath) -> UITableViewCell {
        let cell = tableView.dequeueReusableCell(withIdentifier: identifier, for: indexPath)

        //取出字典中key对应数组元素的值,赋值给textLable
        //根据分区的下标取出对应的key值
        let key = keysArray?[indexPath.section]
        //根据key取出字典中的 value 值
        let group = contactSource[key!]
        //根据cell的下标取出数组中对应位置的元素
        let name = group?[indexPath.row]

        cell.textLabel?.text = name

        // Configure the cell...

        return cell
    }
    //添加区头标题
    override func tableView(_ tableView: UITableView, titleForHeaderInSection section: Int) -> String? {
        return keysArray?[section]
    }
    //添加索引列表
    override func sectionIndexTitles(for tableView: UITableView) -> [String]? {
        return keysArray
    }

    // 2.设置哪些cell可以编辑
    override func tableView(_ tableView: UITableView, canEditRowAt indexPath: IndexPath) -> Bool {
        //控制前两个分区可以编辑
        if indexPath.section < 2 {
            return true
        }
        return false
    }
    //3.设置编辑样式(删除,插入)
    override func tableView(_ tableView: UITableView, editingStyleForRowAt indexPath: IndexPath) -> UITableViewCellEditingStyle {
        if indexPath.section == 0 {
            return .delete
        }else if indexPath.section == 1{
            return .insert
        }
        return .none
    }

    // 提交编辑操作(1.修改数据源,2.更新UI)
    override func tableView(_ tableView: UITableView, commit editingStyle: UITableViewCellEditingStyle, forRowAt indexPath: IndexPath) {
        // 取出选中cell所在的分区对应的key值
        let key = keysArray?[indexPath.section]
        //根据key值取value值数组
        var group = contactSource[key!]

        if editingStyle == .delete {
            if group?.count == 1 {
                //1.删除字典中健值对
                contactSource.removeValue(forKey: key!)
                //2.删除数组中的元素
                keysArray?.remove(at: indexPath.section)
                //3.更新UI
                let set = NSIndexSet(index: indexPath.section)
                tableView.deleteSections(set as IndexSet, with: .left)
            }else{//一条条删除cell
                //1.修改数据源
                group?.remove(at: indexPath.row)
                //2.删除之后重新给字典中key对应value赋值
                contactSource[key!] = group
                //3.更新UI
                tableView.deleteRows(at: [indexPath], with: .fade)

            }

        } else if editingStyle == .insert {
            //准备要插入的数据
            let name = "逗比"
            //1.修改数据源
            group?.append(name)
            //2.重新为contactSource健值对赋值
            contactSource[key!] = group
            //更新UI
            tableView.insertRows(at: [indexPath], with: .right)
            //4.让tableView重新加载数据
            self.tableView.reloadData()
        }
    }
    //设置删除按钮
    override func tableView(_ tableView: UITableView, titleForDeleteConfirmationButtonForRowAt indexPath: IndexPath) -> String? {
        return "删除"
    }
    // 2.设置哪些cell可以移动
    override func tableView(_ tableView: UITableView, canMoveRowAt indexPath: IndexPath) -> Bool {
        // Return false if you do not want the item to be re-orderable.
        return true
    }

    // 3.提交移动结果
    override func tableView(_ tableView: UITableView, moveRowAt fromIndexPath: IndexPath, to: IndexPath) {
        //修改数据源(先取出,再删)
        let key = keysArray?[fromIndexPath.section]
        var group = contactSource[key!]
        //先取出数组中原位置的元素
        let name = group?[fromIndexPath.row]
        //删除数组中原来位置元素
        group?.remove(at: fromIndexPath.row)
        //插入数组中原来位置元素


    }

    /// 限制跨分区移动
    ///
    /// - Parameters: 参数
    ///   - tableView: tableView对象,代理的委托人
    ///   - sourceIndexPath: 移动之前cell位置
    ///   - proposedDestinationIndexPath: 移动之后cell的位置
    /// - Returns: cell移动之后最后位置
    override func tableView(_ tableView: UITableView, targetIndexPathForMoveFromRowAt sourceIndexPath: IndexPath, toProposedIndexPath proposedDestinationIndexPath: IndexPath) -> IndexPath {
        //根据分区下标判断分区是否允许移动,当前后的位置在同一个分区,允许移动,返回移动之后的位置,当前后位置不在同一个分区,不允许移动,返回移动之前的位置
        if sourceIndexPath.section == proposedDestinationIndexPath.section {
            return proposedDestinationIndexPath
        }else{
            return sourceIndexPath
        }

    }
    /*
     // MARK: - Navigation

     // In a storyboard-based application, you will often want to do a little preparation before navigation
     override func prepare(for segue: UIStoryboardSegue, sender: Any?) {
     // Get the new view controller using segue.destinationViewController.
     // Pass the selected object to the new view controller.
     }
     */
}
