一、概念介绍
Elasticsearch
ElasticSearch是一个基于Lucene的搜索服务器。它提供了一个分布式多用户能力的全文搜索引擎,基于RESTful web接口。Elasticsearch是用Java开发的,并作为Apache许可条款下的开放源码发布,是第二流行的企业搜索引擎。设计用于云计算中,能够达到实时搜索,稳定,可靠,快速,安装使用方便。 在elasticsearch中,所有节点的数据是均等的。
Logstash
Logstash是一个完全开源的工具,他可以对你的日志进行收集、分析,并将其存储供以后使用(如,搜索),您可以使用它。说到搜索,logstash带有一个web界面,搜索和展示所有日志。
Kibana
Kibana是一个基于浏览器页面的Elasticsearch前端展示工具。Kibana全部使用HTML语言和Javascript编写的。
Grafana
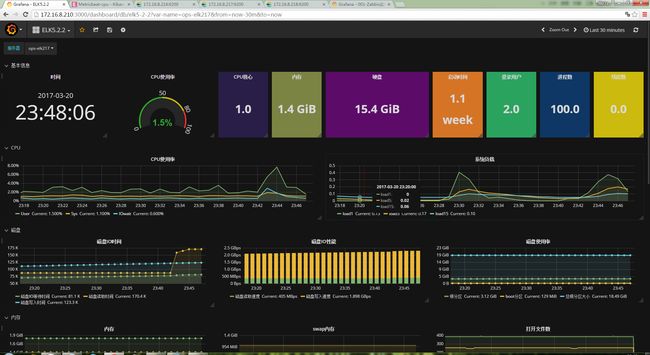
Grafana是 Graphite 和 InfluxDB 仪表盘和图形编辑器。Grafana 是开源的,功能齐全的度量仪表盘和图形编辑器,支持 Graphite,InfluxDB 和 OpenTSDB。Grafana 主要特性:灵活丰富的图形化选项;可以混合多种风格;支持白天和夜间模式;多个数据源;Graphite 和 InfluxDB 查询编辑器等等。
二、实验环境设置:
1、ip规划:
172.16.8.201 nginx+logstash
172.16.8.202 nginx+logstash
172.16.8.203 nginx+logstash
172.16.8.204 redis
172.16.8.205 logstash-server
172.16.8.206 elasticsearch
172.16.8.207 elasticsearch
172.16.8.208 elasticsearch+kibana
172.16.8.209 grafana
2、系统版本:
CentOS release 6.8 (Final)
172.16.8.201 nginx+logstash
172.16.8.202 nginx+logstash
172.16.8.203 nginx+logstash
172.16.8.204 redis
CentOS Linux release 7.3.1611 (Core)
172.16.8.205 logstash-server
172.16.8.206 elasticsearch
172.16.8.207 elasticsearch
172.16.8.208 elasticsearch+kibana
172.16.8.209 grafana
2、软件版本:
nginx-1.10.2-1.el6.x86_64
logstash-2.4.0.noarch.rpm
elasticsearch-2.4.1.rpm
kibana-4.6.1-x86_64.rpm
grafana-4.0.2-1481203731.x86_64.rpm
redis-3.0.7.tar.gz
3、主机名设置:
vim /etc/hosts
172.16.8.201 ops-nginx01
172.16.8.202 ops-nginx02
172.16.8.203 ops-nginx03
172.16.8.204 ops-redis
172.16.8.205 ops-elk05
172.16.8.206 ops-elk06
172.16.8.207 ops-elk07
172.16.8.208 ops-elk08
172.16.8.209 ops-grafana
4、yum源设置&防火墙及SELINUX关闭
yum源设置请参考
http://blog.csdn.net/xiegh2014/article/details/53031894
防火墙及SELINUX关闭请参考
http://blog.csdn.net/xiegh2014/article/details/53031781
三、软件安装及配置
1、nginx安装及配置
分别在三台服务安装:
172.16.8.201 nginx+logstash
172.16.8.202 nginx+logstash
172.16.8.203 nginx+logstash
1.1使用yum源安装nginx
yum install nginx -y
1.2查看安装版本信息:
rpm -qa nginx
nginx-1.10.2-1.el6.x86_64
1.3查看所有的配置文件
rpm -qc nginx
/etc/logrotate.d/nginx
/etc/nginx/conf.d/default.conf
/etc/nginx/conf.d/ssl.conf
/etc/nginx/conf.d/virtual.conf
/etc/nginx/fastcgi.conf
/etc/nginx/fastcgi.conf.default
/etc/nginx/fastcgi_params
/etc/nginx/fastcgi_params.default
/etc/nginx/koi-utf
/etc/nginx/koi-win
/etc/nginx/mime.types
/etc/nginx/mime.types.default
/etc/nginx/nginx.conf
/etc/nginx/nginx.conf.default
/etc/nginx/scgi_params
/etc/nginx/scgi_params.default
/etc/nginx/uwsgi_params
/etc/nginx/uwsgi_params.default
/etc/nginx/win-utf
/etc/sysconfig/nginx
修改nginx的配置文件
vim /etc/nginx/nginx.conf
##### http 标签中
log_format json '{"@timestamp":"$time_iso8601",'
'"@version":"1",'
'"client":"$remote_addr",'
'"url":"$uri",'
'"status":"$status",'
'"domain":"$host",'
'"host":"$server_addr",'
'"size":$body_bytes_sent,'
'"responsetime":$request_time,'
'"referer": "$http_referer",'
'"ua": "$http_user_agent"'
'}';
access_log /var/log/nginx/access_json.log json;
1.4设置开机启动
chkconfig nginx on
/etc/init.d/nginx start
-----------------------------------------------------------------------
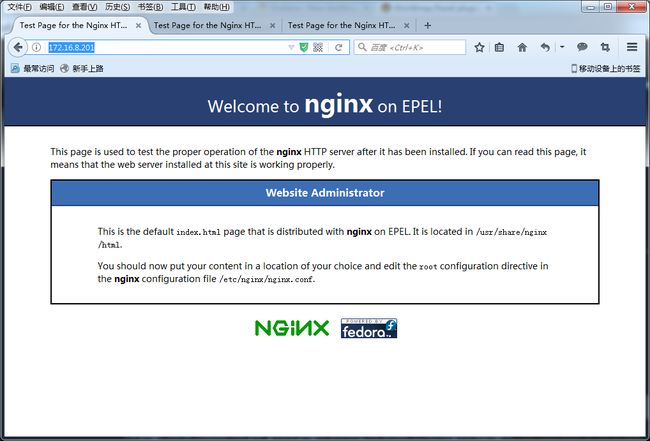
访问nginx页面
http://172.16.8.201/
AB压测工具
yum install httpd-tools -y
ab -n10000 -c1 http://172.16.8.201/
-----------------------------------------------------------------------
2、安装及配置logstash
2.1安装完java后,检测
yum install -y java
java -version
java version "1.7.0_99"
OpenJDK Runtime Environment (rhel-2.6.5.1.el6-x86_64 u99-b00)
OpenJDK 64-Bit Server VM (build 24.95-b01, mixed mode)
2.3安装logstash
rpm -ivh logstash-2.4.0.noarch.rpm
2.4基本的输入输出
/opt/logstash/bin/logstash -e 'input { stdin{} } output { stdout{} }'
Settings: Default pipeline workers: 1
Pipeline main started
e^Hhehe
2017-02-25T07:00:46.494Z ops-nginx01 hehe
test
\2017-02-25T07:00:57.475Z ops-nginx01 test
test
2017-02-25T07:01:02.499Z ops-nginx01 \test
2.5使用rubydebug详细输出
/opt/logstash/bin/logstash -e 'input { stdin{} } output { stdout{ codec => rubydebug} }'
Settings: Default pipeline workers: 1
Pipeline main started
hehe2017 # 输入 hehe2017
{
{
"message" => "hehe2017", # 输入的信息
"@version" => "1", # 版本
"@timestamp" => "2017-02-25T07:03:06.332Z", # 时间
"host" => "ops-nginx01" # 存放的主机节点
}
2.6检测语法是否有错
/opt/logstash/bin/logstash -f json.conf --configtest
Configuration OK
json格式显示内容
[root@ops-nginx01 conf.d]# /opt/logstash/bin/logstash -f json.conf
Settings: Default pipeline workers: 1
Pipeline main started
{
"@timestamp" => "2017-02-25T10:37:42.000Z",
"@version" => "1",
"client" => "172.16.8.4",
"url" => "/index.html",
"status" => "200",
"domain" => "172.16.8.201",
"host" => "172.16.8.201",
"size" => 3698,
"responsetime" => 0.0,
"referer" => "-",
"ua" => "Mozilla/5.0 (Windows NT 6.1; WOW64; rv:51.0) Gecko/20100101 Firefox/51.0",
"path" => "/var/log/nginx/access.log"
}
{
"@timestamp" => "2017-02-25T10:37:42.000Z",
"@version" => "1",
"client" => "172.16.8.4",
"url" => "/nginx-logo.png",
"status" => "200",
"domain" => "172.16.8.201",
"host" => "172.16.8.201",
"size" => 368,
"responsetime" => 0.0,
"referer" => "http://172.16.8.201/",
"ua" => "Mozilla/5.0 (Windows NT 6.1; WOW64; rv:51.0) Gecko/20100101 Firefox/51.0",
"path" => "/var/log/nginx/access.log"
}
2.7修改配置文件,将数据输出到redis:
cat logstash.conf
input {
file {
path => ["/var/log/nginx/access.log"]
type => "nginx_log"
start_position => "beginning"
}
}
output {
redis {
host => "172.16.8.204"
key => 'logstash-redis'
data_type => 'list'
}
}
3、redis安装及配置
3.1安装所需包
yum install wget gcc gcc-c++ -y
3.2下载软件包
wget http://download.redis.io/releases/redis-3.0.7.tar.gz
3.3解压安装
cd/usr/local/src/
tar -xvf redis-3.0.7.tar.gz
redis-3.0.7
make
mkdir -p /usr/local/redis/{conf,bin}
cd utils/
cp mkrelease.sh /usr/local/redis/bin/
cd ../src
cp redis-benchmark redis-check-aof redis-check-dump redis-cli redis-sentinel redis-server redis-trib.rb /usr/local/redis/bin/
创建数据存放目录
mkdir -pv /data/redis/db
mkdir -pv /data/log/redis
dir ./ 修改为dir /data/redis/db/
vim +192 redis.conf
grep -n '^[a-Z]' redis.conf
42:daemonize no
46:pidfile /var/run/redis.pid
50:port 6379
59:tcp-backlog 511
79:timeout 0
95:tcp-keepalive 0
103:loglevel notice
108:logfile ""
123:databases 16
147:save 900 1
148:save 300 10
149:save 60 10000
164:stop-writes-on-bgsave-error yes
170:rdbcompression yes
179:rdbchecksum yes
182:dbfilename dump.rdb
192:dir /data/redis/db/
230:slave-serve-stale-data yes
246:slave-read-only yes
277:repl-diskless-sync no
289:repl-diskless-sync-delay 5
322:repl-disable-tcp-nodelay no
359:slave-priority 100
509:appendonly no
513:appendfilename "appendonly.aof"
539:appendfsync everysec
561:no-appendfsync-on-rewrite no
580:auto-aof-rewrite-percentage 100
581:auto-aof-rewrite-min-size 64mb
605:aof-load-truncated yes
623:lua-time-limit 5000
751:slowlog-log-slower-than 10000
755:slowlog-max-len 128
776:latency-monitor-threshold 0
822:notify-keyspace-events ""
829:hash-max-ziplist-entries 512
830:hash-max-ziplist-value 64
835:list-max-ziplist-entries 512
836:list-max-ziplist-value 64
843:set-max-intset-entries 512
848:zset-max-ziplist-entries 128
849:zset-max-ziplist-value 64
863:hll-sparse-max-bytes 3000
883:activerehashing yes
918:client-output-buffer-limit normal 0 0 0
919:client-output-buffer-limit slave 256mb 64mb 60
920:client-output-buffer-limit pubsub 32mb 8mb 60
937:hz 10
943:aof-rewrite-incremental-fsync yes
3.4启动redis服务
nohup /usr/local/redis/bin/redis-server /usr/local/redis/conf/redis.conf &
3.5查看redis进程是否存在
ps -ef | grep redis
root 5000 1611 0 14:42 pts/0 00:00:00 /usr/local/redis/bin/redis-server *:6379
root 5004 1611 0 14:42 pts/0 00:00:00 grep redis
3.6查看redis默认6379端口
netstat -tnlp
Active Internet connections (only servers)
Proto Recv-Q Send-Q Local Address Foreign Address State PID/Program name
tcp 0 0 0.0.0.0:38879 0.0.0.0:* LISTEN 1174/rpc.statd
tcp 0 0 0.0.0.0:6379 0.0.0.0:* LISTEN 5000/redis-server *
tcp 0 0 0.0.0.0:111 0.0.0.0:* LISTEN 1152/rpcbind
tcp 0 0 0.0.0.0:22 0.0.0.0:* LISTEN 1396/sshd
tcp 0 0 127.0.0.1:631 0.0.0.0:* LISTEN 1229/cupsd
tcp 0 0 127.0.0.1:25 0.0.0.0:* LISTEN 1475/master
tcp 0 0 127.0.0.1:6010 0.0.0.0:* LISTEN 1609/sshd
tcp 0 0 :::32799 :::* LISTEN 1174/rpc.statd
tcp 0 0 :::6379 :::* LISTEN 5000/redis-server *
tcp 0 0 :::111 :::* LISTEN 1152/rpcbind
tcp 0 0 :::22 :::* LISTEN 1396/sshd
tcp 0 0 ::1:631 :::* LISTEN 1229/cupsd
tcp 0 0 ::1:25 :::* LISTEN 1475/master
tcp 0 0 ::1:6010 :::* LISTEN 1609/sshd
4、安装配置logstash server
4.1JAVA及logstash安装配置
yum -y install java
java -version
openjdk version "1.8.0_121"
OpenJDK Runtime Environment (build 1.8.0_121-b13)
OpenJDK 64-Bit Server VM (build 25.121-b13, mixed mode)
rpm -ivh logstash-2.4.0.noarch.rpm
4.2语法检查
/opt/logstash/bin/logstash -f ./logstash_server.conf --configtest
4.3配置文件
cat logstash_server.conf
input {
redis {
port => "6379"
host => "172.16.8.204"
data_type => "list"
key => "logstash-redis"
type => "redis-input"
}
}
output {
elasticsearch {
hosts => "172.16.8.206"
index => "nginx-log-%{+YYYY.MM.dd}"
5、安装部署elasticsearch集群
5.1分别在三台服务器安装:
172.16.8.206 ops-elk06
172.16.8.207 ops-elk07
172.16.8.208 ops-elk08
5.2安装完java
yum -y install java
java -version
openjdk version "1.8.0_121"
OpenJDK Runtime Environment (build 1.8.0_121-b13)
OpenJDK 64-Bit Server VM (build 25.121-b13, mixed mode)
5.3elasticsearch集群安装
rpm -ivh elasticsearch-2.4.1.rpm
systemctl enable elasticsearch.service
systemctl start elasticsearch.service
5.4修改配置文件
-------------------------------------------------------------------------------------------
修改ES配置文件172.16.8.206 ops-elk06
mkdir -p /data/elasticsearch/{data,logs}
chown -R elasticsearch.elasticsearch /data/elasticsearch/
grep -n '^[a-Z]' /etc/elasticsearch/elasticsearch.yml
17:cluster.name: app-elk
23:node.name: ops-elk06
33:path.data: /data/elasticsearch/data
37:path.logs: /data/elasticsearch/logs
43:bootstrap.memory_lock: true
54:network.host: 0.0.0.0
58:http.port: 9200
68:discovery.zen.ping.unicast.hosts: ["172.16.8.207", "172.16.8.208"]
72:discovery.zen.minimum_master_nodes: 3
修改ES配置文件172.16.8.207 ops-elk07
grep -n '^[a-Z]' /etc/elasticsearch/elasticsearch.yml
17:cluster.name: app-elk
23:node.name: ops-elk07
33:path.data: /data/elasticsearch/data
37:path.logs: /data/elasticsearch/logs
43:bootstrap.memory_lock: true
54:network.host: 0.0.0.0
58:http.port: 9200
68:discovery.zen.ping.unicast.hosts: ["172.16.8.206", "172.16.8.208"]
72:discovery.zen.minimum_master_nodes: 3
修改ES配置文件172.16.8.208 ops-elk08
grep -n '^[a-Z]' /etc/elasticsearch/elasticsearch.yml
17:cluster.name: app-elk
23:node.name: ops-elk08
33:path.data: /data/elasticsearch/data
37:path.logs: /data/elasticsearch/logs
43:bootstrap.memory_lock: true
54:network.host: 0.0.0.0
58:http.port: 9200
68:discovery.zen.ping.unicast.hosts: ["172.16.8.206", "172.16.8.207"]
72:discovery.zen.minimum_master_nodes: 3
-------------------------------------------------------------------------------------------
5.5安装插件
/usr/share/elasticsearch/bin/plugin list
/usr/share/elasticsearch/bin/plugin install license
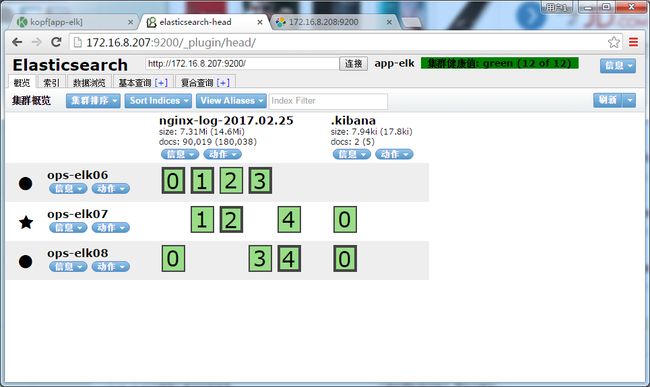
/usr/share/elasticsearch/bin/plugin install mobz/elasticsearch-head
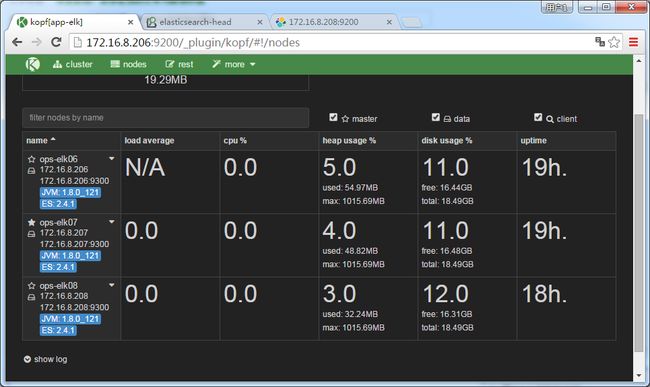
/usr/share/elasticsearch/bin/plugin install lmenezes/elasticsearch-kopf
/usr/share/elasticsearch/bin/plugin install marvel-agent
安装bigdesk 插件
cd /usr/share/elasticsearch/plugins
mkdir bigdesk
cd bigdesk/
git clone https://github.com/lukas-vlcek/bigdesk _site
sed -i '142s/==/>=/' _site/js/store/BigdeskStore.js
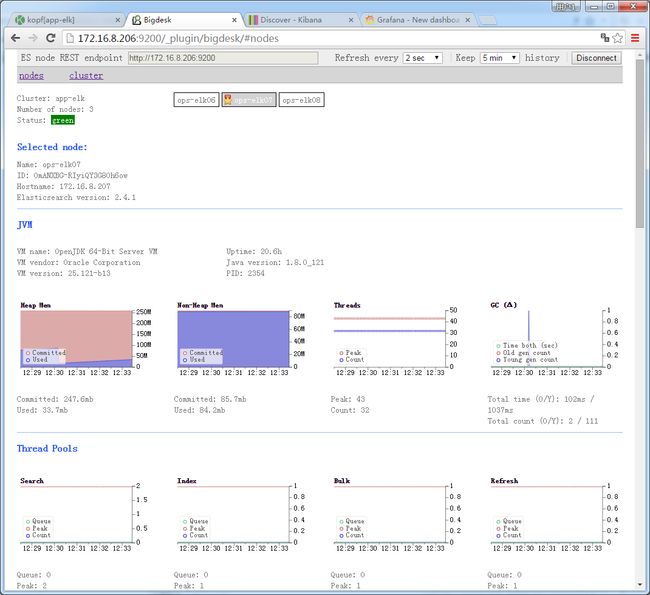
cat >plugin-descriptor.properties< description=bigdesk - Live charts and statistics for Elasticsearch cluster. version=2.5.1 site=true name=bigdesk EOF http://172.16.8.206:9200 http://172.16.8.207:9200 http://172.16.8.208:9200 http://172.16.8.206:9200/_plugin/head/ http://172.16.8.207:9200/_plugin/head/ http://172.16.8.208:9200/_plugin/head/ http://172.16.8.206:9200/_plugin/kopf/#!/cluster http://172.16.8.207:9200/_plugin/kopf/#!/cluster http://172.16.8.208:9200/_plugin/kopf/#!/cluster http://172.16.8.206:9200/_plugin/bigdesk/ 查看集群状态:curl -XGET http://localhost:9200/_cat/health?v 查看集群节点:curl -XGET http://localhost:9200/_cat/nodes?v 查询索引列表:curl -XGET http://localhost:9200/_cat/indices?v 创建索引:curl -XPUT http://localhost:9200/customer?pretty 查询索引:curl -XGET http://localhost:9200/customer/external/1?pretty 删除索引:curl -XDELETE http://localhost:9200/customer?pretty 6、kibana的安装 rpm -ivh kibana-4.6.1-x86_64.rpm 修改配置文件 vim /opt/kibana/config/kibana.yml grep -n '^[a-Z]' /opt/kibana/config/kibana.yml 2:server.port: 5601 5:server.host: "0.0.0.0" 15:elasticsearch.url: "http://localhost:9200" 23:kibana.index: ".kibana" 安装插件 /opt/kibana/bin/kibana plugin --install elasticsearch/marvel/latest 启动服务: /etc/init.d/kibana start 访问方式 http://172.16.8.208:5601/ 6、参数优化(提高ElasticSearch检索效率) 6.1Linux操作系统优化 1)调整系统资源最大句柄数 /etc/security/limits.conf 在文件中增加 * soft nofile 65536 * hard nofile 65536 2)设置bootstrap.mlockall: 为true来锁住内存。因为当jvm开始swapping时es的效率会降低,所以要保证它不swap,可以把ES_MIN_MEM和ES_MAX_MEM两个环境变量设置成同一个值,并且保证机器有足够的内存分配给es。 同时也要允许elasticsearch的进程可以锁住内存,linux下可以通过`ulimit -l unlimited`命令。 3)关闭文件更新时间 cat /etc/fstab /dev/sda7 /data/1 ext4 defaults,noatime 0 0 4)提高ES占用内存(elasticsearch.in.sh) ES_MIN_MEM=30g (一般为物理内存一半,但不要超过31G) ES_MAX_MEM=30g https://www.elastic.co/guide/en/elasticsearch/guide/current/heap-sizing.html#compressed_oops(官方建议) 6.2Elasticsearch 字段缓存优化 1)Fielddata(字段数据) Elasticsearh默认会将fielddata全部加载到内存。但是,内存是有限的,需要对fielddata内存做下限制:Indices.fieldata.cache.size 节点用于fielddata的最大内存,如果fielddata达到该阀值,就会把旧数据交换出去。默认设置是不限制,建议设置10%。 2)doc-values 其实就是在elasticsearch 将数据写入索引的时候,提前生成好fileddata内容,并记录到磁盘上。因为fileddata数据是顺序读写的,所以即使在磁盘上,通过文件系统层的缓存,也可以获得相当不错的性能。doc_values只能给不分词(对于字符串字段就是设置了 "index":"not_analyzed",数值和时间字段默认就没有分词) 的字段配置生效。 如相应字段设置应该是: "@timestamp":{ "type":"date", "index":"not_analyzed", "doc_values":true, } 7、Grafana安装及配置 也可以参考官方文档来安装 http://docs.grafana.org/installation/rpm/ Grafana安装 yum install initscripts fontconfig rpm -ivh grafana-4.0.2-1481203731.x86_64.rpm yum install fontconfig yum install freetype* yum install urw-fonts 启动grafana-server服务 systemctl enable grafana-server.service systemctl start grafana-server.service 安装包详细信息 [root@qas-zabbix ~]# rpm -qc grafana /etc/grafana/grafana.ini /etc/grafana/ldap.toml /etc/init.d/grafana-server /etc/sysconfig/grafana-server /usr/lib/systemd/system/grafana-server.service 二进制文件 /usr/sbin/grafana-server 服务管理脚本 /etc/init.d/grafana-server 安装默认文件 /etc/sysconfig/grafana-server 配置文件 /etc/grafana/grafana.ini 安装systemd服务(如果systemd可用 grafana-server.service 日志文件 /var/log/grafana/grafana.log 访问URL http://172.16.8.209:3000/
