1 spring boot入门
1.1 环境准备
JDK 7及以上
eclipse开发工具
项目管理工具Maven
本文采用Java 1.7.0_60、Spring Boot 1.5.4.RELEASE(或1.5.2.RELEASE)调试通过。
spring-boot相关项目源码,
码云地址:https://git.oschina.net/wyait/springboot1.5.4.git
github地址:https://github.com/wyait/spring-boot-1.5.4.git
1.2 Maven构建项目
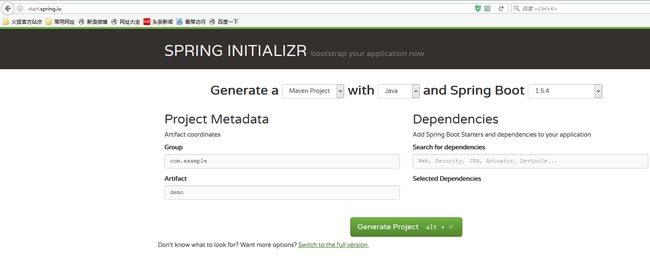
方案一:从官网构建:http://start.spring.io/
generate Project到本地:demo.zip
解压,import到eclipse中即可。
方案二:手动创建
项目源码链接:
码云地址:https://git.oschina.net/wyait/springboot1.5.4.git
github地址:https://github.com/wyait/spring-boot-1.5.4.git
pom.xml文件中导入依赖:
<parent>
<groupId>org.springframework.bootgroupId>
<artifactId>spring-boot-starter-parentartifactId>
<version>1.5.4.RELEASEversion>
parent>
编写controller
① 新建包:com.wyait.boot com.wyait.boot.controller
② 新建启动类:HelloApplication
/**
*
* @项目名称:springboot
* @类名称:HelloApplication
* @类描述:我的第一个springboot启动类
* @创建人:wyait
* @创建时间:2017年6月26日上午11:28:57
* @version:1.0
*/
@Configuration//这是一个配置Spring的配置类
@SpringBootApplication//@SpringBootApplication:Spring Boot项目的核心注解,主要目的是开启自动配置。
public class HelloApplication {
publicstatic void main(String[] args) {
//启动spring boot应用
SpringApplication.run(HelloApplication.class,args);
}
}
③ 新建HelloController
/**
*
* @项目名称:springboot
* @类名称:HelloController
* @类描述:第一个spring Boot Controller类
* @创建人:wyait
* @创建时间:2017年6月26日上午11:35:19
* @version:
*/
@Controller
public class HelloController {
@RequestMapping("/hello")
@ResponseBody
publicString hello() {
return"hello spring boot!";
}
}
④ 启动项目:
方式一:Run AsàJava Application
方式二:选中项目—>Run As-->Maven Build…-->spring boot:run(不推荐使用。网上说是配置热部署之后,重复启动有端口占用问题)
启动console效果:
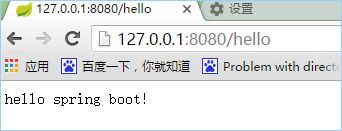
⑤ 访问测试:http://127.0.0.1:8080/hello
2 spring boot核心
下载Spring Boot源码
2.1 入口类和@SpringBootApplication
Spring Boot的项目一般都会有*Application的入口类,入口类中会有main方法,这是一个标准的Java应用程序的入口方法。
@SpringBootApplication注解,是Spring Boot的核心注解,是一个组合注解。跟踪源码:
@SpringBootConfiguration也是组合注解:
@EnableAutoConfiguration:启动自动配置,该注解会使Spring Boot根据项目中配置的依赖,自动配置所需的依赖jar包:比如:我们添加了spring-boot-starter-web配置,Spring Boot会自动配置tomcat、Spring MVC等
@ComponentScan:默认扫描@SpringBootApplication所在类的同级目录和它的子目录(当前包以及它的子包)。
关闭自动配置
查看spring-boot-autoconfigure的自动配置实现。。。。too much
在实际的开发中,我们可能不需要某一项进行自动配置。这时候如何设置?
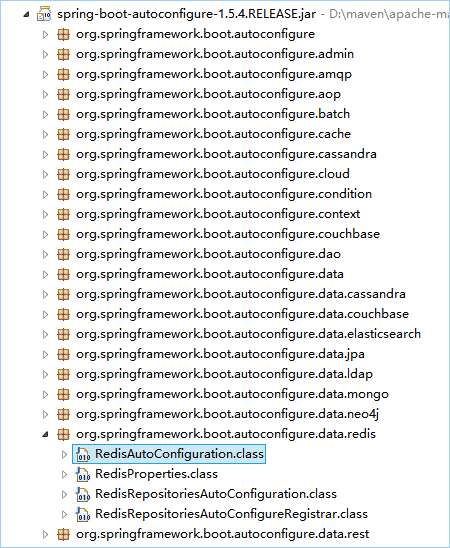
比如:项目中不需要redis自动配置:找到自动配置中对应的后缀为:*AutoConfiguration.class文件
只需要在@SpringBootApplication注解后面添加(exclude={RedisAutoConfiguration.class})
其他配置类似。
2.3 全局配置文件
Spring Boot项目使用全局的配置文件是:application.properties或application.yml,在/resources目录下或者类路径下/config下,一般我们都放在/resources下
新建application.properties文件
更多更详细的配置参考文件:application.properties和《Spring Boot之application配置详解》 或参考官网http://projects.spring.io/spring-boot/
添加设置端口配置:
修改进入DispatcherServlet的规则为:*.html
重新启动,访问:
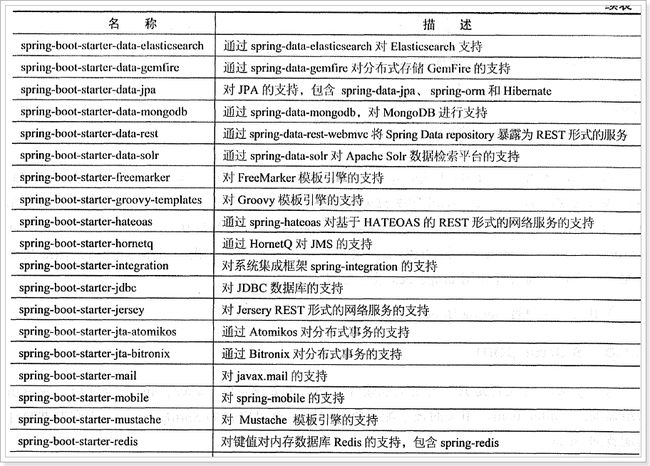
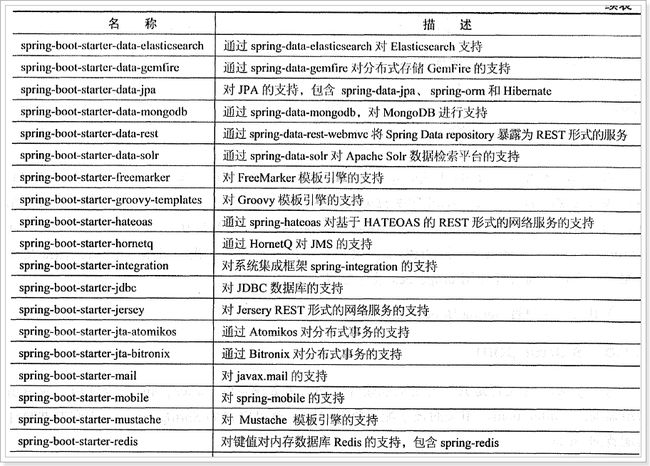
2.4 starter pom相关依赖
2.5 Spring Boot自动配置原理
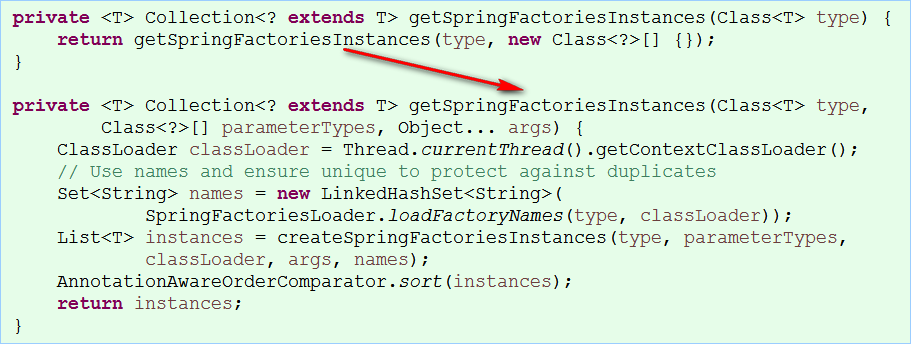
Spring Boot在进行SpringApplication对象实例化时会加载META-INF/spring.factories文件,将该文件中的配置载入到spring容器中。
跟踪源码:
找到SpringApplication的初始化方法:initialize();
//获取spring工厂配置数据
setInitializers((Collection)getSpringFactoriesInstances(
ApplicationContextInitializer.class));
//读取spring.factories中的元素集合数据
Set
SpringFactoriesLoader.loadFactoryNames(type,classLoader));
读取资源数据:
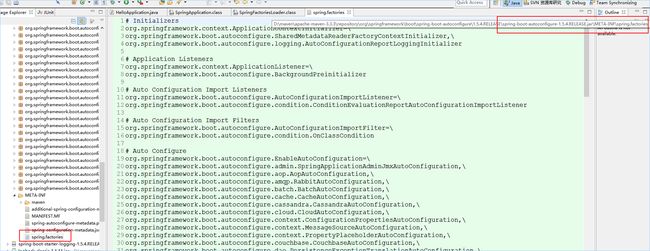
FACTORIES_RESOURCE_LOCATION= "META-INF/spring.factories";
META-INF/spring.factories文件在Spring-Boot-autoconfigura-1.5.4.RELEASE.jar包下面:
里面存放了所有自动配置启动类信息。
2.6 举例:redis自动配置
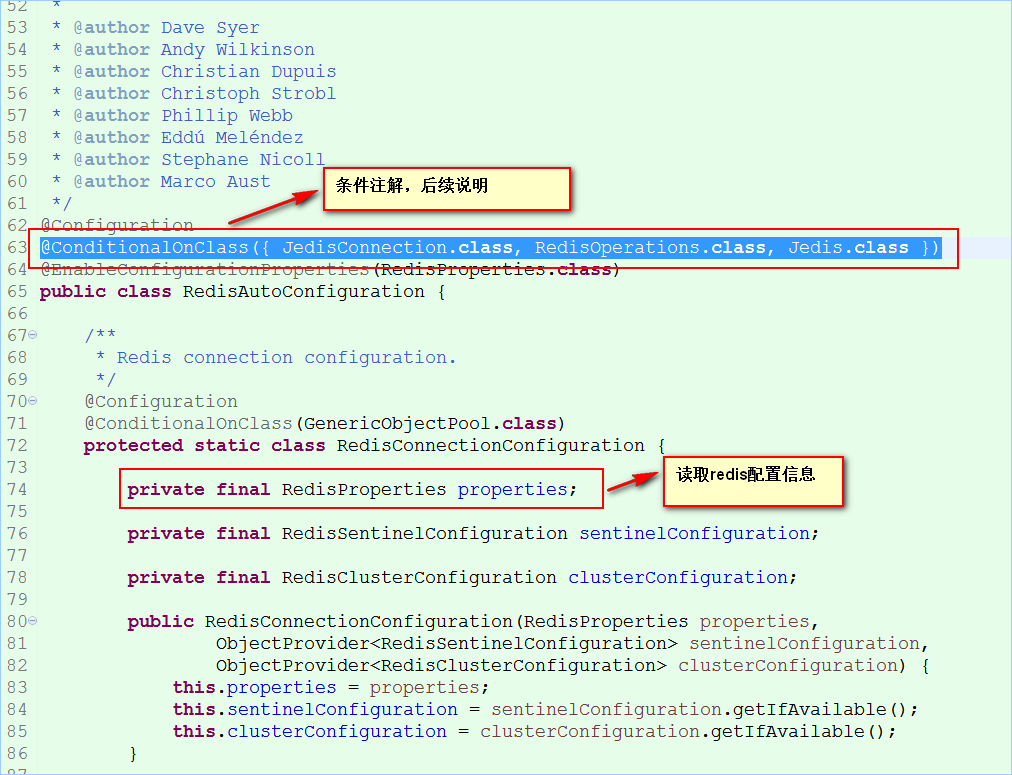
找到RedisAutoConfiguration,跟踪源码:
@ConditionalOnClass({JedisConnection.class, RedisOperations.class, Jedis.class })意思是:如果同时存在这三个类,就自动配置redis,进行redis实例化。否则不进行实例化。
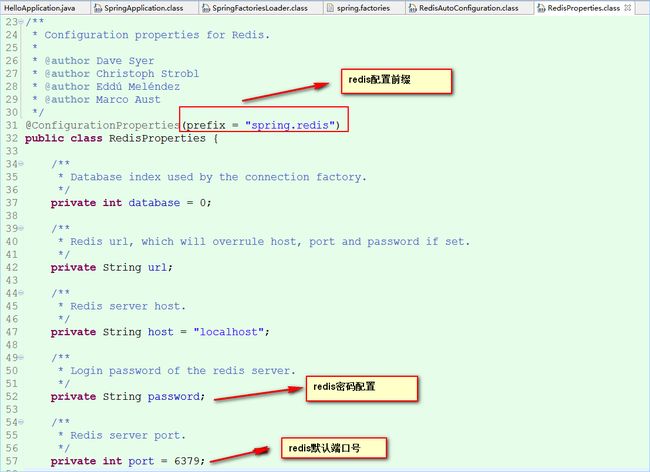
RedisProperties读取配置信息,进行redis实例化
具体细节,可以跟踪源码查看。。。//TODO
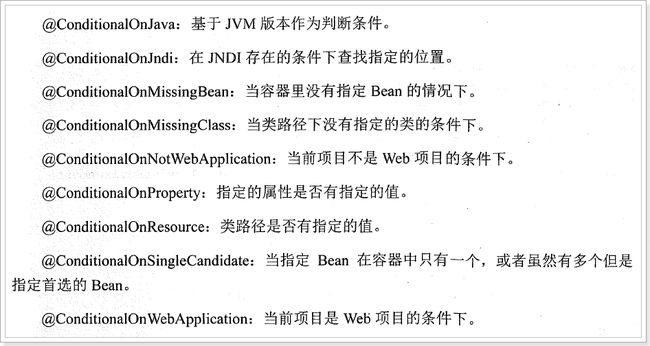
2.7 条件注解
项目源码,
码云地址:https://git.oschina.net/wyait/springboot1.5.4.git
github地址:https://github.com/wyait/spring-boot-1.5.4.git
spring boot系列文章:
spring boot 1.5.4 概述(一)
spring boot 1.5.4入门和原理(二)
spring boot 1.5.4 之web开发(三)
spring boot 1.5.4 整合JSP(四)
spring boot 1.5.4 集成devTools(五)
spring boot 1.5.4 集成JdbcTemplate(六)
spring boot 1.5.4 集成spring-Data-JPA(七)
spring boot 1.5.4 配置文件详解(八)
spring boot 1.5.4 统一异常处理(九)
spring boot 1.5.4 定时任务和异步调用(十)
spring boot 1.5.4 整合log4j2(十一)
spring boot 1.5.4 整合 mybatis(十二)
spring boot 1.5.4 整合 druid(十三)
spring boot 1.5.4 之监控Actuator(十四)
spring boot 1.5.4 整合webService(十五)
spring boot 1.5.4 整合redis、拦截器、过滤器、监听器、静态资源配置(十六)
spring boot 1.5.4 整合rabbitMQ(十七)
spring boot 1.5.4 集成Swagger2构建Restful API(十八)
spring boot 1.5.9 整合redis(十九)
