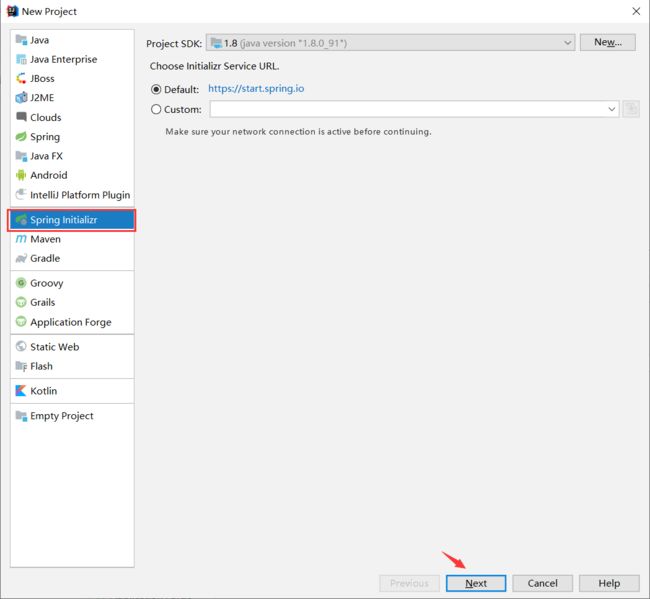
一、idea中新建第一个HelloWorld项目
点击next:
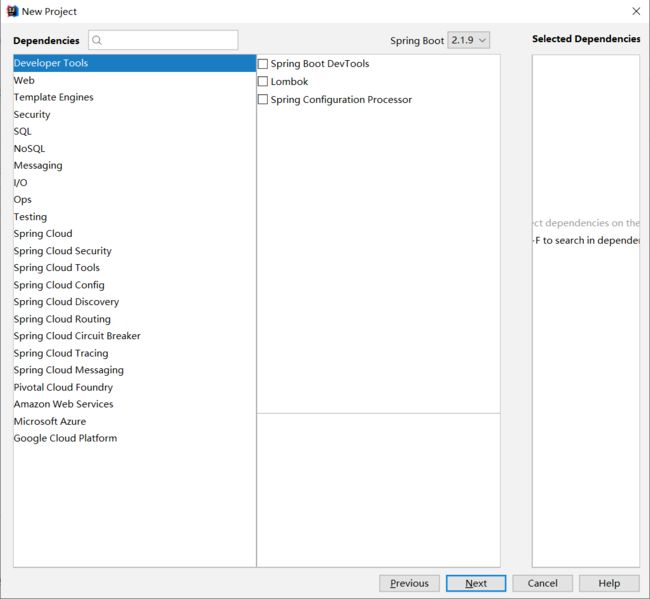
下一步
在这里可以选择我们需要依赖的第三方软件类库,包括spring-boot-web,mysql驱动,mybatis等。我们这里暂时先不添加任何依赖,我们后文手动添加maven依赖
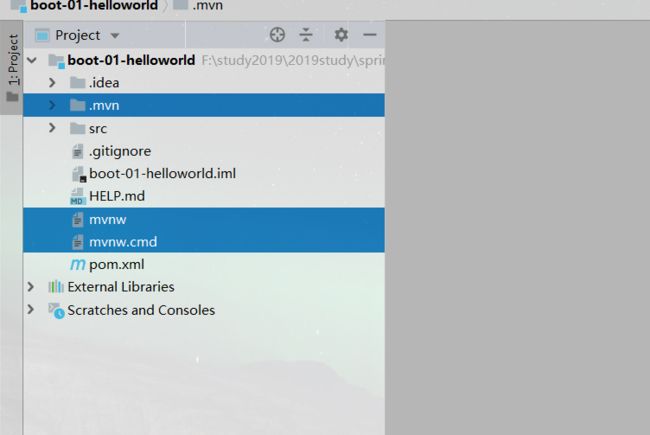
项目构建完成之后删掉下面的这几个文件,这几个文件是maven版本控制相关的文件。我们结合IDEA管理maven,一般来说这几个文件用不到
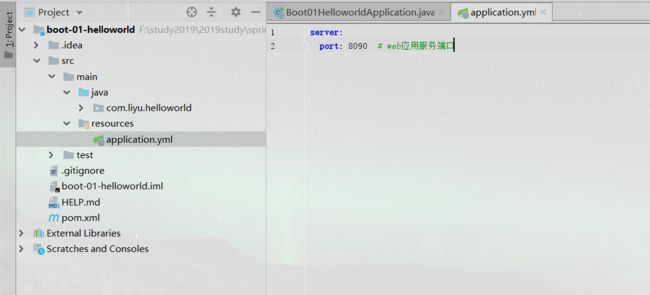
将properties文件文件改为yml文件,这个文件和properties文件的功能是相同的,yml文件的结构更加清晰,需改默认的启动端口为8090
 <dependency>
     <groupId>org.springframework.bootgroupId>
     <artifactId>spring-boot-starter-webartifactId>
 dependency>
在xml文件中进入web-starter
@RestController
public class HelloController {
    @RequestMapping("/hello")
    public String hello(String name) {
        return "hello world, " +name;
    }
}
新建一个HelloController,并创建一个接口:
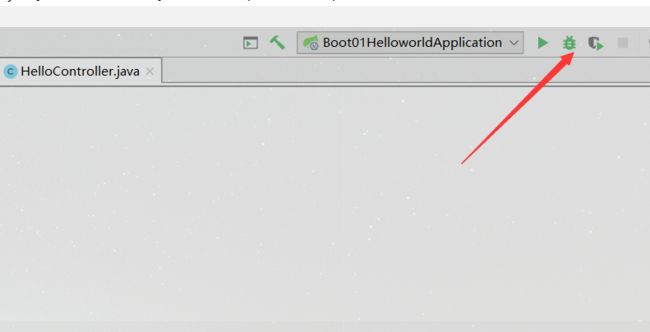
点击debug运行
2.48秒启动成功
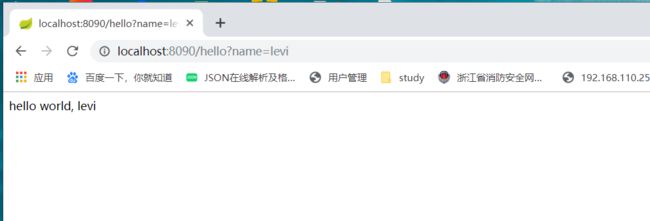
输入地址,后面接上参数,屏幕上显示后台返回的内容
二、lombok插件的引入和使用:
使用lombok有以下几个功能,更多功能可百度 :
- 根据成员变量生成get和set方法
- 根据成员变量生成类的构造函数
- 重写toString()和hashCode方法
- 引入日志框架logFactory,用来打印日志
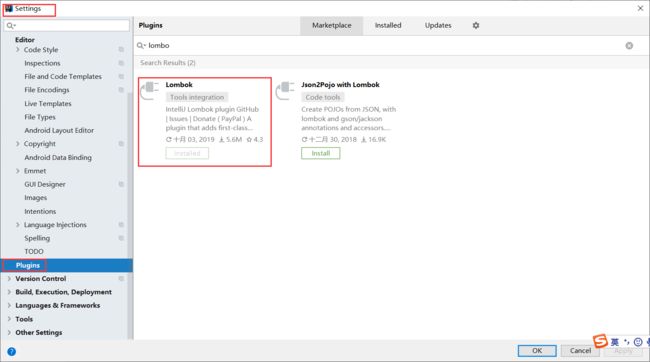
Settings -->Plugins-->Marketplace
下载插件:
            org.projectlombok
            lombok
            true
下载好 插件后,还需要在pom.xml中引入相关依赖才可以继续使用:
新建一个Person 类,在测试新建Person的实例对象,在是指set的时候,自动提示出属性的set方法;
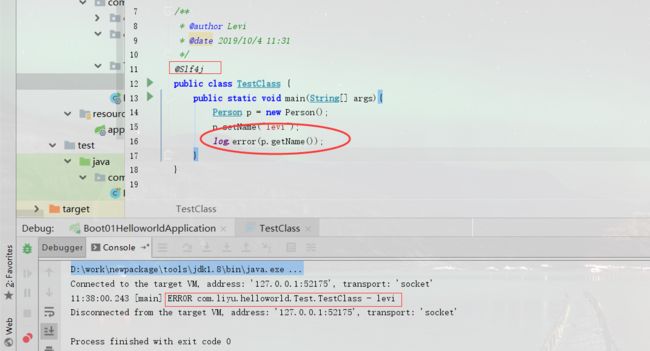
使用@Slf4j注解,可以在方法下直接使用log打印日志;
使用@Builder 注解可以进对象的构建,但是,继承的属性name是不能进行构建的,有全参构造函数注解,自然就有无参构造函数注解:NoArgsConstructor注解。
三、项目的热部署
      org.springframework.boot
      spring-boot-devtools

      true
引入热部署的maven依赖:
                org.springframework.boot
                spring-boot-maven-plugin

                    true
在 plugin 中配置另外一个属性 fork,并且配置为 true。
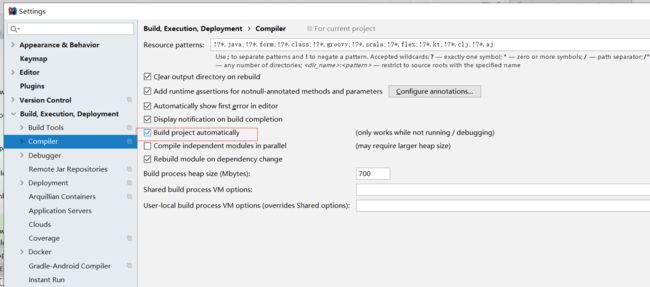
打开自从 编译
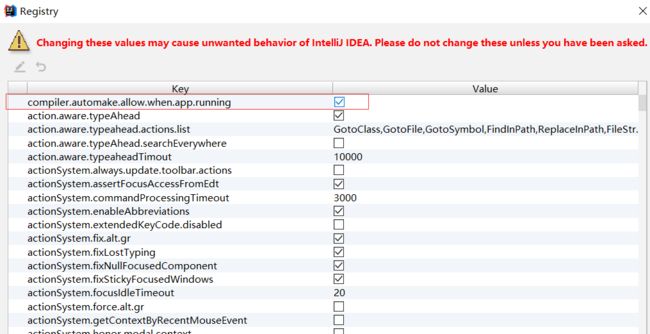
组合键:“Shift+Ctrl+Alt+/” ,选择 “Registry” ,选中打勾 “compiler.automake.allow.when.app.running” 。
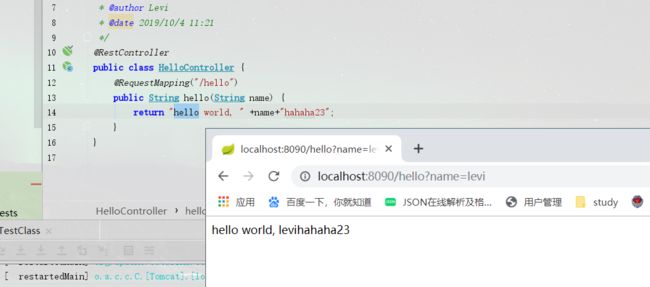
修改返回结果,刷新页面,看到结果已经改变;
3、GeoFormat:可以快速的将JSON转换为实体类,在插件中搜索下载后,在使用
/**
 * id : 1
 * author : zimug
 * title : 手摸手教你开发spring boot
 * content : c
 * createTime :
 * reader : [{"name":"zimug","age":18},{"name":"kobe","age":37}]
 */
//先定义一个空的实体类,快捷键Alt + S,相信后面你就都会了.这是根据JSON生成出来的对应的java bean的代码。
private int id;
private String author;
private String title;
private String content;
private String createTime;
private Listreader;
public int getId() {
return id;
}
public void setId(int id) {
this.id = id;
}
public String getAuthor() {
return author;
}
public void setAuthor(String author) {
this.author = author;
}
public String getTitle() {
return title;
}
public void setTitle(String title) {
this.title = title;
}
public String getContent() {
return content;
}
public void setContent(String content) {
this.content = content;
}
public String getCreateTime() {
return createTime;
}
public void setCreateTime(String createTime) {
this.createTime = createTime;
}
public ListgetReader() {
return reader;
}
public void setReader(Listreader) {
this.reader = reader;
}
public static class ReaderBean {
/**
* name : zimug
* age : 18
*/
private String name;
private int age;
public String getName() {
return name;
}
public void setName(String name) {
this.name = name;
}
public int getAge() {
return age;
}
public void setAge(int age) {
this.age = age;
}
}
准备工作完成!!!
