Linux第4课:搭建apache服务器
时间 2019-03-01 下午3:30
主讲 黄季阳
地点 四楼电教室
Apache(阿帕奇)是一个开放源码的网页服务器,可以在大多数计算机操作系统中运行,由于其多平台和安全性被广泛使用,是最流行的Web服务器端软件之一。它快速、可靠并且可通过简单的API扩展,将Perl/Python等解释器编译到服务器中。
下面,以CenterOS7为例,讲解apache的安装和调试,其他版本的centeros,命令可能有所差异。
yum install httpd httpd-devel
查看httpd的版本,验证是否安装成功:
httpd -version
查看安装目录:
whereis httpd
apache是网站服务器,网站需要使用IP地址和端口来访问,IP地址需要查看本机IP,端口默认是80。
下面,设置网站的IP地址,端口保持不变。
vim /etc/httpd/conf/httpd.conf
附:vi编辑命令的使用技巧(vim是vi的升级版,如果没有vim,则使用yum安装)
esc:set nu 显示行号
:$ 跳到尾行
:530 跳到第530行
:/display_errors 搜索/display_errors,点n跳到下一个
连续搜索80(注意:小键盘好像不能打数字,不要用小键盘),找到:
Listen 80
修改为:
Listen 10.0.11.5:80 (IP为本机IP)
启动apache:
systemctl start httpd.service #启动
systemctl stop httpd.service #停止
systemctl restart httpd.service #重启
查看端口运行情况:
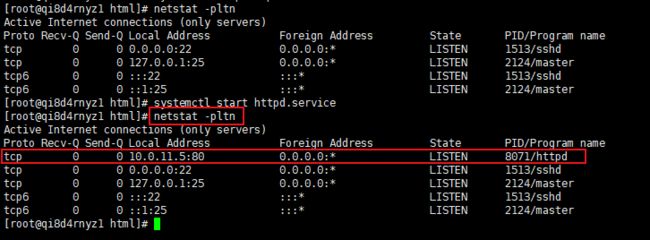
netstat -pltn
可见,httpd已正常运行。
查询防火墙对80端口是否放行:
firewall-cmd --query-port=80/tcp
返回no
附,防火墙用法:
firewall-cmd --state ##查看防火墙状态,是否是running
firewall-cmd --permanent --zone=public --add-port=80/tcp 永久开放80端口号
firewall-cmd --reload ##重新载入配置,比如添加规则之后,需要执行此命令
firewall-cmd --query-port=80/tcp 查询端口号80 是否开启
firewall-cmd --permanent --zone=public --remove-port=80/tcp 移除80端口号
firewall-cmd --list-ports 查看所有已开放的端口
systemctl enable firewalld.service 设置开机自启
systemctl disable firewalld.service 设置开启不自启
systemctl stop firewalld.service; #停止firewall
systemctl disable firewalld.service; #禁止firewall开机启动
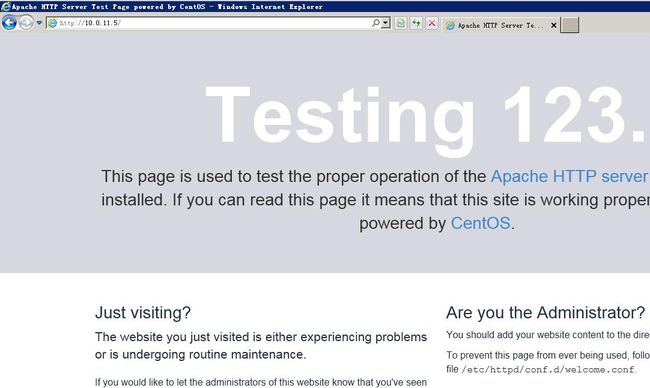
防火墙放行80端口后,浏览器访问:http://10.0.11.5,出现如下页面,表示调试成功。
下面,我们手写一个index.html,并显示出来。方法如下:
cd /var/www/html
vi index.html
果然,服务器是默认访问这个目录的。
这时,再写一个abc.htm,如何把abc.htm设置成默认页面呢?
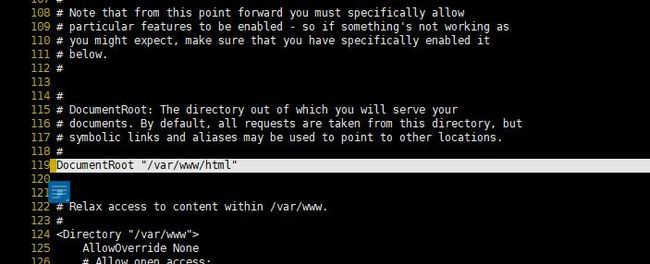
修改方式:vi /etc/httpd/conf/httpd.conf
以上为网站目录和默认首页,默认页面多个,可以使用空格隔开。
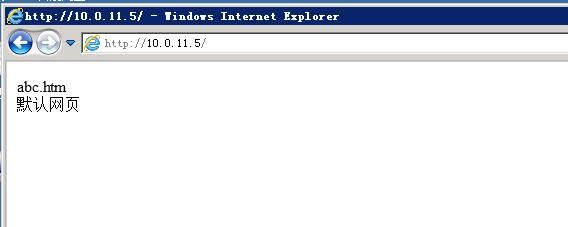
修改后,果然生效。
附1——修改端口号:
关于端口号,默认端口号为80,如需修改,只需在前面httpd.conf的文件中,把Listen 80修改为其他端口即可。但是,修改为1600后,发现apache启动失败。提示:
Job for httpd.service failed because the co和trol process exited with error code. See "systemctl status httpd.service" and "journalctl -xe" for details.
原来,apache为了提高安全性,默认只能使用80和443端口,如需使用其他端口,需要进一步设置。
yum -y install policycoreutils-python
semanage port -a -t http_port_t -p tcp 1600
关于semanage:
semanage port -l|grep http 查看当前允许的端口
semanage port -d -t http_port_t -p tcp 1600 使用-d参数,即为删除1600端口的允许
systemctl restart httpd.service
防火墙放行后,成功!
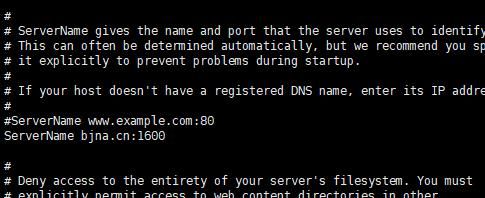
附2——绑定域名:
vi /etc/httpd/conf/httpd.conf
修改内容如图:
systemctl restart httpd.service
发现域名已生效!
附3——开机启动:
通过以上操作,重启后是否正常呢?我们执行reboot命令。
发现重启后,网页无法打开。
检查防火墙对端口的开放:firewall-cmd --list-ports,发现1600端口正常开放。
执行systemctl start httpd.service,后正常。
原来是apache没有自动开机启动,需要手工启动。
systemctl enable httpd.service #开机启动
systemctl disable httpd.service #开机不启动
重启后, 果然正常访问!
附4——宝塔工具:
注意:安装宝塔后,宝塔将取得系统控制权,其他设置将无效。
为了更方便地配置Linux服务器,推荐使用宝塔图形化配置工具:
宝塔官网 www.bt.cn
免费版v6.8安装:
yum install -y wget && wget -O install.sh http://download.bt.cn/install/install_6.0.sh && bash install.sh
安装完成后,记录提示信息:
Bt-Panel: http://*.*.95.16:8888/e9a9b786
username: hmfsyeib
password: d36f6c86
然后,进入对应网页,即可进行远程配置。
卸载宝塔:
wget http://download.bt.cn/install/bt-uninstall.sh
sh bt-uninstall.sh
systemctl restart httpd.service
附5——安装PHP
php和python一样,可以用来开发网页,是服务端网页编码解释器。
yum install php php-mysql php-common php-gd php-mbstring php-mcrypt php-devel php-xml
查看php的版本
php -v
编写一个index.php页面
PHP 测试
Hello World
'; ?>
浏览器测试,显示正常,说明php安装成功!
附6——安装mysql
以下方法为安装mysql 5.7.25,依次执行命令:
cd /usr/local/src/
wget http://repo.mysql.com/mysql57-community-release-el7-8.noarch.rpm
rpm -ivh mysql57-community-release-el7-8.noarch.rpm
yum -y install mysql-server
安装完毕后检查状态:
查看目录:
whereis mysqld
查看版本:
mysql -V
默认配置文件路径:
配置文件:/etc/my.cnf
日志文件:/var/log/var/log/mysqld.log
服务启动脚本:/usr/lib/systemd/system/mysqld.service
socket文件:/var/run/mysqld/mysqld.pid
启动mysql服务:
service mysqld restart
可见,mysql已启动。
下面,修改root密码,mysql安装后,密码随机生成,需要修改。
查看root用户的随机密码:
grep "password" /var/log/mysqld.log
登陆mysql
mysql -u root -p
修改密码强度为低
set global validate_password_policy=LOW;
修改密码最低长度限制为6(默认为8)
set global validate_password_length=6;
修改密码为abcd1234:
SET PASSWORD FOR 'root'@'localhost' = PASSWORD('abcd1234')
下面,修改端口为7188(默认为3306):
vim /etc/my.cnf
添加一行
port=7188
保存退出。
系统放行7188端口:
semanage port -a -t mysqld_port_t -p tcp 7188
防火墙放行7188端口
firewall-cmd --permanent --zone=public --add-port=7188/tcp
firewall-cmd --reload
重启mysql服务:service mysqld restart
可见,mysqld的7188端口已正常启动。
下面,创建一个远程登陆的用户:
set global validate_password_policy=LOW;
create user lpf@'%' identified by 'jxsr201903';
grant all privileges on *.* to lpf;
远程连接测试,正常!
最后,reboot测试一下apache、php、mysql是否都已正常启动。
经测试,重启后均正常。
