Disable NetBIOS over TCP/IP
Disable generatePublisherEvidence
修改位于ASP.NET.CONFIG的文件:C:\Windows\Microsoft.NET\Framework64\v2.0.50727 和 C:\Windows\Microsoft.NET\Framework\v2.0.50727.
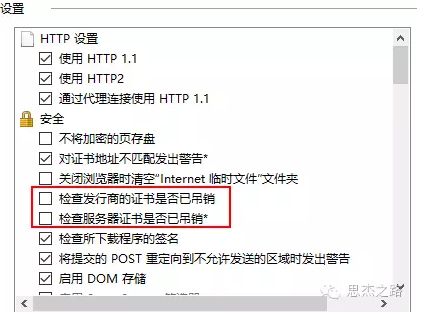
禁用证书吊销检查
启用套接字池
转到C:\Inetpub\ wwwroot\Citrix\
修改 :pooledSockets="on"
工作区控制 - 禁用注销断开连接
转到C:\Inetpub\ wwwroot\Citrix\
修改:<workspaceControl enabled="true" autoReconnectAtLogon="false" logoffAction="none" showReconnectButton="false" showDisconnectButton="false" />
更改注销操作【logoffAction="none"】
工作区控制 - 禁用自动连接
转到C:\Inetpub\ wwwroot\Citrix\
修改:
<workspaceControl enabled="true" autoReconnectAtLogon="false" logoffAction="none" showReconnectButton="false" showDisconnectButton="false" />
更改【autoReconnectAtLogon="false"】
禁用工作区控制
转到C:\Inetpub\ wwwroot\Citrix\
修改:
<workspaceControl enabled="false" autoReconnectAtLogon="false" logoffAction="none" showReconnectButton="false" showDisconnectButton="false" />
修改【enabled="false"】
启用XML验证
如果您需要使用StreoFront到DMZ中,则需要启用XML验证。
1、导入StoreFront PowerShell管理插件;
& "$Env:PROGRAMFILES\Citrix\Receiver StoreFront\Scripts\ImportModules.ps1"
2、启用身份验证服务的功能;
Set-DSXmlServiceAuthentication -SiteId 1 -VirtualPath /Citrix/Authentication
3、创建farmset配置data collectors/brokers将会进行认证。
$Farm = @{

              FarmName = "Farm"

              Port = "443"

              SSLRelayPort = 443

              TransportType = "HTTPS"

              LoadBalance = $false

              AllFailedBypassDuration = 5

              Servers = @("server1", “server2”)

              Platform = @{

                             FarmType = "XenApp"

                             Caption = "Caption"

                             DisplayName = "Authentication Farm"

                          }

            }

$FarmSet = @{

               Name = "Default"

               Farms = @( $Farm )

            }
4、配置基于XML的服务的身份验证使用的场集。
Update-DSFarmSet -IISSiteId 1 -VirtualPath "/Citrix/Authentication" -Farmset $FarmSet
增加超时时间
打开StoreFront的控制台,并单击设置会话超时。
设置虚拟桌面打开全屏
打开C:\inetpub\wwwroot\Citrix\
根据该文件的[应用]部分,添加以下行:
DesktopViewer-ForceFullScreenStartup=true
保存default.ica文件。
打开命令提示符(CMD),并运行iisreset。
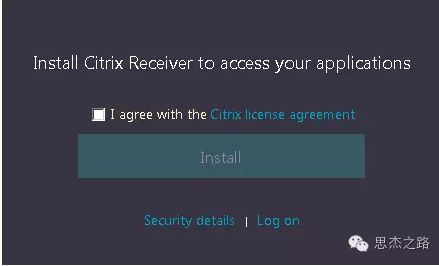
禁用激活窗口
我们打开登录StoreFrone时,点击StoreFront右上角。会出来出来如下所示的界面:
转到C:\inetpub\wwwroot\Citrix\
<receiverConfiguration enabled=”false” downloadURL=”ServiceRecord/GetDocument/receiverconfig.cr” />
修改【enabled=”false”】
重定向StoreFront默认网站的网址
打开IIS,选择服务器然后打开HTTP重定向功能。当然在StoreFront控制台也能够直接打开。
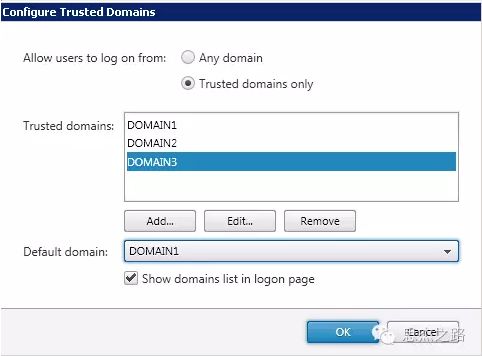
显示域列表店面的登录页上
启用Active Directory密码重置
打开StoreFront控制台,进入认证并选择管理密码选项
禁用插件助手
转到C:\Inetpub\ wwwroot\Citrix\
<pluginAssistant enabled="false" upgradeAtLogin="false">
更改默认视图
转到C:\Inetpub\ wwwroot\Citrix\
<uiViews showDesktopsView="true" showAppsView="true" defaultView="auto" />
您可以将值更改为:
自动:收藏夹选项卡默认显示
桌面:桌面选项卡默认显示
应用:应用程序选项卡默认显示
我们可以禁用选项卡。
<uiViews showDesktopsView="true" showAppsView="true" defaultView="auto" />
上述选项中桌面和应用都是开启的,我们将其值修改为False即可禁用。
启用跟踪
启用StoreFron配置跟踪,请按照以下步骤操作。
Add-PSSnapin Citrix.DeliveryServices.Framework.Commands

Set-DSTraceLevel –All –TraceLevel Verbose

Restart-Service CitrixConfig*
Restart-Service CitrixCreden*
Restart-Service "Citrix Peer*" -Force
Restart-Service Citrixsub*
跟踪位于C:\Program Files\Citrix\Receiver StoreFront\admin\trace.
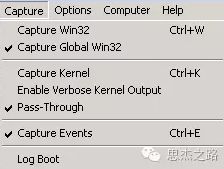
下载DebugView工具。
下载DebugView解压缩并启动运行。
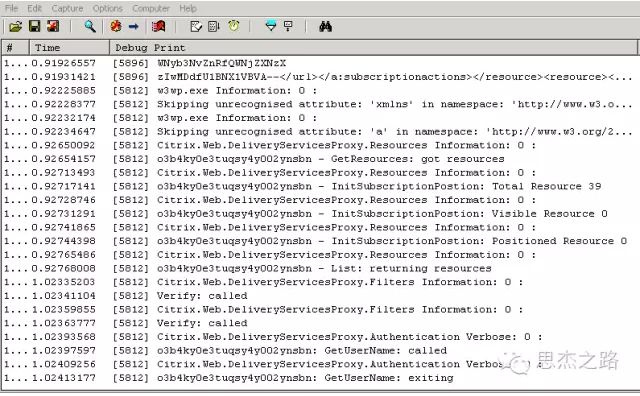
然后,我们就看到了跟踪的信息。
当我们故障排除完成后,记得要禁用跟踪
Add-PSSnapin Citrix.DeliveryServices.Framework.Commands

Set-DSTraceLevel –All –TraceLevel Off

Restart-Service CitrixConfig*
Restart-Service CitrixCreden*
Restart-Service "Citrix Peer*" -Force
Restart-Service Citrixsub*
导航到一个文件夹
转到C:\Inetpub\ wwwroot\Citrix\
添加以下行:
CTXS.Extensions.afterDisplayHomeScreen = function (callback) {
     CTXS.ExtensionAPI.navigateToFolder('folder/path');
};
用文件夹名称或文件夹路径替换文件夹/路径。
要重定向到类别的根,添加以下行:
CTXS.Extensions.afterDisplayHomeScreen = function (callback) {
     CTXS.ExtensionAPI.navigateToFolder('/');
};
删除收藏夹
打开StoreFront控制台,去Store,禁用用户订阅。
重命名StoreFront网页
转到C:\Inetpub\ wwwroot\Citrix\
(function ($) {
    $.localization.customStringBundle("en", {
        AppStore: "Citrix Applications",
        Example2: "This is another example"
    });
})(jQuery);
更改/删除背景
打开C:\inetpub\wwwroot\Citrix\
ctxs.large-ui.min_A97EEF90ADE71C48
ctxs.medium-ui.min_2397A9404AD6F3CB
ctxs.no-js-ui.min_F673C4CFF9E86D60
ctxs.small-ui.min_A915C6B4D6DEB4E5
删除或更改以下修改背景:
background-p_w_picpath:url(../p_w_picpaths/common/ReceiverFullScreenBackground_46E559C0E6B5A27B.jpg);
添加脚注
转到C:\Inetpub\ wwwroot\Citrix\
$('#customBottom').html("Your Text");
现在打开style.css
在我的例子中,我正在调整我的文本在页面的右边,并显示我的公司标志为中心的。
#customBottom {
text-align: right;
background-p_w_picpath: url('');
background-size:  ;
background-repeat: no-repeat;
background-color:;
background-position: center;
height:;
color: black;
font-size: 12px;
}
注意:你需要根据你的审美观,修改
脚注将显示在底部。
添加免责声明
转到C:\Inetpub\ wwwroot\Citrix\
在登录:
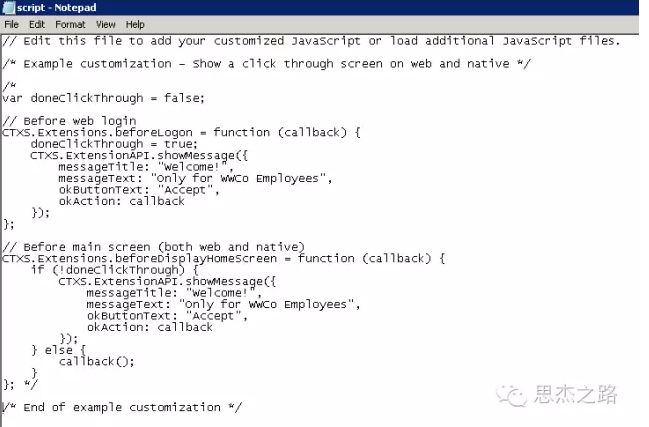
CTXS.Extensions.beforeLogon = function (callback) {
    doneClickThrough = true;
    CTXS.ExtensionAPI.showMessage({
        messageTitle: "Welcome to the new StoreFront!",
        messageText: "Please send your feedback to [email protected].",
        okButtonText: "Continue",
        okAction: callback
    });
};
主屏幕前:
CTXS.Extensions.beforeDisplayHomeScreen = function (callback) {
      if (!doneClickThrough) {
    CTXS.ExtensionAPI.showMessage({
        messageTitle: "Welcome to the new StoreFront!",
        messageText: "Please send your feedback to [email protected].",
        okButtonText: "Continue",
        okAction: callback
    });
 } else {
 callback();
 }
};
添加标题栏
转到C:\Inetpub\ wwwroot\Citrix\
$('#customTop').html(" Download Citrix Receiver");
打开style.css
#customTop {
text-align: center;
background-color:#f9f9f9;
color: #574f5b;
font-size: 12px;
padding-top:5px;
margin-bottom:-20px;

}
#customTop a {
    color: #574f5b;
}
这里是我们需要添加Receiver的图标。
添加一个随机的文本页脚
从StoreFront的页脚文本文件显示一个随机的消息。
转到C:\Inetpub\ wwwroot\Citrix\MainStoreWeb\Custom并打开script.js 文件。
 var lines;
    var randomNumber;
    var lastRandomNumber;

   $( document ).ready(function() {


// load the trivia from the server
      $.ajax({
        url: 'trivia.txt'
      }).done(function(content) {


        // normalize the line breaks, then split into lines
        lines = content.replace(/\r\n|

\r/g, '\n').trim().split('\n');

        // only set up the click handler if there were lines found


     if (lines && lines.length) {
                    // loop to prevent repeating the last random number


        while (randomNumber === lastRandomNumber) {
              randomNumber = parseInt(Math.random() *

lines.length);
              // check to prevent infinite loop
              if (lines.length === 1) { break;

}
            }
            // keep track of the last random number
            lastRandomNumber =

randomNumber;

            // show the corresponding line
            $('#trivia').text(lines

[randomNumber]);
          }
      });
    });
默认情况下,该脚本将尝试找到位于C:\inetpub\wwwroot\Citrix\MainStoreWeb的trivia.txt。
接下来还需要添加以下显示页脚和随机消息:
$('#customBottom').html("");
然后,打开style.css文件(在同一目录),并添加以下内容:
#trivia {
  font: italic 14pt Arial;
}
最后一步是创建C:\inetpub\wwwroot\Citrix\MainStoreWeb\trivia.txt。
Message 1
Message 2
Message 3
Message 4
Message 5
Message 6
StoreFront每次刷新页面会显示不同的消息。

