说明
2018-02-26修改说明
- 由于
ionic3-jpush插件在设置别名时出错,所以修改ionic3-jpush插件为@jiguang-ionic/jpush插件
2017-11-14修改说明
2017-11-08官方phonegap插件jpush-phonegap-plugin更新了Api,请参见。
ionic3-jpush由 1.1.0 升级为 1.2.0 需要jpush-phonegap-plugin 版本 >= 3.2.4。-
以下Api参数发生变化
Alias API- setAlias
- deleteAlias
- getAlias
Tag API
- setTags
- addTags
- deleteTags
- cleanTags
- getAllTags
- checkTagBindState
参考
- 极光官网
- 极光开发者服务
- 极光文档
- jpush-phonegap-plugin
准备
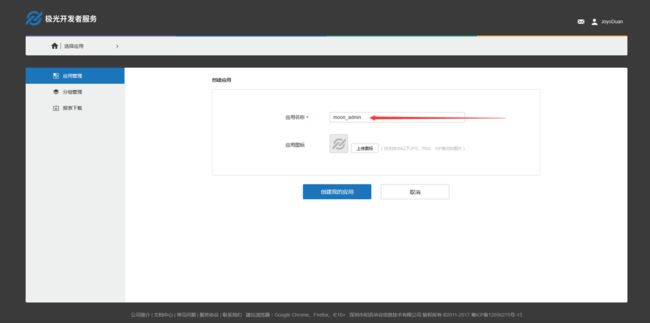
- 在极光开发者服务创建应用
如图:
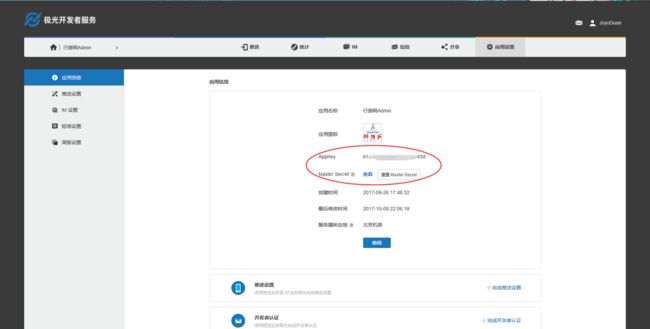
- 点击“创建我的应用”得到
Appkey和Master Secret(Appkey用于安装jpush插件,Master Secret用于后台服务器接入jpush服务)
如图:
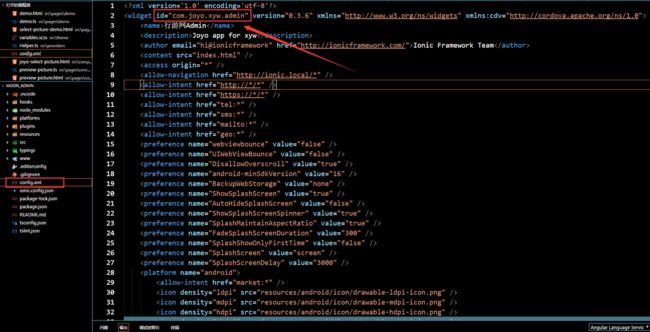
- 在ionic2项目中找到
config.xml文件中找到应用id(应用包名)
如图:
-
将“应用包名”填到“极光开发者服务-推送设置”的“应用包名”中
如图:
安装插件
- 安装客户端(ionic2项目中)
jpush-phonegap-plugin集成插件
ionic cordova plugin add jpush-phonegap-plugin --variable APP_KEY=极光官网得到的Appkey
ps:命令安装过程会安装jpush-phonegap-plugin和cordova-plugin-jcore两个插件 - 安装客户端(ionic2项目中)
@jiguang-ionic/jpush插件
npm install @jiguang-ionic/jpush --save
使用极光推送
-
客户端(ionic2/3应用)
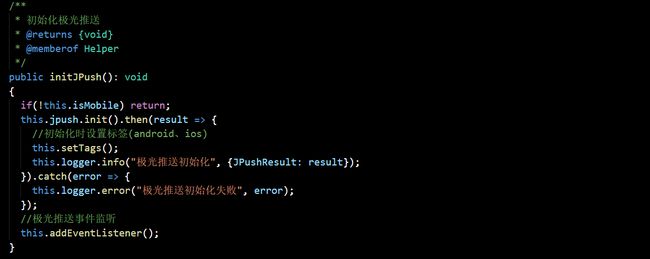
如图:
ps:在
app.component.ts的platform.ready().then({})
中调用this.jpushService.initJPush()初始化极光推送
如图:
我的JPushService.ts所有代码:
import { Injectable } from '@angular/core';
import { Events } from "ionic-angular";
import { JPush } from "@jiguang-ionic/jpush"; //npm install @jiguang-ionic/jpush --save

//自定义服务
import { NativeService } from "./NativeService";
import { Logger } from "./Logger";
import { Utils } from "./Utils";
import { NOTIFY_TYPE } from './Constants';
import { GlobalData } from "./GlobalData";

/**
 * JPush极光推送服务类
 * cordova plugin add jpush-phonegap-plugin --variable APP_KEY=your_jpush_appkey
 * npm install @jiguang-ionic/jpush --save
 * @export
 * @class JPushService
 * Add by JoyoDuan on 2017-10-27
 */
@Injectable()
export class JPushService {

  //是否是真机(手机)
  private isMobile: boolean;
  //是否是android
  private isAndroid: boolean;
  //是否是ios
  private isIos: boolean;

  constructor(private events: Events, private jpush: JPush, private nativeService: NativeService, private logger: Logger,
    private globalData: GlobalData){

    this.isMobile = this.nativeService.isMobile();
    this.isAndroid = this.nativeService.isAndroid();
    this.isIos = this.nativeService.isIos();

  }


  /**************************************** 极光推送 Start ************************************************ */
  /**
   * 初始化极光推送
   * @returns {void}
   * @memberof Helper
   */
  public initJPush(): void
  {
    if(!this.isMobile) return;
    this.jpush.init().then(result => {
      //初始化时设置标签(android、ios)
      // this.setTags();
      this.logger.info("极光推送初始化", {JPushResult: result});
    }).catch(error => {
      this.logger.error("极光推送初始化失败", error);
    });
    //极光推送事件监听
    this.addEventListener();
  }


  /**
   * 极光推送增加监听事件
   * @private
   * @memberof Helper
   */
  private addEventListener(): void
  {
    this.jpush.getUserNotificationSettings().then(result => {
      if(result == 0)
        this.logger.info("系统设置中已关闭应用推送", {result: result});
      if(result > 0)
        this.logger.info("系统设置中打开了应用推送", {result: result});
    });

    //点击通知进入应用程序时会触发的事件,点击通知进入程序
    document.addEventListener("jpush.openNotification", event => {

      //  window['plugins'].jPushPlugin.resetBadge();
      //map需要new Map,否则无法使用
      let content: Map = new Map();

      //android和ios的数据取法不一样,因此if else区分
      if(this.isAndroid)
      {
        content.set('title', event['title']); //推送消息的标题
        content.set('message', event['alert']); //推送消息的内容

        //推送消息的其它数据,为json键值对
        for(let key in event['extras'])
        {
          content.set(key, event['extras'][key]);
        }
      }
      else
      {
        content.set('title', event['aps'].title);
        content.set('message', event['aps'].alert);

        for(let key in event['extras'])
        {
          content.set(key, event['extras'][key]);
        }
      }
      //如果通知类型不存在,则设置默认值
      if( !content.has('type') || Utils.isEmptyStr(content.get('type')) ) content.set('type', NOTIFY_TYPE.MESSAGE);

      this.logger.info("jpush.openNotification", {content: content});

      this.events.publish("openNotification", content);
    }, false);

    //收到通知时会触发该事件,收到通知
    document.addEventListener("jpush.receiveNotification", event => {

      //map需要new Map,否则接收不到值
      let content: Map = new Map();
      //android和ios的数据取法不一样,因此if else区分
      if(this.isAndroid)
      {
        content.set('title', event['title']);
        content.set('message', event['alert']);
        for(let key in event['extras'])
        {
          content.set(key, event['extras'][key]);
        }
      }
      else
      {
        content.set('title', event['aps'].title); //推送消息的标题
        content.set('message', event['aps'].alert); //推送消息的内容

        //推送消息的其它数据,为json键值对
        for(let key in event['extras'])
        {
          content.set(key, event['extras'][key]);
        }
      }
      //如果通知类型不存在,则设置默认值:message
      if( !content.has('type') || Utils.isEmptyStr(content.get('type')) ) content.set('type', NOTIFY_TYPE.MESSAGE);

      this.logger.info("jpush.receiveNotification", {content: content});
      this.events.publish("receiveNotification", content);
    }, false);

    //收到自定义消息时触发该事件,收到自定义消息
    document.addEventListener("jpush.receiveMessage", event => {

      let content: Map = new Map();
      //android和ios的数据取法不一样,因此if else区分
      if(this.isAndroid)
      {
        content.set('message', event['message']);
        for(let key in event['extras'])
        {
          content.set(key, event['extras'][key]);
        }
      }
      else
      {
        content.set('message', event['content']); //推送消息的内容

        //推送消息的其它数据,为json键值对
        for(let key in event['extras'])
        {
          content.set(key, event['extras'][key]);
        }
      }
      //如果通知类型不存在,则设置默认值
      if( !content.has('type') || Utils.isEmptyStr(content.get('type')) ) content.set('type', NOTIFY_TYPE.MESSAGE);

      this.logger.info("jpush.receiveMessage", {content: content});
      this.events.publish("receiveMessage", content);
    }, false);

    //设置标签/别名时触发,设置标签/别名,2017年10月份后没有setTagsWithAlias方法
    // document.addEventListener("jpush.setTagsWithAlias", event => {
    //   let result = "result code:" + event['resultCode'] + " ";
    //   result += "tags:" + event['tags'] + " ";
    //   result += "alias:" + event['alias'] + " ";

    //   this.logger.info("onTagsWithAlias", {result: result});
    //   this.events.publish("setTagsWithAlias", result);
    // }, false);
  }


  //设置标签,可设置多个
  public setTags(tags: string[] = []): void
  {
    if(!this.isMobile) return;
    if(this.isAndroid)
      tags.push("android");
    if(this.isIos)
      tags.push("ios");
    this.jpush.setTags({sequence: Date.now(), tags: tags}).then((res) => {
      this.logger.info('极光推送设置标签setTags返回信息', {tags: tags, res: res});
    }).catch(err => {
      this.logger.error('极光推送设置标签setTags失败', err, {tags: tags});
    });
  }


  //设置别名,建议使用用户ID, userId唯一标识
  public setAlias(alias: string[] = []): void
  {
    if(!this.isMobile) return;

    alias.push(this.globalData.userId);   //用户Id作为别名

    this.jpush.setAlias({sequence: Date.now(), alias: alias}).then((res) => {
      this.logger.info('极光推送设置别名setAlias返回信息', {alias: alias, res: res});
    }).catch(err => {
      this.logger.error('极光推送设置别名setAlias失败', err, {alias: alias});
    });
  }


  //设置标签和别名,在ionioc3-jpush 1.2.0中删除了setTagsWithAlias()方法
  // public setTagsWithAlias(tags: string[] = [], alias: string[] = []): void
  // {
  //   if(!this.isMobile) return;
  //   if(this.isAndroid)
  //     tags.push("android");
  //   if(this.isIos)
  //     tags.push("ios");
  //   if(!alias || Utils.isEmptyStr(alias))
  //     alias = this.globalData.userId; //用户Id作为别名
  //   this.logger.info("极光推送设置标签和别名,setTagsWithAlias", {tags: tags, alias: alias});
  //   this.jpush.setTagsWithAlias(tags, alias);
  // }
  /**************************************** 极光推送 End ************************************************ */
}
- 服务端推送JPush服务(我这里用的是JAVA)
- 参考极光文档
- jar包方式,请到jpush-api-java-client下载jar包。
-
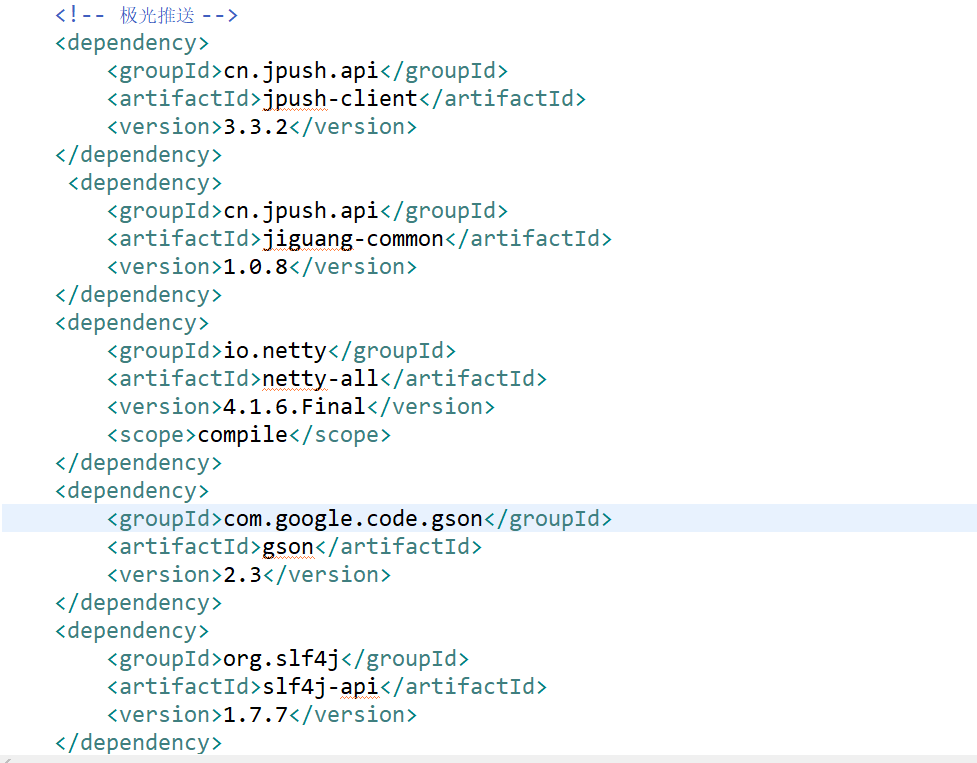
maven方式,请在maven的pom.xml文件中添加JPush的依赖包
如图:
代码:
        cn.jpush.api
        jpush-client
        3.3.2


        cn.jpush.api
        jiguang-common
        1.0.8


        io.netty
        netty-all
        4.1.6.Final
        compile


        com.google.code.gson
        gson
        2.3


        org.slf4j
        slf4j-api
        1.7.7
简单示例如图:
代码:
    @RequestMapping(value="notifyInfo")
    @ResponseBody
    public String notifyInfo(String type)
    {
        JPushClient jpushClient = new JPushClient(MASTER_SECRET, APP_KEY, null, ClientConfig.getInstance());

        Map extras = new HashMap();
        extras.put("type", type);
        PushPayload payload = PushPayload.newBuilder()
                    .setPlatform(Platform.android())
                    .setAudience(Audience.all())
                    .setNotification(Notification.android("JoyoDuan!这是JPush推送测试消息!", "消息通知", extras))
                    .build();
        try {
            PushResult result = jpushClient.sendPush(payload);
            System.out.println(extras);
        } catch (APIConnectionException e) {
            // TODO Auto-generated catch block
            e.printStackTrace();
        } catch (APIRequestException e) {
            // TODO Auto-generated catch block
            e.printStackTrace();
        }
        return "notifySuccess";
    }
该博文只是简单的写出了JPush的客户端和服务端的基本用法,具体的可以跟我相互交流。

