前言
本章是我学习前端单元测试的一个梳理和总结,进入主题:
1.什么是前端单元测试
测试是什么:为检测特定的目标是否符合标准而采用专用的工具或者方法进行验证,并最终得出特定的结果。
对于前端开发过程来说,这里的特定目标就是指我们写的代码,而工具就是我们需要用到的测试框架(库)、测试用例等。检测处的结果就是展示测试是否通过或者给出测试报告,这样才能方便问题的排查和后期的修正。
2.为什么要做单元测试
某些库可能会被多个地方使用,需要保证它未来能够保持稳定性,这样以后在修改代码的时候不用大量去回归原来的代码
3.一些概念
TDD:测试驱动
BDD:行为驱动
语法上的差异只是前者在做断言,后者在做描述
出现BDD的原因是希望项目经理能写,希望PD在写story的时候就把测试用例写了,所以它强调的是多角色在生产链路上的协同问题,所以用TDD型的语法测试用例和BDD型的语法测试用例没有什么差别。
4.一些例子
mocha:mocha是一个功能丰富的测试框架,也就是运行测试的工具,
travis-ci:持续集成工具,相当于一个docker容器,每次发布代码会把代码拉到docker容器,然后执行一些你想执行的东西
karma:浏览器测试框架,可以搭配mocha、should.js等一起使用,为了让测试用例可以跑在真实的浏览器中,并且同时可以跑多个浏览器,可以检测浏览器的兼容性。mac没有IE,可以使用https://www.browserling.com/
主要是在填karma.conf.js
karma的原理主要是把代码放过去以后如何把测试的结果同步给node,用websocket做通讯,联动浏览器和node。webpack的热重载也是用websocket做通讯
断言库:做单元测试是需要写测试脚本的,那么测试脚本就需要用到断言库
- node assert:http://nodejs.cn/api/assert.html 由于是node原生支持,debug能力会更强。
- should.js
- expect.js
- chai.js
mocha不限制使用哪一种断言库,它需要先引入断言库,如:
var should=require('should');
mocha的使用先推荐一下阮一峰老师的教程http://www.ruanyifeng.com/blog/2015/12/a-mocha-tutorial-of-examples.html
4.1mocha简单使用:
安装mocha:
npm install mocha -g
写一个测试模块:
// add.js
var add = require('./add.js');
var expect = require('chai').expect;

describe('加法函数的测试', function() {
  it('1 加 1 应该等于 2', function() {
    expect(add(1, 1)).to.be.equal(2);
  });
});
测试脚本:因为上面是add.js,所以通常,测试脚本与所要测试的源码脚本同名,但是后缀名为.test.js(表示测试)或者.spec.js(表示规格)。比如,add.js的测试脚本名字就是add.test.js
// add.test.js
var add = require('./add.js');
var expect = require('chai').expect;

describe('加法函数的测试', function() {
  it('1 加 1 应该等于 2', function() {
    expect(add(1, 1)).to.be.equal(2);
  });
});
控制台运行:
mocha
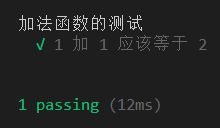
结果:
4.2 travis-ci简单使用:
我的代码:https://github.com/pidanooo/exercise2
项目目录:
测试模块:
// lib/add.js
function add(a, b) {
  // 实现该函数
  let arr, brr, plus = 0, final = [];
  const max = Math.max(a.length, b.length);
  arr = a.padStart(max, '0').split('');
  brr = b.padStart(max, '0').split('');

  for (let i = arr.length - 1; i >= 0; i--) {
    const num = (parseInt(arr[i]) + parseInt(brr[i]) + plus).toString();
    if (num > 9) {
      plus = 1
    } else {
      plus = 0;
    }
    const result = num.split('')[num.length - 1];
    final.unshift(result);
  }
  if (plus === 1) {
    final.unshift('1');
  }
  return final.join('');
}

module.exports = add
测试脚本:
// test/test.js
var add = require('../lib/add');
require('should');

describe('大数相加add方法', function () {
  it('字符串"42329"加上字符串"21532"等于"63861"', function () {
    add('42329', '21532')
      .should.equal('63861')
  })

  it('"843529812342341234"加上"236124361425345435"等于"1079654173767686669"', function () {
    add('843529812342341234', '236124361425345435')
      .should.equal('1079654173767686669')
  })
})
主要是配置.travis.yml文件
language: node_js
node_js:
  - "8"
  - "10"
before_install:
  - npm install -g mocha
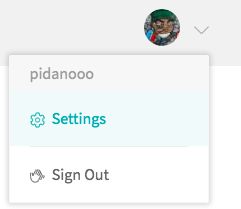
登录https://travis-ci.org/ 并登录自己的github账号,之后点击settings
然后可以看到自己的仓库,把你需要的打开,就能跑起来了:
点击项目看看跑的怎么样:
当出现绿色的passing的时候就说明跑成功了,以后修改了代码再来看一下,就能知道有没有问题;
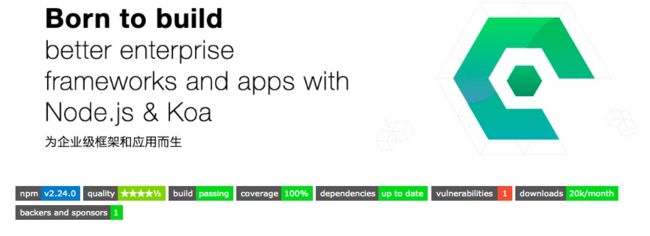
我们看一些开源的库都会有这个玩意儿,如egg.js:
4.3 karma简单使用
我的代码:https://github.com/pidanooo/exercise3
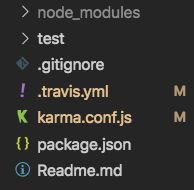
目录结构:
全局安装
npm install -g karma-cli
安装所有依赖
npm install
初始化一下
karma init
主要是配置karma.config.js
// Karma configuration
// Generated on Tue Aug 06 2019 22:07:56 GMT+0800 (GMT+08:00)

module.exports = function(config) {
  config.set({

    // base path that will be used to resolve all patterns (eg. files, exclude)
    basePath: '',


    // frameworks to use
    // available frameworks: https://npmjs.org/browse/keyword/karma-adapter
    frameworks: ['mocha'],  // 测试框架


    // list of files / patterns to load in the browser
    files: [
      'https://cdn.bootcss.com/jquery/2.2.4/jquery.js',
      'node_modules/should/should.js',
      'test/**.js'
    ],  // html会引用这些文件


    // list of files to exclude
    exclude: [
    ],


    // preprocess matching files before serving them to the browser
    // available preprocessors: https://npmjs.org/browse/keyword/karma-preprocessor
    preprocessors: {
    },


    // test results reporter to use
    // possible values: 'dots', 'progress'
    // available reporters: https://npmjs.org/browse/keyword/karma-reporter
    reporters: ['progress'],  // 控制台的报表


    // web server port
    port: 9876,


    // enable / disable colors in the output (reporters and logs)
    colors: true,


    // level of logging
    // possible values: config.LOG_DISABLE || config.LOG_ERROR || config.LOG_WARN || config.LOG_INFO || config.LOG_DEBUG
    logLevel: config.LOG_INFO,


    // enable / disable watching file and executing tests whenever any file changes
    autoWatch: true,  // 监听文件改变


    // start these browsers
    // available browser launchers: https://npmjs.org/browse/keyword/karma-launcher
    browsers: ['Chrome'],   // 选择的浏览器,要在package.json的devDependencies中添加对应的launcher  如 karma-firefox-launcher


    // Continuous Integration mode
    // if true, Karma captures browsers, runs the tests and exits
    singleRun: false,   // 是否只跑一遍,比如放在travis-ci的话就要设置为true,否则会把容器一直占用

    // Concurrency level
    // how many browser should be started simultaneous
    concurrency: Infinity
  })
}
运行一下:
karma start
reporters: ['progress'] 在控制台会输出:

会打开浏览器:
好嘞,我已经成功了!


