1.系统要求:JDK1.8+
2.解压Solr
3.以SolrCloud模式启动:
Unix或MacOS:bin/solr start -e cloud
Windows:bin\solr.cmd start -e cloud
4.进入目录-启动:solr.cmd start -e cloud
C:\soft\solr-7.1.0\bin>solr.cmd start -e cloud

Welcome to the SolrCloud example!

This interactive session will help you launch a SolrCloud cluster on your local workstation.
To begin, how many Solr nodes would you like to run in your local cluster? (specify 1-4 nodes) [2]:
5.选择在你的集群上运行几个solr节点(选择1-4,默认2个):直接回车
Ok, let's start up 2 Solr nodes for your example SolrCloud cluster.
Please enter the port for node1 [8983]:
6.为节点1选择端口(默认8983):直接回车
Please enter the port for node2 [7574]:
7.为节点2选择端口(默认7574):直接回车
Creating Solr home directory D:\solr-7.1.0\example\cloud\node1\solr
Cloning D:\solr-7.1.0\example\cloud\node1 into
   D:\solr-7.1.0\example\cloud\node2

Starting up Solr on port 8983 using command:
"D:\solr-7.1.0\bin\solr.cmd" start -cloud -p 8983 -s "D:\solr-7.1.0\example\clou
d\node1\solr"

Waiting up to 30 to see Solr running on port 8983
Started Solr server on port 8983. Happy searching!

Starting up Solr on port 7574 using command:
"D:\solr-7.1.0\bin\solr.cmd" start -cloud -p 7574 -s "D:\solr-7.1.0\example\clou
d\node2\solr" -z localhost:9983

Waiting up to 30 to see Solr running on port 7574
INFO  - 2017-11-03 09:37:54.245; org.apache.solr.client.solrj.impl.ZkClientClust
erStateProvider; Cluster at localhost:9983 ready

Now let's create a new collection for indexing documents in your 2-node cluster.

Please provide a name for your new collection: [gettingstarted]
8.最后一句话:系统提示你创建一个用于索引数据的集合。因为Solr提供一些样本数据,我们不妨与教程一致,在控制台输入techproducts 然后回车:
How many shards would you like to split techproducts into? [2]
9.让你选择想分割到两个节点上的碎片数量(默认为2),就是均匀分割到两个节点上。【我们目前有两个节点,所以2就是平均分。如果我们建立三个节点,那么想要平均分就要输入3】。直接回车:
How many replicas per shard would you like to create? [2]
10.让你选择为每个碎片创建多少副本?【副本是用来故障切换的】这里默认2,回车:
Please choose a configuration for the techproducts collection, available options
 are:
_default or sample_techproducts_configs [_default]
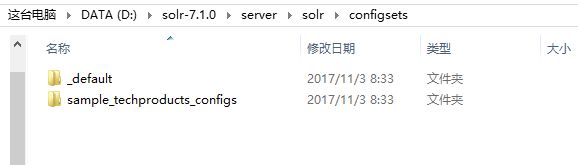
11.让你选择一个配置,在本地可以找到这两个目录:
813478-20171103102132857-1264377659.png
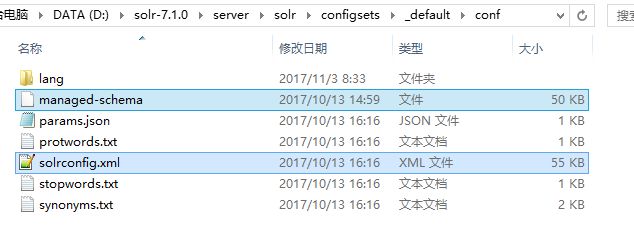
12.Solr有两个开箱即用的配置文件样本集,称为“configSet”。而索引集合必须有一个“ConfigSet”。它包括两个主要配置文件:
813478-20171103102648748-634026861.png
13.sample_techproducts_configs ,它包括了我们定义的索引集合名称:techproducts。这个config包含了我们需要的示例数据。所以在控制台上输入sample_techproducts_configs并回车【可能会慢一点,耐心】:
sample_techproducts_configs
Created collection 'techproducts' with 2 shard(s), 2 replica(s) with config-set
'techproducts'

Enabling auto soft-commits with maxTime 3 secs using the Config API

POSTing request to Config API: http://localhost:8983/solr/techproducts/config
{"set-property":{"updateHandler.autoSoftCommit.maxTime":"3000"}}
Successfully set-property updateHandler.autoSoftCommit.maxTime to 3000


SolrCloud example running, please visit: http://localhost:8983/solr


D:\solr-7.1.0>
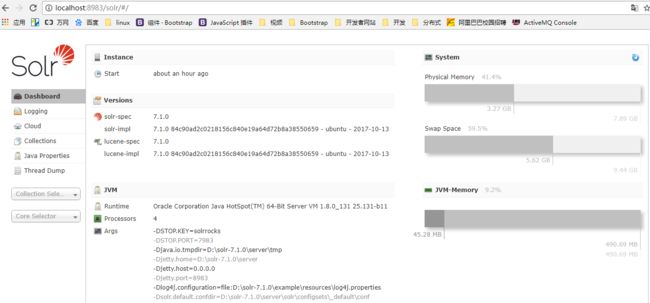
14.最后访问:http://localhost:8983/solr
813478-20171103103423263-846218571.png
15.Solr现在将运行两个“节点”,一个在端口7574上,一个在端口8983上。一个集合techproducts,两个分片集合,每个都有两个副本。【点击Cloud可见】:

813478-20171103103618638-406557973.png
16.到此Solr已经启动啦,可是还没有数据,下面来完成:
Linux:solr-7.1.0:$ bin/post -c techproducts example/exampledocs/*

Windows:D:\solr-7.1.0> java -jar -Dc=techproducts -Dauto example\exampledocs\post.jar example\exampledocs\*
17.出现以下结果:
D:\solr-7.1.0>java -jar -Dc=techproducts -Dauto example\exampledocs\post.jar exa
mple\exampledocs\*
SimplePostTool version 5.0.0
Posting files to [base] url http://localhost:8983/solr/techproducts/update...
Entering auto mode. File endings considered are xml,json,jsonl,csv,pdf,doc,docx,
ppt,pptx,xls,xlsx,odt,odp,ods,ott,otp,ots,rtf,htm,html,txt,log
POSTing file books.csv (text/csv) to [base]
POSTing file books.json (application/json) to [base]/json/docs
POSTing file gb18030-example.xml (application/xml) to [base]
POSTing file hd.xml (application/xml) to [base]
POSTing file ipod_other.xml (application/xml) to [base]
POSTing file ipod_video.xml (application/xml) to [base]
POSTing file manufacturers.xml (application/xml) to [base]
POSTing file mem.xml (application/xml) to [base]
POSTing file money.xml (application/xml) to [base]
POSTing file monitor.xml (application/xml) to [base]
POSTing file monitor2.xml (application/xml) to [base]
POSTing file more_books.jsonl (application/json) to [base]/json/docs
POSTing file mp500.xml (application/xml) to [base]
POSTing file post.jar (application/octet-stream) to [base]/extract
POSTing file sample.html (text/html) to [base]/extract
POSTing file sd500.xml (application/xml) to [base]
POSTing file solr-word.pdf (application/pdf) to [base]/extract
POSTing file solr.xml (application/xml) to [base]
POSTing file test_utf8.sh (application/octet-stream) to [base]/extract
POSTing file utf8-example.xml (application/xml) to [base]
POSTing file vidcard.xml (application/xml) to [base]
21 files indexed.
COMMITting Solr index changes to http://localhost:8983/solr/techproducts/update.
..
Time spent: 0:00:06.768

D:\solr-7.1.0>
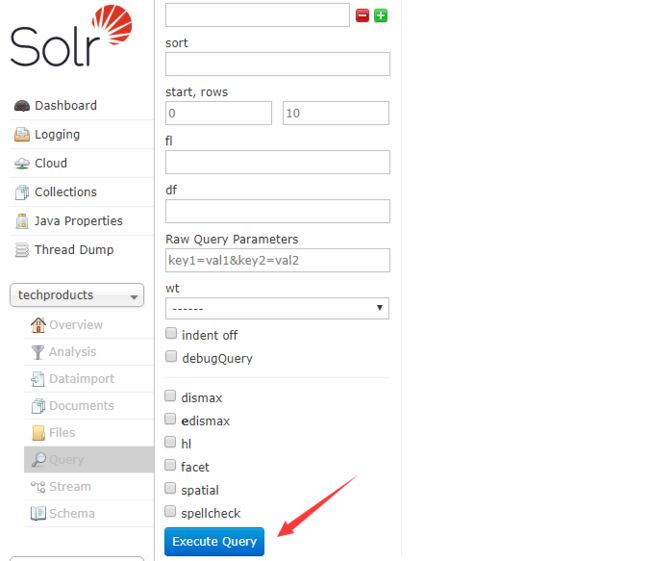
18.基本搜索, 访问:http://localhost:8983/solr/#/techproducts/query
813478-20171103104625435-373251698.png
19.点击Execute Query。开始查询,你会发现右边有好几条JSON数据。准确来说:是十条。

813478-20171103104737810-1830197033.png
20.右上角是发送的URL,你可以点击它,点击试试看
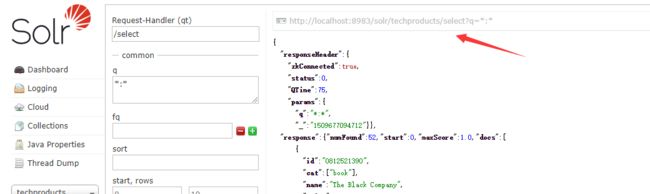
813478-20171103104959904-1691871248.png
QQ截图20180126141730.png
21.查询参数解释:

813478-20171103110356013-539080167.png
22.修改q为foundation,结果显示有四个命中:

813478-20171103110542732-1147606283.png
23.将id放入fl中,再次查询,你会发现显示的字段只有id:

813478-20171103110834873-595896972.png
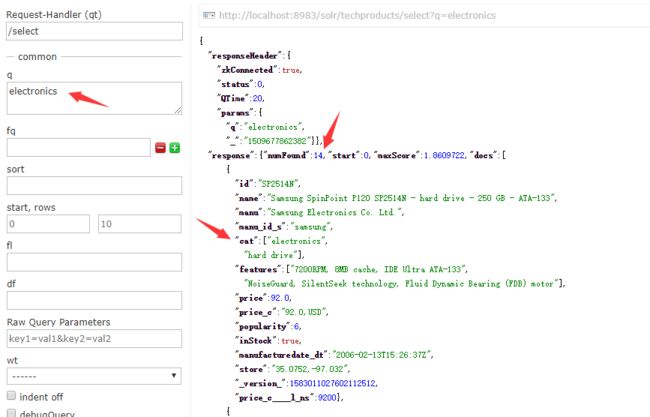
24.我们再改变p为electronics,有14个结果:
813478-20171103113148560-623714229.png
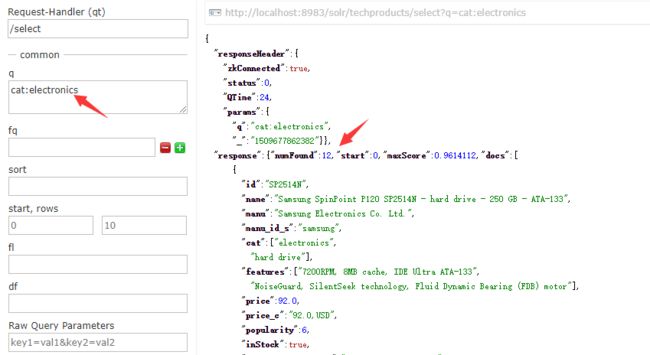
25.这种查询是在所有索引字段查询包括electronics字段的文档,如果想更精确一点,我们看到有一个cat字段,那么将p改为cat:electronics,意思为仅仅cat字段中包含electronics信息的数据:
813478-20171103113356310-803057048.png
26.下面进行短语搜索,短语搜索必需加上双引号。
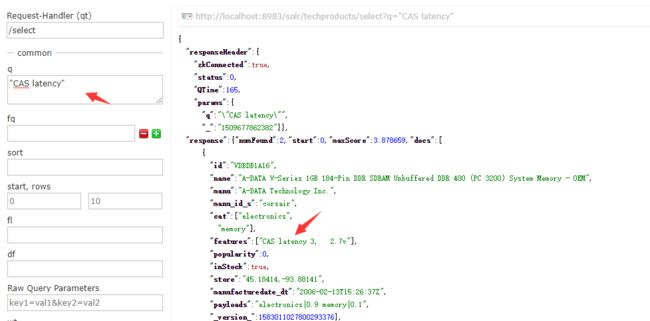
813478-20171103113800045-118772672.png
27.最后,如果你希望删除此集合:
D:\solr-7.1.0> bin\solr delete -c techproducts
注意:Linux的路径为/
28.停止启动的Solr:
D:\solr-7.1.0> bin\solr stop -all