Mycat快速入门(一): Mycat简介
分享一个朋友的人工智能教程。比较通俗易懂,风趣幽默,感兴趣的朋友可以去看看。
一:Mycat简介
Mycat是数据库分库分表的中间件,Mycat使用最多的两个功能是:读写分离和分库分表功能,支持全局表和E-R关系(这两个比较实用)。
Mycat官网: http://www.mycat.io/
Mycat权威指南:http://www.mycat.io/document/mycat-definitive-guide.pdf
Mycat实体书籍:《分布式数据库架构及企业实践——基于Mycat中间件》 ISBN:978-7-121-30287-9
二:Mycat安装
官网有Mycat的下载地址,下载最新的release版本即可,目前最新的是1.6-RELEASE,根据自己的操作系统下载安装文件,下载解压就算安装完成了,不需要别的操作。
- bin : 二进制文件,用于管理mycat,如启动start、重启restart、停止stop、查看状态status等
- conf : 配置文件
- server.xml 用于配置Mycat的用户名、密码、逻辑数据库名、服务端口、读写权限等
- schema.xml 最常用的配置文件,用于配置物理数据库信息(ip、port、username、password、database)、表的配置(表所在的数据节点、表的分片规则、主键是否自增等)、读写分离配置等
- rule.xml 分片规则配置,mycat提供了十多种分片规则,也可以自定义分片规则
- log4j2.xml 配置mycat的日志信息,开发的时候建议设置成debug级别
- lib : Mycat是Java语言开发的,这是引用的jar包
- logs: Mycat打印的日志文件
- console.log mycat启动时的日志,启动成功一般会有有日志记录,如果没有日志记录可以通过mycat status命令来查看是否启动成功,如果启动失败可以去mycat.log中查看错误日志
- mycat.log mycat执行sql对应的日志,可以通过该日志知道mycat是怎么样执行sql的,一些错误日志会输出到该文件中,是一个很重要的日志文件
- wrapper.log 错误日志也可能在这个日志文件中
- switch.log
三:mycat命令
# 前端启动 打印一些信息 通过ctrl+c来停止
~ bin/mycat console
# 后台启动 几乎不打印日志
~ bin/mycat start
# 打印的信息比较多
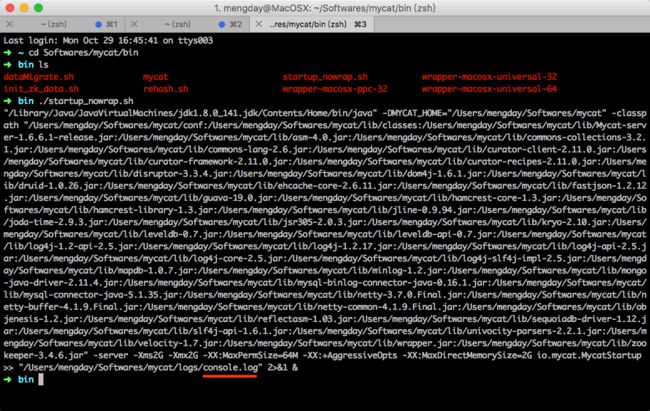
~ ./bin/startup_nowrap.sh
# 重新启动
~ bin/mycat restart

# 查看mycat是否正在运行
~ bin/mycat status
# 停止mycat
~ bin/mycat stop

# 有时候启动失败是端口占用了,找到它,杀死它,重启启动
~ lsof -i:8066
~ kill -9 PID
~ bin/mycat start
四:Mycat的配置文件
① server.xml
<mycat:server xmlns:mycat="http://io.mycat/">
        <system>
                <property name="defaultSqlParser">druidparserproperty>
                <property name="mutiNodeLimitType">1property>

                <property name="serverPort">8066property>

                <property name="managerPort">9066property>
        system>


        <user name="root">
                <property name="password">root123property>
                <property name="schemas">testdbproperty>
        user>


        <user name="guest">
                <property name="password">guest123property>
                <property name="schemas">testdbproperty>
                <property name="readOnly">trueproperty>
        user>
mycat:server>
server.xml用于配置mycat的服务参数,如mycat的服务端口号8066,mycat的管理端口号9066,连接mycat的用户名user.name、密码user.pasword、要连接的数据库user.schemas(多个数据库用逗号分隔,如db1,db2), user节点可以配置多个
② schema.xml
<mycat:schema xmlns:mycat="http://io.mycat/">
	<schema name="TESTDB" checkSQLschema="false" sqlMaxLimit="100">
		<table name="hotnews" primaryKey="ID" autoIncrement="true" dataNode="dn1,dn2,dn3" rule="mod-long" />
		<table name="company" primaryKey="ID" type="global" dataNode="dn1,dn2,dn3" />

		<table name="customer" primaryKey="ID" dataNode="dn1,dn2" rule="sharding-by-intfile">
			<childTable name="orders" primaryKey="ID" joinKey="customer_id" parentKey="id">
				<childTable name="order_items" joinKey="order_id" parentKey="id" />
			childTable>
			<childTable name="customer_addr" primaryKey="ID" joinKey="customer_id" parentKey="id" />
		table>
	schema>

	<dataNode name="dn1" dataHost="localhost1" database="db1" />
	<dataNode name="dn2" dataHost="localhost1" database="db2" />
	<dataNode name="dn3" dataHost="localhost1" database="db3" />

	<dataHost name="localhost1" maxCon="1000" minCon="10" balance="0"
			  writeType="0" dbType="mysql" dbDriver="native" switchType="1"  slaveThreshold="100">
		<heartbeat>select user()heartbeat>


		<writeHost host="hostM1" url="localhost:3306" user="root" password="123456">

			<readHost host="hostS2" url="192.168.1.200:3306" user="root" password="xxx" />
		writeHost>
		<writeHost host="hostS1" url="localhost:3316" user="root" password="123456" />

	dataHost>

mycat:schema>
1. schema
schema标签用于定义MyCat实例中的逻辑库,MyCat可以有多个逻辑库(即可以配置多个schema标签),每个逻辑库都有自己的相关配置。可以使用schema标签来划分这些不同的逻辑库
| 属性名 | 值 |
|---|---|
| name | 逻辑数据库名称,和server.xml中的user节点下的schemas节点的值保持相同(当schemas只有一个数据库时) |
| checkSQLschema | 是否要检查sql语句中是否包含schema,次schema的值就是schema节点中的name属性,如当执行select * from TESTDB.表名;是否要将逻辑数据库“TESTDB.”去掉,一般情况下写SQL也不带“TESTDB.”,所以一般情况下也不需要检查,所以一般情况下都会设置为false |
| sqlMaxLimit | 当sql语句中没有使用limit子句mycat会自动加上,防止返回数据过多影响性能,如果显式使用limit子句了mycat就不会再自动加了 |
2. table
| 属性名 | 值 |
|---|---|
| name | 表名 |
| primaryKey | 主键字段 |
| autoIncrement | 主键是否自增,默认是false,如果要使用这个功能最好配合使用数据库模式的全局序列 |
| dataNode | 数据节点,一个数据节点对应一个物理数据库,值为dataNode节点中的name属性值,可以配置多个值,多个值使用逗号分隔 |
| type | 一般值为global表示全局表,全局表的意思是每个物理数据库都会存在这个表,而且每个物理数据库上的这个物理表的数据都完全一致,这样当关联全局表时就不需要跨库关联 |
| rule | 分片规则,如果需要分表就需要指定使用哪个分片规则,分片规则在rule.xml中配置 |
3. childTable
子表,具有E-R关系的表,即具有父子关系的表或者是一对多关系的表,例如订单表tbl_order和订单项表tbl_order_item, 子表中可以嵌套子表
| 属性名 | 值 |
|---|---|
| joinKey | 外键字段,例如tbl_order_item表中的字段order_id |
| parentKey | 外键实际指向的表对应的字段,例如tbl_order_item.order_id实际是指向的tbl_order.id |
4. dataNode
数据节点
| 属性名 | 值 |
|---|---|
| name | 名称,可以在table节点中dataNode属性来引用,dataHost属性为dataHost节点中的name值 |
| database | 真实的物理数据库名称 |
5. dataHost
| 属性名 | 值 |
|---|---|
| name | 名称,可以在dataNode节点中的dataHost中引用该名称 |
| maxCon | 指定每个读写实例连接池的最大连接 |
| minCon | 指定每个读写实例连接池的最小连接,初始化连接池的大小 |
| balance | 负载均衡类型,很重要的一个属性, 一般读写分离要设置成1。 0: 不开启读写分离机制,所有读操作都发送到当前可用的writeHost上 1: 全部的 readHost 与 stand by writeHost 参与 select 语句的负载均衡,简单的说,当双主双从模式(M1->S1,M2->S2,并且 M1 与 M2 互为主备),正常情况下,M2,S1,S2 都参与 select 语句的负载 均衡。 2: 所有读操作都随机的在 writeHost、readhost 上分发 3: 所有读请求随机的分发到 wiriterHost 对应的 readhost 执行,writerHost 不负担读压力 |
| writeType | 写操作的负载均衡,一般设置为0,表示所有写操作发送到配置的第一个writeHost,第一个挂了切到还生存的第二个writeHost,重新启动后已切换后的为准,切换记录在配置文件中:dnindex.properties |
| switchType | 主从切换类型 1:默认值,表示自动切换 2: 基于MySQL主从同步的状态决定是否切换(心跳语句为 show slave status) ,一般用于读写分离 3:基于 MySQL galary cluster 的切换机制(适合集群) 心跳语句为 show status like ‘wsrep%’ |
| dbType | 数据库的类型,有mysql、oracle、mongodb、spark等 |
| dbDriver | 一般设置为native |
6. heartbeat
心跳语句
- select user()
- show slave status
- show status like ‘wsrep%’
7. writeHost和readHost
writeHost:写节点
readHost:读节点,读写分离时一般写走writeHost读走readHost
| 属性名 | 值 |
|---|---|
| host | 主机名,主一般使用Master中的M后缀来结尾,M后面使用1、2、3等序号标识 |
| url | 配置实际物理数据库的ip和端口,例如url="127.0.0.1:3306" |
| user | 物理数据库的用户名 |
| password | 物理数据库的密码 |
③ rule.xml
<mycat:rule xmlns:mycat="http://io.mycat/">
	<tableRule name="rule1">
		<rule>
			<columns>idcolumns>
			<algorithm>func1algorithm>
		rule>
	tableRule>

	<tableRule name="rule2">
		<rule>
			<columns>user_idcolumns>
			<algorithm>func1algorithm>
		rule>
	tableRule>

	<tableRule name="sharding-by-intfile">
		<rule>
			<columns>sharding_idcolumns>
			<algorithm>hash-intalgorithm>
		rule>
	tableRule>
	<tableRule name="auto-sharding-long">
		<rule>
			<columns>idcolumns>
			<algorithm>rang-longalgorithm>
		rule>
	tableRule>
	<tableRule name="mod-long">
		<rule>
			<columns>idcolumns>
			<algorithm>mod-longalgorithm>
		rule>
	tableRule>
	<tableRule name="sharding-by-murmur">
		<rule>
			<columns>idcolumns>
			<algorithm>murmuralgorithm>
		rule>
	tableRule>
	<tableRule name="crc32slot">
		<rule>
			<columns>idcolumns>
			<algorithm>crc32slotalgorithm>
		rule>
	tableRule>
	<tableRule name="sharding-by-month">
		<rule>
			<columns>create_timecolumns>
			<algorithm>partbymonthalgorithm>
		rule>
	tableRule>
	<tableRule name="latest-month-calldate">
		<rule>
			<columns>calldatecolumns>
			<algorithm>latestMonthalgorithm>
		rule>
	tableRule>

	<tableRule name="auto-sharding-rang-mod">
		<rule>
			<columns>idcolumns>
			<algorithm>rang-modalgorithm>
		rule>
	tableRule>

	<tableRule name="jch">
		<rule>
			<columns>idcolumns>
			<algorithm>jump-consistent-hashalgorithm>
		rule>
	tableRule>

	<function name="murmur" class="io.mycat.route.function.PartitionByMurmurHash">
		<property name="seed">0property>
		<property name="count">2property>
		<property name="virtualBucketTimes">160property>


	function>

	<function name="crc32slot" class="io.mycat.route.function.PartitionByCRC32PreSlot">
	function>
	<function name="hash-int" class="io.mycat.route.function.PartitionByFileMap">
		<property name="mapFile">partition-hash-int.txtproperty>
	function>
	<function name="rang-long" class="io.mycat.route.function.AutoPartitionByLong">
		<property name="mapFile">autopartition-long.txtproperty>
	function>
	<function name="mod-long" class="io.mycat.route.function.PartitionByMod">

		<property name="count">3property>
	function>

	<function name="func1" class="io.mycat.route.function.PartitionByLong">
		<property name="partitionCount">8property>
		<property name="partitionLength">128property>
	function>
	<function name="latestMonth" class="io.mycat.route.function.LatestMonthPartion">
		<property name="splitOneDay">24property>
	function>
	<function name="partbymonth" class="io.mycat.route.function.PartitionByMonth">
		<property name="dateFormat">yyyy-MM-ddproperty>
		<property name="sBeginDate">2015-01-01property>
	function>

	<function name="rang-mod" class="io.mycat.route.function.PartitionByRangeMod">
        	<property name="mapFile">partition-range-mod.txtproperty>
	function>

	<function name="jump-consistent-hash" class="io.mycat.route.function.PartitionByJumpConsistentHash">
		<property name="totalBuckets">3property>
	function>
mycat:rule>
以mod-long举例说明节点的配置
<tableRule name="mod-long">
	<rule>
		<columns>idcolumns>
		<algorithm>mod-longalgorithm>
	rule>
tableRule>


<function name="mod-long" class="io.mycat.route.function.PartitionByMod">

	<property name="count">3property>
function>
分片规则Mycat提供十多种,按照以上格式,也可以自定义分片规则
④ log4j2.xml
<Configuration status="WARN">
    <Appenders>
        <Console name="Console" target="SYSTEM_OUT">
            <PatternLayout pattern="%d [%-5p][%t] %m %throwable{full} (%C:%F:%L) %n"/>
        Console>

        <RollingFile name="RollingFile" fileName="${sys:MYCAT_HOME}/logs/mycat.log"
                     filePattern="${sys:MYCAT_HOME}/logs/$${date:yyyy-MM}/mycat-%d{MM-dd}-%i.log.gz">
            <PatternLayout>
                <Pattern>%d{yyyy-MM-dd HH:mm:ss.SSS} %5p [%t] (%l) - %m%nPattern>
            PatternLayout>
            <Policies>
                <OnStartupTriggeringPolicy/>
                <SizeBasedTriggeringPolicy size="250 MB"/>
                <TimeBasedTriggeringPolicy/>
            Policies>
        RollingFile>
    Appenders>
    <Loggers>


    <asyncRoot level="debug" includeLocation="true">

        <AppenderRef ref="RollingFile"/>
    asyncRoot>
    Loggers>
Configuration>
log4j2.xml配置文件一般不怎么修改,一般修改一下日志级别level, 开发时设置成debug便于调试发现问题,生成环境下建议将级别调整为 info/ware。
- mycat/logs/warapper.log: 启动时候如果系统环境配置错误或缺少配置时,导致 Mycat 无法启 动,可以通过查看 warrpper.log 查看具体错误原因。
- mycat/logs/console.log 记录启动的日志
- mycat/logs/mycat.log 通过该日志可以看到Mycat整个执行的计划。其中最重要的是sql路由的计划,可以看到 sql 具体被分配到那个分片执行,一般执行结果不对,可以分析该日志文件获知mycat是具体怎么执行的。mycat日志也记录SQL语法等错误,当发现SQL执行有异常的时候,大多数情况下,都可以通过分析 Mycat 日志来定位错误
分享一个朋友的人工智能教程。比较通俗易懂,风趣幽默,感兴趣的朋友可以去看看。


