kubernetes api微服务开发--jupyter模型创建
目标:完成模型开发功能中的Model创建,返回jupyter notebook访问信息
环境:IntelliJ IDEA
步骤:概述->Replication Controller功能修改->TensorFlow Jupyter Notebook应用创建->获取notebook token->访问jupyter notebook并测试
1.概述
人工智能服务中模型开发功能的实现主要参考金山云方案,提供一个tensorflow容器,并通过jupyter notebook编写代码,实现模型开发。
本文使用容器镜像为jupyter/tensorflow-notebook
2.Replication Controller功能修改
在原有rc创建代码的基础上,增加cpu与memory设定的功能:
//创建Replication Controller
public static ReplicationController createRC(String rcName, String nsName, String lbkey, String lbvalue,
                                             int replicas, String ctName, String imName, int cnPort,
                                             String cpuRes, String memRes, String cpuLim, String memLim){
    Quantity cpuQn = new QuantityBuilder()
            .withAmount(cpuRes)
            .build();
    Quantity memQn = new QuantityBuilder()
            .withAmount(memRes)
            .build();
    Quantity cpuliQn = new QuantityBuilder()
            .withAmount(cpuLim)
            .build();
    Quantity memliQn = new QuantityBuilder()
            .withAmount(memLim)
            .build();
    ReplicationController rc = new ReplicationControllerBuilder()
            .withApiVersion("v1")
            .withKind("ReplicationController")
            .withNewMetadata()
                .withName(rcName)
                .withNamespace(nsName)
                .addToLabels(lbkey, lbvalue)
            .endMetadata()
            .withNewSpec()
                .withReplicas(replicas)
                .addToSelector(lbkey, lbvalue)
                .withNewTemplate()
                    .withNewMetadata()
                        .addToLabels(lbkey, lbvalue)
                    .endMetadata()
                    .withNewSpec()
                        .addNewContainer()
                            .withName(ctName)
                            .withImage(imName)
                            .addNewPort()
                                .withContainerPort(cnPort)
                            .endPort()
                            .withNewResources()
                                .addToRequests("cpu", cpuQn)
                                .addToRequests("memory", memQn)
                                .addToLimits("cpu", cpuliQn)
                                .addToLimits("memory", memliQn)
                            .endResources()
                        .endContainer()
                    .endSpec()
                .endTemplate()
            .endSpec()
            .build();
    try {
        kubernetesClient.replicationControllers().create(rc);
        System.out.println("replication controller create success");
    }catch (Exception e) {
        System.out.println("replication controller create failed");
    }
    return rc;
}
其中request为初始运行时占用的资源值,limit为最大能使用的资源值。
将新增参数加入DevK8sApiController.java
//k8s rc create
@ApiOperation(value = "CreateReplicationController", notes = "CreateReplicationController")
@RequestMapping(value = "/createrc", method = RequestMethod.POST)
public ReplicationController createk8src(@RequestParam(value = "ReplicationControllerName") String rcName,
                                         @RequestParam(value = "NamespaceName") String nsName,
                                         @RequestParam(value = "LabelKey") String lbkey,
                                         @RequestParam(value = "LabelValue") String lbvalue,
                                         @RequestParam(value = "Replicas") int replicas,
                                         @RequestParam(value = "ContainerName") String ctName,
                                         @RequestParam(value = "ImageName") String imName,
                                         @RequestParam(value = "ContainerPort") int cnPort,
                                         @RequestParam(value = "CpuR") String cpurName,
                                         @RequestParam(value = "MemR") String memrName,
                                         @RequestParam(value = "CpuL") String cpulName,
                                         @RequestParam(value = "MemL") String memlName){
    return devK8sApiService.createRC(rcName, nsName, lbkey, lbvalue, replicas, ctName,imName, cnPort, cpurName, memrName, cpulName, memlName);
}
3.TensorFlow Jupyter Notebook应用创建
修改完成后gradle build重新构建项目,启动应用,访问swagger-ui。
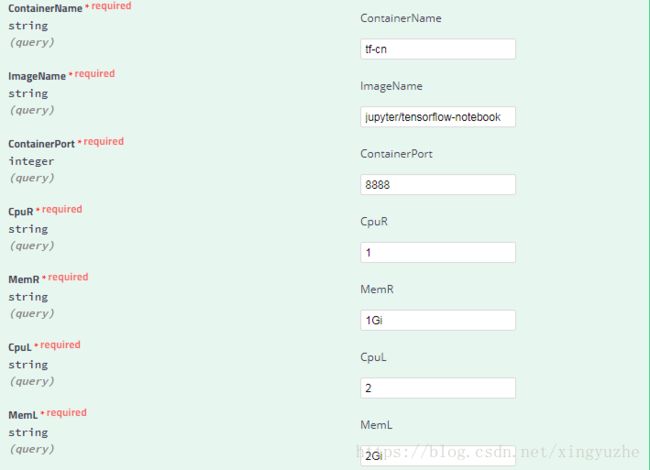
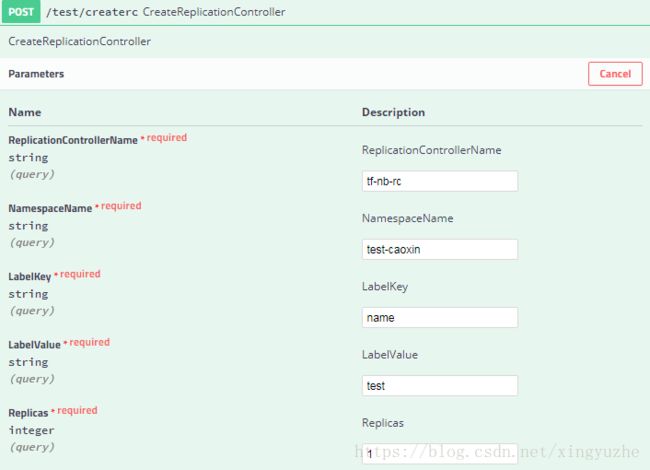
(1)创建replication controller
传入参数:
查看返回结果:
在master节点上查看rc信息:
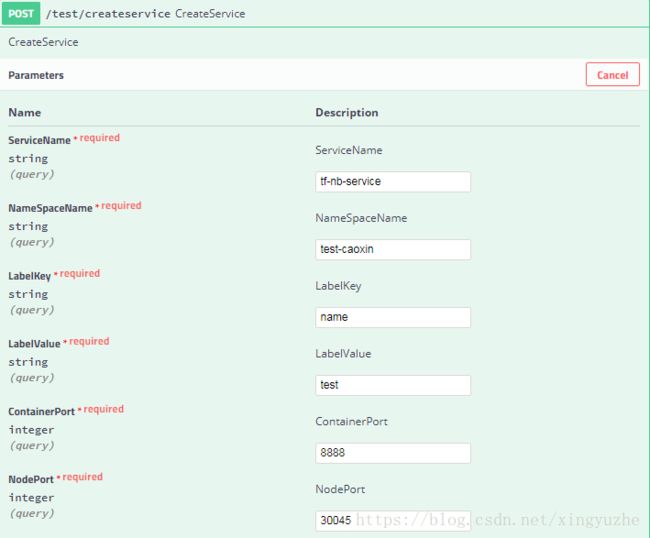
(2)创建service
传入参数:
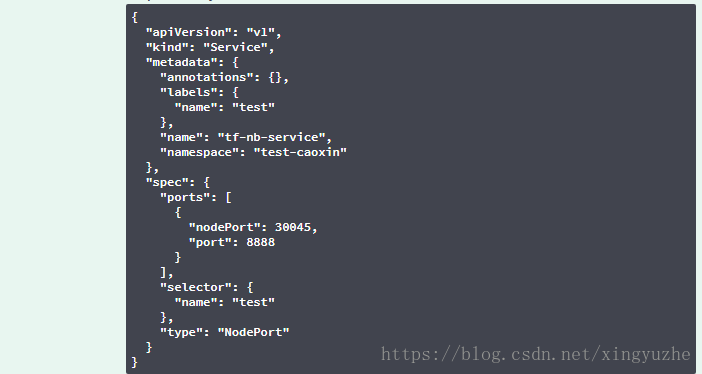
返回结果:
在master节点上查看service信息:
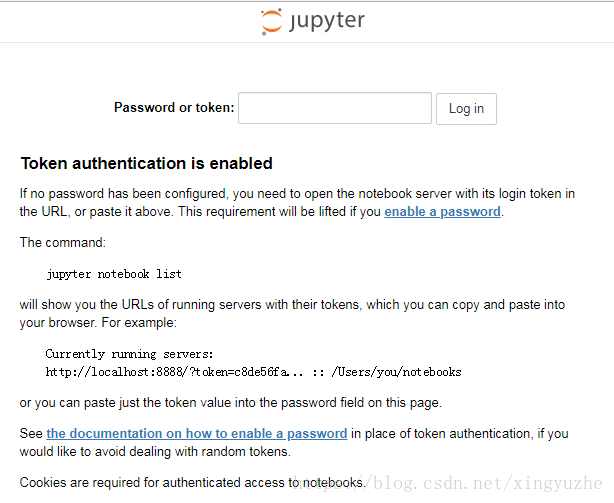
访问:http://NodeIP:30045
需要获取notebook的token才能访问。
4.获取notebook token
编写token获取方法:
//token查询
public static Map readToken(String nsName, String rcName, String lbKey, String lbValue){
    Map resourceInfo = new HashMap();

    try {
        //ExecWatch tokenResult = kubernetesClient.pods().inNamespace(nsName).withName(rcName).exec("jupyter notebook list");
        PodList podList = kubernetesClient.pods().inNamespace(nsName).withLabel(lbKey, lbValue).list();
        for (Pod pod:podList.getItems()){
            String podName = pod.getMetadata().getName();
            String podLog = kubernetesClient.pods().inNamespace(nsName).withName(podName).getLog();
            resourceInfo.put(podName+"token: ", podLog);
        }
        //resourceInfo.put("token: ", tokenResult.toString());
        System.out.println("model token get success");
    }catch (Exception e){
        System.out.println("model token get failed");
    }
    return resourceInfo;
}
因执行exec会有认证的问题,此处使用getLog的方法获取启动日志,在日志中查询token。
同时修改DevK8sApiController.java
//token read
@ApiOperation(value = "ReadToken", notes = "ReadToken")
@RequestMapping(value = "/readtoken", method = RequestMethod.GET)
public Map readJNtoken(@RequestParam(value = "NamespaceName") String nsName,
                                        @RequestParam(value = "ReplicationControllerName") String rcName,
                                       @RequestParam(value = "LabelKey") String lbkey,
                                       @RequestParam(value = "LabelValue") String lbvalue){
    return devK8sApiService.readToken(nsName, rcName, lbkey, lbvalue);
}
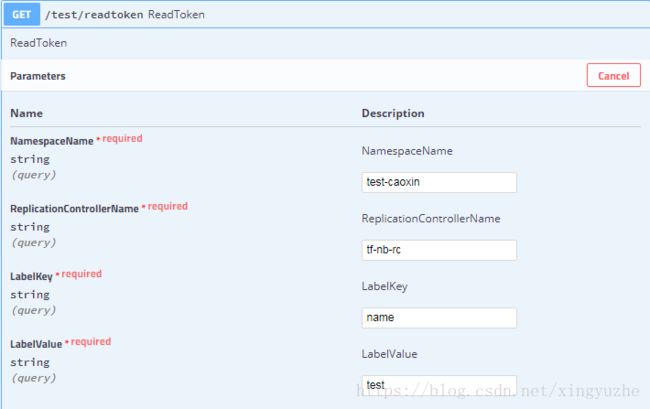
因为rc创建的pod都会随机生成5位字符串,所以通过Label查询pod名称,并获取日志。
传入参数:
结果查询:

token信息:token=1e90f0ce7fcc6f7a5805778da7be6c122e92a6adbeec9aba
5.访问jupyter notebook并测试
输入上一节中的token并登录:

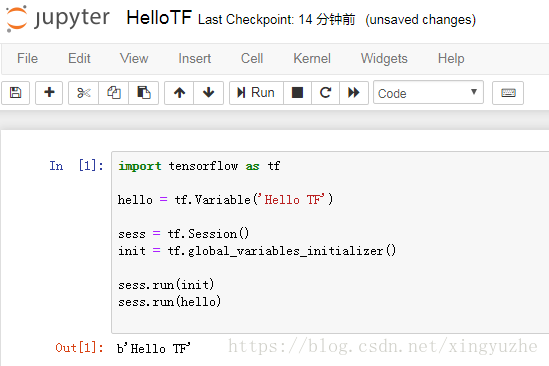
编写tensorflow测试程序:
import tensorflow as tf

hello = tf.Variable('Hello TF')

sess = tf.Session()
init = tf.global_variables_initializer()

sess.run(init)
sess.run(hello)以上,开发模型创建完成。
