一文看懂mybatis底层运行原理解析
友情提示 : 本文的重点是解析mybatis执行一次sql 的流程 ,过程中思维比较跳跃,觉得比较难得可以往下查看总结中源码流程
这篇文章通过一个insert语句来解析mybatis执行一次sql的运行流程。背景介绍,源码来自于 mybatis-3.0.5.jar,
mybatis-config.xml:
mapper对应的接口:
public interface DataDao {

    public  int mysqlInsert(Map map) throws Exception;
}
接口对应的 DataDao.xml:
		insert into ${tableName}
		(${columns})
		values
		(${colValues})
首先我们会从mybatis的入口加载的地方来进行解读,先看一段mybatis的插入代码:
/**
     * 传入map参数,执行插入
     * @param map
     * @return
     */
    public static int mysqlInsert(Map map) throws Exception {
        SqlSession session = null;
        int index=0;
        try {
            session = SessionFactory.getSession();
            DataDao dataDao = session.getMapper(DataDao.class);
            index=dataDao.mysqlInsert(map);
            if(index>0){
                logger.info("insert success: "+index);
            }
             session.commit(true);
        } catch (Exception e) {
            logger.error("插入异常:", e);
            session.rollback(true);
            throw e;
        } finally {
            session.close();
        }
        return index;
    }
public class SessionFactory {
private static Logger logger = LoggerFactory.getLogger(SessionFactory.class);
private static SqlSessionFactoryBuilder sqlSessionFactoryBuilder;
private static SqlSessionFactory sqlSessionFactory;
//初始化mybatis
static {
String resource = "mybatis-config.xml";
Reader reader = null;
try {
reader = Resources.getResourceAsReader(resource);
sqlSessionFactoryBuilder = new SqlSessionFactoryBuilder();
sqlSessionFactory = sqlSessionFactoryBuilder.build(reader);
} catch (IOException e) {
logger.error("加载配置文件错误:",e);
e.printStackTrace();
}catch (Exception e){
logger.error("加载配置文件错误:",e);
}
logger.info("init mybatis");
}
public static synchronized SqlSession getSession() throws IOException {
SqlSession sqlSession =null;
if(null == sqlSession) {
sqlSession = (null != sqlSessionFactory)?sqlSessionFactory.openSession(): null;
}
return sqlSession;
}
}代码中可以看到首先会通过 SessionFactory 去获取 SqlSession,里面会有一段static代码,在SessionFactory类加载时会执行mybatis-config.xml 的初始化过程。现在我们直接看重点:
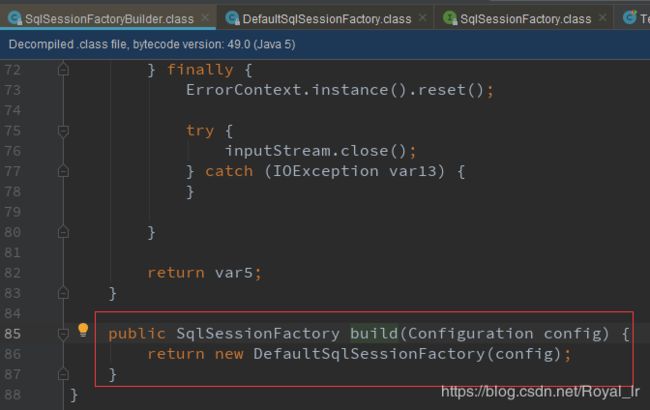
通过SqlSession 的 getMapper获取DataDao数据接口的时候发现有2个实现,追溯到SessionFactory的初始化中会看到下面一段:
所以我们直接进入 DefaultSqlSession getMapper方法中,可以找到 MapperRegistry 中: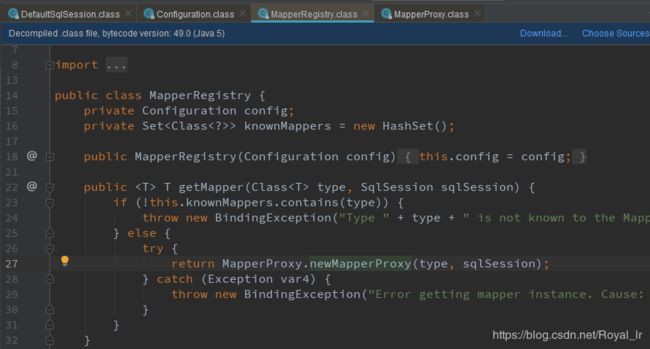
看到这里熟悉的动态代理的朋友知道这是一个获取java的动态代理类的写法(ps: 不熟悉动态代理的,可以看这里我的上一篇博客 动态代理白话解析),我们继续往下看:
继续走到下一步:dataDao.mysqlInsert(map); 执行这个方法时会调用 MapperProxy 的 invoke方法:
开源看到除了Object 中的方法不能代理,其他的都会走到 mapperMethod.execute(args):
type 字段会在mapperMethod初始化时赋值,这里我们执行的insert,继续往下走到DefaultSqlSession 的update方法 :
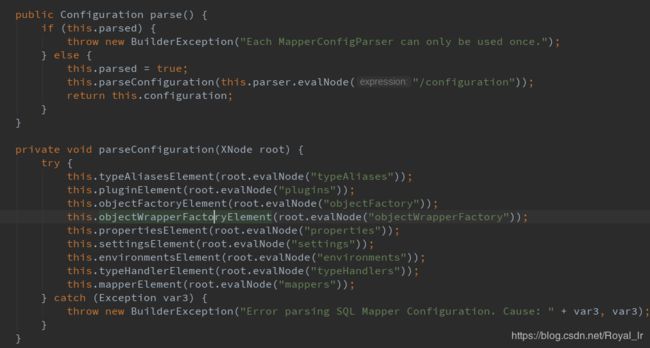
到这里后,接下来我们开始看 Configuration的初始化,它在SqlSessionFactory初始化时构造的
上面2段代码可以看到 Configuration 是通过加载mybatis-config.xml时进行初始化的。
现在我们回到 this.configuration.getMappedStatement(statement); 这段代码:
进去看下我们发现他其实是通过 id 去获取对应的MappedStatement ,通过上文我们可以知道id是MapperMethod的execute方法传进来的commandName,它在MapperMethod 的构造函数中的 setupFields 方法中初始化:
在本文中的值为: DataDao.mysqlInsert。类似这种,也就是接口类.方法名。
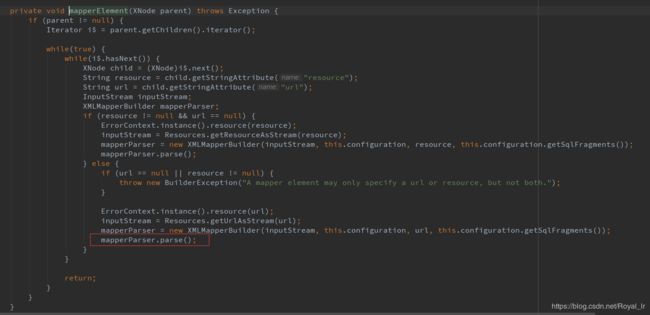
现在我们回到主流程中,查看 mappedStatements 的初始化过程,是在上文中初始化Configuration 的this.mapperElement(root.evalNode("mappers")); 中 :
这里会解析mapper.xml中的sql节点,本文中的示例是 这一段:
我们继续查看mappedStatements的初始化 :
这里的id我们可以看到就是节点中的namespace.id的值拼接,也就是 DataDao.mysqlInsert
现在我们继续回到主流程,看这段代码:
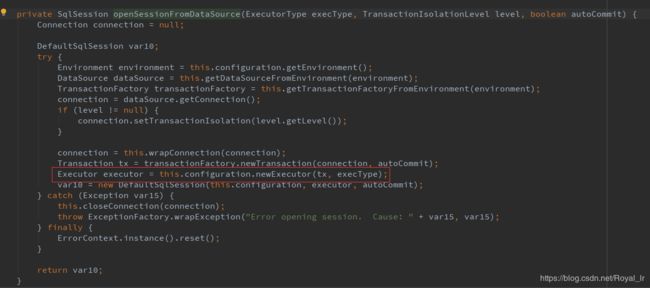
代码中通过executor执行update方法,现在我们看下 executor 的初始化过程,是在SqlSession初始化的过程中:
在Configuration的构造函数中可以看到这里的 executorType 默认为SIMPLE,cacheEnabled 默认为true.
现在我们继续回到主流程,进到 CachingExecutor 的 update 方法中:
这里会进入到 BaseExecutor 的 update方法中
这里会进入到 SimpleExecutor 的doUpdate中:
这里首先初始化了一个 RoutingStatementHandler ,由上文可知 statementType 默认为 PREPARED,所以 其 delegate 属性为 PreparedStatementHandler。我们回到主流程,继续看 this.prepareStatement(handler) :
会走到 BaseStatementHandler 的 prepare 方法 :
这里会进入到 PreparedStatementHandler 的 instantiateStatement 方法:
这里的 boundSql 是在 上文中的 mappedStatement 初始化的时候赋值的:
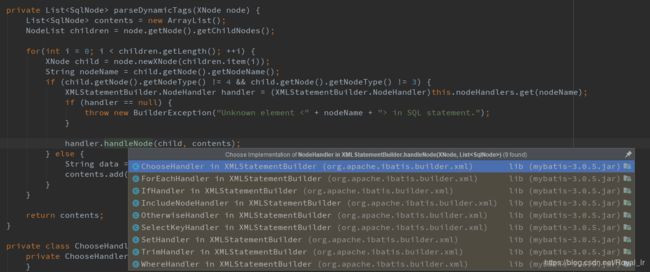
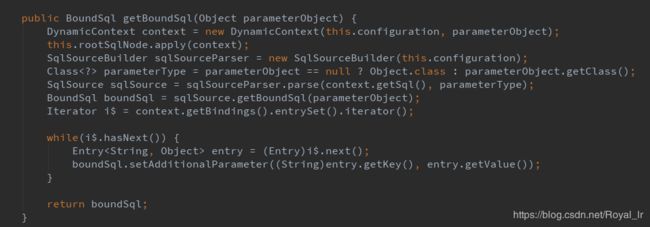
首先是在 parseStatementNode 中初始化 DynamicSqlSource,然后获取 BoundSql,接下来我们看下XMLStatementBuilder的parseDynamicTags方法:
代码中我们可以看到若节点类型既不是文本节点也不是CDATA节点就会调用不同的处理类去处理,我们比较常用的就是查询时使用的
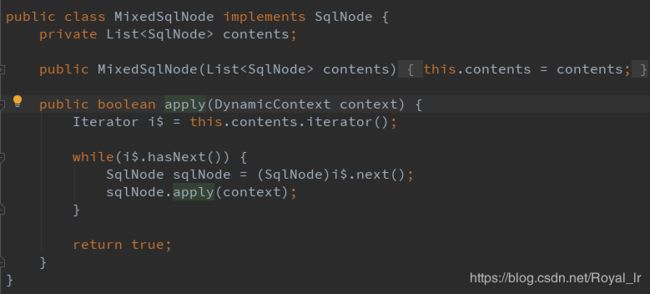
由上文知:rootSqlNode是MixedSqlNode,这里会执行 MixedSqlNode 的 apply 方法,在本例中会执行 TextSqlNode 的 apply
方法:
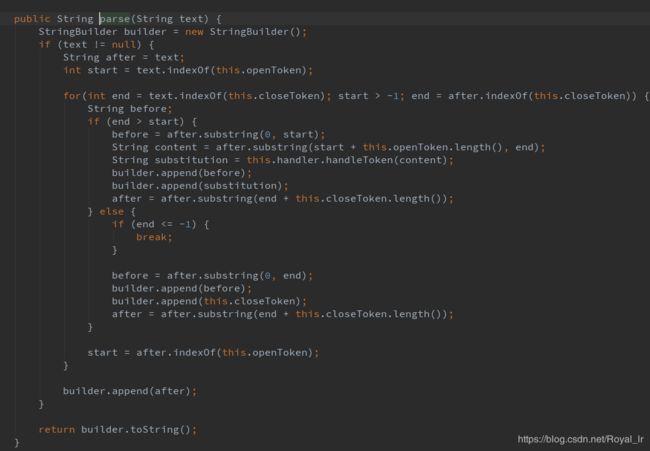
这一段呢主要是用来处理sql中的${}占位符参数,本文中的 insert into ${tableName} (${columns}) values (${colValues}) 经过parse 转换后 insert into table (id,name) values (1,'test') , 这一段的代码就不分析了,比较繁杂,主要是通过将对应的占位符替换为对应的值。
我们回到 getBoundSql 方法 ,继续往下走,到 sqlSourceParser.parse(context.getSql(), parameterType) 这一行代码:
又看到了熟悉的代码,这一段是将#{} 占位符替换为对应的value.
我们继续回到上文主流程中的 PreparedStatementHandler 的 instantiateStatement 方法,往下走:
这里的 Jdbc3KeyGenerator 是如果你设置了useGeneratedKeys=true 用来 自动生成主键的,resultSetType 本例中也没有涉及为空,所以这里会返回一个 PreparedStatement, 到这里我们的 SimpleExecutor 的 doUpdate 的 this.prepareStatement(handler)
这段代码就分析完了。
我们回到主流程继续往下走:
这里进入到 jdbc 的 PreparedStatement 的执行过程,执行insert插入的操作。后面2段代码我就不分析了,主要是用来获取主键的。
到这里,mybatis执行一次insert sql的运行机制就解析完成了。
总结:
在源码分析的过程中,可能会比较跳跃,因为在源码分析过程中会有一些配置类或执行类的初始化过程。这里分享一下快速阅读源码的方式,在查看源码的过程中,可能会有许多扩展,校验,初始化的一些功能代码,比如:
1. Configuration 类的初始化
2. Interceptor 拦截器的执行(实际采用的是责任链设计模式和动态代理设计模式来实现的拦截)
3. cache缓存的实现方式
可以暂时先跳过,先把主要流程的代码过一遍,比如mybatis 执行一次sql的流程源码可以按照如下方式查看:
当我们将整体流程实现查看清楚后,如果想查看更多的细节,可以使用其他时间回头来查看扩展功能的实现方式

