Android webView拍照与展示相册图片
一.准备工作
1.测试平板:android 7.0
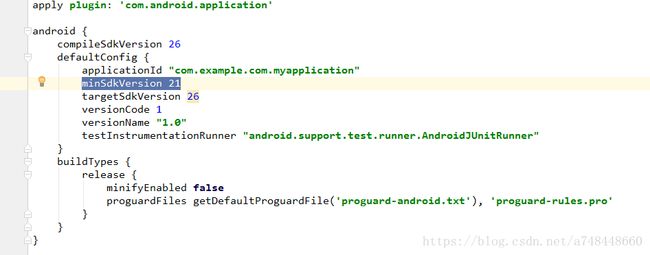
2.androidSDK:26

二.实验步骤
2.2)增加webView标签在 activity_main.xml
<android.support.constraint.ConstraintLayout xmlns:android="http://schemas.android.com/apk/res/android"
    xmlns:app="http://schemas.android.com/apk/res-auto"
    xmlns:tools="http://schemas.android.com/tools"
    android:layout_width="match_parent"
    android:layout_height="match_parent"
    tools:context="com.example.com.myapplication.MainActivity">

    <TextView
        android:layout_width="wrap_content"
        android:layout_height="wrap_content"
        android:text="Hello World!"
        app:layout_constraintBottom_toBottomOf="parent"
        app:layout_constraintLeft_toLeftOf="parent"
        app:layout_constraintRight_toRightOf="parent"
        app:layout_constraintTop_toTopOf="parent" />


    <FrameLayout
        android:layout_width="match_parent"
        android:layout_height="match_parent"
        android:id="@+id/ly_content">

        <WebView
            android:id="@+id/web_map"
            android:layout_width="match_parent"
            android:layout_height="match_parent" />
    FrameLayout>

android.support.constraint.ConstraintLayout>
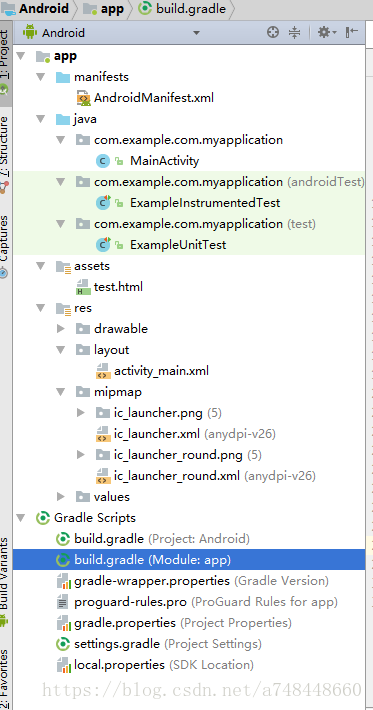
2.3) 新建test.html 在assets下
<html>
<body>
<input id="fileImage" type="file" size="300" onchange="showImage()"  name="fileselect" accept="image/*" />
<img src="" id="show" width="200">
<script>

    function showImage() {

        var reads= new FileReader();
        f=document.getElementById('fileImage').files[0];
        reads.readAsDataURL(f);
        reads.οnlοad=function (e) {
            document.getElementById('show').src=this.result;
        };
    }

script>
body>

html>
2.4) 获取相机、存储、定位权限,代码写在 MainActivity.java
private  void initPower(){
        int checkCallPhonePermission = ContextCompat.checkSelfPermission(MainActivity.this, Manifest.permission.CAMERA);
        int locations = ContextCompat.checkSelfPermission(MainActivity.this, Manifest.permission.ACCESS_FINE_LOCATION);
        int storgeWrite =ContextCompat.checkSelfPermission(MainActivity.this,Manifest.permission.WRITE_EXTERNAL_STORAGE);
        int storgeRead =ContextCompat.checkSelfPermission(MainActivity.this,Manifest.permission.READ_EXTERNAL_STORAGE);
        if (checkCallPhonePermission != PackageManager.PERMISSION_GRANTED) {
            ActivityCompat.requestPermissions(MainActivity.this, new String[]{Manifest.permission.CAMERA}, 6);
        }

        if(locations != PackageManager.PERMISSION_GRANTED){
            ActivityCompat.requestPermissions(MainActivity.this, new String[]{Manifest.permission.ACCESS_FINE_LOCATION}, 7);
        }
        if(storgeRead != PackageManager.PERMISSION_GRANTED){
            ActivityCompat.requestPermissions(MainActivity.this, new String[]{Manifest.permission.READ_EXTERNAL_STORAGE}, 8);
        }
        if(storgeWrite != PackageManager.PERMISSION_GRANTED){
            ActivityCompat.requestPermissions(MainActivity.this, new String[]{Manifest.permission.WRITE_EXTERNAL_STORAGE}, 8);
        }
    }
与此同时;在AndroidMainfest.xml 设置权限
<manifest xmlns:android="http://schemas.android.com/apk/res/android"
    package="com.example.com.myapplication">

    <uses-permission android:name="android.permission.ACCESS_FINE_LOCATION" />
    <uses-permission android:name="android.permission.INTERNET" />
    <uses-permission android:name="android.permission.READ_EXTERNAL_STORAGE" />

    <uses-permission android:name="android.permission.WRITE_EXTERNAL_STORAGE" />

    <uses-permission android:name="android.permission.MOUNT_UNMOUNT_FILESYSTEMS"/>

    <uses-permission android:name="android.permission.CAMERA"/>

    <uses-feature android:name="android.hardware.camera" />
    <uses-feature android:name="android.hardware.camera.autofocus" />

    <application
        android:allowBackup="true"
        android:icon="@mipmap/ic_launcher"
        android:label="@string/app_name"
        android:roundIcon="@mipmap/ic_launcher_round"
        android:supportsRtl="true"
        android:theme="@style/AppTheme">
        <activity android:name=".MainActivity">
            <intent-filter>
                <action android:name="android.intent.action.MAIN" />

                <category android:name="android.intent.category.LAUNCHER" />
            intent-filter>
        activity>
    application>

manifest>
2.5) 在MainActivity.java 初始化webView
 private WebView wView; //web展示地图
  public void readWebMap(){
        wView = (WebView) findViewById(R.id.web_map);
        wView.loadUrl("file:///android_asset/test.html");
        WebSettings settings = wView.getSettings();

        settings.setJavaScriptEnabled(true);    //设置webview支持javascript
        settings.setLoadsImagesAutomatically(true);    //支持自动加载图片
        settings.setUseWideViewPort(true);    //设置webview推荐使用的窗口,使html界面自适应屏幕
        settings.setLoadWithOverviewMode(true);
        settings.setSaveFormData(true);    //设置webview保存表单数据

        settings.setSupportMultipleWindows(true);
        settings.setAppCacheEnabled(true); //设置APP可以缓存
        settings.setDatabaseEnabled(true);
        settings.setDomStorageEnabled(true);//返回上个界面不刷新  允许本地缓存
        settings.setAllowFileAccess(true);// 设置可以访问文件

        wView.setLongClickable(true);
        wView.setScrollbarFadingEnabled(true);
        wView.setScrollBarStyle(View.SCROLLBARS_INSIDE_OVERLAY);
        wView.setDrawingCacheEnabled(true);


        //添加客户端支持
        wView.setWebChromeClient(new MyWebChromeClient() );

    }
    //自定义chromeClient
private class MyWebChromeClient extends WebChromeClient {

        // For Android 3.0+
        public void openFileChooser(ValueCallback uploadMsg) {

            mUploadMessage = uploadMsg;
            openImageChooserActivity();


        }

        // For Android 3.0+
        public void openFileChooser(ValueCallback uploadMsg, String acceptType) {
            mUploadMessage = uploadMsg;
            openImageChooserActivity();
        }

        // For Android 4.1
        public void openFileChooser(ValueCallback uploadMsg, String acceptType, String capture) {
            mUploadMessage = uploadMsg;
            openImageChooserActivity();

        }

        // For Android 5.0+
        public boolean onShowFileChooser(WebView webView, ValueCallback filePathCallback, WebChromeClient.FileChooserParams fileChooserParams) {
            mUploadCallbackAboveL = filePathCallback;
            openImageChooserActivity();
            return true;
        }


    }
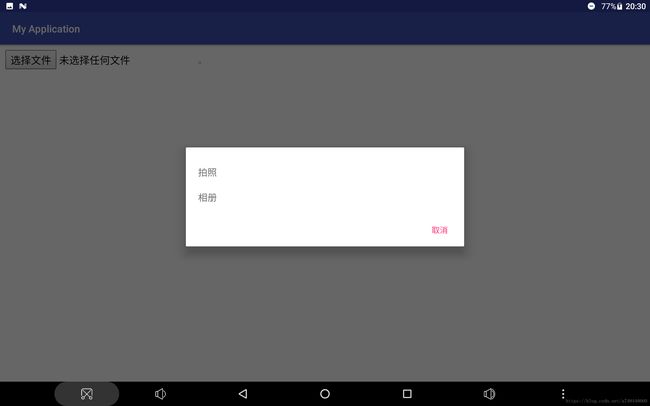
2.6) 当页面选择文件后,利用MaterialDialog 选择 拍照还是相册,进行图片的选择,并返回到html
  ///选择拍照还是相册
    public void openImageChooserActivity() {
        new MaterialDialog.Builder(this)
                .items(stocks)
                .positiveText("取消")
                .onPositive(new MaterialDialog.SingleButtonCallback() {
                    @Override
                    public void onClick(@NonNull MaterialDialog dialog, @NonNull DialogAction which) {
                        if (mUploadCallbackAboveL != null) {
                            mUploadCallbackAboveL.onReceiveValue(null);
                            mUploadCallbackAboveL = null;
                        }
                        if (mUploadMessage != null) {
                            mUploadMessage.onReceiveValue(null);
                            mUploadMessage = null;
                        }
                        dialog.dismiss();
                    }
                })
                .cancelable(false)
                .canceledOnTouchOutside(false)
                .itemsCallback(new MaterialDialog.ListCallback() {
                    @Override
                    public void onSelection(MaterialDialog dialog, View itemView, int position, CharSequence text) {
                        if (position == 0) {
                            takeCamera();
                        } else if (position == 1) {
                            takePhoto();
                        }
                    }
                }).show();
    }

 //拍照
    private void takeCamera() {
        Intent intent = new Intent(MediaStore.ACTION_IMAGE_CAPTURE);


        cameraFielPath = Environment.getExternalStorageDirectory() + "//" + System.currentTimeMillis() + ".jpg";
        File outputImage = new File(cameraFielPath);
        intent.putExtra(MediaStore.EXTRA_OUTPUT, Uri.fromFile(outputImage));
        startActivityForResult(intent, FILE_CAMERA_RESULT_CODE);
    }


    //选择图片
    private void takePhoto() {
        Intent i = new Intent(Intent.ACTION_GET_CONTENT);
        i.addCategory(Intent.CATEGORY_OPENABLE);
        i.setType("image/*");
        startActivityForResult(Intent.createChooser(i, "Image Chooser"), FILE_CHOOSER_RESULT_CODE);
    }


    @Override
    protected void onActivityResult(int requestCode, int resultCode, Intent data) {
        //  super.onActivityResult(requestCode, resultCode, resultData);
        if (null == mUploadMessage && null == mUploadCallbackAboveL) return;
        if (resultCode != RESULT_OK) {//同上所说需要回调onReceiveValue方法防止下次无法响应js方法
            if (mUploadCallbackAboveL != null) {
                mUploadCallbackAboveL.onReceiveValue(null);
                mUploadCallbackAboveL = null;
            }
            if (mUploadMessage != null) {
                mUploadMessage.onReceiveValue(null);
                mUploadMessage = null;
            }
            return;
        }
        Uri result = null;
        if (requestCode == FILE_CAMERA_RESULT_CODE) {
            if (null != data && null != data.getData()) {
                result = data.getData();
            }
            if (result == null && hasFile(cameraFielPath)) {
                result = Uri.fromFile(new File(cameraFielPath));
            }
            if (mUploadCallbackAboveL != null) {
                mUploadCallbackAboveL.onReceiveValue(new Uri[]{result});
                mUploadCallbackAboveL = null;
            } else if (mUploadMessage != null) {
                mUploadMessage.onReceiveValue(result);
                mUploadMessage = null;
            }
        } else if (requestCode == FILE_CHOOSER_RESULT_CODE) {
            if (data != null) {
                result = data.getData();
            }
            if (mUploadCallbackAboveL != null) {
                onActivityResultAboveL(data);
            } else if (mUploadMessage != null) {
                mUploadMessage.onReceiveValue(result);
                mUploadMessage = null;
            }
        }
    }


    /**
     * 判断文件是否存在
     */
    public static boolean hasFile(String path) {
        try {
            File f = new File(path);
            if (!f.exists()) {
                return false;
            }
        } catch (Exception e) {
            Log.i("error", e.toString());
            return false;
        }
        return true;
    }

    @TargetApi(Build.VERSION_CODES.LOLLIPOP)
    private void onActivityResultAboveL(Intent intent) {
        Uri[] results = null;
        if (intent != null) {
            String dataString = intent.getDataString();
            ClipData clipData = intent.getClipData();
            if (clipData != null) {
                results = new Uri[clipData.getItemCount()];
                for (int i = 0; i < clipData.getItemCount(); i++) {
                    ClipData.Item item = clipData.getItemAt(i);
                    results[i] = item.getUri();
                }
            }
            if (dataString != null)
                results = new Uri[]{Uri.parse(dataString)};
        }
        mUploadCallbackAboveL.onReceiveValue(results);
        mUploadCallbackAboveL = null;
    }
如果是android7.0 ,需要在 onCreate方法中加入 如下代码
StrictMode.VmPolicy.Builder builder = new StrictMode.VmPolicy.Builder();
        StrictMode.setVmPolicy(builder.build());
        builder.detectFileUriExposure();
才可以调用相机。
三.效果
四.参考
https://blog.csdn.net/aicfeng_liuy/article/details/52535642
https://blog.csdn.net/qq_23179075/article/details/70314473
https://www.jianshu.com/p/13f4b8f70947
五.Demo下载
https://download.csdn.net/download/a748448660/10645776


