小编今天继续开始讲解IOS开发中另一个重要的内容--选择器的使用
选择器分为:日期选择器和普通选择器
今天,我们先介绍日期选择器,下一篇文章介绍普通选择器以及数据源的实现
日期选择器
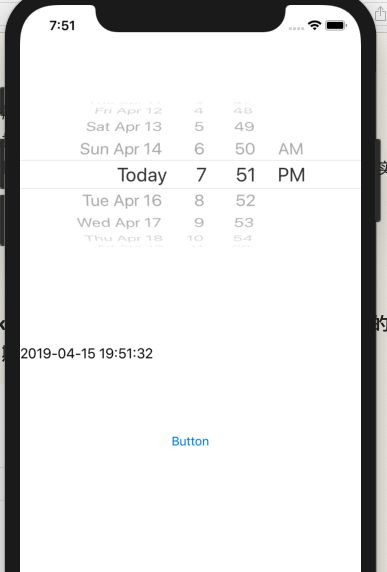
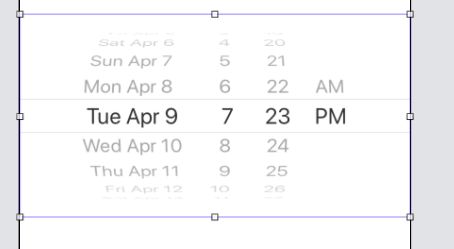
效果如下:
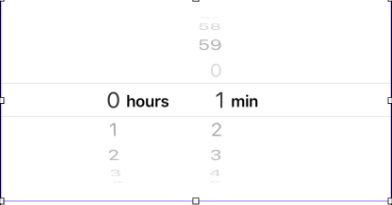
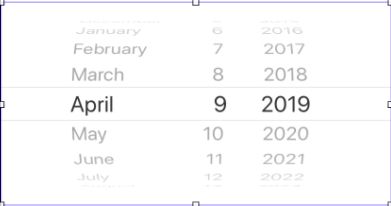
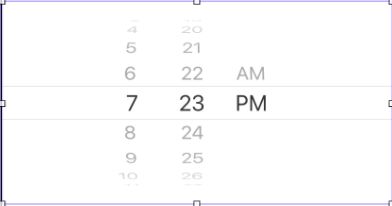
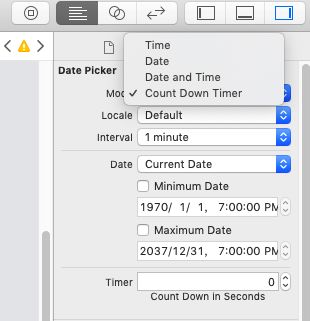
定义:UIDatePicker日期选择器,实现了对于日期的选择,日期的选择有四种模式【日期,日期时间,时间,倒计时】
设置方法,在控制版中设置类型
实现部分
- 故事版实现
#import "ViewController.h"

@interface ViewController ()
@property (weak, nonatomic) IBOutlet UILabel *label;
@property (weak, nonatomic) IBOutlet UIDatePicker *dataPicker;
@end

@implementation ViewController
- (IBAction)onClick:(UIButton *)sender {
    NSDate *theDate = self.dataPicker.date;
    NSLog(@"the date picked is :%@",[theDate descriptionWithLocale:[NSLocale currentLocale]]);
    NSDateFormatter *dateFormatter = [[NSDateFormatter alloc] init];
    dateFormatter.dateFormat = @"YYYY-MM-dd HH:mm:ss";
    NSLog(@"the date formate is:%@",[dateFormatter stringFromDate:theDate]);
    self.label.text = [dateFormatter stringFromDate:theDate];
}

- (void)viewDidLoad {
    [super viewDidLoad];
    // Do any additional setup after loading the view, typically from a nib.
}
@end
代码分析:
- NSDate *theDate = self.dataPicker.date;
这部分内容实现了日期的载入,类型为NSDate的对象接受传入dataPicker的date数据,并将数据打印出来,跟踪日期结果,打印结果是NSDate的默认形式
图6--跟踪输出值
- NSDateFormatter *dateFormatter = [[NSDateFormatter alloc] init];
dateFormatter.dateFormat = @"YYYY-MM-dd HH:mm:ss";
为了实现日期数据输出的格式为自定义格式,我们应该使用类似于NSString的stringWithFormat的形式一样,调用NSDateFormatter创建形式为YYYY-MM-dd HH:mm:ss的输出格式
- 代码实现
1.首先我们先创建一个标签(UILabel)和按钮(UIButton)的输出口
@interface ViewController ()
@property (nonatomic,strong) UIDatePicker *datePicker;
@property (nonatomic,strong) UILabel *label;
@end
2.初始化日期选择器
//日期选择器
    CGFloat datePickerWidth = 320;
    CGFloat datePickerHeight = 167;
    self.datePicker = [[UIDatePicker alloc] initWithFrame:CGRectMake(0, 0, datePickerWidth, datePickerHeight)];
    //设置中文
    self.datePicker.locale = [NSLocale localeWithLocaleIdentifier:@"zh-Hans"];
    //设置日期格式
    self.datePicker.datePickerMode = UIDatePickerModeDateAndTime;

    [self.view addSubview:self.datePicker];
注意:中文设置方式,使用self.datePicaker.lacale = [NSLocale localeWithLocaleIdentifier:@"zh-Hans"];进行设置语言类型为中文
//设置日期格式
    self.datePicker.datePickerMode = UIDatePickerModeDateAndTime;
Mode
typedef NS_ENUM(NSInteger, UIDatePickerMode) {
    UIDatePickerModeTime,           // Displays hour, minute, and optionally AM/PM designation depending on the locale setting (e.g. 6 | 53 | PM)
    UIDatePickerModeDate,           // Displays month, day, and year depending on the locale setting (e.g. November | 15 | 2007)
    UIDatePickerModeDateAndTime,    // Displays date, hour, minute, and optionally AM/PM designation depending on the locale setting (e.g. Wed Nov 15 | 6 | 53 | PM)
    UIDatePickerModeCountDownTimer, // Displays hour and minute (e.g. 1 | 53)
} __TVOS_PROHIBITED;
3.设置标签以及按钮(与之前文章相同,用于显示值的变化)
//添加标签
    CGFloat labelWidth = 200;
    CGFloat labelHeight = 21;
    CGFloat labelTopView = 281;
    self.label = [[UILabel alloc] init];
    self.label.text = @"Lable";
    self.label.frame = CGRectMake((screen.size.width-labelWidth), (labelTopView), labelWidth, labelHeight);
    self.label.textAlignment = NSTextAlignmentCenter;
    [self.view addSubview:self.label];

    //添加按钮
    UIButton *button = [UIButton buttonWithType:UIButtonTypeSystem];
    [button setTitle:@"Button" forState:UIControlStateNormal];
    CGFloat buttonWidth = 46;
    CGFloat buttonHeight = 30;
    CGFloat buttonTopView = 379;
    button.frame = CGRectMake((screen.size.width-buttonWidth) /2, buttonTopView, buttonWidth, buttonHeight);
    //指定事件
    [button addTarget:self action:@selector(onclick:) forControlEvents:UIControlEventTouchUpInside];
    [self.view addSubview:button];
4.实现按钮的选择@selector(onclick:)
- (void)onclick:(id)sender{
    NSDate *theDate = self.datePicker.date;
    NSLog(@"the date picked is: %@",[theDate descriptionWithLocale:[NSLocale currentLocale]]);
    NSDateFormatter *dateFormatter = [[NSDateFormatter alloc] init];
    dateFormatter.dateFormat = @"YYYY-MM-dd HH:mm:ss";
    NSLog(@"the date formate is:%@",[dateFormatter stringFromDate:theDate]);
    self.label.text = [dateFormatter stringFromDate:theDate];
}
