微信测试号申请以及微信授权登录
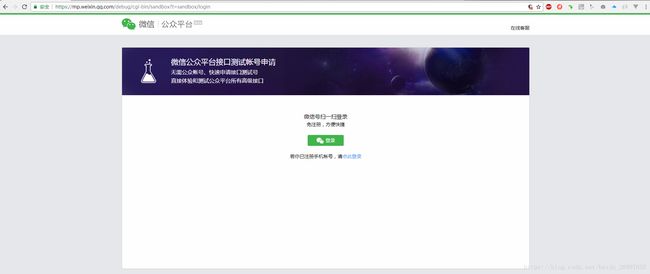
一、申请微信测试号
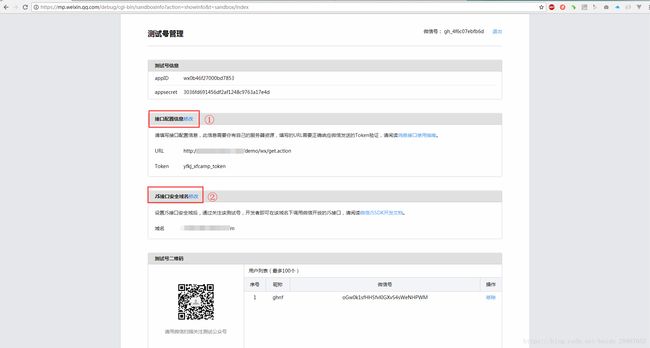
① 第一点就是接口配置信息,可以使用springmvc或servlet来进行验证,我这里使用springmvc来编写验证代码:
DemoController.java
package com.demo.controller;

import com.demo.util.WxUtils;
import org.springframework.web.bind.annotation.GetMapping;
import org.springframework.web.bind.annotation.PostMapping;
import org.springframework.web.bind.annotation.RequestMapping;
import org.springframework.web.bind.annotation.RestController;

import javax.servlet.http.HttpServletRequest;
import javax.servlet.http.HttpServletResponse;
import java.io.IOException;
import java.io.PrintWriter;
import java.security.MessageDigest;
import java.security.NoSuchAlgorithmException;
import java.util.Arrays;
import java.util.Map;

/**
 * @author xyd
 * @version V1.0
 * @Package com.demo.controller
 * @Description:
 * @date 2018/8/6 17:19
 */
@RestController("demo")
@RequestMapping("/wx")
public class DemoController {
    //这里的token要和微信测试号网页填写的token一样
    public static final String TOKEN = "okjfdlsf_lsdfjdslkfj_token";

    @GetMapping("/get")
    public void get(String signature,String timestamp,String nonce,String echostr, HttpServletResponse response) throws IOException, NoSuchAlgorithmException {
        // 将token、timestamp、nonce三个参数进行字典序排序
        System.out.println("signature:"+signature);
        System.out.println("timestamp:"+timestamp);
        System.out.println("nonce:"+nonce);
        System.out.println("echostr:"+echostr);
        System.out.println("TOKEN:"+TOKEN);
        String[] params = new String[] { TOKEN, timestamp, nonce };
        Arrays.sort(params);
        // 将三个参数字符串拼接成一个字符串进行sha1加密
        String clearText = params[0] + params[1] + params[2];
        String algorithm = "SHA-1";
        String sign = new String(
                org.apache.commons.codec.binary.Hex.encodeHex(MessageDigest.getInstance(algorithm).digest((clearText).getBytes()), true));
        // 开发者获得加密后的字符串可与signature对比,标识该请求来源于微信
        if (signature.equals(sign)) {
            response.getWriter().print(echostr);
        }
    }


}
需要注意的是:
- 注意网站地址需要在公网能够访问
- 最好使用80端口和域名
- 使用get方式访问
虽然以上都做到了,但是还是配置失败,在无可奈何之下,疯狂的点提交,结果给成功了。。。。。。
② 接下来填写“JS接口安全域名”,由于我有经过备案的个人域名,所以这一步直接成功。
这个我猜测是需要备案的域名才行的吧。
③ 扫描二维码关注测试公众号
二、微信授权登录
1、首先查看微信开发文档
开发文档地址:微信公众号开发文档
2、静默授权登录
步骤:
1.首先使用微信浏览器访问地址:
https://open.weixin.qq.com/connect/oauth2/authorize?appid=APPID&redirect_uri=REDIRECT_URI&response_type=code&scope=SCOPE&state=STATE#wechat_redirect
其中APPID, REDIRECT_URL, SCOPE, STATE这些参数是需要根据实际情况来替换的,具体不多说。注意一下REDIRECT_URL和SCOPE,官方文档说了REDIRECT_URL最好经过urlEncode编码后替换,编码地址:urlEncode,SCOPE选择snsapi_base(静默授权)。
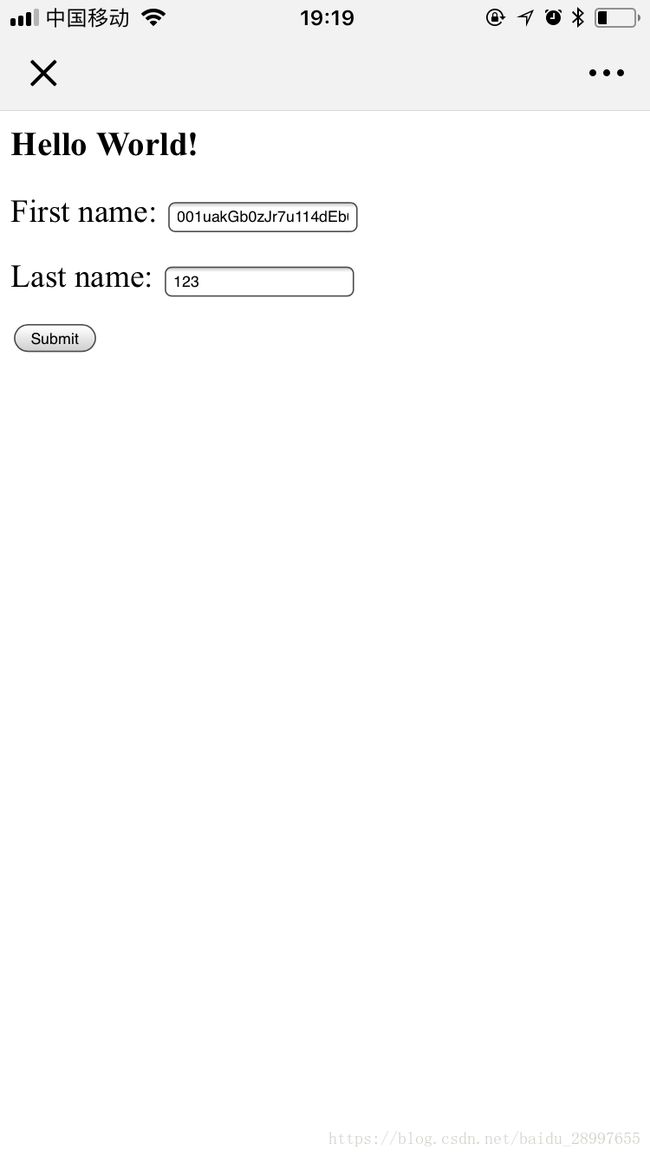
2.访问上述地址时会有一瞬间的loading,然后就会跳转到REDIRECT_URL,REDIRECT_URL可以是一个页面也可以是一个action,而跳转到该地址时会有两个参数一起带过来。如:
www.demo.com/?code=CODE&state=STATE
首先,code的作用是为了拿到openId,而state的作用根据我的理解是为了标识此授权登录的状态和功能。
这里我使用jsp页面获取code,代码如下:
login.jsp
<html>
<body>
<script src='http://res.wx.qq.com/open/js/jweixin-1.2.0.js'>script>
<h2>Hello World!h2>
        <%
           String code =  request.getParameter("code");
           String state =  request.getParameter("state");
        %>
<script>


script>
<form action="wx/login.action" method="post">
    <p>First name: <input type="text" name="code" value="<%= code%>" />p>
    <p>Last name: <input type="text" name="state" value="<%= state%>"/>p>
    <input type="submit" value="Submit" />
form>
body>
html>
此时,在DemoController中加入以下代码:
@PostMapping("/login")
    public String login(String code, String state, HttpServletRequest request) throws Exception {
        return WxUtils.getLoginAcessToken("wx0b46f27000bd7853", "3036fd691456df2af1248c9763a17e4d", code);
    }
WxUtils是自己写的工具类,使用httpClient来向微信服务器发送请求,代码如下:
WxUtils.java
package com.demo.util;

import com.alibaba.fastjson.JSON;
import org.apache.http.HttpResponse;
import org.apache.http.client.HttpClient;
import org.apache.http.client.methods.HttpGet;
import org.apache.http.impl.client.HttpClients;
import org.apache.http.util.EntityUtils;
import org.springframework.web.bind.annotation.PostMapping;

import javax.servlet.http.HttpServletRequest;
import java.util.Map;

/**
 * @author xyd
 * @version V1.0
 * @Package com.demo.util
 * @Description:
 * @date 2018/8/6 17:24
 */
public class WxUtils {

    /**
     * 获取Openid
     * @param appid
     * @param secret
     * @param code
     * @return
     * @throws Exception
     */
    public static String getLoginAcessToken(String  appid, String secret, String code) throws Exception{
        HttpClient httpclient =  HttpClients.createDefault();
        String smsUrl="https://api.weixin.qq.com/sns/oauth2/access_token?appid="+ appid +"&SECRET="+ secret + "&code=" + code + "&grant_type=authorization_code";
        HttpGet httpGet = new HttpGet(smsUrl);
        String strResult = "";

        HttpResponse response = httpclient.execute(httpGet);
        if (response.getStatusLine().getStatusCode() == 200) {
            strResult = EntityUtils.toString(response
                    .getEntity(),"UTF-8");
        }

          System.out.println(strResult);
        return strResult;
    }
}
3.该接口返回的数据就是微信官方文档的标准数据了:
微信浏览器地址:
https://open.weixin.qq.com/connect/oauth2/authorize?appid=wx0b46f27000bd7853&redirect_uri=http%3a%2f%2ftest.*.com%2fdemo%2flogin.jsp&response_type=code&scope=snsapi_base&state=123#wechat_redirect
中间出现一些问题,提示:
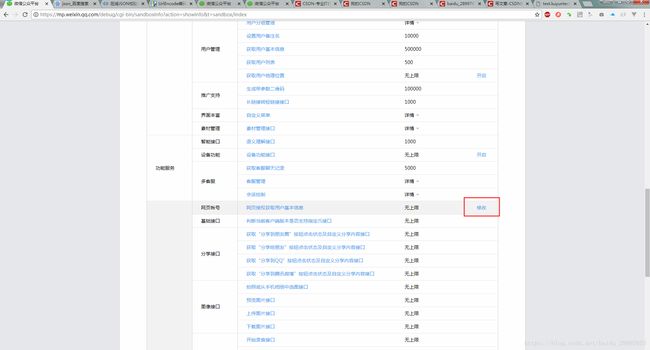
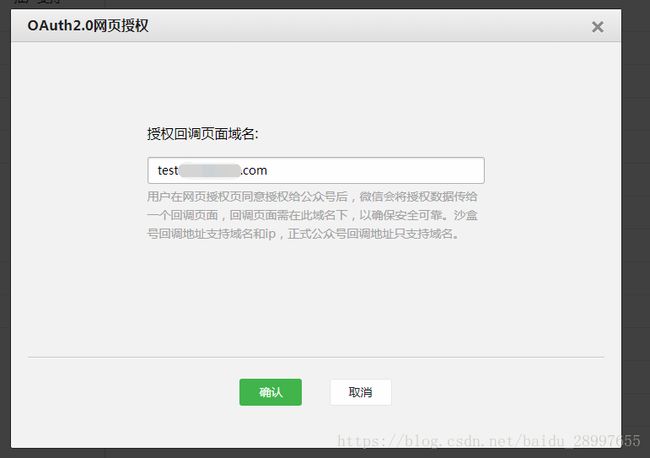
10003 redirect_uri域名与后台配置不一致
注意:
- 域名配置,这里填写的是域名(是一个字符串),而不是URL,因此请勿加 http:// 等协议头
- 不要填写到详细的app目录或页面目录
{
    "access_token": "12_k1ZcdnsfYCE6IUA44yOhT55nDqZyuc5D9oIRq-34sPzImaPEr2RlX0zQGhHNVpxzmA-jlu9DCJuiwmtXOQ7VlZlSnps1TcYaZd3-i-f3io0",
    "expires_in": 7200,
    "refresh_token": "12_K0b2BbG3hQX_CHpQR-F0LZYR3PEfqjINdj9e5Rb9fmDiICRMtL0P0HHxDphnRhZ-QQrlu_4Myaj9hSEZvUITEoJXGnbjg8e6jAymrRt-yqg",
    "openid": "oGw0k1sfHHSfvl0GXvS4sWeNHPWM",
    "scope": "snsapi_base"
}
实际过程中不用返回用户信息,而是将openId同数据库中比对,然后在session中插入该用户的信息使之处于在线状态!
微信静默授权登录完成!
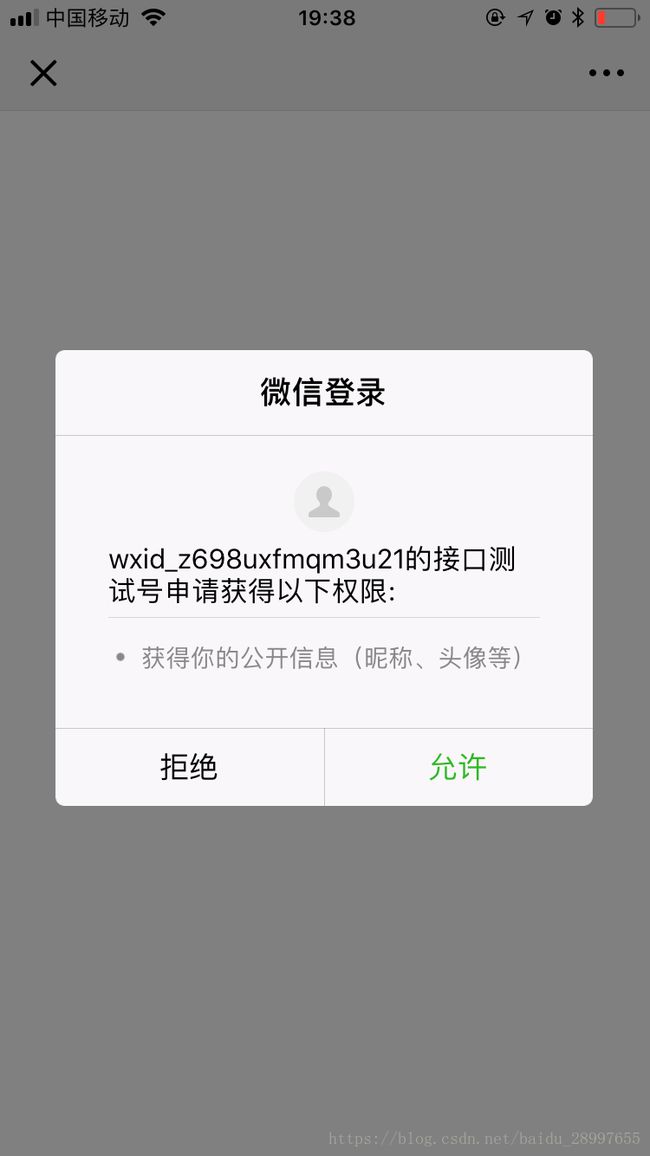
3、非静默授权
很简单,将上述地址:
https://open.weixin.qq.com/connect/oauth2/authorize?appid=APPID&redirect_uri=REDIRECT_URI&response_type=code&scope=SCOPE&state=STATE#wechat_redirect
中的SCOPE替换成:snsapi_userinfo就行了,其他步骤参考第2步。代码如下
DemoController.java 加入如下代码:
@PostMapping("/loginOpen")
    public String loginOpen(String code, String state, HttpServletRequest request) throws Exception {
        return WxUtils.getLoginAcessToken("wx0b46f27000bd7853", "3036fd691456df2af1248c9763a17e4d", code);
    }
webapp下复制login.jsp为loginOpen.jsp
<html>
<body>
<script src='http://res.wx.qq.com/open/js/jweixin-1.2.0.js'>script>
<h2>Hello World!h2>
        <%
           String code =  request.getParameter("code");
           String state =  request.getParameter("state");
        %>
<script>


script>
<form action="wx/loginOpen.action" method="post">
    <p>First name: <input type="text" name="code" value="<%= code%>" />p>
    <p>Last name: <input type="text" name="state" value="<%= state%>"/>p>
    <input type="submit" value="Submit" />
form>
body>
html>
其他代码不变,访问链接如下:
https://open.weixin.qq.com/connect/oauth2/authorize?appid=wx0b46f27000bd7853&redirect_uri=http%3a%2f%2ftest.*.com%2fdemo%2floginOpen.jsp&response_type=code&scope=snsapi_userinfo&state=123#wechat_redirect
图:
结果:
{
    "access_token": "12_M60HDZs9MgFKFqL-vPypzLmF7zFU2mW-vUt54YgplngC-aQ2i5tJz4Gb7qt5q99XAQ3ObGPYZsgilXcqBReh1ZsuvmbrKsPVM_uKacBraGo",
    "expires_in": 7200,
    "refresh_token": "12_P-p6A5PjymXR6ykFxBviVKGiyJL7Sdh6ac8QvJ9YUMhHaQCTzLIeGc9GB7Umvo5j294uN1aZhLEvGlS5DucgFP3vSpOIESW4jziWBQG3GWI",
    "openid": "oGw0k1sfHHSfvl0GXvS4sWeNHPWM",
    "scope": "snsapi_userinfo"
}
授权登录完成!
随后代码码云:点击
