intellij idea使用细节整理
代码自动补全(live templates)
IDEA中代码自动补全
在IDEA中通过”快捷键+TAB”实现代码自动补全。
比如System.out.println(“”);,在IDEA中可以sout + TAB实现。 
常用代码自动补全快捷键
| 快捷键 | 说明 |
|---|---|
| sout | System.out.println(“”); |
| psvm | main方法 |
编写自己的live templates
1.打开Live Templates,点击+新建live template或live template分组,我这里新建了一个名为tag的live template在名为My Live Template的分组里。 
2.IDEA提供了相关表达式可以实现某些操作,点击Edit variables编辑模板变量,在Expression中调用相关表达式。
比如,我在模板中定义了一个NAME模板变量($NAME$),点击Edit variables就可以看到这个变量,在Expression中调用了className()返回当前类的类名。

live templates表达式参考文档地址:https://www.jetbrains.com/idea/help/creating-and-editing-template-variables.html
3.在live template上右键选择Change context可以定义该live templates可以在哪些语言中使用 
常用设置项
常用快捷键
| 快捷键 | 说明 |
|---|---|
| Alt + Ctrl + S | 打开Settings |
| Alt + Ctrl + Shift + S | 打开Project Structrue |
| Alt + Enter | 快速修复 |
| Alt + / | 单词自动补全 |
| Alt + Insert | 代码自动生成,比如setter、getter、toString等等 |
| Alt + Shift + V | 把类中成员移动到另一个类 |
| Ctrl + Shift + F | 格式化代码 |
| Ctrl + Shift + U | 大小写切换 |
| Ctrl + Shift + I | 根据当前上下文显示代码定义,比如:光标停在方法上就会以popupview方式显示该方法的定义 |
| Ctrl + click | 跳到源码 |
| Shift + Shift | 搜索所有文件 |
| Ctrl + E | 打开最近访问文件列表 |
设置Eclipse风格快捷键
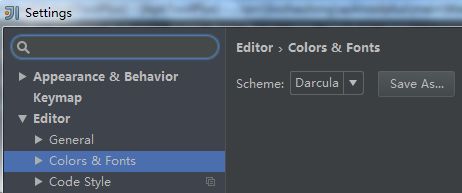
使用黑色风格主题
默认显示行号
设置文件编码默认为UTF-8
字体设置
打开Font,点击Save As新建自定义的字体配置,Size设置为16会比较好看。 
插件管理
Alt+Ctrl+S打开Settings,在Plugins界面中可以搜索/安装相关插件和管理已安装插件。 
代码快速注解的使用
默认Fix doc comment是没有设置快捷键的,我这里把他设置成Alt + M 
在方法名称、类名、字段名上按Alt + M,会自动加上注解模板内容 
注解中使用link标签
link使用格式如下: {@link[ {@link#
使用link链接一个方法:{@link Test#test()}
使用link链接本类中方法:{@link #test()}
更多JavaDoc标签的使用可以参考Oracle的javadoc文档:
http://docs.oracle.com/javase/8/docs/technotes/tools/windows/javadoc.html
跳动下一个错误
默认Next Highlighted Error是没有设置快捷键的,我这里把他设置成Shift + E 
导出工程到Eclipse

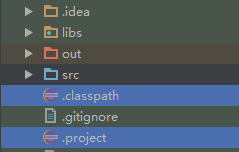
导出成功后,在工程目录下会自动添加Eclipse工程相关配置文件,然后就可以使用Eclipse打开该工程了。 
导出jar
1.打开Project Structure(Ctrl+Shift+Alt+S),添加导出配置,可添加多个导出配置 
2.点ok,可以看到导出配置,而且可以编辑导出配置 
ClassPath的配置
Class-Path: jar1-name jar2-name directory-name/jar3-name
示例:Class-Path: a.jar libs/b.jar,根目录为导出的jar所在目录,比如libs/b.jar表示导出jar同级目录下libs/b.jar。
配置完成后就可以很方便的导出工程了。
Build——Build Artifacts 
Build完成后就可以在Output directory下找到了 
自定义文件和代码模板
1.打开File and Code Templates,点击+添加自己的模板,模板的编写可参考现有模板。
说明文档地址:https://www.jetbrains.com/idea/help/creating-and-editing-file-templates.html 
模板文件就放在用户目录下
- Windows:
- Linux: ~/.
- OS X: ~/Library/Preferences/
关联api文档
1.打开Project Structure(Ctrl+Shift+Alt+S),在这里可以关联Module、Libraries、SDK的文档,点击+关联文档,有两个+:一个是关联本地文档,一个是关联在线文档 
2.关联成功后,在光标停在类名时按下Shift + F2即可打开该类的api doc。
单元测试
2.新建一个类并编写相关test方法
public class ApkToolPlusTest {

    public static final String TAG = ApkToolPlusTest.class.getSimpleName();

    @Test
    public void testJar2Smali() {
        String jarPath = ApkToolPlusTest.class.getResource("trove4j.jar").getFile();
        File jarFile = new File(jarPath);
        ApkToolPlus.jar2smali(jarPath,jarFile.getParentFile().getPath()+"/smali");
    }

    @Test
    public void testSignApk(){
        String apkPath = ApkToolPlusTest.class.getResource("test_unsigned.apk").getFile();
        KeystoreConfig config = new KeystoreConfig();
        config.alias = "linchaolong";
        config.aliasPassword = "linchaolong";
        config.keystorePath = ApkToolPlusTest.class.getResource("debug.keystore").getFile();
        config.keystorePassword = "linchaolong";
        ApkToolPlus.signApk(apkPath, config);
    }

    @Test
    public void testSystemProperties(){
        Properties properties = System.getProperties();
        properties.list(System.out);
    }

}
工程默认是没有导入junit的jar,可以通过alt + enter导入。
3.运行某个test,比如testJar2Smali,可以在testJar2Smali方法上右键选择Run ‘testJar2Smali()’ ![]()
4.运行类中所有test,比如ApkToolPlusTest ,可以在类名上右键选择Run ‘ApkToolPlusTest’ 
5.运行包中所有test,比如test包下所有test,可以在包名上右键选择Run ‘Tests in test’,如果是运行工程中所有test可以在src文件夹或工程上右键并Run。


