深度学习之 物体识别 Tensorflow object detection API 训练自己的模型 完整例子
记录 Tensorflow object detection API 物体识别 训练自己的模型
1、搭建环境
本例子,基于win10 64位 + Anaconda环境
安装和验证(自带例子)过程中会遇到缺失包及各种版本匹配问题(公司网络有些限制),如果想节省时间的,可以安装如下版本的
Anaconda及相关包
1、安装Anaconda,版本建议如下
Anaconda3-5.2.0-Windows-x86_64.exe 自带的python 版本为Python 3.6.5
2、TensorFlow 安装
使用Anaconda自带的即可
3、相关包,这几个包后面验证时需要安装,建议在anaconda官网 https://anaconda.org/ 上搜索,下载到本地安装,直接在线
安装可能会不断的更新各种包,问题不断。
如下:
先下载几个包 https://anaconda.org/
pydot-1.3.0-py36_1000.tar.bz2
pydub-0.23.0-py_0.tar.bz2
absl-py-0.7.0-py36_1000.tar.bz2
protobuf-3.6.1-py36he025d50_1001.tar.bz2
安装命令
conda --use-local xxx
2、搭建Tensorflow object detection API环境及验证
1、下载 Tensorflow object detection API
git库https://github.com/tensorflow/models 下载Windows版本
下载完减压
Protobuf 配置(上面已经安装此包)
models\research\目录下打开命令行窗口,输入:
protoc object_detection/protos/*.proto --python_out=.
如果报错,进入object_detection/protos/录下,把.proto文件一个一个运行,每运行一个,文件夹下
出现对应的.py的文件。比如protoc object_detection/protos/anchor_generator.proto --python_out=.
会出现anchor_generator_pb2.py
如下:
2、python环境变量设置
‘此电脑’-‘属性’- ‘高级系统设置’ -‘环境变量’-‘系统变量’ ‘PYTHONPATH’的中增加:
models/research/ 及 models/research/slim 两个文件夹的完整路径

3、验证 测试API,在 models/research/ 文件夹下运行命令行: python object_detection/builders/model_builder_test.py 不报错就ok。
3、测试自带案例
1、配置jupyter notebook
打开Anaconda Prompt, 输入jupyter notebook,会启动浏览器,并显示默认路径上的目录。
这里可能找不到你模型models-master所在的目录,修改下jupyter notebook配置文件,路径改成包含jupyter notebook路径,
比如,D:\AI\practice\deep\models-master, 那么可以改成如下,这样运行jupyter notebook浏览器看到目录为D:\AI\practice\deep
修改默认路径方法,找到配置文件jupyter_notebook_config.py
搜索关键字c.NotebookApp.notebook_dir,路径改成想要的目录
c.NotebookApp.notebook_dir = ‘D:\AI\practice\deep’
可能还不起作用,
打开jupyter notebook属性,最后面改成实际目录
E:\anaconda3\python.exe E:\anaconda3\cwp.py E:\anaconda3 E:\anaconda3\python.exe E:\anaconda3\Scripts
jupyter-notebook-script.py D:\AI\practice\deep
详细参考
https://blog.csdn.net/yilulvxing/article/details/79744159
2、 测试自带案例
打开Anaconda Prompt, cd到models-master\research\object_detection目录下
再输入jupyter notebook,浏览器打开的可能默认路径,一步一步选到object_detection目录下,点击打开
object_detection_tutorial.ipynb
运行:点击菜单 “Cell”->“Run All”
会看到如下结果,也可以换成自己的图片试试
到此Tensorflow object detection API 的环境搭建与测试已ok
4、训练自己的模型
4.1 生成训练和验证数据集
1)本案采用的水杯识别,从公司办公座位拍了上百张水杯照片,当然网上很多物体的大量数据集,可自行选择下载并使用。
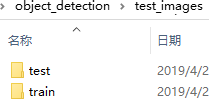
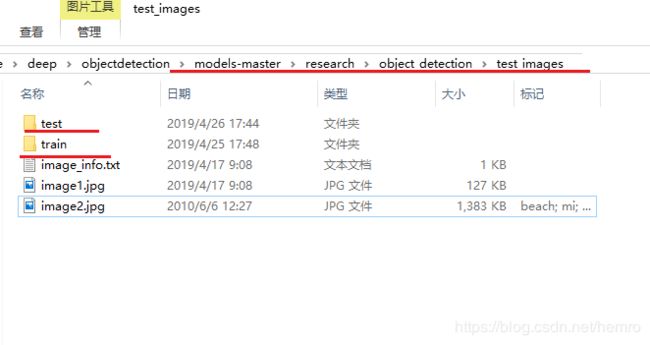
得到的训练集和测试集,分别在\models-master\research\object_detection\test_images文件夹下创建train和test文件夹,把对应的
数据集拷贝进去。如下:
使用labelImg标注问题非常方便,下载地址 https://tzutalin.github.io/labelImg/
安装和使用可以参考这篇,这里不重复, https://cloud.tencent.com/developer/news/325876
打开labelImg,点击open dir选择train目录,如下图,
接下里对每张图片中目标物体进行标注
按W,框住目标问题,弹出物体类别,可以选择已有,也可以输入一个新的值(本案使用cup,缺省的类别中没有,所以第一个标注时
新输入cup,后面的图片直接可以选择cup即),分类在data文件夹下predefined_classes.txt,也可以手动更改类别。
标注好图片中目标水杯后,点击save,会保存成图片名称一样的xml文件,内容大致如下:

标注完成第一张图片后,点击next image,标注下一个直到全部图片都标注完毕
3)修改上面标注格式xml文件修改成TensorFlow的格式
下载转化脚本, https://github.com/XiangGuo1992/Screen-Vehicle-Detection-using-Tensorflow-API
下载完解压包,进入目录
**第一步,**找到xml_to_csv.py 文件,修改dir和path为之前的train目录,如下,
os.chdir(‘D:\AI\practice\deep\objectdetection\models-master\research\object_detection\test_images\train’)
path = ‘D:\AI\practice\deep\objectdetection\models-master\research\object_detection\test_images\train’
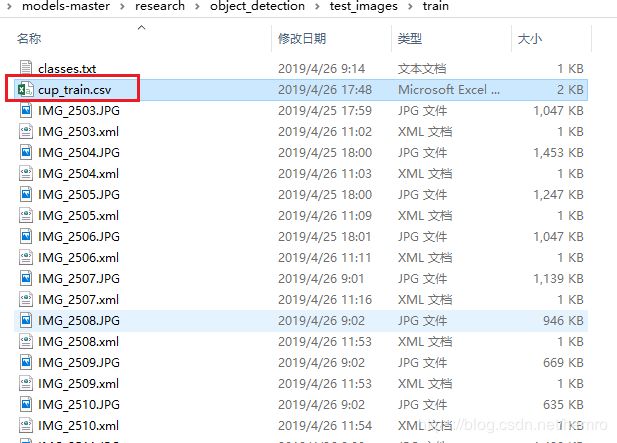
运行xml_to_csv.py,对应的目录下生成 cup_train.csv文件,如下

第二步 上一步生成的 cup_train.csv文件拷贝到models-master\research\object_detection\data文件夹下
打开python generate_tfrecord.py,将对应的label改成自己的类别,路径改成
models-master/research和models-master/research/object_detection
修改类别:
def class_text_to_int(row_label):
if row_label == ‘cup’:
return 1
else:
None
修改路径为models-master/research和models-master/research/object_detection
import sys
sys.path.append(‘D:\AI\practice\deep\objectdetection\models-master\research’)
os.chdir(‘D:\AI\practice\deep\objectdetection\models-master\research\object_detection’)
运行:
python generate_tfrecord.py --csv_input=data/cup_train.csv --output_path=data/cup_train.record
运行后在data目录下产生cup_train.record文件,如下

修改第一步和第二步中的train改成test,生成cup_test.csv和cup_test.record
第三步 在data创建一个*.pbtxt文件,本案为例cup.pbtxt,内容如下,类型和ID对应cup_train.record中保持一致。
item {
  id: 1
  name: 'cup'
}
到此数据集已经准备,数据目录如下
models-master/research/object_detection/test_images下

models-master/research/object_detection/test_images/data

4.2 模型配置
上一步数据已经准备,下面开始准备模型
4.2.1 下载模型
下载模型,https://github.com/tensorflow/models/blob/master/research/object_detection/g3doc/detection_model_zoo.md
本例使用ssd_mobilenet_v1_coco_2018_01_28,在ssd_mobilenet_v1_coco 右键另存为,保存成
ssd_mobilenet_v1_coco_2018_01_28.tar.gz, 解压到object_detection下ssd_mobilenet_v1_coco_2018_01_28

4.2.1 配置模型
修改配置文件,打开training目录下ssd_mobilenet_v1_coco.config文件,拉到最后,修改如下配置
fine_tune_checkpoint: “object_detection/ssd_mobilenet_v1_coco_2018_01_28/model.ckpt” // ssd_mobilenet_v1_coco_2018_01_28对应下载的模型,填写上一步加压出来的目录
from_detection_checkpoint: true
num_steps: 200000
}
train_input_reader {
label_map_path: “object_detection/data/cup.pbtxt” // 上一节生成的类型文件
tf_record_input_reader {
input_path: “object_detection/data/cup_train.record” // 上一节生成的训练record文件
}
}
eval_config {
num_examples: 8000
max_evals: 10
use_moving_averages: false
}
eval_input_reader {
label_map_path: “object_detection/data/cup.pbtxt” // 上一节生成的类型文件
shuffle: false
num_readers: 1
tf_record_input_reader {
input_path: "object_detection/data/cup_test.record"// 上一节生成的验证record文件
}
}
4.3 开始训练
在models-master\research\object_detection目录下运行
python object_detection/model_main.py
–pipeline_config_path=object_detection/training/ssd_mobilenet_v1_coco.config
–model_dir=object_detection/training
–num_train_steps=50000
–num_eval_steps=2000
–alsologtostderr
补充,训练模型玩报错问题
tensorflow.python.framework.errors_impl.NotFoundError: Failed to create a directory: object_detection/training\export\Servo\temp-b’1558174728’; No such file or directory
解决方法
anaconda3\Lib\site-packages\tensorflow\python\saved_model\builder_impl.py 中102行
file_io.recursive_create_dir(self._export_dir)换成
os.makedirs(compat.as_str(self._export_dir), exist_ok=True)


