Scroller实现View的平滑滑动
在之前介绍的关于View滑动的内容时,关于使用使用Scroller进行View的平滑滑动没有介绍,今天在这里补充一下。关于为什么使用Scroller滑动,这里就不多介绍,主要是因为使用scrollTo()或者scrollBy()都是瞬间完成,用户体验不是太好,当然滑动最终的实现都是通过scrollTo()实现,所以,你也可以通过不断移动一小段距离再加上一个Timer进行控制,也可以实现平滑移动的效果,具体可以参见Android中实现滑动(中)----实现(2)。下面就来看看如何使用Scroller。
1,使用步骤
这里我们直接进入主题,先给出Scroller的使用步骤,然后给出示例代码和效果图,最后在结合源码简单分析一下。使用步骤如下:
- 自定义一个View继承你想实现平滑滑动的控件
- 添加一个Scroller成员变量,并在构造方法中初始化
- 重写View的computeScroll()方法
- 定义外部访问的用于调用滑动实现的接口
有一点抽象,下面我们就结合具体的示例说一下,首先我们自定义各一个SelfButton继承至Button,并在内部实现了上述四个步骤:
package com.hfut.operationscroll;

import android.content.Context;
import android.util.AttributeSet;
import android.view.View;
import android.widget.Button;
import android.widget.Scroller;

/**
 * author:why
 * created on: 2019/5/25 13:31
 * description:用Scroller实现View 的平滑滑动
 */
public class SelfButton extends android.support.v7.widget.AppCompatButton {

    Scroller scroller;
    public SelfButton(Context context, AttributeSet attrs) {
        super(context, attrs);
        scroller=new Scroller(context);

    }

    /**
     * 第三步:重写computeScroll()方法
     */
    @Override
    public void computeScroll() {
        super.computeScroll();
        if(scroller.computeScrollOffset()){
            ((View)getParent()).scrollTo(scroller.getCurrX(),scroller.getCurrY());
            invalidate();//重绘,在重绘调用draw()方法中,内部会调用View的computeScroll()方法
        }
    }

    /**
     * 第四步:对外调用接口,可以封装成接口
     * @param destX:滑动Dest X
     * @param destY:滑动Dest Y
     * @param duration:滑动时间
     */
    public void scrollerMove(int destX,int destY,int duration){
        int scrollX=getScrollX();
        int scrollY=getScrollY();
        int moveDistX=destX-scrollX;
        int moveDistY=destX-scrollY;
        scroller.startScroll(scrollX,scrollY,moveDistX,moveDistY,duration);
        invalidate();
    }
}
然后我们在业务层调用一下看看效果:
button.scrollerMove(-400, -400,5000);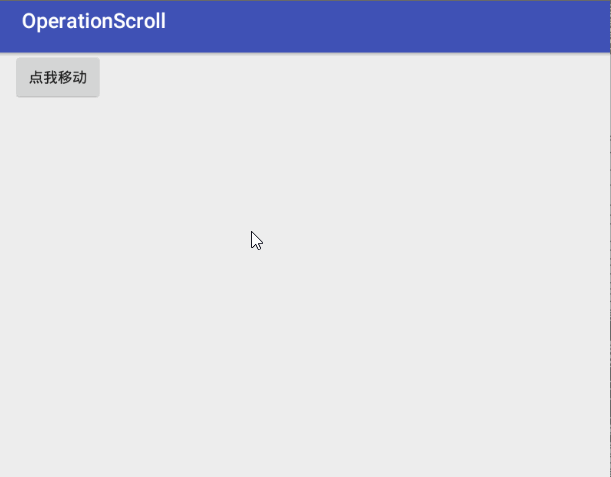
可以看到我们使用scroller再加上上面说的四步,成功实现view的平滑滑动,那么究竟是Scroller究竟是什么,怎么实现的了,下面我们就来简单分析一下。
2,Scroller实现View平滑滑动分析
首先,我们使用Scroller的指导它究竟是什么,那么最好的当然还是看官方文档介绍:
*This class encapsulates scrolling. You can use scrollers ({@link Scroller} * or {@link OverScroller}) to collect the data you need to produce a scrolling * animation—for example, in response to a fling gesture. Scrollers track * scroll offsets for you over time, but they don't automatically apply those * positions to your view. It's your responsibility to get and apply new * coordinates at a rate that will make the scrolling animation look smooth.
这是一个封装了滚动的类,你可以通过滚动条来收集你想要产生滚动动画的数据,比如,响应一个手势动作;滚动条会实时获取滚动的偏移量,但是它们不负责把这些数据应用到你的view上,你需要自己吧这些数据应用到你的view上实现一个平滑滚动动画的效果。
上面是我自己简单翻译的,感觉比较抽象哈,其实一点都不难,我们就结合上面给的示例说明一下上面意思:
- 首先Scroller它是一个封装了滚动类,你可以通过它来收集数据
- 究竟如何收集数据了,那我们就需要转到Scroller源码中一探究竟了。首先我们知道获取数据的接口如下(在重写的computeScroll()中):
scroller.getCurrX()
scroller.getCurrY()
我们跟到Scroller源码中看一下(只给出一个,另一个类似):
   /**
     * Returns the current X offset in the scroll.
     *
     * @return The new X offset as an absolute distance from the origin.
     */
    public final int getCurrX() {
        return mCurrX;
}这里只是返回了一个内部变量的值,那么它的赋值逻辑我们在哪个调用的接口中实现的了。我们在重写获取这些数值之前还调用了Scroller的一个接口,那就是computeScrollOffset(),下面就来看看它的逻辑代码:
 /**
     * Call this when you want to know the new location.  If it returns true,
     * the animation is not yet finished.
     */
    public boolean computeScrollOffset() {
        if (mFinished) {
            return false;
        }

        int timePassed = (int)(AnimationUtils.currentAnimationTimeMillis() - mStartTime);

        if (timePassed < mDuration) {
            switch (mMode) {
            case SCROLL_MODE:
                final float x = mInterpolator.getInterpolation(timePassed * mDurationReciprocal);
                mCurrX = mStartX + Math.round(x * mDeltaX);
                mCurrY = mStartY + Math.round(x * mDeltaY);
                break;
            case FLING_MODE:
                final float t = (float) timePassed / mDuration;
                final int index = (int) (NB_SAMPLES * t);
                float distanceCoef = 1.f;
                float velocityCoef = 0.f;
                if (index < NB_SAMPLES) {
                    final float t_inf = (float) index / NB_SAMPLES;
                    final float t_sup = (float) (index + 1) / NB_SAMPLES;
                    final float d_inf = SPLINE_POSITION[index];
                    final float d_sup = SPLINE_POSITION[index + 1];
                    velocityCoef = (d_sup - d_inf) / (t_sup - t_inf);
                    distanceCoef = d_inf + (t - t_inf) * velocityCoef;
                }

                mCurrVelocity = velocityCoef * mDistance / mDuration * 1000.0f;

                mCurrX = mStartX + Math.round(distanceCoef * (mFinalX - mStartX));
                // Pin to mMinX <= mCurrX <= mMaxX
                mCurrX = Math.min(mCurrX, mMaxX);
                mCurrX = Math.max(mCurrX, mMinX);

                mCurrY = mStartY + Math.round(distanceCoef * (mFinalY - mStartY));
                // Pin to mMinY <= mCurrY <= mMaxY
                mCurrY = Math.min(mCurrY, mMaxY);
                mCurrY = Math.max(mCurrY, mMinY);

                if (mCurrX == mFinalX && mCurrY == mFinalY) {
                    mFinished = true;
                }

                break;
            }
        }
        else {
            mCurrX = mFinalX;
            mCurrY = mFinalY;
            mFinished = true;
        }
        return true;
}这个就是实现在Scroller开始滚动后(startScroll())计算数据的逻辑,其中startScroll()的逻辑如下:
/**
     * Start scrolling by providing a starting point and the distance to travel.
     * The scroll will use the default value of 250 milliseconds for the
     * duration.
     *
     * @param startX Starting horizontal scroll offset in pixels. Positive
     *        numbers will scroll the content to the left.
     * @param startY Starting vertical scroll offset in pixels. Positive numbers
     *        will scroll the content up.
     * @param dx Horizontal distance to travel. Positive numbers will scroll the
     *        content to the left.
     * @param dy Vertical distance to travel. Positive numbers will scroll the
     *        content up.
     */
    public void startScroll(int startX, int startY, int dx, int dy) {
        startScroll(startX, startY, dx, dy, DEFAULT_DURATION);
    }

    /**
     * Start scrolling by providing a starting point, the distance to travel,
     * and the duration of the scroll.
     *
     * @param startX Starting horizontal scroll offset in pixels. Positive
     *        numbers will scroll the content to the left.
     * @param startY Starting vertical scroll offset in pixels. Positive numbers
     *        will scroll the content up.
     * @param dx Horizontal distance to travel. Positive numbers will scroll the
     *        content to the left.
     * @param dy Vertical distance to travel. Positive numbers will scroll the
     *        content up.
     * @param duration Duration of the scroll in milliseconds.
     */
    public void startScroll(int startX, int startY, int dx, int dy, int duration) {
        mMode = SCROLL_MODE;
        mFinished = false;
        mDuration = duration;
        mStartTime = AnimationUtils.currentAnimationTimeMillis();
        mStartX = startX;
        mStartY = startY;
        mFinalX = startX + dx;
        mFinalY = startY + dy;
        mDeltaX = dx;
        mDeltaY = dy;
        mDurationReciprocal = 1.0f / (float) mDuration;
    }
- 收集之后,如果你不做任何操作,Scroller本身也不会为你的View和这些data建立联系,那我们就需要重写computeScroll()方法自己应用这些数据
 ((View)getParent()).scrollTo(scroller.getCurrX(),scroller.getCurrY());
 invalidate();//重绘,在重绘调用draw()方法中,内部会调用View的computeScroll()方法
- 就这样,Scroller内部获取数据通过接口抛出来,我们拿到之后应用到View的滑动动画上就可以了。
所以整个流程梳理下来就是如下这样:
- 我们开启Scroller的startScroll()实现一些状态的赋值,比如mFinished等
- 我们在自定义View的重写的computeScroll()方法中调用Scroller的computeScrollerOffset()接口计算滑动数据,然后通过Scroller的getCurrX()等接口获取实时计算的数据
- 拿到数据之后,我们需要根据自己的需要来使用这些数据,我们这里想要实现一个滑动的效果,所以直接调用了scrollTo()来接收这些数据,最后通过invalidate()方法实现view的重绘
- 在View重绘的过程中,必然需要调用draw()方法,而在draw()方法中,又会调用computeScroll()方法,就这样实现了一个平滑动画的效果,直至结束(以下条件不满足,逻辑来自Scroller中的computeScrollOffset())。
if (timePassed < mDuration)至此,关于Scroller实现View的平滑滑动的实现以及分析就结束了。如果想了解View其他滑动实现,欢迎阅读
注:欢迎扫码关注
