centos通过logstash完成mysql数据库同步至elasticsearch,elasticsearch logstash maven ik分词器安装配置,elasticsearch索引创建
首先 下载elasticsearch与logstash 并上传至服务器(这里由于笔者工程历史原因,所以采用5.6.1的,下次有机会来个6.0的)
elasticsearch
https://artifacts.elastic.co/downloads/elasticsearch/elasticsearch-5.6.1.tar.gz
logstash
https://artifacts.elastic.co/downloads/logstash/logstash-5.6.1.tar.gz
elasticsearch-analysis-ik
https://github.com/medcl/elasticsearch-analysis-ik/archive/v5.6.1.tar.gz
elasticsearch安装配置
elasticsearch要求登录用户必须为非root,所以我们先创建一个用户 并设置密码
useradd huaihkiss
passwd huaihkiss
由于笔者工程要求 所以再为该用户设置超级管理员权限
vim /etc/passwdhuaihkiss:x:1000:1000::/home/huaihkiss:/bin/bash
改为
huaihkiss:x:1000:0::/home/huaihkiss:/bin/bash
vim /etc/sudoersroot ALL=(ALL) ALL
下边加入
huaihkiss ALL=(ALL) ALL
提高vm.max_map_count大小(注:以下操作除了启动elasticsearch以外,其余操作都需要用root用户或者sudo权限操作,否则会有权限问题)
vim /etc/sysctl.conf加入
vm.max_map_count = 262144保存更新
sysctl -p
修改ulimit
vim /etc/security/limits.conf加入如下两句
huaihkiss hard nofile 1000000
huaihkiss soft nofile 111111100000
保存后切换为huaihkiss用户,并查看ulimit(切换其他用户是由于elasticsearch要求非root用户启动,以上其他操作是为了elasticsearch启动要求)
su huaihkiss
ulimit -Hn
下载并解压elasticsearch
wget https://artifacts.elastic.co/downloads/elasticsearch/elasticsearch-5.6.1.tar.gz
tar -xf elasticsearch-5.6.1.tar.gz
cd elasticsearch-5.6.1
修改network.host配置
vim config/elasticsearch.yml加入
network.host: 0.0.0.0后台启动elasticsearch
./bin/elasticsearch -d浏览器访问elasticsearch
http://ip:9200/这样就成功了
maven安装配置
wget http://mirrors.tuna.tsinghua.edu.cn/apache/maven/maven-3/3.5.2/binaries/apache-maven-3.5.2-bin.tar.gz
tar -xf apache-maven-3.5.2-bin.tar.gz
配置环境变量
vim /etc/profile最底部加入环境变量(jdk请自行配置)
export MAVEN_HOME=/usr/local/soft/apache-maven-3.5.2
export PATH=$JAVA_HOME/bin:$MAVEN_HOME/bin:$PATH
使环境变量生效
source /etc/profile测试命令
mvn -version让maven使用阿里云镜像库
vim apache-maven-3.5.2/conf/settings.xml在mirrors标签中添加如下内容,保存即可
      alimaven
      aliyun maven
      http://maven.aliyun.com/nexus/content/groups/public/
      central
ik分词器配置安装
按照以下操作
wget https://github.com/medcl/elasticsearch-analysis-ik/archive/v5.6.1.tar.gz
tar -xf v5.6.1.tar.gz
cd elasticsearch-analysis-ik-5.6.1/
mvn clean package
cd target/releases/
cp elasticsearch-analysis-ik-5.6.1.zip /usr/local/soft/elasticsearch-5.6.1/plugins/
cd /usr/local/soft/elasticsearch-5.6.1/plugins/
unzip elasticsearch-analysis-ik-5.6.1.zip
rm -rf elasticsearch-analysis-ik-5.6.1.zip
mv elasticsearch ik
编辑ik,引入词典(这里的词典是笔者自己找的,读者可以按照需求自行添加)
vim ik/config/IKAnalyzer.cfg.xml
        IK Analyzer 扩展配置

        extra_single_word.dic;sogougood.dic;sogou_stanrd.dic;gooddic.dic
重启elasticsearch后,访问地址测试
http://192.168.29.210:9200/_analyze?analyzer=ik_max_word&pretty=true&text=中华人民共和国
添加elasticsearch索引映射关系与指定分词器
使用postman之类的工具,发起以下请求(具体properties设置请参考其他文档)
put http://192.168.29.210:9200/test{
"settings": {
"number_of_shards":1,
"analysis": {
"analyzer": {
"ik": {
"tokenizer": "ik_max_word"
}
}
}
},
"mappings": {
"myproduct": {
"_parent": {
"type": "mysupplier"
},
"dynamic": "false",
"include_in_all": false,
"properties": {
}
}
}
}增加最大结果集
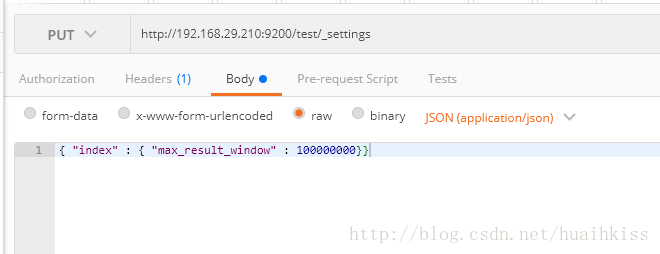
put http://192.168.29.210:9200/test/_settings{ "index" : { "max_result_window" : 100000000}}
logstash安装配置
下载并解压logstash
wget https://artifacts.elastic.co/downloads/logstash/logstash-5.6.1.tar.gz
tar -xf logstash-5.6.1.tar.gz
创建同步配置文件
cd logstash-5.6.1/config/
vim logstash.conf
input {
stdin {
}
jdbc {
jdbc_connection_string => "jdbc:mysql://127.0.0.1:3306/mytest"
jdbc_user => "root"
jdbc_password => "root!@#$"
jdbc_driver_library => "/usr/local/soft/logstash-5.6.1/config/mysql-connector-java-5.1.42.jar"
jdbc_driver_class => "com.mysql.jdbc.Driver"
jdbc_paging_enabled => "true"
jdbc_page_size => "50000"
statement_filepath => "/usr/local/soft/logstash-5.6.1/config/product.ins.sql"
schedule => "* * * * *"
type => "myproduct"
}
}
output {
if [type] == "myproduct" {
elasticsearch {
hosts => "127.0.0.1:9200"
index => "test"
document_type => "myproduct"
document_id => "p%{product_id}"
parent => "s%{supplier_id}"
}
}
stdout {
codec => json_lines
}
}input
jdbc_password:jdbc密码
jdbc_connection_string:jdbc地址
statement_filepath:带有要同步的sql语句的文本文件
type:多同步源时用以区分的标识
schedule:同步的时间规则,参考cron
jdbc_driver_library:数据库驱动jar包
jdbc_driver_class:驱动class
output
hosts:要同步到的elasticsearch地址
index:要同步到的索引
document_type:要同步到的elasticsearch的type
document_id:指定id字段
parent:指定父文档id
这里要注意一点:document_id与parent要带上各自的标识,例如该文档的type为product,父文档的type为supplier,那么就应该为document_id的参数前边加一个p,parent参数前边加一个s,以防id冲突。
笔者之前踩的坑。。哈哈
接下来,编辑sql语句
vim product.ins.sqlSELECT
xpi.wl_bn product_wl_bn,
xpi.id product_id,
xpi.created_time product_created_time,
xpi.updated_time product_updated_time,
xpi.bn product_bn,
xpi.supplier_id supplier_id,
xpi.brand_id brand_id,
xpi.`name` product_name,
xpi.image_url image_url,
xpi.description product_description,
xpi.param param,
xpi.category_id category_id,
xpi.type_id type_id,
xpi.details_picture details_picture,
xpi.sales product_sales,
xpi.is_new product_is_new,
xpi.is_hot product_is_hot,
xpi.default_price default_price,
xpi.hits hits,
xpi.`status` `status`,
xpi.enabled product_enabled,
xpi.re_mark product_re_mark,
xpc.created_time category_created_time,
xpc.updated_time category_updated_time,
xpc.`name` product_category_name,
xpc.re_mark product_category_re_mark,
xpc.enabled product_category_enabled,
xpc2.created_time second_category_created_time,
xpc2.updated_time second_category_updated_time,
xpc2.`name` second_product_category_name,
xpc2.re_mark second_product_category_re_mark,
xpc2.enabled second_product_category_enabled,
xpc1.created_time first_category_created_time,
xpc1.updated_time first_category_updated_time,
xpc1.`name` first_product_category_name,
xpc1.re_mark first_product_category_re_mark,
xpc1.enabled first_product_category_enabled,
xpi.other_praise_rate product_other_praise_rate,
xpi.total_praise_rate product_total_praise_rate,
xpi.praise_rate product_praise_rate,
xpi.other_sales product_other_sales,
xpi.total_sales product_total_sales
FROM
x_product_info xpi
LEFT JOIN x_product_category xpc ON xpi.category_id = xpc.id
LEFT JOIN x_product_category xpc2 ON xpc2.id = xpc.parent_id
LEFT JOIN x_product_category xpc1 ON xpc1.id = xpc2.parent_id下载mysql驱动包
wget http://central.maven.org/maven2/mysql/mysql-connector-java/5.1.42/mysql-connector-java-5.1.42.jar回到bin目录下,并通过配置文件运行logstash
cd ../bin/
./logstash -f ../config/logstash.conf
之后就开始自动同步了


