纯手写SpringBoot教案系列-SpringBoot-Web开发详解
三.SpringBoot Web实战开发
1. 静态资源的映射处理
1.1 以webjars形式引入
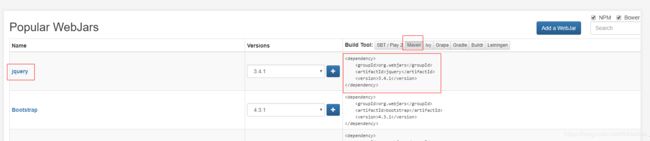
以jq为例
- 进入官网,找到jq,并切换页签到maven
-
复制maven到我们的pom.xml
-
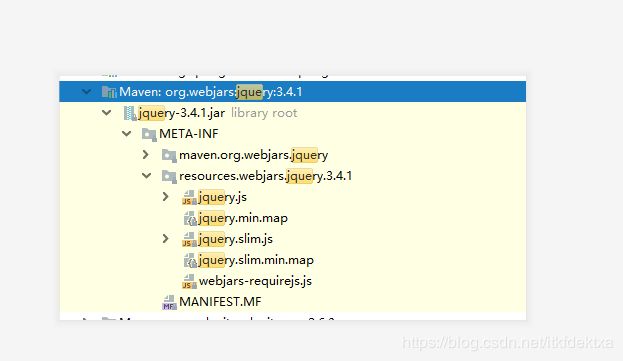
导入后目录结构
-
SpringBoot将包路径映射为了Restful URL
访问http://localhost/webjars/jquery/3.4.1/jquery.min.js
-
访问成功!
1.2 以静态资源导入(常用)
webjars的方式导入简单,但是访问路径较长,我们有没有更加简便的方法?
在不做任何声明的情况下,SpringBoot都会去以下目录寻找静态资源
-
classpath:/META-INF/resources/
-
classpath:/resources/
-
classpath:/static/
-
classpath:/public/
-
“/”:当前项目根路径
我们统一规定放在static下
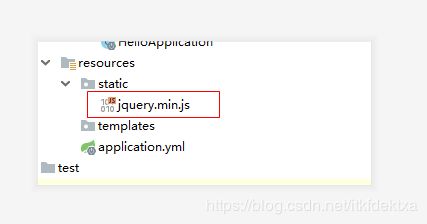
- 将我们要引入的文件复制到项目的static下
-
选择build>rebuild project 重新构建项目
-
运行SpringBoot
-
访问http://localhost/jquery.min.js
-
访问成功!
1.3 首页
requestMapping为"/"的返回结果
前者只需要放在静态资源规定的5个文件夹下即可
1.4 网站图标
application配置
spring.mvc.favicon.enable = false可以关闭该功能,SpringBoot默认开启
将favicon.ico放在任意静态资源文件夹下
1.5 制定自己的静态资源文件夹
spring.resources.static-locations = classpath:/hello/,classpath:/mystatic/
注意:自己定义后默认静态文件夹会失效!
2.Thymeleaf 详解
如果出现只加载得了一个页面的情况,是因为下载了假的thymeleaf包,清空.m2文件夹下的所有依赖重新导入maven依赖即可
SpringBoot推荐的模板引擎
模板引擎:将模板和数据组合渲染后返回给用户的程序
2.1 thymeleaf依赖导入
-
导入相关依赖
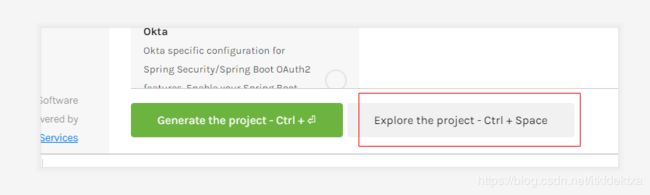
进入https://start.spring.io/
-
切换到starter选择视图
- 选择thymeleaf
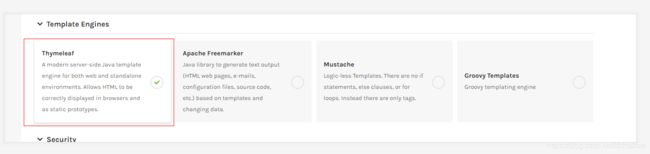
- 查看生成的pom依赖文件
-
复制依赖
<dependency> <groupId>org.springframework.bootgroupId> <artifactId>spring-boot-starter-thymeleafartifactId> dependency> -
导入成功
2.2 thymeleaf源码配置分析
-
找到thymeleaf下的xxxAutoConfiguration包
package org.springframework.boot.autoconfigure.thymeleaf;
-
进入ThymeleafProperties,可以看到一些基础的默认配置
@ConfigurationProperties(
    prefix = "spring.thymeleaf"
)
public class ThymeleafProperties {
    private static final Charset DEFAULT_ENCODING;
    public static final String DEFAULT_PREFIX = "classpath:/templates/";
    public static final String DEFAULT_SUFFIX = ".html";
    private boolean checkTemplate = true;
    private boolean checkTemplateLocation = true;
    private String prefix = "classpath:/templates/";
    private String suffix = ".html";
    private String mode = "HTML";
2.3 thymeleaf语法
进入官网下载thymeleaf官方pdf文档
https://www.thymeleaf.org/documentation.html
入门示例
后台
@Controller
public class BaseController {
    @Autowired
    Student student;

    @ResponseBody
    @RequestMapping("/")
    public String home(){
        Logger logger = LoggerFactory.getLogger(this.getClass());
        logger.info("hello");
        return student.toString();
    }

    @RequestMapping("/hello")
    public String hello(Map<String,Object> map){
        map.put("msg","hello beijing");
        return "hello";
    }

}
前端
<html lang="zh" xmlns:th="http://www.thymeleaf.org">
<head>
    <meta charset="UTF-8">
    <meta name="viewport"
          content="width=device-width, user-scalable=no, initial-scale=1.0, maximum-scale=1.0, minimum-scale=1.0">
    <meta http-equiv="X-UA-Compatible" content="ie=edge">
    <title>hellotitle>
head>
<body>
    <div th:text="${msg}">div>
body>
html>
使用
-
导入thymeleaf约束文档
<html xmlns:th="http://www.thymeleaf.org"> -
学习语法规则(常用)
th:text=""	渲染text
th:id=""	渲染id
th:class=""	渲染class
th:uText=""	渲染html(不转义)
th:object=""	渲染对象(结合*{属性名}直接取出对应属性)
th:each="" 	渲染数组或者集合
@{}	绑定link,参考官方文档,可以不用?拼参数
[[]]	行内表达式
更多表达式语法参考官方文档第四章
更多渲染标签参考官方文档第十章
实战th:each
后台
@Controller
public class BaseController {
    @Autowired
    Student student;

    @ResponseBody
    @RequestMapping("/")
    public String home(){
        Logger logger = LoggerFactory.getLogger(this.getClass());
        logger.info("hello");
        return student.toString();
    }

    @RequestMapping("/hello")
    public String hello(Map<String,Object> map){
        map.put("msg","hello beijing");
        map.put("list", Arrays.asList("tom","jerry","jack"));
        return "hello";
    }

}
前端
<html lang="zh" xmlns:th="http://www.thymeleaf.org">
<head>
    <meta charset="UTF-8">
    <meta name="viewport"
          content="width=device-width, user-scalable=no, initial-scale=1.0, maximum-scale=1.0, minimum-scale=1.0">
    <meta http-equiv="X-UA-Compatible" content="ie=edge">
    <title>hellotitle>
head>
<body>
    <div th:text="${msg}">div>
    <ul th:each="user : ${list}" >
        <li th:text="${user}">li>
    ul>
body>
html>
2.4 thymeleaf vs jsp
- 未破坏html文档结构,文件仍是.html
- Spring官方推荐,更好的生态
- 渲染速度更快
- 后台数据用Map返回
- jsp还需要配合jstl
总之,freemarker和thymeleaf是大势所趋,jsp祖传代码势必淘汰!
3. 热部署dev-tools
搭建参考文献
https://blog.csdn.net/qq_42685050/article/details/81588584
-
加入pom依赖
<dependency> <groupId>org.springframework.bootgroupId> <artifactId>spring-boot-devtoolsartifactId> <optional>trueoptional> <scope>truescope> dependency><plugin> <groupId>org.springframework.bootgroupId> <artifactId>spring-boot-maven-pluginartifactId> <configuration> <fork>truefork> configuration> plugin> -
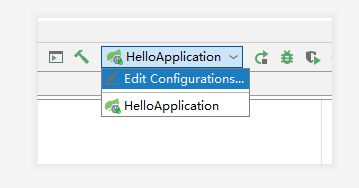
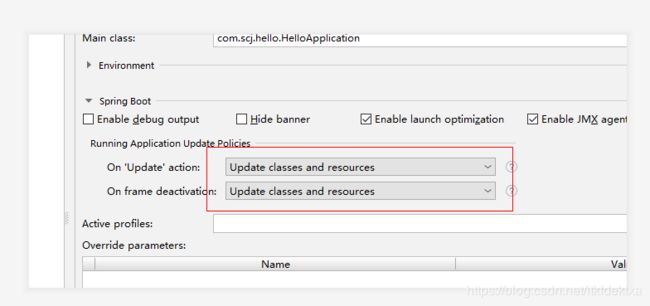
设置IDEA自动编译
File-Settings-Compiler勾选 Build Project automatically
快捷键 ctrl + shift + alt + /,选择Registry,勾上 Compiler autoMake allow when app running
-
设置热交换文件和类
- 重启SpringBoot程序,完成热部署设置
4. 国际化
1. 以前的SpringMVC做法
- 编写国际化配置文件
- 使用ResourceBundleMessageSource管理国际化资源文件
- 在页面使用fmt:message取出国际化内容
2. SpringBoot做法
-
编写国际化文件,抽取页面需要国际化的内容
注意:国际化文件必须是.properties文件
3. 国际化实战开发
因为properties文件存在编码问题,所以我们先要对IDEA进行全局设置

-
创建i18n文件夹
- 创建hello.properties
- 创建hello_zh_CN.properties
- 创建hello_en_US.properties
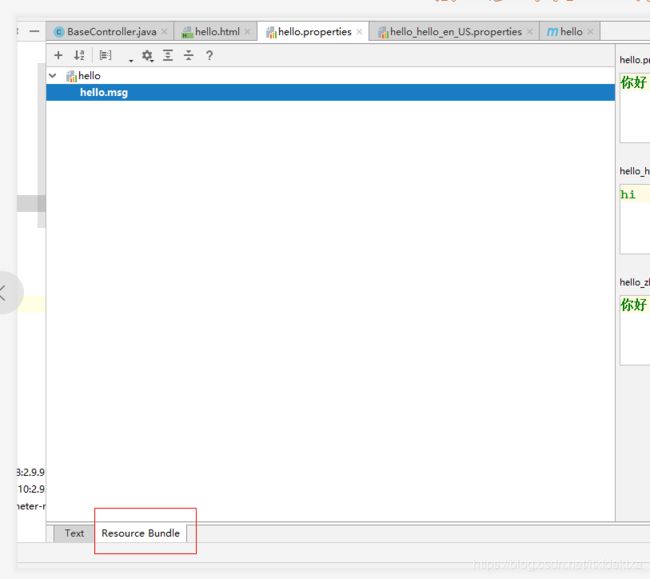
这时IDEA会自动监测到国际化文件并为我们生成国际化视图
切换到国际化编辑器
-
配置自定义国际化路径(如果不想配置可以直接放到SpringBoot规定的/resources/messages文件夹下)
# 国际化配置 spring: messages: basename: i18n.hello -
在页面中通过#{…}获取国际化的值
4. 国际化原理
在Web中,根据用户的请求头信息(Accept Language)来区别语言信息
在SpringMVC中有LocaleResolver接口用于处理国际化中的地域问题
首先自己实现一个localeResolver
package com.scj.hello.component;

import org.springframework.util.StringUtils;
import org.springframework.web.servlet.LocaleResolver;

import javax.servlet.http.HttpServletRequest;
import javax.servlet.http.HttpServletResponse;
import java.util.Locale;

/**
 * @ClassName MylocaleResolver
 * @Description
 * @Author QinLing
 * @Date 2019/8/13 0013 17:26
 * @Version 1.0
 **/
public class MylocaleResolver implements LocaleResolver {
    @Override
    public Locale resolveLocale(HttpServletRequest request) {
        String l = request.getParameter("l");
        Locale locale = Locale.getDefault();
        if(!StringUtils.isEmpty(l)){
            String[] split = l.split("_");
            locale = new Locale(split[0],split[1]);
        }
        return locale;
    }

    @Override
    public void setLocale(HttpServletRequest httpServletRequest, HttpServletResponse httpServletResponse, Locale locale) {

    }
}
配置自己的区域解析器到SpringBoot
package com.scj.hello.config;

import com.scj.hello.component.MylocaleResolver;
import org.springframework.context.annotation.Bean;
import org.springframework.context.annotation.Configuration;
import org.springframework.web.servlet.LocaleResolver;

/**
 * @ClassName MyConfig
 * @Description
 * @Author QinLing
 * @Date 2019/8/13 0013 17:33
 * @Version 1.0
 **/
@Configuration
public class MyConfig {
    @Bean
    public LocaleResolver localeResolver(){
        return new MylocaleResolver();
    }
}
页面中添加切换选项
<html lang="zh" xmlns:th="http://www.thymeleaf.org">
<head>
    <meta charset="UTF-8">
    <meta name="viewport"
          content="width=device-width, user-scalable=no, initial-scale=1.0, maximum-scale=1.0, minimum-scale=1.0">
    <meta http-equiv="X-UA-Compatible" content="ie=edge">
    <title>hellotitle>
head>
<body>
    <div th:text="${msg}">div>
    <ul th:each="user : ${list}" >
        <li th:text="${user}">li>
    ul>
    <h1 th:text="#{hello.msg}">h1>
    <h3>切换语言h3>
    <a th:href="@{/hello(l='zh_CN')}">中文a>
    <a th:href="@{/hello(l='en_US')}">英文a>
body>
html>
5. 拦截器实战详解
通常系统都会有权限管理,不同用户能看到的内容是不一样的,我们之前SpringMVC通过xml文件配置拦截器的方式来拦截请求
- 过滤器和拦截器的区别?
SpringBoot推荐全注解开发,除了pom以外的文件都不是xml格式,所以SpringBoot给我们提供了配置类的注解@Configuration
-
创建拦截器
@Component public class BaseInterceptor implements HandlerInterceptor { @Override public boolean preHandle( HttpServletRequest request, HttpServletResponse response, Object handler) throws Exception { System.out.println("拦截器执行"); return false; } @Override public void postHandle( HttpServletRequest request, HttpServletResponse response, Object handler, ModelAndView modelAndView) throws Exception { } @Override public void afterCompletion(HttpServletRequest request, HttpServletResponse response, Object handler, Exception exception) throws Exception { } } -
注册拦截器
@Configuration public class BaseInterceptorConfig implements WebMvcConfigurer { @Autowired private BaseInterceptor baseInterceptor; @Override public void addInterceptors(InterceptorRegistry registry) { registry.addInterceptor(baseInterceptor); } } -
管理例外情况
@Configuration
public class BaseInterceptorConfig implements WebMvcConfigurer {
    @Autowired
    private BaseInterceptor baseInterceptor;

    @Override
    public void addInterceptors(InterceptorRegistry registry) {
        List exclude = new ArrayList();//不拦截的列表
        exclude.add("/");
        exclude.add("/css/**");
        exclude.add("/js/**");
        registry.addInterceptor(baseInterceptor).excludePathPatterns(exclude);
    }
}
6. Restful 规范
CRUD:/资源名称/资源标识/资源操作
对比普通CRUD,和REST风格的CRUD
| 操作方式 | 普通玩家 | 高级玩家 |
|---|---|---|
| 增 | addUser | user/post |
| 删 | deleteUser?id={} | user/{id}/delete |
| 查 | getUser?id={} | user/{id}/get |
| 改 | updateUser?id={} | user/put |
提升@RequestMapping 注解使用技巧
https://juejin.im/entry/59bb7a8f5188256bd871dc15
处理动态URL
@RestController
@RequestMapping("/home")
public class IndexController {
    @RequestMapping(value = "/fetch/{id} ", method = RequestMethod.GET)
    String getDynamicUriValue(@PathVariable String id) {
        System.out.println("ID is  " + id);
        return "Dynamic URI parameter fetched ";
    }
    @RequestMapping(value = "/fetch/{id:[a-z]+}/{name} ", method = RequestMethod.GET)
    String getDynamicUriValueRegex(@PathVariable("name ") String name) {
        System.out.println("Name is  " + name);
        return "Dynamic URI parameter fetched using regex ";
    }
}
7.SpringBoot 错误处理
7.1 SpringBoot默认错误处理方式
-
返回空白页,并返回错误码(访问不存在的页面)
-
用PostMan模拟其他客户端,SpringBoot会响应json数据
https://www.cnblogs.com/fnng/p/9136434.html
7.2 定制自己的错误页面
错误页面会响应4xx和5xx
-
定制错误页面
在模板引擎的/templates/error下对应状态码创建,例如/templates/error/404.html
或者可以/templates/error/4xx.html匹配一种类型的错误
在页面中使用行内表达式[[${status}]]可以获取具体的报错编号
可选
- timestamp
- error
- status
- exception
- message
- errors
如果以上两种共存,精确的报错页面优先
以上是有模板引擎的情况下,没有的情况下直接放到templates文件夹下即可
-
定制错误json(略,使用SpringBoot默认即可)
以上博文是我在培训的时候整理的教案,码字不易,转载请注明出处,联系邮箱[email protected]