Android MVP+Dagger2使用教程
Dagger2是一个依赖注入框架,在解耦合方面堪称强大。如果你还不知道什么是依赖注入,以及使用Dagger2的原因,那么还是麻烦你先去google、百度一下,这里我暂时不会涉及dagger2的原理,而是使用一个非常简单的MVP例子来应用dagger2。为什么要使用MVP的例子讲解呢?因为dagger2和MVP是天造地设的一对~、
一、不使用dagger2的MVP Demo
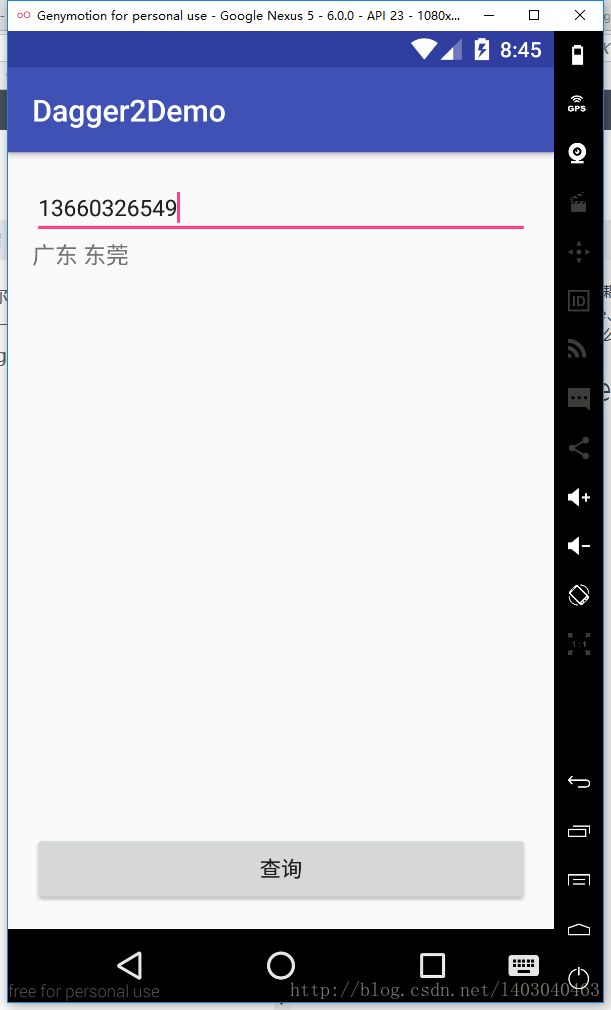
这个MVP Demo非常简单,模拟手机号码归属地查询的实现。如下图,在EditText中输入手机号码,点击查询按钮,就会显示出手机号码所归属的省市。PS:为了简(偷)便(懒),这里并不存在网络请求,我只是模拟了这一过程而已,所以手机号输入可以是随意的字符即可,只要保证EditText的内容不为空就可以了,各位见怪勿怪哈哈哈~

MVP分为model、view、和presenter,其中Activity承担View的角色,只负责控件的显示和更新。model负责业务逻辑和各种数据实体,presenter则负责连接Activity。
1、View
首先是IQueryView.java
public interface IQueryView {

    //查询成功后,显示手机归属地的查询结果
    void showSuccessMsg(String successMsg);
    //查询失败,显示失败原因
    void showErrorMsg(String errorMsg);
}
然后在MainActivity中实现该接口:
MainActivity.class
public class MainActivity extends AppCompatActivity implements IQueryView,View.OnClickListener{
    //输入手机号码
    EditText et;
    //显示查询结果
    TextView tv;
    Button btn;

    //presenter的实现在下面
    public QueryPresenter presenter;

    @Override
    protected void onCreate(Bundle savedInstanceState) {
        super.onCreate(savedInstanceState);
        setContentView(R.layout.activity_main);

        et= (EditText) findViewById(R.id.et);
        tv= (TextView) findViewById(R.id.tv_res);
        btn= (Button) findViewById(R.id.btn_query);

        presenter=new QueryPresenter(this);
        btn.setOnClickListener(this);
    }

    //在TextView中显示查询结果,Activity只负责View的更新和显示
    @Override
    public void showSuccessMsg(String successMsg) {
        tv.setText(successMsg);
    }

    //查询失败时,Toast提示
    @Override
    public void showErrorMsg(String errorMsg) {
        Toast.makeText(this,errorMsg,Toast.LENGTH_LONG).show();
    }

    //点击查询按钮时,将查询逻辑交给Presenter
    @Override
    public void onClick(View view) {
        presenter.query(et.getText().toString().trim());
    }
}
2、Presenter
Presenter负责连接view和model,view无法直接获取model的数据,model也无法直接操作view,即实现了view和model之间的完全解耦。Presenter和View、Presenter和Model之间的通信都是使用接口。
QueryPresenter.java:
public class QueryPresenter implements OnQueryListener{

    private IQueryView view;
    public QueryModel model;

    public QueryPresenter(IQueryView view){
        this.view=view;
        model=new Model();
    }

    //使用model发起网络请求
    public void query(String phoneNumber){
        model.queryNumber(phoneNumber,this);
    }

    @Override
    public void onSuccess(String successMsg) {
        //通知View更新
        view.showSuccessMsg(successMsg);
    }

    @Override
    public void onError(String errorMsg) {
        view.showErrorMsg(errorMsg);
    }
}
onQueryListener.java:连接Presenter和Model
public interface OnQueryListener {
    //model通知presenter查询成功
    void onSuccess(String successMsg);
    //model通知presenter查询失败
    void onError(String errorMsg);
}
3、Model
model代表业务逻辑和数据实体,在这里,model完成手机号归属地查询的网络请求(模拟)
QueryModel.java:
public class QueryModel {
    public QueryModel(){}

    /**
     * 模拟手机号码归属地查询
     * @param phoneNum
     * @param listener
     */
    public void queryNumber(String phoneNum, OnQueryListener listener){
        //模拟网络请求,请求结果为广东 东莞
        String result="广东 东莞";
        //通知Presenter
        listener.onSuccess(result);
    }
}
好了,完整的MVP Demo就是这样了。可以看到,我们在MainActivity中需要实例化Presenter:
presenter=new QueryPresenter(this);在QueryPresenter中我们还需要实例化Model
    public QueryPresenter(IQueryView view){
        this.view=view;
        model=new Model();
    }
这就是所谓的依赖,MainActivity依赖QueryPresenter,QueryPresenter依赖QueryModel。在大型项目中,一个类可能依赖多个其他的类,需要书写类似A a=new A( )的代码就会很多很繁琐,而使用dagger2就可以省去很多代码量,更重要的是,降低耦合度,让程序结构更清晰,易于维护和测试。
二、使用dagger2的MVP Demo
1、引入dagger2的准备工作
在project–build.gradle中添加apt插件。PS:apt插件不止这一种
build.gradle:
// Top-level build file where you can add configuration options common to all sub-projects/modules.

buildscript {
    repositories {
        jcenter()
    }
    dependencies {
        classpath 'com.android.tools.build:gradle:2.2.3'
        //添加apt插件
        classpath 'com.neenbedankt.gradle.plugins:android-apt:1.8'
        // NOTE: Do not place your application dependencies here; they belong
        // in the individual module build.gradle files
    }
}

allprojects {
    repositories {
        jcenter()
    }
}

task clean(type: Delete) {
    delete rootProject.buildDir
}
在app–build.gradle中添加依赖,记得在上方添加:
apply plugin: 'com.neenbedankt.android-apt'app-build.gradle:
apply plugin: 'com.neenbedankt.android-apt'
....
dependencies {
    compile fileTree(include: ['*.jar'], dir: 'libs')
    androidTestCompile('com.android.support.test.espresso:espresso-core:2.2.2', {
        exclude group: 'com.android.support', module: 'support-annotations'
    })
    compile 'com.android.support:appcompat-v7:25.3.1'
    testCompile 'junit:junit:4.12'

    //dagger2和Java注解的依赖
    compile 'com.google.dagger:dagger:2.11'
    compile 'org.glassfish.main:javax.annotation:4.0-b33'
    //注意是apt而不是compile
    apt 'com.google.dagger:dagger-compiler:2.11'
}
好了,准备工作做好了,可以开始使用dagger2了
2、应用dagger2
首先在需要被实例化的依赖对象的构造函数中添加注解@inject
先举个简单的例子吧,QueryModel的构造函数不需要参数,也就是默认的无参构造函数:
    @Inject
    public QueryModel(){}
然后在需要用到QueryModel的类QueryPresenter中也添加@inject注解(在对象声明处添加)
    @Inject
    public QueryModel model;
在这两个地方都添加了@inject依赖就意味着告诉dagger,我这个model对象是需要实例化的,当用到model时,你就使用被@inject的构造函数来实例化这个model吧
那现在问题是谁来实例化这个对象?于是就轮到Component出来了:
QueryPresenterComponent.java:
@Component
public interface QueryPresenterComponent {
    void inject(QueryPresenter presenter);
}
注意上方的@Component注解,其中的inject()方法表明该Component是可以为QueryPresenter进行依赖注入的。还要注意一点,该类必须是抽象类或者接口,
最后,我们需要在Presenter中实时地声明对类对象进行依赖注入,原本的model=new QueryModel( )就不需要了。
注意:我们使用了DaggerQueryPresenterComponent,这个类是Dagger2自动为我们生成的,命名规则是在我们刚刚创建的类QueryPresenterComponent前面加上Dagger。在make project之后我们才能使用这个类。
    public QueryPresenter(IQueryView view){
        this.view=view;
        //model=new QueryModel();
        DaggerQueryPresenterComponent.builder().build().inject(this);
    }
好了,修改完毕后重新运行程序,运行结果是一样的。
现在有个问题就是QueryPresneter的实例化,也就是在MainActivity中的依赖注入。这时候操作基本和上面差不多,但是要发现的一点是QueryPresneter的构造函数是需要一个参数的:
    public QueryPresenter(IQueryView view){
        this.view=view;
        DaggerQueryPresenterComponent.builder().build().inject(this);
    }
来,我们一步一步来
首先,还是添加@inject
在QueryPresenter构造函数和MainActivity对象声明处添加注解:
    @Inject
    public QueryPresenter(IQueryView view){
        this.view=view;
        DaggerQueryPresenterComponent.builder().build().inject(this);
    }
@Inject
public QueryPresenter presenter;然后就是创建Component了,但是这次稍有不同,在创建Component之前我们先创建Module
Module你可以理解为对象提供参数。Component能为对象选定构造函数然后创建对象实例,那构造函数中需要的参数呢?就要由Module来提供了
MainActivityModule.class:
@Module
public class MainActivityModule {
    private IQueryView view;
    //参数通过构造函数传入
    public MainActivityModule(IQueryView view){
        this.view=view;
    }

    //提供参数
    @Provides
    public IQueryView provideQueryView(){
        return view;
    }
}
注意上方的@Module注解
我们在MainActivityModule的构造函数中传入QueryPresenter所需要的参数
然后使用@Provides注解注明provideQueryView()适用于提供参数的。
当Component找到以下被@inject的构造方法时,会发现凭借自己无法提供IQueryView 参数,然后就会前往它所关联的Module看其能否提供参数,那么接下来就是把Component和Module进行关联了
    @Inject
    public QueryPresenter(IQueryView view){
        this.view=view;
        DaggerQueryPresenterComponent.builder().build().inject(this);
    }
再然后,创建Component并关联Module
Component的命名规则一般是:谁需要依赖注入,就在谁的名字后面添加Component,像MainActivity需要注入QueryPresenter,那么在类名就是MainActivityComponent了。
@Component(modules=MainActivityModule.class)
public interface MainActivityComponent {
    void inject(MainActivity activity);
}
注意上方的@Component(modules=MainActivityModule.class)
最后,就是在MainActivity中,显示声明依赖注入了,记得先make project
    @Override
    protected void onCreate(Bundle savedInstanceState) {
        super.onCreate(savedInstanceState);
        setContentView(R.layout.activity_main);

        et= (EditText) findViewById(R.id.et);
        tv= (TextView) findViewById(R.id.tv_res);
        btn= (Button) findViewById(R.id.btn_query);

        btn.setOnClickListener(this);
//        presenter=new QueryPresenter(this);
        DaggerMainActivityComponent.builder().mainActivityModule(new MainActivityModule(this)).build().inject(this);
    }
好了,完整流程就是这样啦,最后附上源码
源码下载