JBPM 7.17 学习笔记(9)用spring boot+jbpm 实现请假流程
本文不使用 jBPM 的业务中心和执行服务器,只使用核心 API。
新建 spring-boot-web 项目
pom.xml 文件中添加如下依赖:
            jboss-public-repository-group
            JBoss Public Repository Group
            http://repository.jboss.org/nexus/content/groups/public/

                true
                never


                true
                daily


            org.kie
            kie-api
            ${runtime.version}


            org.drools
            drools-core
            ${runtime.version}


            org.drools
            drools-decisiontables
            ${runtime.version}


            net.minidev
            json-smart
            2.3
            compile


            com.google.guava
            guava
            23.0

     ...
流程图
流程图使用 eclpse 创建或者业务中心创建,流程图显示如下:

实现过程略,将 leave.bpmn 拷贝到项目的 resources 目录下。
AppConfiguration
在这个类中主要是 bean 的配置,这些 bean 会在控制器中注入,主要是和 jBPM 相关的类,比如 RuntimeManager、RuntimeEngine、KieSession 等:
@Configuration
@Component
public class AppConfiguration {

    @Bean(name = "manager")
    public RuntimeManager manager() {
        JBPMHelper.startH2Server();
        JBPMHelper.setupDataSource();
        RuntimeEnvironment environment = RuntimeEnvironmentBuilder.Factory.get().newDefaultBuilder()
                .userGroupCallback(new UserGroupCallback() {
                    public List getGroupsForUser(String userId) {
                        List result = new ArrayList<>();
                        if ("zhaoliu".equals(userId)) {
                            result.add("HR");
                        } else if ("wangwu".equals(userId)) {
                            result.add("PM");
                        }
                        return result;
                    }

                    public boolean existsUser(String arg0) {
                        return true;
                    }

                    public boolean existsGroup(String arg0) {
                        return true;
                    }
                })
                .addAsset(KieServices.Factory.get().getResources().newClassPathResource("leave.bpmn"), ResourceType.BPMN2)
                .get();
        return RuntimeManagerFactory.Factory.get().newSingletonRuntimeManager(environment);
    }

    @Bean(name="runtime")
    public RuntimeEngine runtime(RuntimeManager manager){
        return manager.getRuntimeEngine(null);
    }
    @Bean(name="ksession")
    public KieSession ksession(RuntimeEngine runtime ){return runtime.getKieSession();}
    @Bean(name="taskService")
    public TaskService taskService(RuntimeEngine runtime){return runtime.getTaskService();}
}
控制器基类
首先编写一个 BaseController,在这个控制器中注入 Bean,实现一些常见功能,然后让其它控制器来继承它。
自动装配
对 AppConfiguration 中的 bean 进行 Autowire:
	 @Autowired
    protected RuntimeManager manager;

    @Autowired
    @Qualifier("runtime")
    protected RuntimeEngine runtime;

    @Autowired
    @Qualifier("ksession")
    protected KieSession ksession;

    @Autowired
    @Qualifier("taskService")
    protected TaskService taskService;
获取用户
为了简单起见,我们在用户登录后将用户名保存到 cookie 中。这个方法很简单,直接从 cookie 中获取用户名。这仅仅是处于演示的目的,请自行根据需要修改其实现。
protected String _getUser(HttpServletRequest req, JSONObject json) {
        // 从请求参数中获取 username
        String username = json.getAsString("username");
        if (username != null) {
            return username;
        }
        // 从 cookie 中获取 username
        Cookie[] cookies = req.getCookies();
        if (cookies != null) {
            for (Cookie cookie : cookies) {
                if (cookie.getName().equals("username")) {
                    username = cookie.getValue();
                    try {
                        username = URLDecoder.decode(username, "utf-8");
                        return username;
                    } catch (UnsupportedEncodingException e) {
                        e.printStackTrace();
                    }
                }
            }
        }
        return null;
    }
获取待办
	// 获取待办任务
    protected BaseResponse _todoList(String username) {

        BaseResponse result = new BaseResponse();

        List list = taskService.getTasksAssignedAsPotentialOwner(username, "en-UK");

        List> data = Lists.newArrayList();

        for(TaskSummary task : list){
            Map map = taskService.getTaskContent(task.getId());
            Long pid = task.getProcessInstanceId();
            map.put("taskId",task.getId());
            map.put("pid",task.getProcessInstanceId());
            map.put("status",task.getStatus());
            map.put("applicant",_getVariable("applicant",pid));
            map.put("leader",_getVariable("leader",pid));
            map.put("director",_getVariable("director",pid));
            map.put("hr",_getVariable("hr",pid));
            data.add(map);
        }

        result.success = true;
        result.data = data;
        return result;

    }
获取某个用户的待办很简单,只需要调用 taskService.getTasksAssignedAsPotentialOwner。但是必须指定用户名。
因为 TaskSummary 中的信息很简单,不包含全局变量中的请假人、请假时间 等信息,所以我们又从全局变量中获取了这些数据,一起返回给前端。
读取全局变量调用了 _getVariable() 方法,这个方法定义如下:
	// 读取全局变量
    protected Object _getVariable(String key,Long pId){
        ProcessInstance pi = ksession.getProcessInstance(pId);

        WorkflowProcessInstance processInstance = (WorkflowProcessInstance)pi;

        return processInstance.getVariable(key);
    }
kie API 隐藏了获取所有流程实例变量的方法(ProcessService 的 getVariables() 不再有效),要获取流程变量,只能调用
WorkflowProcessInstance 接口的getVariable()方法。
办理任务
	// 办理任务
    protected BaseResponse _doTask(Long taskId,String username,Map outParams) {
        BaseResponse result = new BaseResponse() ;

        TaskSummary task = _getTaskById(taskId,username);
        if(task ==null){
            result.message = "此任务无效-用户不拥有此任务或任务已完成";
            return result;
        }
        taskService.start(taskId, username);
        taskService.complete(taskId, username, outParams);

        result.success = true;
        result.message = "任务"+ taskId+"处理完成。";
        return result;
    }
这里将任务的 start 和 complete 合并到一起了,因为我们的流程中任务的分配全部都是自动分配的(通过 ActorId),所以不需要调用 claim 来认领任务。
_getTaskById 方法主要是做一个保护,防止用户办理了不属于自己的任务,或者已经办结的任务:
	// 根据 id 获取任务
    protected TaskSummary _getTaskById(Long taskId,String username){
        List list = taskService.getTasksAssignedAsPotentialOwner(username, "en-UK");

        List> data = Lists.newArrayList();

        for(TaskSummary task : list){

            if(taskId.equals(task.getId())){
                return task;
            }
        }
        return null;
    }
就是通过对该用户的待办列表进行过滤,通过 id 找出对应的任务。如果找不到,则表明该任务不属于该用户,或者任务状态不对(比如已经办结),可以返回空。
登录
登录放在 LoginController 控制器中做。为了简单起见,这里并没有验证密码,直接将用户名放到 cookie 中:
	@RequestMapping("/login")
    @ResponseBody
    public BaseResponse login(@RequestBody JSONObject json, HttpServletResponse res) {
        BaseResponse result = new BaseResponse();

        String username = json.getAsString("username");
        Assert.hasText(username, "用户名不能为空");
        result.message = username+"登录成功";
        result.data = username;

        try {
            username = URLEncoder.encode(username, "utf-8");
        } catch (UnsupportedEncodingException e) {
            e.printStackTrace();
        }
        Cookie cookie = new Cookie("username", username);
        cookie.setMaxAge(3600); //设置cookie的过期时间是3600s
        res.addCookie(cookie);

        result.success = true;

        return result;
    }
流程控制器
流程的启动、提交申请、审核、备案操作放在 LeaveProcessController 控制器(继承了 BaseController)。
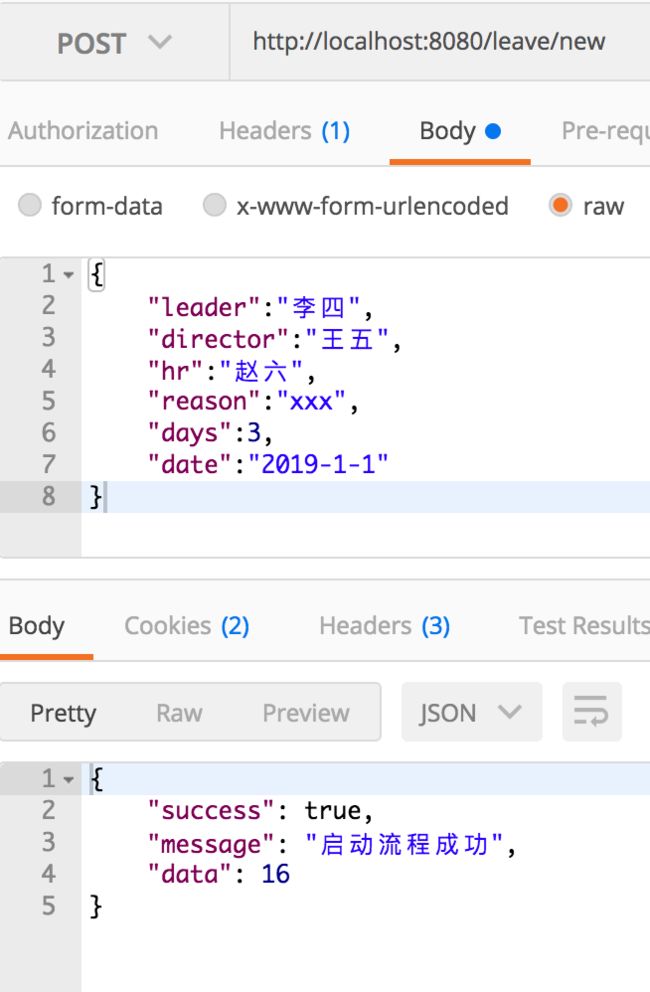
启动流程
 // 新建请假条
    @RequestMapping("/new")
    @ResponseBody
    public BaseResponse newLeave(@RequestBody JSONObject form, HttpServletRequest req) {
        BaseResponse result = new BaseResponse();

        String username = _getUser(req, form);
        if (StringUtils.isEmpty(username)) {
            result.message = "请登录";
            return result;
        }

        result = assertForm(form, username);// 表单不完整,不要创建流程实例,避免在数据库中生成一些无效的任务

        if (result.success == false) {
            return result;
        }
        form.put("applicant", username);
        // 初始化一些默认值
        form.put("applicantSubmit", false);
        form.put("leaderAgree", false);
        form.put("directorAgree", false);
        form.put("hrRecord", false);

        // 启动新的流程
        // 这个 processId 必须匹配 .bpmn 文件中的 ID 属性。
        ProcessInstance pi = ksession.startProcess("get-started.leave", form);

        result.message = "启动流程成功";
        result.success = true;
        result.data = pi.getId();

        return result;

    }
用户启动流程时,需要提交一些表单数据(比如请假时间、事由、天数、请假人、审核人等),我们首先对数据进行一些简单校验(调用 assertForm 方法),然后调用 kesession.startProcess 启动流程,并将表单数据传入。这些数据会作为全局变量(流程实例变量)存在。
获取待办
	  // 获取待办
    @RequestMapping("/todoList")
    @ResponseBody
    public BaseResponse todoList(@RequestBody JSONObject form, HttpServletRequest req) {

        BaseResponse result = new BaseResponse();
        String username = _getUser(req, form);

        if (StringUtils.isEmpty(username)) {
            result.message = "请重新登录";
            return result;
        }
        return _todoList(username);
调用父类的 _todoList 方法,前面已经介绍。
提交申请
	// 提交申请
    @RequestMapping("/submitApplication")
    @ResponseBody
    public BaseResponse submitApplication(@RequestBody JSONObject form, HttpServletRequest req) {

        BaseResponse result = new BaseResponse();

        String username = _getUser(req, form);

        if (StringUtils.isEmpty(username)) {
            result.message = "请重新登录";
            return result;
        }

        Number taskId = form.getAsNumber("taskId");

        if (StringUtils.isEmpty(taskId)) {
            result.message = "任务 id 不能为空";
            return result;
        }

        Map outParams = new HashMap();
        outParams.put("applicantSubmit_out", true);
        result = _doTask(taskId.longValue(), username, outParams);

        if (result.success) {
            result.message = "提交申请成功,taskId = " + taskId;
        }
        return result;
    }
跳过参数校验,其实只是调用了父类的 _doTask 方法而已。其中 outParams 设置了任务的输出参数 applicantSubmit_out。在流程定义中,这个输出参数绑定的是全局变量 applicantSubmit ,因此当 complete 之后,全局变量 applicantSubmit 为 true。
审批和备案
剩下的 3 个任务其实和提交申请是大同小异的,只不过输出参数不同而已:
// leader审批
    @RequestMapping("/leaderApprove")
    @ResponseBody
    public BaseResponse leaderApprove(@RequestBody JSONObject json, HttpServletRequest req) {

        BaseResponse result = new BaseResponse();

        String username = _getUser(req, json);// 审批人

        if (StringUtils.isEmpty(username)) {
            result.message = "请重新登录";
            return result;
        }

        boolean agree = json.getAsNumber("agree").intValue() != 0;// 0 驳回,1 同意

        Number taskId = json.getAsNumber("taskId");// 待办 id

        if (taskId == null) {
            result.message = "任务 id 不能为空";
            return result;
        }

        Map outParams = new HashMap();
        outParams.put("leaderAgree_out", agree);

        result = _doTask(taskId.longValue(), username, outParams);

        if (result.success) {
            result.message = "leader 审批" + (agree ? "通过" : "不通过") + ",taskId = " + taskId;
        }
        return result;

    }

    // director 审批
    @RequestMapping("/directorApprove")
    @ResponseBody
    public BaseResponse directorApprove(@RequestBody JSONObject json, HttpServletRequest req) {

        BaseResponse response = new BaseResponse();

        String username = _getUser(req, json);// 审批人

        if (StringUtils.isEmpty(username)) {
            response.message = "请重新登录";
            return response;
        }

        boolean agree = json.getAsNumber("agree").intValue() != 0;// 0 驳回,1 同意
        Number taskId = json.getAsNumber("taskId");// 待办 id

        if (taskId == null) {
            response.message = "任务 id 不能为空";
            return response;
        }

        Map outParams = new HashMap();
        outParams.put("directorAgree", agree);// Not directorAgree_out !!!

        response = _doTask(taskId.longValue(), username, outParams);

        if (response.success) {
            response.message = "director 审批" + (agree ? "通过" : "不通过") + ",taskId = " + taskId;
        }
        return response;

    }

    // hr 备案
    @RequestMapping("/hrRecord")
    @ResponseBody
    public BaseResponse hrRecord(@RequestBody JSONObject json, HttpServletRequest req) {

        BaseResponse res = new BaseResponse();

        String username = _getUser(req, json);// 审批人

        if (StringUtils.isEmpty(username)) {
            res.message = "请重新登录";
            return res;
        }

        Number taskId = json.getAsNumber("taskId");// 待办 id

        if (taskId == null) {
            res.message = "任务 id 不能为空";
            return res;
        }

        Map outParams = new HashMap();
        outParams.put("hrRecord_out", true);

        res = _doTask(taskId.longValue(), username, outParams);

        if (res.success) {
            res.message = "director 备案通过,taskId = " + taskId;
        }
        return res;

    }
测试
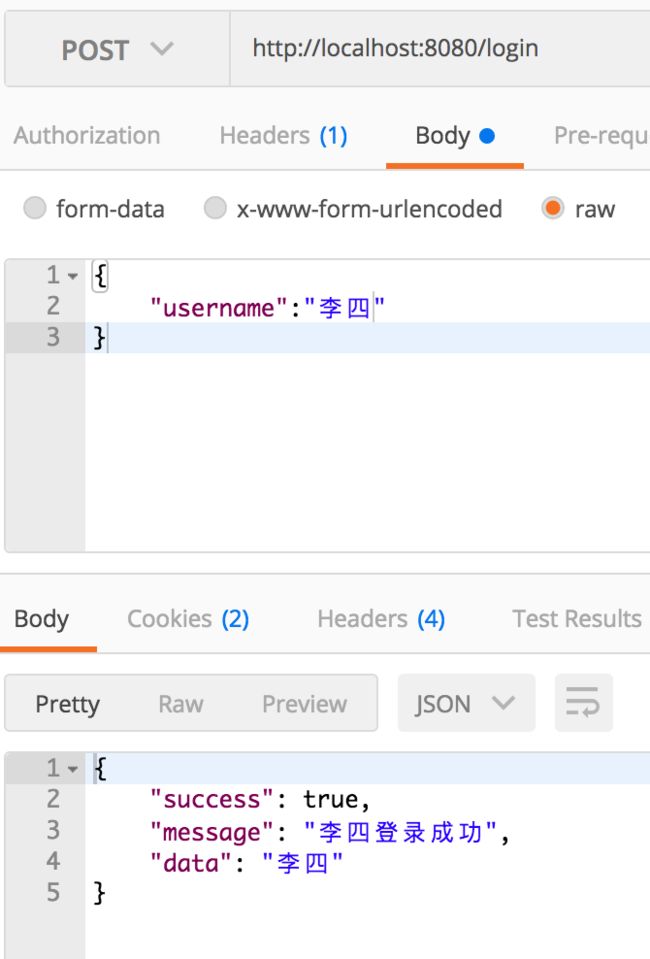
打开 postman 进行接口测试。测试结果如下。
登录:

提交申请:

获取待办:

审批:

前端测试:
