springboot部署到阿里云
运行springboot项目,如果你关闭当前shell窗口,就会导致服务器的springboot关闭。因为我们现在用的是springboot自带的tomcat,不能在后台运行。
springboot生成的jar在阿里云的linux服务器后台运行,不会在shell客户端关闭时关闭

通过创建stop.sh , start.sh ,run.sh这三个脚本文件来实现后台长久运行springboot
这里我把运行的qcl80.jar ,start .sh,stop.sh ,run.sh都放在home下的jar目录下
1,创建stop.sh
vim stop.sh 创建文件然后把下面内容复制进去,一定要把qcl80.jar替换成你的jar
#!/bin/bash
PID=$(ps -ef | grep qcl80.jar | grep -v grep | awk '{ print $2 }')
if [ -z "$PID" ]
then
    echo Application is already stopped
else
    echo kill $PID
    kill $PID
fi
2,创建start.sh,这里我们用80端口,这样可以直接通过ip访问,不用再输端口了
vim start.sh 输入这个命令后然后把下面的内容复制进去
#!/bin/bash
nohup java -jar qcl80.jar --server.port=80 &
3,创建run.sh
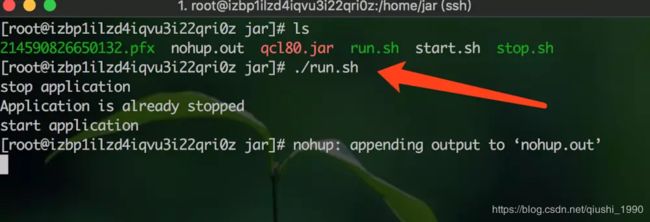
整合了关闭和启动的脚本:run.sh,由于会先执行关闭应用,然后再启动应用,这样不会引起端口冲突等问题,适合在持续集成系统中进行反复调用。
把下面内容复制进去,一定要注意复制时不能少东西
#!/bin/bash
echo stop application
source stop.sh
echo start application
source start.sh
4,start .sh,stop.sh ,run.sh都创建后
./run.sh 运行run.sh脚本
如果遇到没有权限运行的问题,就在run.sh所在目录下执行
chmod u+x *.sh 这样就ok了。
执行完以后,我们可以去nohup.out文件中查看启动的log
cat nohup.out 这个命令可以查看jar启动的log
到此我们的springboot项目就启动了,可以通过你阿里云的公网ip访问你的网站了

由于我配置了https,所以这里用IP访问会显示不安全,接下来给大家讲解怎么配置https访问。
四,配置https
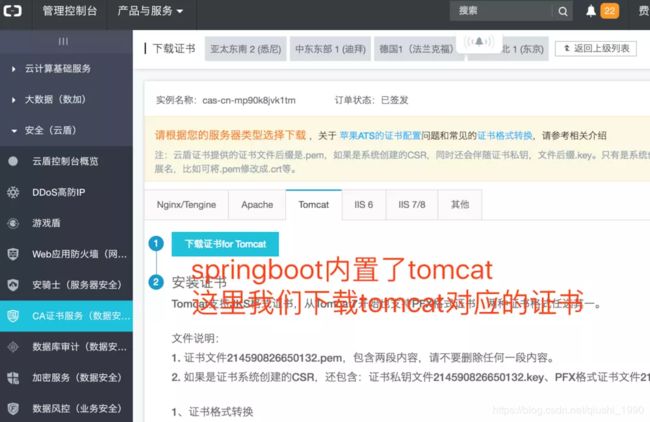
1,申请阿里云免费的ca证书,ca证书是实现https必不可少的
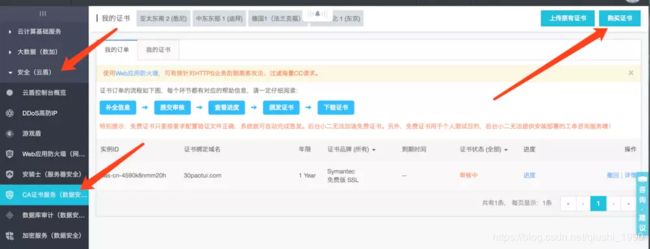
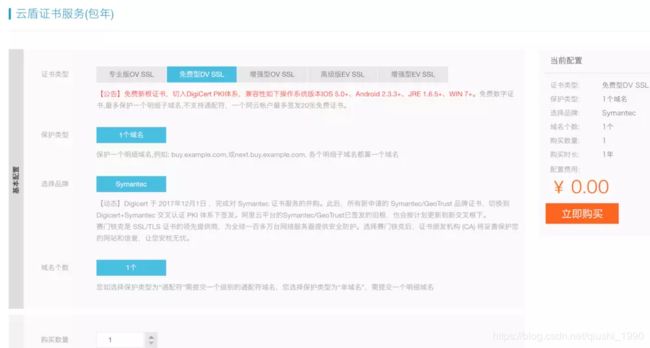

通常审核10分钟左右就行,如果资料不全或者不真实可能就久些。
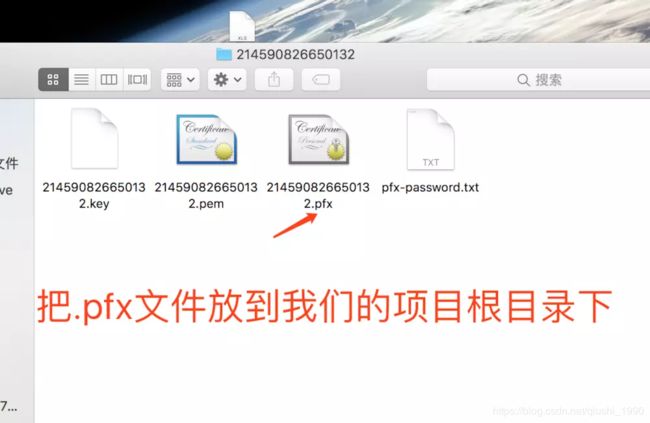
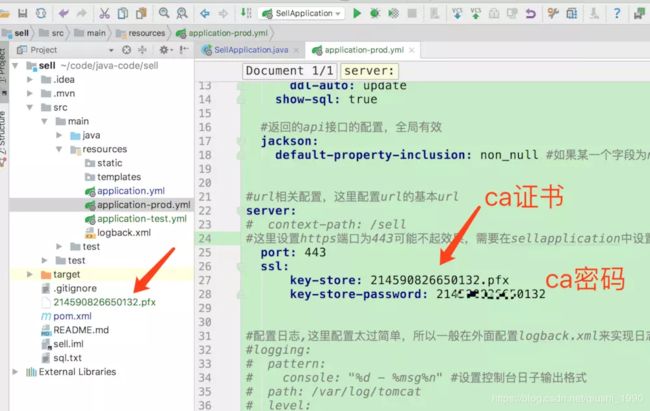
注意:214590826650132.pfx还需要在我们能阿里云的home/jar目录下放一份,即和我们的打包jar放在同一个目录下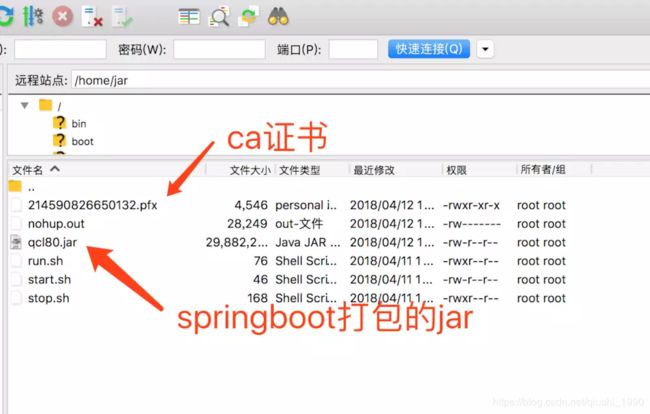
HTTP自动转向HTTPS
实现http转https就是我们访问
30paotui.com
www.30paotui.com
http://30paotui.com
http://www.30paotui.com
都会指向https://30paotui.com
- 实现上面的功能需要我们在springboot的application中配置如下代码
package com.qcl;

import org.apache.catalina.Context;
import org.apache.catalina.connector.Connector;
import org.apache.tomcat.util.descriptor.web.SecurityCollection;
import org.apache.tomcat.util.descriptor.web.SecurityConstraint;
import org.springframework.boot.SpringApplication;
import org.springframework.boot.autoconfigure.SpringBootApplication;
import org.springframework.boot.context.embedded.ConfigurableEmbeddedServletContainer;
import org.springframework.boot.context.embedded.EmbeddedServletContainerCustomizer;
import org.springframework.boot.context.embedded.EmbeddedServletContainerFactory;
import org.springframework.boot.context.embedded.tomcat.TomcatEmbeddedServletContainerFactory;
import org.springframework.context.annotation.Bean;

@SpringBootApplication
public class SellApplication implements EmbeddedServletContainerCustomizer {

    public static void main(String[] args) {
        SpringApplication.run(SellApplication.class, args);
    }


    //拦截所有请求
    @Bean
    public EmbeddedServletContainerFactory servletContainer() {
        TomcatEmbeddedServletContainerFactory tomcat = new TomcatEmbeddedServletContainerFactory() {
            @Override
            protected void postProcessContext(Context context) {
                SecurityConstraint constraint = new SecurityConstraint();
                constraint.setUserConstraint("CONFIDENTIAL");
                SecurityCollection collection = new SecurityCollection();
                collection.addPattern("/*");
                constraint.addCollection(collection);
                context.addConstraint(constraint);
            }
        };
        tomcat.addAdditionalTomcatConnectors(httpConnector());
        return tomcat;
    }

    //配置http转https
    @Bean
    public Connector httpConnector() {
        Connector connector = new Connector(TomcatEmbeddedServletContainerFactory.DEFAULT_PROTOCOL);
        connector.setScheme("http");
        //Connector监听的http的端口号
        connector.setPort(80);
        connector.setSecure(false);
        //监听到http的端口号后转向到的https的端口号
        connector.setRedirectPort(443);
        return connector;
    }

    //这里设置默认端口为443,即https的,如果这里不设置,会https和http争夺80端口
    @Override
    public void customize(ConfigurableEmbeddedServletContainer container) {
        container.setPort(443);
    }
}
至此,我们的springboot就可以在阿里云上运行了,同时支持http和https的访问
