Eclipse配置javaCV开发环境
Eclipse配置javaCV开发环境
JavaCV 是一款开源的视觉处理库,基于GPLv2协议。JavaCV是对各种常用计算机视觉库的封装后的一组jar包,其中封装了OpenCV、libdc1394、OpenKinect、videoInput和ARToolKitPlus等计算机视觉编程人员常用库的接口,可以通过其中的utility类方便的在包括Android在内的Java平台上调用这些接口。
1、需要软件
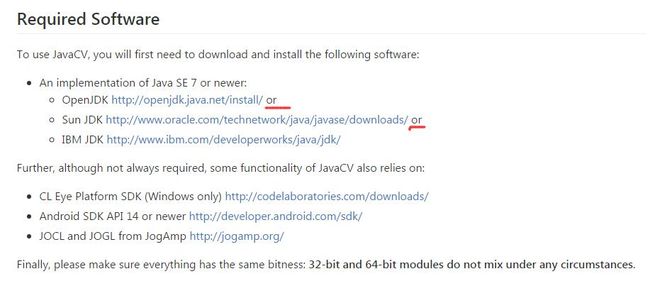
要想使用JavaCV, 需要先下载和配置以下软件:(1)An implementation of Java SE 7 or newer:
- OpenJDK http://openjdk.java.net/install/
- Sun JDK http://www.oracle.com/technetwork/java/javase/downloads/
- IBM JDK http://www.ibm.com/developerworks/java/jdk/

(2)JavaCV下载
JavaCV下载地址:https://github.com/bytedeco/javacv/
这里下载的是javacv-platform-1.3-bin.zip。
javacv-platform-1.3-bin.zip解压后里面包含一个samples文件夹和若干jar文件。
(3)我的电脑已安装的软件Eclipse+JavaSE8。
3、安装配置
(1)新建java工程“Test_javaCV”。
(2)右击工程,选择Java Build Path ----> Libraries---->用户库(User Libray)-->新建(New),给出用户库名,这里我设为javacv-1.3。
(3)添加JAR包,选择“Add External JARS”,选择下载的有关文件,javacpp.jar、javacv.jar、opencv.jar、opencv-windows-x86.jar等。然后把javacv-bin里的jar文件选中(根据自己的平台来),选OK即可
4、测试配置
在有些例程中import是这样的:
            import static com.googlecode.javacv.cpp.opencv_core.*;
            import static com.googlecode.javacv.cpp.opencv_imgproc.*;
            import static com.googlecode.javacv.cpp.opencv_highgui.*;
但按照我们的版本,应该是这样的:
            import static org.bytedeco.javacpp.opencv_core.*;
            import static org.bytedeco.javacpp.opencv_imgproc.*;
            import static org.bytedeco.javacpp.opencv_highgui.*;
简言之,就是把com.googlecode.javacv.cpp 全改为org.bytedeco.javacpp。
测试实例
新建一个Resources文件夹,将待检测的图像放到此文件夹下。
Test_javaCV.java代码:
import javax.swing.JFrame;
import org.bytedeco.javacpp.*;
import org.bytedeco.javacv.*;
import static org.bytedeco.javacpp.opencv_core.*;
import static org.bytedeco.javacpp.opencv_imgproc.*;
import static org.bytedeco.javacpp.opencv_imgcodecs.*;

/**
 * C to Java translation of the houghlines.c sample provided in the c sample directory of OpenCV 2.1,
 * using the JavaCV Java wrapper of OpenCV 2.2 developped by Samuel Audet.
 *
 * @author Jeremy Nicola
 * [email protected]
 */
public class Test_javaCV {

    /**
     * usage: java HoughLines imageDir\imageName TransformType
     */
    public static void main(String[] args) {

        String fileName = args.length >= 1 ? args[0] : "./Resources/pic1.png"; // if no params provided, compute the defaut image
        IplImage src = cvLoadImage(fileName, 0);
        IplImage dst;
        IplImage colorDst;
        CvMemStorage storage = cvCreateMemStorage(0);
        CvSeq lines = new CvSeq();

        CanvasFrame source = new CanvasFrame("Source");
        CanvasFrame hough = new CanvasFrame("Hough");
        OpenCVFrameConverter.ToIplImage sourceConverter = new OpenCVFrameConverter.ToIplImage();
        OpenCVFrameConverter.ToIplImage houghConverter = new OpenCVFrameConverter.ToIplImage();
        if (src == null) {
            System.out.println("Couldn't load source image.");
            return;
        }

        dst = cvCreateImage(cvGetSize(src), src.depth(), 1);
        colorDst = cvCreateImage(cvGetSize(src), src.depth(), 3);

        cvCanny(src, dst, 50, 200, 3);
        cvCvtColor(dst, colorDst, CV_GRAY2BGR);

        /*
         * apply the probabilistic hough transform
         * which returns for each line deteced two points ((x1, y1); (x2,y2))
         * defining the detected segment
         */
        if (args.length == 2 && args[1].contentEquals("probabilistic")) {
            System.out.println("Using the Probabilistic Hough Transform");
            lines = cvHoughLines2(dst, storage, CV_HOUGH_PROBABILISTIC, 1, Math.PI / 180, 40, 50, 10, 0, CV_PI);
            for (int i = 0; i < lines.total(); i++) {
                // Based on JavaCPP, the equivalent of the C code:
                // CvPoint* line = (CvPoint*)cvGetSeqElem(lines,i);
                // CvPoint first=line[0], second=line[1]
                // is:
                Pointer line = cvGetSeqElem(lines, i);
                CvPoint pt1  = new CvPoint(line).position(0);
                CvPoint pt2  = new CvPoint(line).position(1);

                System.out.println("Line spotted: ");
                System.out.println("\t pt1: " + pt1);
                System.out.println("\t pt2: " + pt2);
                cvLine(colorDst, pt1, pt2, CV_RGB(255, 0, 0), 3, CV_AA, 0); // draw the segment on the image
            }
        }
        /*
         * Apply the multiscale hough transform which returns for each line two float parameters (rho, theta)
         * rho: distance from the origin of the image to the line
         * theta: angle between the x-axis and the normal line of the detected line
         */
        else if(args.length==2 && args[1].contentEquals("multiscale")){
                        System.out.println("Using the multiscale Hough Transform"); //
            lines = cvHoughLines2(dst, storage, CV_HOUGH_MULTI_SCALE, 1, Math.PI / 180, 40, 1, 1, 0, CV_PI);
            for (int i = 0; i < lines.total(); i++) {
                CvPoint2D32f point = new CvPoint2D32f(cvGetSeqElem(lines, i));

                float rho=point.x();
                float theta=point.y();

                double a = Math.cos((double) theta), b = Math.sin((double) theta);
                double x0 = a * rho, y0 = b * rho;
                CvPoint pt1 = cvPoint((int) Math.round(x0 + 1000 * (-b)), (int) Math.round(y0 + 1000 * (a))), pt2 = cvPoint((int) Math.round(x0 - 1000 * (-b)), (int) Math.round(y0 - 1000 * (a)));
                System.out.println("Line spoted: ");
                System.out.println("\t rho= " + rho);
                System.out.println("\t theta= " + theta);
                cvLine(colorDst, pt1, pt2, CV_RGB(255, 0, 0), 3, CV_AA, 0);
            }
        }
        /*
         * Default: apply the standard hough transform. Outputs: same as the multiscale output.
         */
        else {
            System.out.println("Using the Standard Hough Transform");
            lines = cvHoughLines2(dst, storage, CV_HOUGH_STANDARD, 1, Math.PI / 180, 90, 0, 0, 0, CV_PI);
            for (int i = 0; i < lines.total(); i++) {
                CvPoint2D32f point = new CvPoint2D32f(cvGetSeqElem(lines, i));

                float rho=point.x();
                float theta=point.y();

                double a = Math.cos((double) theta), b = Math.sin((double) theta);
                double x0 = a * rho, y0 = b * rho;
                CvPoint pt1 = cvPoint((int) Math.round(x0 + 1000 * (-b)), (int) Math.round(y0 + 1000 * (a))), pt2 = cvPoint((int) Math.round(x0 - 1000 * (-b)), (int) Math.round(y0 - 1000 * (a)));
                System.out.println("Line spotted: ");
                System.out.println("\t rho= " + rho);
                System.out.println("\t theta= " + theta);
                cvLine(colorDst, pt1, pt2, CV_RGB(255, 0, 0), 3, CV_AA, 0);
            }
        }
        source.showImage(sourceConverter.convert(src));
        hough.showImage(houghConverter.convert(colorDst));

        source.setDefaultCloseOperation(JFrame.EXIT_ON_CLOSE);
        hough.setDefaultCloseOperation(JFrame.EXIT_ON_CLOSE);
    }
}
运行结果


