python-数据库
###python操作mysql数据库
Python标准数据库借口为Python DB-APl,Python DB-APl为开发人员提供了数据库应用编程的借口。
DB-Apl是一个规范,它定义了一系列必须的对象和数据库存取方式,以便为各种各样的底层数据库系统和多数多样的数据库接口程序提供一致的访问接口。
DB-APl使用流程:
- 引入APl模块。
- 获取与数据库的连接
- 执行SQL语句和储存的过程
- 关闭数据库连接
###MySQLdb
MySQLdb是用于Python链接Mysql数据库的接口,它实现了Python数据库APl规范V2.0,基于MySQL C APl上建立的。
####如何安装MySQLdb模块
可以访问:这里写链接内容
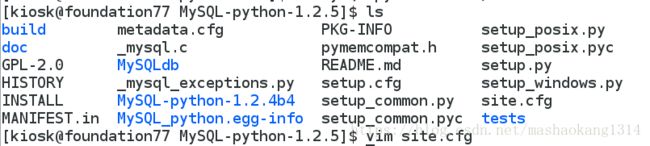
选择合适的安装包,以MySQL-python-1.2.5为例。
tar -xvf MySQL-python-1.2.5.tar
cd MySQL-python-1.2.5
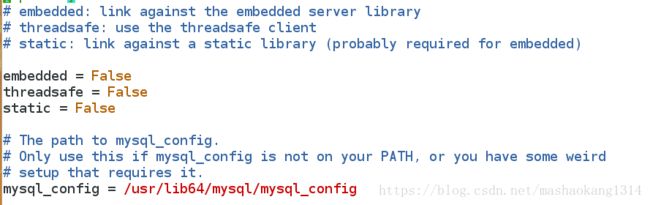
#更改site.cfg文件
python setup.py build
python setup.py install
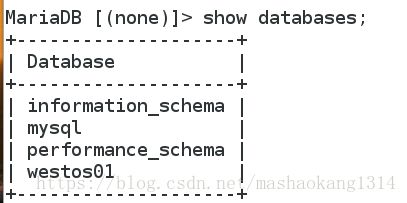
####下载数据库
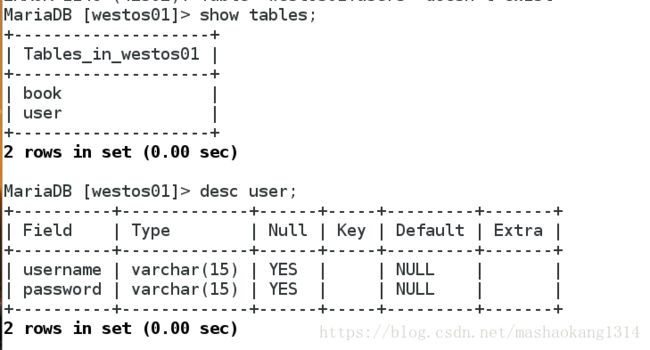
确定已经创建数据库和表还有表中的字段
如果忘记了数据库的密码
1.先关闭服务
systemctl stop marizdb
2.跳过权限安全检查
mysqld_safe --skip-grant-table &
3.直接在命令行输入使用命令
mysql
4.进去的到用户所在数据库修改密码

![]()
5.结束跳过检查进程,然后重新启动数据库服务。
查看进程PID
ps -aux|grep mysql
kill -9 PID
systemctl restart mariadbd
修改数据库的编码格式(能存储中文不乱码)
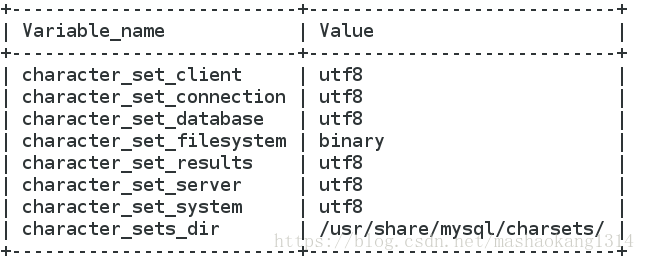
查看数据库的编码格式
MariaDB [(none)]> show variables like 'character%';
- 临时修改(重启数据库修改就会失效)
set character_set_client=utf8
- 永久修改(修改配置文件)
注意修改的所在行开头空4个空格符
vim /etc/my.cnf.d/client.cnf

vim /etc/my.cnf.d/server.cnf

然后重新启动数据库服务。
###连接数据库
import MySQLdb as mysql  #导入MySQLdb包

# 连接数据库(user:连接的用户,db:连接的数据库的名称,passwd:数据库的密码)
conn = mysql.connect(user='root', passwd='123', host='localhost',
              port=3306, db='westos01', charset='utf8')

# 创建一个游标, 为了给数据库发送sql指令;
cur = conn.cursor()


# 1. 执行insert的sql语句;
cur.execute('insert into bookuse values("user10", "user10");')
# 提交sql语句的操作,作用于数据库
conn.commit()

# 关闭游标
cur.close()

# 关闭连接
conn.close()

####2. 执行insert的sql语句, 包含多条数据;
描述:创建一个生成指定个数的用户名,并将这些用户名和密码传入数据库
import  pymysql
from colorFont import *

def create_user_data(n):  # 100
    users = []
    for i in range(n):   # 0,1,2,3,
        username = 'user'+str(i+1)
        users.append((username, '000000'))
    return users

# 1. 连接数据库连接
conn = pymysql.connect(host='localhost', user='root',
                       passwd='westos', db='westos',
                       charset='utf8')

# 2. 创建游标, 给数据库发送sql指令
cur = conn.cursor()

# 3. 执行sql语句: 插入多条数据
try:
    # 执行的插入语句;
    insert_sqli = 'insert into aa values(%s,%s)'
    # 执行函数, 随机生成n条用户数据; 列表里面嵌套元组; [('user1', '000000'), ('user2', '00000')]
    users = create_user_data(90)
    cur.executemany(insert_sqli, users)
except Exception as e:
    print(FAIL + "sql execute failed"+ END)
else:
    print(OKGREEN + "sql execute success" + END)
# 4. 提交sql语句, 作用于数据库;
conn.commit()

# 5. 先关闭游标
cur.close()
# 6. 关闭数据库连接
conn.close()
####3.executemany(sql语句, 列表)
users = [('harry1', 'westos'), ('kiosk1', 'redhat')]
insert_sqli = 'insert into users values(%s, %s);'
cur.executemany(insert_sqli, users)
####4.批量删除
delete_sqli = 'delete from user where username="%s"'
users = ['user'+str(i) for i in range(1,101)]
for user in users:
cur.execute(delete_sqli %(user))
####5.数据库的更新操作
sql = "update user password set password=password('456') where username = 'user10';"

cur.execute(sql)
![]()
不加密更新密码
####6.数据库查询操作
conn = mysql.connect(user='root', passwd='123', host='localhost',
              port=3306, db='westos01', charset='utf8')
cur = conn.cursor()


cur.execute('select * from user')
查看一条信息;
print cur.fetchone()
print cur.fetchone()
#查看指定条信息;
print cur.fetchmany(2)  #查询从当前指针位置后的两条信息
移动数据库结果信息的指针到最开始;
cur.scroll(0, 'absolute')  #绝对指向(默认每次从开头)
cur.scroll(2,'relative') #相对指向(每次从当前位置开始)
 查看指针后的所有的信息;
print cur.fetchall()
查看表头信息
desc = cur.description
print("表的描述信息:", desc)

table_header = [item[0] for item in desc]
print("表头:", table_header)
![]()
#封装数据库
将其连接代码封装成模块,用的时候直接导入
将连接的信息单独封装成字典
config.py
db_config = {
    'host':'localhost',
    'user':'root',
    'passwd':'123',
    'db':'westos01',
    'charset':'utf8'
}
import config
import pymysql

class Mysql(object):
    def __init__(self, db_config):   # db_config dict
        # 在实例化对象时自动执行
        try:
            self.db_config = db_config
            self.conn = pymysql.connect(**self.db_config)  # (user='root')
            self.cur = self.conn.cursor()
        except Exception as e:
            print("连接数据库失败:", e)
        else:
            print("连接数据库成功!")


    def __str__(self):
        return  "Connect(%s user=%s db=%s)" %(
            self.db_config['host'], self.db_config['user'], self.db_config['db'])

    def __del__(self):
        self.conn.commit()
        self.cur.close()
        self.conn.close()


if __name__=="__main__":
    test_sql = Mysql(config.db_config)
    print(str(test_sql))
#使用with安全上下文管理器
操作完数据库自动自动提交关闭数据库和游标
import pymysql

conn = pymysql.connect(host='localhost', user='root',
                       passwd='westos', db='westos',
                       charset='utf8')
with conn:
    cur = conn.cursor()
#储存图片到数据库
import  pymysql
# 1. 连接数据库连接
conn = pymysql.connect(host='localhost', user='root',
                       passwd='123', db='westos01',
                       charset='utf8')

# 2. 创建游标, 给数据库发送sql指令
cur = conn.cursor()

# 3. 执行sql语句:
# 1). 创建存储图片的数据库表;
#primary key 表示这个表头是主键,是唯一的不能重复
try:
    cur.execute('create table images('
                'id int primary key auto_increment , '
                'imgName varchar(50),'
                'imgData mediumblob); ')
except Exception as e:
    print(e)
else:
    print("table create sucess!")

# 2). 插入图片;
try:

    insert_sqli = 'insert into images (imgName, imgData) values(%s, %s);'
    f = open('img/img01.jpg', 'rb')   #图片是二进制文件,所以加上b读取
    img_data = f.read()
    f.close()
    cur.execute(insert_sqli, ('img01.jpg', img_data ))
except Exception as e:
    print(e)
else:
    print("插入图片信息成功!")

conn.commit()
# 4. 先关闭游标
cur.close()
# 5. 关闭数据库连接
conn.close()

#读取数据库中的图片
from Sql import Mysql
from config import db_config

sql=Mysql(db_config)

read_sql='select imgData from images'
sql.cur.execute(read_sql)

with open('hello2','wb') as f:
    f.write(sql.cur.fetchone()[0])
#多台主机远程备份数据库
- mysql的备份
mysqldump -uroot -p123 > mariadb.dump
mysqldump -uroot -p123 --no-data > mariadb.dump #不备份数据,只备份字段

mysqldump -uroot -p123 --all-databases > mariadb.dump #备份所有数据
- 恢复
#在数据库外部创建一个库
mysqladmin -uroot -p123 create mariadb2

mysql -uroot -pwestoss mariasb2 < mariadb.dump
- 需要备份的远程主机的信息
mysqlinfo.py
mysql_list = [
    {
        'host':'172.25.254.77',
        'user':'root',
        'passwd':'123',
        'db':'westos01'
    }
]
import os
import time

from mysqlInfo import mysql_list

BACKUP_DIR = '/mnt/BACKUP/'

if not os.path.exists(BACKUP_DIR):
    os.mkdir(BACKUP_DIR)
    print("%s create success!" % (BACKUP_DIR))
else:
    try:
        for host in mysql_list:
            # date = os.popen('date +%Y_%m_%d')
            shell_sen = "mysqldump -h %s -u%s -p%s %s >%s"
            host_ip = host['host']
            user = host['user']
            passwd = host['passwd']
            db = host['db']
            backup_filename = BACKUP_DIR + '%s_%s.dump' %(host_ip, db)
            print(backup_filename)
            print(shell_sen % (host_ip, user, passwd, db, backup_filename))
            os.system(shell_sen % (host_ip, user, passwd, db, backup_filename))
            print("backup %s host" %(host_ip))
    except Exception as e:
        print(e)
    else:
        print('sucess')
os.mknod(time.ctime())
#用户和权限访问操作
创建一个用户可在本机登录,密码为hello
create user hello@localhost identified by 'hello';
创建一个用户可在远程登录,密码为hello
create user hello@'%' identified by 'hello';
创建一个数据库普通用户可进行操作,数据库岁普通用户有权限
create database mariadb;

给hello用户数据库mariadb的所有权限,也可以只给部分权限(insert,update,delete,select,create)
grant all on mariadb.* to hello@lacalhost;
刷新,重新授权表
flush privileges;
查看hello用户的权限
show grants for hello@localhost;

删除指定用户授权
revoke delete,update on mariadb.* from hello@localhosy;
删除用户
drop user hello@localhost;