SpringBoot2.0整合SpringCache和Redis攻略
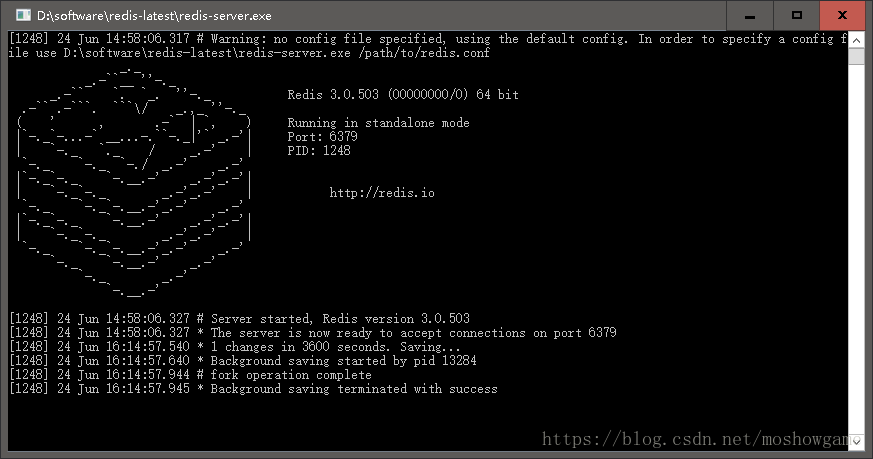
Redis
Redis 是一个高性能的key-value数据库,广泛应用于互联网业务的缓存,如token池,商品缓存等等热点数据的缓存。
-
linux原版官方地址
http://redis.io -
windows版下载地址
https://github.com/ServiceStack/redis-windows -
下载链接
https://github.com/ServiceStack/redis-windows/raw/master/downloads/redis-latest.zip
https://github.com/MicrosoftArchive/redis/releases -
具体安装教程可以参考(win+linux+mac)
http://www.runoob.com/redis/redis-install.html -
Redis Desktop Manager 桌面GUI管理工具
https://redisdesktop.com/download -
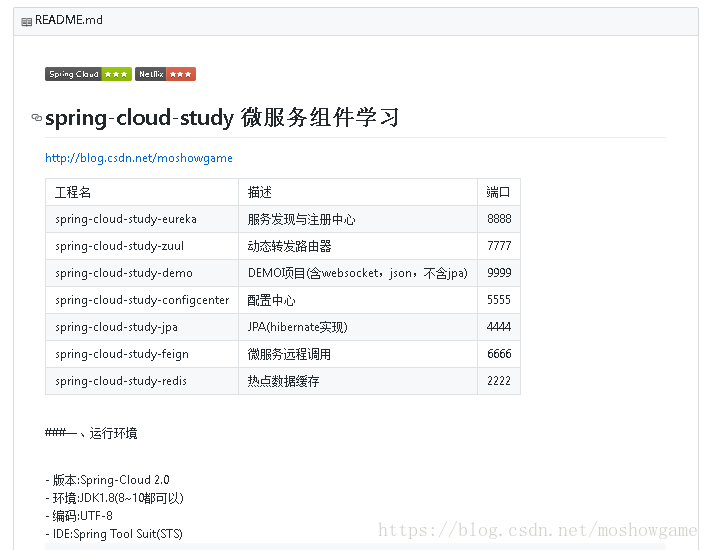
SpringCloudStudy项目(参考spring-cloud-study-redis,可单独运行)
https://github.com/moshowgame/spring-cloud-study
https://gitee.com/moshow/spring-cloud-study
SpringBoot对应(自带)RedisClient是不同的
SpringBoot1.5.x版本 -> jedis
SpringBoot2.x版本 - > lettuce
SpringBoot2.0整合SpringCache和Redis实战
maven配置
		<dependency>
			<groupId>org.springframework.bootgroupId>
			<artifactId>spring-boot-starter-cacheartifactId>
		dependency>
		<dependency>
			<groupId>org.springframework.bootgroupId>
			<artifactId>spring-boot-starter-data-redisartifactId>
		dependency>
另外有个hutool的超级工具类也不错,不是必须的,项目用上了,大家可以用用
<dependency>
    <groupId>cn.hutoolgroupId>
    <artifactId>hutool-allartifactId>
    <version>4.1.0version>
dependency>
yml配置
server:
  port: 2222
  servlet:
      context-path: /redis
#......这里省略其他的
#Jedis配置,默认本地都是这么连接的
jedis:
    pool:
      host: 127.0.0.1
      port: 6379
      password: password
      timeout: 0
      config:
      maxTotal: 100
      maxIdle: 10
      maxWaitMillis: 100000
#lettuce版本
    redis:
        host: 127.0.0.1
        port: 6379
        password: password
        timeout: 0
        lettuce:
          pool:
            minIdle: 0
            maxIdle: 10
            maxWait: 10000
            max-active: 10
RedisConfig配置
SpringBoot提供了对Redis的自动配置功能,在RedisAutoConfiguration中默认为我们配置了JedisConnectionFactory(客户端连接)、RedisTemplate以及StringRedisTemplate(数据操作模板),其中StringRedisTemplate模板只针对键值对都是字符型的数据进行操作,本示例采用RedisTemplate作为数据操作模板,该模板默认采用JdkSerializationRedisSerializer的二进制数据序列化方式,为了方便演示本示例采用Jackson2JsonRedisSerializer来序列化和反序列化redis的value值,使用StringRedisSerializer来序列化和反序列化redis的key值。
/**
 * redis缓存配置
 */
@Configuration
@EnableCaching
public class RedisConfig extends CachingConfigurerSupport {

	  @Bean
	   public RedisTemplate<Object, Object> redisTemplate(RedisConnectionFactory connectionFactory) {
	      RedisTemplate<Object, Object> template = new RedisTemplate<>();
	      template.setConnectionFactory(connectionFactory);

	      //使用Jackson2JsonRedisSerializer来序列化和反序列化redis的value值
	      Jackson2JsonRedisSerializer serializer = new Jackson2JsonRedisSerializer(Object.class);

	      ObjectMapper mapper = new ObjectMapper();
	      mapper.setVisibility(PropertyAccessor.ALL, JsonAutoDetect.Visibility.ANY);
	      mapper.enableDefaultTyping(ObjectMapper.DefaultTyping.NON_FINAL);
	      serializer.setObjectMapper(mapper);

	      template.setValueSerializer(serializer);
	      //使用StringRedisSerializer来序列化和反序列化redis的key值
	      template.setKeySerializer(new StringRedisSerializer());
	      template.afterPropertiesSet();
	      return template;
	   }
}
RedisController
这些写业务方法,以及调用缓存
import java.util.ArrayList;
import java.util.List;

import org.springframework.cache.annotation.CachePut;
import org.springframework.cache.annotation.Cacheable;
import org.springframework.web.bind.annotation.GetMapping;
import org.springframework.web.bind.annotation.PathVariable;
import org.springframework.web.bind.annotation.RequestMapping;
import org.springframework.web.bind.annotation.RestController;

import com.softdev.system.redis.entity.Item;

import cn.hutool.core.util.RandomUtil;

@RestController
public class RedisController {

	 /**
     * @Cacheable 应用到读取数据的方法上,先从缓存中读取,如果没有再从DB获取数据,然后把数据添加到缓存中
     * unless 表示条件表达式成立的话不放入缓存
     */
	@GetMapping("/item/{id}")
    @Cacheable(value = "item")
    public Item getItemById(@PathVariable int id) {
    	Item item = new Item();
    	item.setItemId(id);
    	item.setItemName("德玛西亚"+id);
        return item;
    }
	 /**
     * @Cacheable 应用到读取数据的方法上,先从缓存中读取,如果没有再从DB获取数据,然后把数据添加到缓存中
     * unless 表示条件表达式成立的话不放入缓存
     */
	@GetMapping("/item/all")
    @Cacheable(value = "item")
    public List<Item> getAllItem() {
		Item item1 = new Item();
    	item1.setItemId(666);
    	item1.setItemName("德玛西亚"+666);
    	Item item2 = new Item();
    	item2.setItemId(999);
    	item2.setItemName("德玛西亚"+999);
    	List<Item> items=new ArrayList<Item>();
    	items.add(item1);
    	items.add(item2);
        return items;
    }
	/**
     * 这个是空方法,由于缓存的原因,上面/item/all设置的值会被这个方法作为缓存拿出来
     */
	@GetMapping("/item/all2")
    @Cacheable(value = "item")
    public List<Item> getAllItem2() {
    	List<Item> items=new ArrayList<Item>();
        return items;
    }
    /**
     * @CachePut 应用到写数据的方法上,如新增/修改方法,调用方法时会自动把相应的数据放入缓存
     * @param person
     * @return
     */
    @CachePut(value = "item")
    @GetMapping("/item/{id}/update")
    public Item updateItem(@PathVariable int id) {
    	Item item = new Item();
    	item.setItemId(id);
    	item.setItemName("德玛西亚XXX"+id);
        return item;
    }

    /**
     * #item.itemId或者#p0.itemId是EL表达式来指定我们的key
     */
    @Cacheable(value = "item",key="#item.itemId")
    @GetMapping("/item/object")
    public Item updateItem(Item item) {
        return item;
    }
}
结果演示
【放入缓存】
http://localhost:2222/redis/item/2   {"itemId":2,"itemName":"德玛西亚2"}
http://localhost:2222/redis/item/3   {"itemId":3,"itemName":"德玛西亚3"}
【读取缓存(可以去RedisDesktopManager看一下,已经有数据了)】
http://localhost:2222/redis/item/2  {"itemId":2,"itemName":"德玛西亚2"}
http://localhost:2222/redis/item/3   {"itemId":3,"itemName":"德玛西亚3"}

【放入list缓存】
http://localhost:2222/redis/item/all  [{"itemId":666,"itemName":"德玛西亚666"},{"itemId":999,"itemName":"德玛西亚999"}]
【读取list缓存(这是一个空方法,只是因为有了缓存才有数据)】
http://localhost:2222/redis/item/all2  [{"itemId":666,"itemName":"德玛西亚666"},{"itemId":999,"itemName":"德玛西亚999"}]

【更新缓存】
http://localhost:2222/redis/item/2/update   {"itemId":2,"itemName":"德玛西亚XXX2"}
【重新读取缓存】
http://localhost:2222/redis/item/2   {"itemId":2,"itemName":"德玛西亚XXX2"}

【EL表达式指定KEY】
访问地址 http://localhost:2222/redis/item/object?itemId=4&itemName=XXXX
返回结果 {"itemId":4,"itemName":"XXXX"}

【获取缓存(结果不变还是XXXX不是4444)】
访问地址 http://localhost:2222/redis/item/object?itemId=4&itemName=4444
返回结果 {"itemId":4,"itemName":"XXXX"}
Spring缓存注解@Cacheable、@CacheEvict、@CachePut使用
从3.1开始,Spring引入了对Cache的支持。其使用方法和原理都类似于Spring对事务管理的支持。Spring Cache是作用在方法上的,其核心思想是这样的:当我们在调用一个缓存方法时会把该方法参数和返回结果作为一个键值对存放在缓存中,等到下次利用同样的参数来调用该方法时将不再执行该方法,而是直接从缓存中获取结果进行返回。所以在使用Spring Cache的时候我们要保证我们缓存的方法对于相同的方法参数要有相同的返回结果。
@Cacheable
@Cacheable可以标记在一个方法上,也可以标记在一个类上。当标记在一个方法上时表示该方法是支持缓存的,当标记在一个类上时则表示该类所有的方法都是支持缓存的。对于一个支持缓存的方法,Spring会在其被调用后将其返回值缓存起来,以保证下次利用同样的参数来执行该方法时可以直接从缓存中获取结果,而不需要再次执行该方法。Spring在缓存方法的返回值时是以键值对进行缓存的,值就是方法的返回结果,至于键的话,Spring又支持两种策略,默认策略和自定义策略,这个稍后会进行说明。需要注意的是当一个支持缓存的方法在对象内部被调用时是不会触发缓存功能的。
@Cacheable可以指定三个属性,value、key和condition。
###value属性指定Cache名称
value属性是必须指定的,其表示当前方法的返回值是会被缓存在哪个Cache上的,对应Cache的名称。其可以是一个Cache也可以是多个Cache,当需要指定多个Cache时其是一个数组。
   @Cacheable("cache1")//Cache是发生在cache1上的

   public User find(Integer id) {

      returnnull;

   }


   @Cacheable({"cache1", "cache2"})//Cache是发生在cache1和cache2上的

   public User find(Integer id) {

      returnnull;

   }
###使用key属性自定义key
key属性是用来指定Spring缓存方法的返回结果时对应的key的。该属性支持SpringEL表达式。当我们没有指定该属性时,Spring将使用默认策略生成key。我们这里先来看看自定义策略,至于默认策略会在后文单独介绍。
自定义策略是指我们可以通过Spring的EL表达式来指定我们的key。这里的EL表达式可以使用方法参数及它们对应的属性。使用方法参数时我们可以直接使用“#参数名”或者“#p参数index”。下面是几个使用参数作为key的示例。
   @Cacheable(value="users", key="#id")

   public User find(Integer id) {

      returnnull;

   }

   @Cacheable(value="users", key="#p0")

   public User find(Integer id) {

      returnnull;

   }


   @Cacheable(value="users", key="#user.id")

   public User find(User user) {

      returnnull;

   }


   @Cacheable(value="users", key="#p0.id")

   public User find(User user) {

      returnnull;

   }
condition属性指定发生的条件
有的时候我们可能并不希望缓存一个方法所有的返回结果。通过condition属性可以实现这一功能。condition属性默认为空,表示将缓存所有的调用情形。其值是通过SpringEL表达式来指定的,当为true时表示进行缓存处理;当为false时表示不进行缓存处理,即每次调用该方法时该方法都会执行一次。如下示例表示只有当user的id为偶数时才会进行缓存。
   @Cacheable(value={"users"}, key="#user.id", condition="#user.id%2==0")
   public User find(User user) {
      System.out.println("find user by user " + user);
      return user;
   }
@CachePut
在支持Spring Cache的环境下,对于使用@Cacheable标注的方法,Spring在每次执行前都会检查Cache中是否存在相同key的缓存元素,如果存在就不再执行该方法,而是直接从缓存中获取结果进行返回,否则才会执行并将返回结果存入指定的缓存中。@CachePut也可以声明一个方法支持缓存功能。与@Cacheable不同的是使用@CachePut标注的方法在执行前不会去检查缓存中是否存在之前执行过的结果,而是每次都会执行该方法,并将执行结果以键值对的形式存入指定的缓存中。
@CachePut也可以标注在类上和方法上。使用@CachePut时我们可以指定的属性跟@Cacheable是一样的。
   @CachePut("users")//每次都会执行方法,并将结果存入指定的缓存中
   public User find(Integer id) {
      returnnull;
   }
开源项目
https://github.com/moshowgame/spring-cloud-study
https://gitee.com/moshow/spring-cloud-study


