计算机图形学 || Translation
Basic:
1. 画一个立方体(cube):边长为4, 中心位置为(0, 0, 0)。分别启动和关闭深度测试glEnable(GL_DEPTH_TEST) 、 glDisable(GL_DEPTH_TEST) ,查看区别,并分析原因。
着色器:
- 顶点着色器:
#version 330 core
layout (location = 0) in vec3 aPos;
//layout (location = 1) in vec3 aColor;
layout (location = 1) in vec2 aTexCoord;

out vec3 ourColor;
// 增加纹理属性
out vec2 TexCoord;
//增加变换属性
uniform mat4 model;
uniform mat4 view;
uniform mat4 projection;

void main ()
{
    gl_Position = projection * view * model * vec4(aPos, 1.0);
    ourColor = vec3(1.0f, 1.0f, 1.0f);
    TexCoord = aTexCoord;
}
- 片段着色器:
#version 330 core
out vec4 FragColor;

in vec3 ourColor;
in vec2 TexCoord;

uniform sampler2D texture1;
uniform sampler2D texture2;

void main ()
{
    // 将两种纹理进行混合
    FragColor = mix(texture(texture1, TexCoord), texture(texture2, TexCoord), 0.2);
}
建模:
- 设置立方体的36个顶点:
float vertices[] = {
        // 顶点位置           // 纹理坐标
        -2.0f, -2.0f, -2.0f, 0.0f, 0.0f,
         2.0f, -2.0f, -2.0f, 1.0f, 0.0f,
         2.0f,  2.0f, -2.0f, 1.0f, 1.0f,
         2.0f,  2.0f, -2.0f, 1.0f, 1.0f,
        -2.0f,  2.0f, -2.0f, 0.0f, 1.0f,
        -2.0f, -2.0f, -2.0f, 0.0f, 0.0f,
    	......	  ......	......
};
坐标设定:
- 设置观察(摄像机)矩阵和透视投影矩阵,因为设置的边长较大,所以要将视角拉向很远。
// 设置view和透视矩阵,因为默认摄像机和透视不变化所以开始就可以设置好
    glm::mat4 view = glm::mat4(1.0f);
    glm::mat4 projection = glm::mat4(1.0f);
    view = glm::translate(view, glm::vec3(0.0f, 0.0f, -15.0f));
    projection = glm::perspective(glm::radians(45.0f), (float)SCR_WIDTH / (float)SCR_HEIGHT, 0.1f, 100.0f);
    object1.use(); // don't forget to activate/use the shader before setting uniforms!
    object1.setMat4("view", view);
    object1.setMat4("projection", projection);
- 设置模型矩阵:
因为设计线性代数的矩阵运算,所以模型变换时要先缩放,后旋转最后位移。变为矩阵运算则刚好相反进行创建。最后发送给着色器,再这之前记得激活(每次使用前一定记得激活!!!)。
object1.use();
glm::mat4 model = glm::mat4(1.0f); // make sure to initialize matrix to identity matrix first
// 先缩放,后旋转,最后位移,矩阵乘法顺序相反
// 沿水平方向来回移动
model = glm::translate(model, glm::vec3(1.0, 0.0, 0.0));
// 沿着x = z轴持续旋转
model = glm::rotate(model, rad_z , glm::vec3(0.0f, 0.0f, 1.0f));
// 持续放大缩小
//float scale_size = 2 * abs(cos((float)glfwGetTime()));
model = glm::scale(model, glm::vec3(_s, _s, _s));
object1.setMat4("model", model);
纹理:
- 为了美观又为立方体添加了纹理效果:
unsigned int texture1, texture2;
texture1 = LoadTexture("timg.jpg", 0);
texture2 = LoadTexture("rocket.png", 1);

// 激活并绑定纹理单元
glActiveTexture(GL_TEXTURE0);
glBindTexture(GL_TEXTURE_2D, texture1);
glActiveTexture(GL_TEXTURE1);
glBindTexture(GL_TEXTURE_2D, texture2);
// 将纹理绑定到对应的纹理单元
object1.use(); // don't forget to activate/use the shader before setting uniforms!
object1.setInt("texture1", 0);
object1.setInt("texture2", 1);
深度测试:
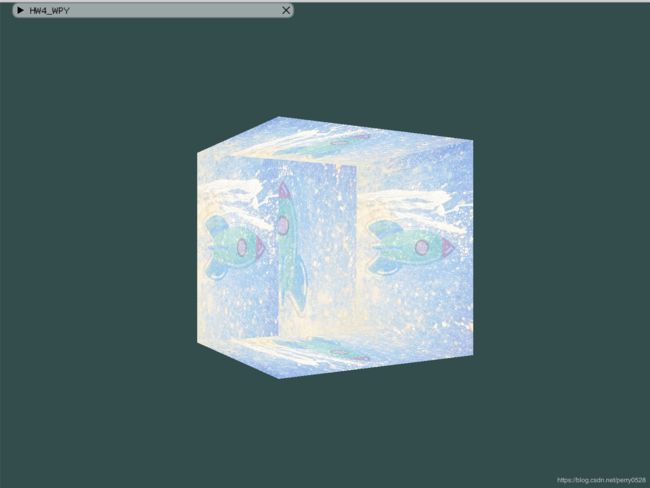
- 开启深度测试
现象解释:
OpenGL是一个三角形一个三角形地来绘制你的立方体的,所以即便之前那里有东西它也会覆盖之前的像素。因为这个原因,有些三角形会被绘制在其它三角形上面,虽然它们本不应该是被覆盖的。
- 深度缓冲:
OpenGL存储它的所有深度信息于一个Z缓冲(Z-buffer)中,也被称为深度缓冲(Depth Buffer)。GLFW会自动生成这样一个缓冲(就像它也有一个颜色缓冲来存储输出图像的颜色)。深度值存储在每个片段里面(作为片段的z值),当片段想要输出它的颜色时,OpenGL会将它的深度值和z缓冲进行比较,如果当前的片段在其它片段之后,它将会被丢弃,否则将会覆盖。这个过程称为深度测试(Depth Testing),它是由OpenGL自动完成的。
通过glEnable函数来开启深度测试。glEnable和glDisable函数启用或禁用某个OpenGL功能。这个功能会一直保持启用/禁用状态,直到另一个调用来禁用/启用它。
glEnable(GL_DEPTH_TEST);
因为使用了深度测试,我们也想要在每次渲染迭代之前清除深度缓冲(否则前一帧的深度信息仍然保存在缓冲中)。就像清除颜色缓冲一样,可以通过在glClear函数中指定DEPTH_BUFFER_BIT位来清除深度缓冲:
glClear(GL_COLOR_BUFFER_BIT | GL_DEPTH_BUFFER_BIT);
2. 平移(Translation):使画好的cube沿着水平或垂直方向来回移动。
model = glm::translate(model, glm::vec3(1.0f, 0.0f, 0.0f));
3. 旋转(Rotation):使画好的cube沿着XoZ平面的x=z轴持续旋转。
model = glm::rotate(model, (float)glfwGetTime() * glm::radians(30.0f), glm::vec3(0.0f, 0.0f, 1.0f));
4.放缩(Scaling):使画好的cube持续放大缩小。
float scale_size = 2 * abs(cos((float)glfwGetTime()));
model = glm::scale(model, glm::vec3(scale_size, scale_size, scale_size));
5. 在GUI里添加菜单栏,可以选择各种变换。
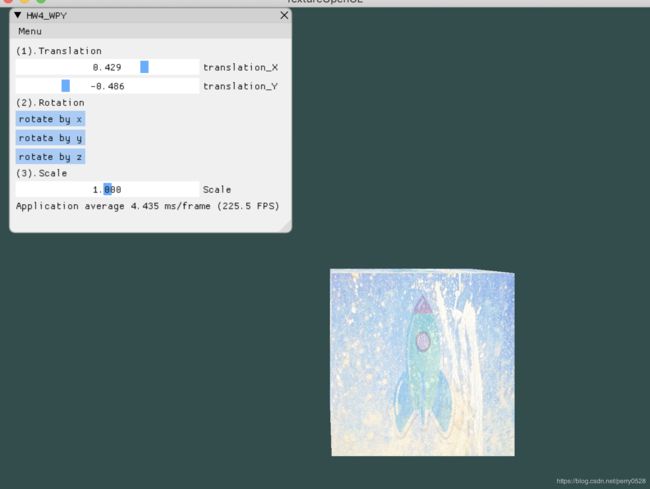
功能:
- Translatin:
- 分别有x轴和y轴两个Slider,拖动进度条可以使物体沿两个轴移动。
- 因为z轴的移动视觉效果类似放缩,所以不做设计。
- Rotation:
- 分别有三个按钮,对应x, y, z轴,点击可以使得立方体沿着对应轴旋转响应单位角度(设置为30度)。
- Scale:
- 拖动Slider实现立方体的放缩,上限为2倍。
// imgui的Slider变化量
float _t_x = 0, _t_y = 0, _s = 1;
float rad_x = 0.0f, rad_y = 0.0f, rad_z = 0.0f;
bool r_x = false, r_y = false, r_z = false;
// imgui的menu
bool tool_active = true;
bool basic = false;
bool bonus = false;
ImGui::Text("(1).Translation");
ImGui::SliderFloat("translation_X", &_t_x, -1, 1);
ImGui::SliderFloat("translation_Y", &_t_y, -1, 1);
//ImGui::SliderFloat("translation_Z", &_t_z, -1, 1);
ImGui::Text("(2).Rotation");
//ImGui::SliderFloat("Rotation", &_r, -1, 1);
if (ImGui::Button("rotate by x"))
{
    r_x = true;
    rad_x += glm::radians(30.0f);
}
if (ImGui::Button("rotata by y"))
{
    r_y = true;
    rad_y += glm::radians(30.0f);
}
if (ImGui::Button("rotate by z"))
{
    r_z = true;
    rad_z += glm::radians(30.0f);
}
ImGui::Text("(3).Scale");
ImGui::SliderFloat("Scale", &_s, 0, 2);
object1.use();
// 变换组合
glm::mat4 model = glm::mat4(1.0f); // make sure to initialize matrix to identity matrix first
// 先缩放,后旋转,最后位移,矩阵乘法顺序相反
// 沿水平方向来回移动
model = glm::translate(model, glm::vec3(_t_x, _t_y, 0.0));
// 沿着x = z轴持续旋转
if (r_x)
{
    model = glm::rotate(model, rad_x , glm::vec3(1.0f, 0.0f, 0.0f));

}
if (r_y)
{
    model = glm::rotate(model, rad_y,  glm::vec3(0.0f, 1.0f, 0.0f));

}
if (r_z)
{
    model = glm::rotate(model, rad_z, glm::vec3(0.0f, 0.0f, 1.0f));
}
// 持续放大缩小
//float scale_size = 2 * abs(cos((float)glfwGetTime()));
model = glm::scale(model, glm::vec3(_s, _s, _s));
object1.setMat4("model", model);
实现效果:
6. 结合Shader谈谈对渲染管线的理解
shader的管线步骤如下:
- vertex processor(vs)
- Primitive assembly(图元装配)
- Geometry processor(几何学处理)(包括将物体从三维透影到二维)
- clipper
- 光栅化
- fragment processor
在openGL中编写shader程序则主要包含以下步骤:
- 创建shader对象
- 顶点shader
- 片元shader
- 指定shader源代码
- 编译shader
- 调试
- 将shader对象与程序对象绑定
- 链接
- 调试
- 释放中间shader对象
- 通过glUseProgram将链接好的程序对象送到shader管线,这个shader将对之后的draw有效
shader对象调用顶点和片元的shader代码:
- 顶点shader代码中包含顶点buffer中的值被解释为其在buffer中位置(可能包含位置,法向,纹理等多个属性)。
- main中把多个shader对象链接到一起形成最终的shader。
- 顶点shader运行成功后将会把物体从三维投射到二维(透射除法)
- 光栅化后每个片元执行片元shader的操作,输出的最终颜色由out的FragColor决定。
Bonus:
- 功能:
- 将basic和bonus分别以不同的menu在gui中区别出来。
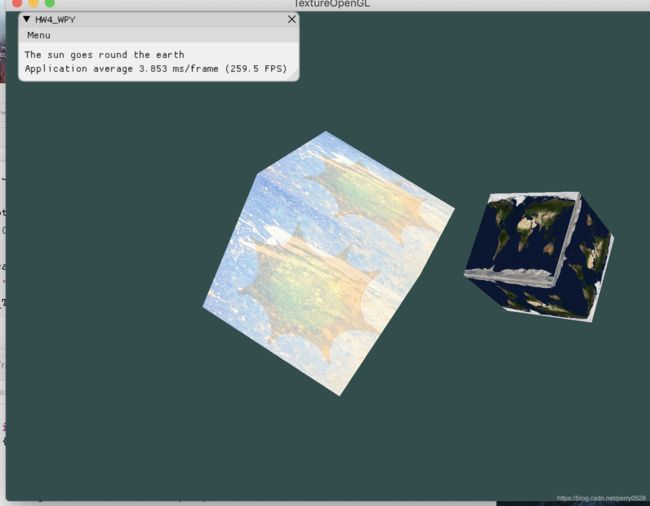
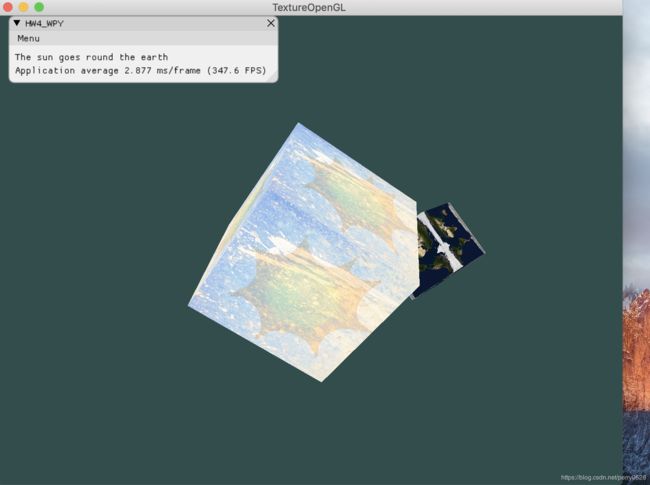
- bonus中实现了一个模拟的地球绕太阳旋转(用立方体表示的),地球具备自转和公转能力,太阳自转。
- 地球和太阳分别隶属不同的着色器,因为设置不同的纹理,太阳是太空和太阳结合的纹理属性,地球是地球表面贴图的纹理属性。
Shader object1("shader.vs", "shader.fs");
Shader object2("shader1.vs", "shader1.fs");
texture3 = LoadTexture("地球.jpg", 0);
texture4 = LoadTexture("太阳.png", 1);
glActiveTexture(GL_TEXTURE2);
glBindTexture(GL_TEXTURE_2D, texture3);
glActiveTexture(GL_TEXTURE3);
glBindTexture(GL_TEXTURE_2D, texture4);
object1.use(); // don't forget to activate/use the shader before setting uniforms!
object1.setInt("texture1", 0);
object1.setInt("texture2", 3);
object2.use();
object2.setInt("Texture", 2);
object1.use();
// 变换组合
// 太阳
glm::mat4 model = glm::mat4(1.0f);
model = glm::rotate(model, (float)glfwGetTime() * glm::radians(30.0f), glm::vec3(0.5f, 0.8f, 0.0f));
object1.setMat4("model", model);
glDrawArrays(GL_TRIANGLES, 0, 36);
object2.use();
glm::mat4 model1 = glm::mat4(1.0f); // make sure to initialize matrix to identity matrix first
// 公转
float X = sin(glfwGetTime()) * 5;
float Z = cos(glfwGetTime()) * 5;
model1 = glm::translate(model1, glm::vec3(X, 0.0f, Z));
// 自转
model1 = glm::rotate(model1, (float)glfwGetTime() * glm::radians(45.0f), glm::vec3(0.5f, 1.0f, 0.3f));
// 地球比太阳小
model1 = glm::scale(model1, glm::vec3(0.5f, 0.5f, 0.5f));
object2.setMat4("model", model1);
glDrawArrays(GL_TRIANGLES, 0, 36);
实现效果:
- 略丑(捂脸)


详细代码参考:
https://github.com/WangPerryWPY/Computer_Graphics/tree/master/HW4


