springboot swagger2集成
Swagger简单介绍
Swagger是一个Restful风格接口的文档在线自动生成和测试的框架
官网:http://swagger.io
官方描述:The World’s Most Popular Framework for APIs.
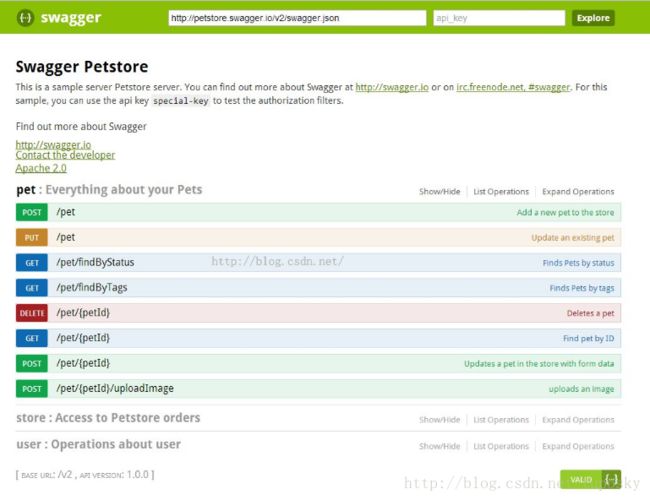
Swagger ui 的原生UI界面如下:
如何使用Swagger
1、引入jar包
首先需要在你的 pom.xml 中引入swagger的包
    io.springfox
    springfox-swagger2
    2.2.2


//非源生的swagger    大神写的页面

  com.github.caspar-chen
  swagger-ui-layer
  0.0.5
2.启用swagger
启用swagger ,创建SwaggerConfig文件,内容如下,
@Configuration
@EnableSwagger2
public class SwaggerConfig {

    @Bean
    public Docket ProductApi() {
        return new Docket(DocumentationType.SWAGGER_2)
                .genericModelSubstitutes(DeferredResult.class)
                .useDefaultResponseMessages(false)
                .forCodeGeneration(false)
                .pathMapping("/")
                .select()
                .build()
                .apiInfo(productApiInfo());
    }

    private ApiInfo productApiInfo() {
        ApiInfo apiInfo = new ApiInfo("XXX系统数据接口文档",
                "文档描述。。。",
                "1.0.0",
                "API TERMS URL",
                "联系人邮箱",
                "license",
                "license url");
        return apiInfo;
    }
}
//若是源生的swagger需要添加
@EnableSwagger2
@WebAppConfiguration
@SpringBootApplication
@EnableSwagger2
@WebAppConfiguration
public class DemoApplication {

    public static void main(String[] args) {
        SpringApplication.run(DemoApplication.class, args);
    }
}
非源生的的地址
swagger-ui-layer 的默认访问地址是: http://${host}:${port}/docs.html
源生
http://localhost:8080/swagger-ui.html
3.添加swagger注解
    @ApiOperation(value="获取用户详细信息", notes="根据url的id来获取用户详细信息")
    @ApiImplicitParam(name = "id", value = "用户ID", required = true, dataType = "Integer", paramType = "path")
    @RequestMapping(value = "user/{id}", method = RequestMethod.GET)
    public String getUserById (@PathVariable(value = "id") Integer id){
        return "1";
    }
4.添加自定义UI界面(未测试)
有两种方式
1.可以在项目的基础上新增一个servlet ,指向对应的html文件
html文件里再去解析json,并渲染UI
2.新建一个项目,用webjars将前端资源打成jar包,再供其他项目使用
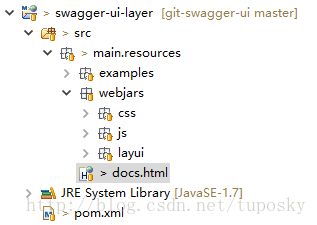
项目结构如图 
主要文件是docs.html,此文件作用是解析json和渲染UI
通过ajax请求v2/api-docs,再解析json。
$.ajax({
    url : "v2/api-docs",
    //url : "http://petstore.swagger.io/v2/swagger.json",
    dataType : "json",
    type : "get",
    success : function(data) {
        //do something
       console.log(data);
    }
});
//写在最后
使用swagger-ui-layer
现在已经将项目在github上开源了,取名为swagger-ui-layer。
欢迎star,fork,commit,也可以随意修改成自己喜欢的UI风格
github地址:https://github.com/caspar-chen/swagger-ui-layer
码云地址:https://www.oschina.net/p/swagger-ui-layer
要使用swagger-ui-layer很简单
只需要在pom.xml中加入引用最新版本jar包就可以了
最新版jar包地址:
http://search.maven.org/#search%7Cgav%7C1%7Cg%3A%22com.github.caspar-chen%22%20AND%20a%3A%22swagger-ui-layer%22
