网站架构概述
网站架构一般认为是根据客户需求分析的结果,准确定位网站目标群体,设置网站的整体架构,规划、设计网站栏目及其内容,制定网站开发流程的顺序,最大限度地进行高效资源分配与管理的设计。
PV(Page View,页面浏览量)即点击量,通常是衡量一个网络新闻频道或者网站的主要指标。对PV 的解释是,一个访问者在24 小时内到底看了网站的几个页面。这里需要注意的是。同一个人浏览的同一页面,不重复计算 PV 量。
案例概述
本次案例设计采用四层模式实现,主要分为前端反向代理、Web层、数据库缓存和数据库层。前端反向代理层采用主备模式,Web层采用群集模式,数据库缓存层采用主备模式,数据库层采用主从模式。
拓扑架构如图所示,实线是正常情况下的数据流向连接,虚线是异常情况下的数据流向连接。
案例环境,如表所示。
使用所需的软件包可使用此链接获得:
主机名 IP 地址 系统版本 用途 Master 192.168.66.138 centos 7 (64 位) 前端反向代理主机、redis 缓存主机、Mysql 数据库主库 Backup 192.168.66.139 centos 7 (64 位) 前端反向代理备机、redis 缓存主机、Mysql 数据库从库 tomcat 1 192.168.66.136 centos 7 (64 位) Web 服务 tomcat 2 192.168.66.137 centos 7 (64 位) Web 服务 链接:https://pan.baidu.com/s/1JgWf8Zrc6KZsAU1-7-Lsug
提取码:0m8z
实施步骤
1.在前端搭建 Nginx 反向代理和 Keeepalived
(1)安装带有 nginx rpm 软件包 的源(主从都要安装),关闭防火墙。
[root@backup ~]# systemctl stop firewalld
[root@backup ~]# setenforce 0
[root@backup ~]# rpm -ivh http://nginx.org/packages/centos/7/noarch/RPMS/nginx-release-centos-7-0.el7.ngx.noarch.rpm
获取http://nginx.org/packages/centos/7/noarch/RPMS/nginx-release-centos-7-0.el7.ngx.noarch.rpm
警告:/var/tmp/rpm-tmp.bQAX0y: 头V4 RSA/SHA1 Signature, 密钥 ID 7bd9bf62: NOKEY
准备中... ################################# [100%]
正在升级/安装...
1:nginx-release-centos-7-0.el7.ngx ################################# [100%]
(2)使用centos 默认仓库完成下面的安装 keepalived 和 nginx
[root@backup ~]# yum install -y keepalived nginx
(3)编辑前端代理主机 keepalived 配置文件(主服务器:master)
[root@master ~]# vim /etc/keepalived/keepalived.conf
! Configuration File for keepalived
vrrp_script nginx { //nginx 的触发脚本,需要创建/opt/nginx.sh
script "/opt/shell/nginx.sh"
interval 2global_defs {
router_id NGINX_HA //注意:router_id 群集名称,从服务器群集名称为:NGINX_HB
}vrrp_instance VI_1 {
state MASTER //主服务器状态为 MASTER, 从服务器的状态为:BACKUP
interface eNS33
virtual_router_id 51 //虚拟 id 主从也要不一样,从为52
priority 100 //优先级 ,从服务器的优先级要小于主服务器的优先级
advert_int 1
authentication {
auth_type PASS
auth_pass 1111
}
track_script { //触发 nginx 脚本
nginx
}
virtual_ipaddress {
192.168.66.100 //虚拟 IP
192.168.200.100
}
}
(4)编辑nginx的启动脚本
[root@master ~]# mkdir /opt/shell
[root@master ~]# vim /opt/shell/nginx.sh#!/bin/bash
k=`ps -ef | grep keepalived | grep -v grep | wc –l` //查看当前所有进程,过滤 keepalived 进程,反向过滤 grep 进程
if [ $k -gt 0 ];then
/bin/systemctl start ngingx.service //启动nginx 服务
fi
给脚本执行权限
[root@master ~]# chmod +x /opt/shell/nginx.sh
从服务器的 keepalived 配置文件与主服务器基本一致,注意 route id 、state、和优先级有区别
(5)配置nginx前端调度功能,nginx 反向代理 tomcat (主从服务器配置一样)。
[root@master shell]# vim /etc/nginx/nginx.conf (在gzip on 下方,添加以下内容)
#gzip on;
upstream tomcat_pool { //节点服务器 tomcat 池
server 192.168.66.136:8080; //节点 Web 服务器 IP 地址,Tomcat默认端口8080
server 192.168.66.137:8080;
ip_hash; // 会话稳固功能,否则无法通过vip地址登陆
}
server {
listen 80;
server_name 192.168.66.100; //虚拟 IP 地址
location / {
proxy_pass http://tomcat_pool;
proxy_set_header X-Real-IP $remote_addr;
}
}
检查nginx的配置文件语法
[root@master shell]# nginx -t -c /etc/nginx/nginx.conf //检查nginx的配置文件语法
nginx: the configuration file /etc/nginx/nginx.conf syntax is ok
nginx: configuration file /etc/nginx/nginx.conf test is successful
(6)启动 keepalived 服务,nginx 服务夜壶自动启动
[root@master ~]# systemctl start keepalived.service
[root@master ~]# netstat -ntap | grep nginx
tcp 0 0 0.0.0.0:80 0.0.0.0:* LISTEN 43058/nginx: master
2.配置节点服务器,在 Web 层安装 Tomcat 服务
(1)解压 jdk 和 tomcat 软件包(关闭防火墙)
[root@promote pv]# tar zxvf jdk-8u144-linux-x64.tar.gz -C /opt/
[root@promote pv]# tar zxvf apache-tomcat-8.5.23.tar.gz -C /opt/
将解压后的软件包移动到 /usr/local/目录下,并重命名
[root@promote opt]# mv jdk1.8.0_144/ /usr/local/java
[root@promote opt]# mv apache-tomcat-8.5.23/ /usr/local/tomcat8
[root@promote opt]# cd /usr/local/
[root@promote local]# ls
bin etc games include java lib lib64 libexec sbin share src tomcat8
(2)添加环境变量,使系统能够识别,能够使用 java 中的命令
[root@promote local]# vim /etc/profile
export JAVA_HOME=/usr/local/java
export JRE_HOME=/usr/local/java/jre
export PATH=$PATH:/usr/local/java/bin
export CLASSPATH=./:/usr/local/java/lib:/usr/local/java/jre/lib
生效环境变量,查看 java 版本
[root@promote local]# source /etc/profile
[root@promote local]# java -version
openjdk version "1.8.0_131"
OpenJDK Runtime Environment (build 1.8.0_131-b12)
OpenJDK 64-Bit Server VM (build 25.131-b12, mixed mode)
(3)启动 tomcaT 服务
[root@promote local]# ln -s /usr/local/tomcat8/bin/startup.sh /usr/bin/tomcatup
[root@promote local]# ln -s /usr/local/tomcat8/bin/shutdown.sh /usr/bin/tomcatdown
[root@promote local]# tomcatup //使用命令 tomcatup
Using CATALINA_BASE: /usr/local/tomcat8
Using CATALINA_HOME: /usr/local/tomcat8
Using CATALINA_TMPDIR: /usr/local/tomcat8/temp
Using JRE_HOME: /use/local/java/jre
Using CLASSPATH: /usr/local/tomcat8/bin/bootstrap.jar:/usr/local/tomcat8/bin/tomcat-juli.jar
Tomcat started.
查看 tomcat 默认端口是否启动
[root@promote local]# netstat -ntap | grep 8080
tcp6 0 0 :::8080 :::* LISTEN 58040/java
tcp6 0 0 192.168.66.136:8080 192.168.66.1:52004 FIN_WAIT2 -
tcp6 0 0 192.168.66.136:8080 192.168.66.1:52003 FIN_WAIT2 -
(4)在浏览器测试 tomcat 网站
更改测试首页(节点服务器1),网站首页路径。
[root@promote webapps]# cd /usr/local/tomcat8/webapps/
[root@promote webapps]# ls
docs examples host-manager manager ROOT
[root@promote webapps]# cd ROOT
[root@promote ROOT]# ls
asf-logo-wide.svg bg-nav-item.png favicon.ico tomcat.css tomcat-power.gif
bg-button.png bg-nav.png index.jsp tomcat.gif tomcat.svg
bg-middle.png bg-upper.png RELEASE-NOTES.txt tomcat.png WEB-INF
[root@promote ROOT]# mv index.jsp index.jsp.bk //将原来的默认网站首页重命名
重新编辑网站默认首页
[root@promote ROOT]# vim index.jsp
server 136!!!
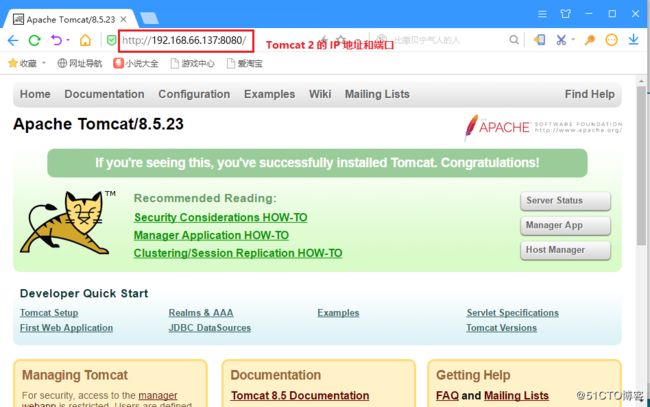
验证页面
(5)节点服务器2的配置与1相同,测试网站
编辑默认首页
[root@promote ROOT]# vim index.jsp
server 137!!!
验证首页
最后通过前端反向代理虚拟 IP 地址访问测试 http://192.168.66.100 如图所示
模拟故障,关闭节点服务器2,再次访问,看能否访问到节点服务器1 的首页
[root@tomcat2 bin]#tomcatdown
Using CATALINA_BASE: /usr/local/tomcat8
Using CATALINA_HOME: /usr/local/tomcat8
Using CATALINA_TMPDIR: /usr/local/tomcat8/temp
Using JRE_HOME: /usr/local/java/jre
Using CLASSPATH: /usr/local/tomcat8/bin/bootstrap.jar:/usr/local/tomcat8/bin/tomcat-juli.jar
从上图中我们可以看到虚拟 IP 没有变化,但是后端响应的服务器已经改变,说明 Web 服务器群集配置完成。
(6) 编辑 server.xml 文件
[root@promote ROOT]# cd /usr/local/tomcat8/conf/
[root@promote conf]# ls
Catalina context.xml logging.properties tomcat-users.xsd
catalina.policy jaspic-providers.xml server.xml web.xml
catalina.properties jaspic-providers.xsd tomcat-users.xml
[root@promote conf]# vim server.xml
3.在主从服务器上部署mysql数据库
(1)使用 yum 方式安装 mariadb 数据库,两台服务器上都要安装
[root@master ~]# yum install -y mariadb-server mariadb
启动数据库,并查看端口是否开启
[root@master ~]# systemctl enable mariadb.service //开机自启动
Created symlink from /etc/systemd/system/multi-user.target.wants/mariadb.service to /usr/lib/systemd/system/mariadb.service.
[root@master ~]# systemctl start mariadb.service //启动数据库
[root@master ~]# netstat -ntap | grep 3306
tcp 0 0 0.0.0.0:3306 0.0.0.0:* LISTEN 78702/mysqld
(2)进行常规安全设置,使用命令 mysql_secure_installation
[root@master ~]# mysql_secure_installation
…….
Enter current password for root (enter for none): //按回车进入
OK, successfully used password, moving on...Setting the root password ensures that nobody can log into the MariaDB
root user without the proper authorisation.Set root password? [Y/n] y //设置数据库 root 用户密码 ,yes
New password:
Re-enter new password:
Password updated successfully!
Reloading privilege tables..
... Success!Remove anonymous users? [Y/n] n //是否清除其匿名用户, no
... skipping.Normally, root should only be allowed to connect from 'localhost'. This
ensures that someone cannot guess at the root password from the network.Disallow root login remotely? [Y/n] y //管理员本地登录,yes
... Success!By default, MariaDB comes with a database named 'test' that anyone can
access. This is also intended only for testing, and should be removed
before moving into a production environment.Remove test database and access to it? [Y/n] n //删除测试数据库,no
... skipping.Reloading the privilege tables will ensure that all changes made so far
will take effect immediately.Reload privilege tables now? [Y/n] y //重新加载 tables ,yes
... Success!Cleaning up...
All done! If you've completed all of the above steps, your MariaDB
installation should now be secure.Thanks for using MariaDB! //mariadb 数据库安装完成。
(3)登录数据库
[root@master ~]# mysql -uroot -p
Enter password:
Welcome to the MariaDB monitor. Commands end with ; or \g.
Your MariaDB connection id is 7
Server version: 5.5.60-MariaDB MariaDB ServerCopyright (c) 2000, 2018, Oracle, MariaDB Corporation Ab and others.
Type 'help;' or '\h' for help. Type '\c' to clear the current input statement.
MariaDB [(none)]> show databases; //查看数据库
+--------------------+
| Database |
+--------------------+
| information_schema |
| mysql |
| performance_schema |
| test |
+--------------------+
4 rows in set (0.00 sec)
(4)导入数据库,(主数据库和从数据库都要导入)。
[root@master ~]# mkdir /aaa
[root@master ~]# mount.cifs //192.168.66.1/rhel7 /aaa //挂载需要导入的数据库
Password for root@//192.168.66.1/rhel7:
[root@master pv]# ls
apache-jmeter-4.0 JDK1.8.0 slsaledb-2014-4-10.sql
apache-jmeter-4.0.zip jdk-8u144-linux-x64.tar.gz SLSaleSystem.tar.gz
apache-tomcat-8.5.23.tar.gz mysql-5.6.26.tar.gz
导入数据库并查看
[root@master pv]# mysql -u root -p < slsaledb-2014-4-10.sql
Enter password:
登录数据库查询
[root@master pv]# mysql -uroot -p
Enter password:
Welcome to the MariaDB monitor. Commands end with ; or \g.
Your MariaDB connection id is 9
Server version: 5.5.60-MariaDB MariaDB ServerCopyright (c) 2000, 2018, Oracle, MariaDB Corporation Ab and others.
Type 'help;' or '\h' for help. Type '\c' to clear the current input statement.
MariaDB [(none)]> show databases; //查看数据库
+--------------------+
| Database |
+--------------------+
| information_schema |
| mysql |
| performance_schema |
| slsaledb | //数据库导入成功
| test |
+--------------------+
5 rows in set (0.00 sec)MariaDB [(none)]> use slsaledb; //进入slsabledb 数据库
Reading table information for completion of table and column names
You can turn off this feature to get a quicker startup with -ADatabase changed
MariaDB [slsaledb]> show tables; //查看表
+-------------------------+
| Tables_in_slsaledb |
+-------------------------+
| BASICS_PARAMETER |
| INFO_ANNEXES |
| INVENTORY |
| MULTI_LAN |
| ORDER_INFO |
| ORDER_LIST |
| USER_ACCOUNT_201312 |
| USER_ACCOUNT_201404 |
| USER_ACCOUNT_LOG_201404 |
| USER_BUY |
| USER_BUY_BONUS |
| USER_CASH |
| USER_PAIR_201312 |
| USER_PLACE |
| USER_POINT |
| USER_POINT_GOODS |
| USER_RECHARGE |
| USER_REFER |
| affiche |
| au_authority |
| au_function |
| au_role |
| au_user |
| data_dictionary |
| goods_info |
| goods_pack |
| goods_pack_affiliated |
| information |
| leave_message |
| reply |
| uploadtemp |
+-------------------------+
31 rows in set (0.01 sec)从数据库也要导入数据库,操作一样。
(5)在数据库上给网上商城项目授权使用导入数据库 slsaledb (主从数据库都要授予权限)
MariaDB [(none)]> GRANT all ON slsaledb.* TO 'root'@'%' IDENTIFIED BY 'abc123';
Query OK, 0 rows affected (0.00 sec)MariaDB [(none)]> flush privileges; //刷新数据库
Query OK, 0 rows affected (0.00 sec)
4在tomcat节点服务器上部署商城项目(两个节点服务器都要做)
(1)解压商城项目到 /usr/local/tomcat8/webapps/
[root@promote pv]# tar zxvf SLSaleSystem.tar.gz -C /usr/local/tomcat8/webapps/
编辑商城项目中的文件,路径为。
(2)重启tomcat
[root@promote classes]# tomcatdown
Using CATALINA_BASE: /usr/local/tomcat8
Using CATALINA_HOME: /usr/local/tomcat8
Using CATALINA_TMPDIR: /usr/local/tomcat8/temp
Using JRE_HOME: /usr/local/java/jre
Using CLASSPATH: /usr/local/tomcat8/bin/bootstrap.jar:/usr/local/tomcat8/bin/tomcat-juli.jar
[root@promote classes]# tomcatup
Using CATALINA_BASE: /usr/local/tomcat8
Using CATALINA_HOME: /usr/local/tomcat8
Using CATALINA_TMPDIR: /usr/local/tomcat8/temp
Using JRE_HOME: /usr/local/java/jre
Using CLASSPATH: /usr/local/tomcat8/bin/bootstrap.jar:/usr/local/tomcat8/bin/tomcat-juli.jar
Tomcat started.
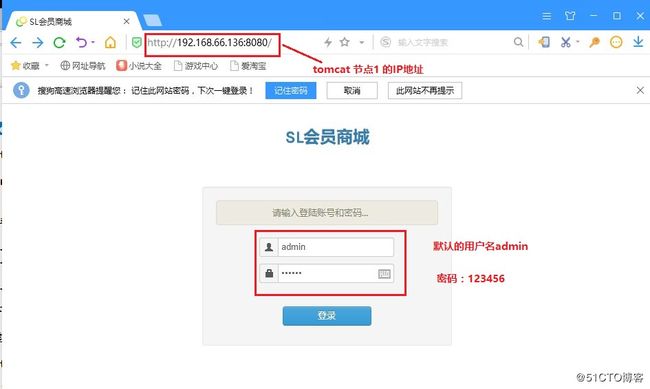
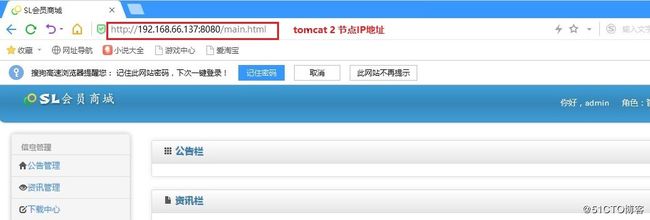
(3)在浏览器上测试 tomcat 节点是否能正常访问 SL会员商城,输入用户名:admin ,密码:123456
在访问另一个 tomcat 节点
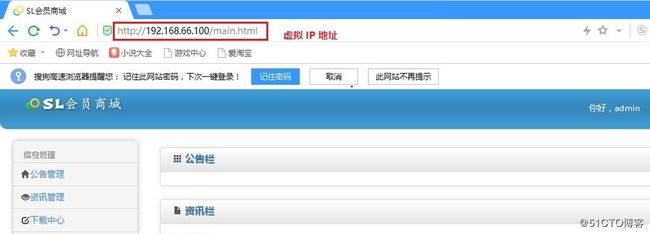
使用虚拟 IP 地址访问
5接下来我们开始安装并配置 redis 主从缓存服务器。
(1)Redis 简介
Redis 是一个高性能的 key-value 数据库,和 Memcached 类似,但它支持的 value 类型更多。与 Memcached 一样,为了保证效率,数据都是缓存再去爱内存中。区别是 redis 会周期性地把更新的数据写入磁盘或者把修改操作写入追加的记录文件中,并且在此基础上实现了 master-slave (主从)同步。
Redis 的出现,很大程度上补偿了 Memcached 这类 key-value 存储的不足,在部分场合可以对关系型数据库起到很好的补偿作用。
(2)安装并配置 redis
[root@master pv]# yum install -y epel-release
[root@master pv]# yum install redis –y
修改主缓存服务器的 redis 主配置文件 /etc/redis.conf 中的 redis 监听端口
[root@master pv]# vim /etc/redis.conf
61 bind 0.0.0.0 //默认所有网段都能访问(61行)
port 6379 //默认端口(不用更改)
主缓存服务器启动服务
[root@master pv]# systemctl start redis.service
[root@master pv]# netstat -ntap | grep 6379
tcp 0 0 0.0.0.0:6379 0.0.0.0:* LISTEN 99160/redis-server
客户端连接主缓存服务器
[root@master pv]# redis-cli -h 192.168.66.138 -p 6379
手动插入一条数据库并查询
192.168.66.138:6379> set name test
OK
192.168.66.138:6379> get name
"test"
修改从缓存服务器修改主配置文件 /etc/redis.conf 。需要在 265 # slaveof
[root@master pv]# vim /etc/redis.conf
61 bind 0.0.0.0 //默认所有网点都能访问
265 # slaveof
266 slaveof 192.168.66.138 6379 //添加主服务器地址
从缓存服务器启动服务
[root@backup pv]# systemctl start redis.service
[root@backup pv]# netstat -antp | grep 6379
tcp 0 0 0.0.0.0:6379 0.0.0.0:* LISTEN 44175/redis-server
tcp 0 0 192.168.66.139:45519 192.168.66.138:6379 ESTABLISHED 44175/redis-server
在从缓存服务器上,使用 redis 客户端连接连接从缓存 redis 服务,查询刚在朱缓存服务器上插入的 name 值。
[root@backup pv]# redis-cli -h 192.168.66.139 -p 6379
192.168.66.139:6379> get name
"test"结果说明主从缓存服务器同步正常。测试没问题后删除刚刚插入的值,使用命令 del name 即可。
(3)回到 tomxat 节点服务器上配置商城项目中连接redis的参数(两台tomcat 节点服务器都要做)
vim /usr/local/tomcat8/webapps/SLSaleSystem/WEB-INF/classes/applicationContext-mybatis.xml
47
//连接地址给为虚拟 IP
48//端口默认
(4)在 redis 缓存服务器的客户端使用虚拟 IP 测试缓存结果
[root@master pv]# redis-cli -h 192.168.66.100 -p 6379
192.168.66.100:6379> info........
keyspace_hits:1 //命中数
keyspace_misses:0 //未命中数
登录商城,然后反复点击需要数据库参与的操作页面,再回来检查keyspace_hits或者keyspace_misses: 值变化。
(5)配置 redis 群集主从切换(注意:只在 redis 主缓存服务器上做)
首先获取当前服务器的角色
[root@master pv]# redis-cli -h 192.168.66.138 info Replication
# Replication
role:master //当前服务器为主缓存服务器
connected_slaves:1
slave0:ip=192.168.66.139,port=6379,state=online,offset=1527,lag=0
master_repl_offset:1527
repl_backlog_active:1
repl_backlog_size:1048576
repl_backlog_first_byte_offset:2
repl_backlog_histlen:1526
配置redis集群主从切换---只在主服务器上操作
[root@master pv]# vim /etc/redis-sentinel.conf
17 protected-mode no //开启群集功能(第17行,去掉前面的 #)
69 sentinel monitor mymaster 192.168.66.138 6379 1 //设置主服务器,最后的 1 表示:有一台从服务器
98 sentinel down-after-milliseconds mymaster 3000 //故障切换时间单位是毫秒
启动 redis 群集功能(在主从服务器上都要开启)
[root@master pv]# service redis-sentinel start
Redirecting to /bin/systemctl start redis-sentinel.service
[root@master pv]# netstat -ntap | grep 26379
tcp 0 0 0.0.0.0:26379 0.0.0.0:* LISTEN 111984/redis-sentin
tcp6 0 0 :::26379 :::* LISTEN 111984/redis-sentin
查看群集信息
[root@master pv]# redis-cli -h 192.168.66.138 -p 26379 info Sentinel
# Sentinel
sentinel_masters:1
sentinel_tilt:0
sentinel_running_scripts:0
sentinel_scripts_queue_length:0
sentinel_simulate_failure_flags:0
master0:name=mymaster,status=ok,address=192.168.66.138:6379,slaves=1,sentinels=3 //此时主服务器还是138
验证主从切换,关闭主服务器的 redis
[root@master pv]# systemctl stop redis
[root@master pv]# redis-cli -h 192.168.66.138 -p 26379 info Sentinel //查看群集状态
# Sentinel
sentinel_masters:1
sentinel_tilt:0
sentinel_running_scripts:0
sentinel_scripts_queue_length:0
sentinel_simulate_failure_flags:0
master0:name=mymaster,status=ok,address=192.168.66.139:6379,slaves=1,sentinels=3 //此时主服务器以切换到139
再次启动主服务器的 redis ,看是否恢复为主
[root@master pv]# systemctl start redis
[root@master pv]# redis-cli -h 192.168.66.138 -p 26379 info Sentinel
# Sentinel
sentinel_masters:1
sentinel_tilt:0
sentinel_running_scripts:0
sentinel_scripts_queue_length:0
sentinel_simulate_failure_flags:0
master0:name=mymaster,status=odown,address=192.168.66.139:6379,slaves=1,sentinels=3结果显示当主服务器出现故障时,从服务器会自动切换为主服务器,当原来的主服务器重新上线启动,并不能抢占为 master,只有当现在的主服务器宕机,才能恢复为master,说明 redis 缓存服务器群集的主从切换配置成功。
验证主从同步
[root@master pv]# redis-cli -h 192.168.66.138 -p 6379
192.168.66.138:6379> set name2 test2
OK
192.168.66.138:6379> get name2
"test2"
在从服务器上查看
[root@backup pv]# redis-cli -h 192.168.66.139 -p 6379
192.168.66.139:6379> get name2
"test2"
6.配置mysql 主从(在主从服务器上都做)
[root@master pv]# vim /etc/my.cnf
[mysqld]
datadir=/var/lib/mysql
socket=/var/lib/mysql/mysql.sock
binlog-ignore-db=mysql,information_schema
character_set_server=utf8
log_bin=mysql_bin
server_id=1 //从服务器的 server_id=2 ,其他与主相同
log_slave_updates=true
sync_binlog=1
修改配置文具后,需要重启数据库
[root@master pv]# systemctl restart mariadb
[root@master pv]# netstat - ntap | grep 3306tcp 0 0 0.0.0.0:3306 0.0.0.0:* LISTEN 45543/mysqld
登录数据库
[root@master pv]# mysql -u root -p
Enter password:
Welcome to the MariaDB monitor. Commands end with ; or \g.
Your MariaDB connection id is 42
Server version: 5.5.60-MariaDB MariaDB ServerCopyright (c) 2000, 2018, Oracle, MariaDB Corporation Ab and others.
Type 'help;' or '\h' for help. Type '\c' to clear the current input statement.
MariaDB [(none)]> show master status; //查看 master 状态,记录日志文件名称和 位置值
+------------------+----------+--------------+--------------------------+
| File | Position | Binlog_Do_DB | Binlog_Ignore_DB |
+------------------+----------+--------------+--------------------------+
| mysql_bin.000002 | 245 | | mysql,information_schema |
+------------------+----------+--------------+--------------------------+
1 row in set (0.00 sec)MariaDB [(none)]> grant replication slave on *.* to 'rep'@'192.168.66.%' identified by '123456'; //给访问权限
Query OK, 0 rows affected (0.01 sec)MariaDB [(none)]> flush privileges; //刷新
Query OK, 0 rows affected (0.01 sec)
从数据库也要修改配置文件,并重启服务。在从服务器上指向主服务器
MariaDB [(none)]> change master to master_host='192.168.66.138',master_user='rep',master_password='123456',master_log_file='mysql_bin.000002',master_log_pos=245;
Query OK, 0 rows affected (0.06 sec)
MariaDB [(none)]> start slave; //开启 slave
Query OK, 0 rows affected (0.00 sec)MariaDB [(none)]> show slave status\G; //查看 slave状态
*************************** 1. row ***************************
Slave_IO_State: Waiting for master to send event
Master_Host: 192.168.66.138
Master_User: rep
Master_Port: 3306
Connect_Retry: 60
Master_Log_File: mysql_bin.000002
Read_Master_Log_Pos: 625
Relay_Log_File: mariadb-relay-bin.000002
Relay_Log_Pos: 909
Relay_Master_Log_File: mysql_bin.000002
Slave_IO_Running: Yes //这两项都为 Yes
Slave_SQL_Running: Yes
Replicate_Do_DB:
Replicate_Ignore_DB:
Replicate_Do_Table:mysql数据库主从配置完成,整个架构部署完成。
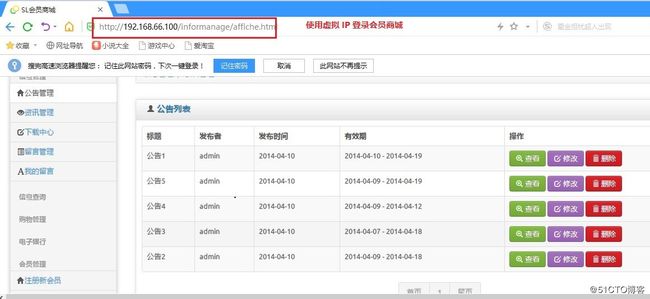
使用虚拟IP 登录会员商城
查看 redis 命中数
登录商城,然后反复点击需要数据库参与的操作页面,再回来检查keyspace_hits或者keyspace_misses: 值变化。说明redis 已经在运行。


