Android自动化测试之Monkey命令使用及monkey脚本编写
系列文章
Android自动化测试环境部署及adb sdkmanager avdmanager Monitor DDMS工具使用及命令详解
Android自动化测试之Monkey使用及monkey脚本编写
Android自动化测试之MonkeyRunner MonkeyDevice MonkeyImage API使用详解 脚本编写 脚本录制回放
背景
如果开发完app,开发人员没有充分的自测,然后等到测试人员反馈bug的时候已经晚了,所以作为一个合格的程序猿,很有必要掌握测试技术,也就是自动化测试了,将bug摁死在开发阶段;我们总不能花一天在那用手点点点吧,不现实,想想你晚上下班,把自动化测试一开,放在办公室跑一晚上,第二天过来直接看结果,这多嗨。
其实现在市面上有很多自动化测试平台,做的都很全面了,而且还提供了很多机型供你选择,比如:
- 腾讯优测云测试平台
- 华为开发者联盟
- Testin 云测
唯一一个缺点就是【收费】,本着为公司着想还是我们自己动手吧。
现在通用的一些测试工具如下:
- Monkey:Android SDK自带的一个黑盒测试命令行工具,使用adb来运行它,运行在设备端,向系统发送伪随机的用户事件流,如按键、触屏、输入等,来确定应用是否会发生异常,并伴随着日志输出。实际上该工具只能对程序做一些压力测试或者稳定性测试,由于测试事件和数据都是随机的,不能自定义,所以有很大的局限性。
- MonkeyRunner:Android SDK自带的一个黑盒测试工具,位于tools目录下,比Monkey强大,可以编写脚本来自定义数据,事件;但是脚本是采用python语言编写的,其实就是对python进行了封装,对测试人员要求较高。
- Instrumentation:这个是Google早期提供的测试自动化测试工具类,可以看成是Android的一个组件,可以模拟用户众多事件,通常用来单元测试,对测试人员要求较高,需要了解Android的api。
- UiAutomator:Android提供的自动化测试框架,也是前两年最佳的UI测试框架,基本上支持所有的用户事件,可以抓取APP页面控件属性,测试代码结构简单,编写容易,能跨APP测试,但是要求设备在Android4.1以上,不支持Hybird APP,WebApp。
- Appium:这应该是最近很火的一个测试框架,支持Native APP,Hybird APP,Web APP;可以跨平台在Windows,Mac,Linux使用,支持Android,ios;支持java,js,php,Python等语言编写测试脚本。
本篇文章从Monkey开始介绍自动化测试,内容如下:
- monkey命令和参数详细介绍
- monkey命令的使用
- monkey脚本方法介绍和编写
- monkey server命令介绍和使用
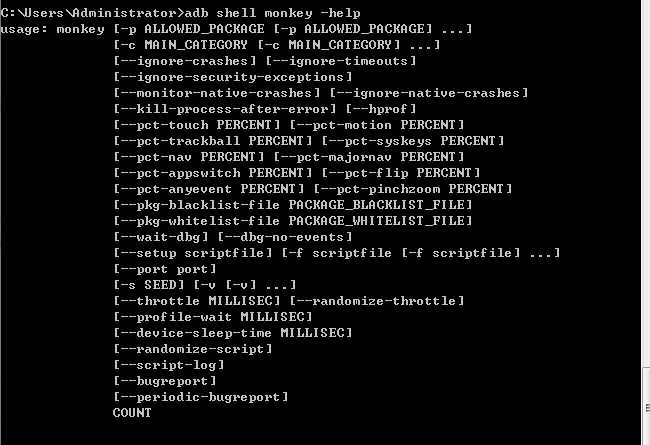
Monkey命令介绍
monkey命令格式:adb shell monkey [options]
- -p 用于约束限制,用此参数指定一个包,指定包后Monkey将被允许启动指定应用;如果不指定包, Monkey将被允许随机启动设备中的应用(主Activity有android.intent.category.LAUNCHER 或android.intent.category.MONKEY类别 )。比如 adb shell monkey -p xxx.xxx.xxx 1 ; xxx.xxx.xxx 表示应用包名,1 表示monkey模拟用户随机事件参数,最低1,这样就能把应用启动起来
- -c 指定Activity的category类别,如果不指定,默认是CATEGORY_LAUNCHER 或者 Intent.CATEGORY_MONKEY;不太常用的一个参数
- -v 用于指定反馈信息级别,也就是日志的详细程度,分Level1、Level2、Level3;-v 默认值,仅提供启动提示,操作结果等少量信息 ,也就是Level1,比如adb shell monkey -p xxx.xxx.xxx -v 1 ;-v -v 提供比较详细信息,比如启动的每个activity信息 ,也就是Level2,比如adb shell monkey -p xxx.xxx.xxx -v -v 1 ;-v -v -v 提供最详细的信息 ,比如adb shell monkey -p xxx.xxx.xxx -v -v -v 1
- -s 伪随机数生成器的种子值,如果我们两次monkey测试事件使用相同的种子值,会产生相同的事件序列;如果不指定种子值,系统会产生一个随机值。种子值对我们复现bug很重要。使用如下adb shell monkey -p xxx.xxx.xxx -s 11111 10;这也是伪随机事件的原因,因为这些事件可以通过种子值进行复现
- --ignore-crashes 忽略异常崩溃,如果不指定,那么在monkey测试的时候,应用发生崩溃时就会停止运行;如果加上了这个参数,monkey就会运行到指定事件数才停止。比如adb shell monkey -p xxx.xxx.xxx -v -v -v --ignore-crashes 10
- --ignore-timeouts 忽略ANR,情况与4类似,当发送ANR时候,让monkey继续运行。比如adb shell monkey -p xxx.xxx.xxx -v -v -v --ignore-timeouts 10
- --ignore-native-crashes 忽略native层代码的崩溃,情况与4类似,比如adb shell monkey -p xxx.xxx.xxx -v -v -v --ignore-native-crashes 10
- --ignore-security-exceptions 忽略一些许可错误,比如证书许可,网络许可,adb shell monkey -p xxx.xxx.xxx -v -v -v --ignore-security-exceptions 10
- --monitor-native-crashes 是否监视并报告native层发送的崩溃代码,adb shell monkey -p xxx.xxx.xxx -v -v -v --monitor-native-crashes 10
- --kill-procress-after-error 用于在发送错误后杀死进程
- --hprof 设置后,在Monkey事件序列之前和之后立即生产分析报告,保存于data/mic目录,不过将会生成大量几兆文件,谨慎使用
- --throttle 设置每个事件结束后延迟多少时间再继续下一个事件,降低cpu压力;如果不设置,事件与事件之间将不会延迟,事件将会尽快生成;一般设置300ms,因为人最快300ms左右一个动作,比如 adb shell monkey -p xxx.xxx.xxx -v -v -v --throttle 300 10
- --pct-touch 设置触摸事件的百分比,即手指对屏幕进行点击抬起(down-up)的动作;不做设置情况下系统将随机分配各种事件的百分比。比如adb shell monkey -p xxx.xxxx.xxx --pct-touch 50 -v -v 100 ,这就表示100次事件里有50%事件是触摸事件
- --pct-motion 设置移动事件百分比,这种事件类型是由屏幕上某处的一个down事件-一系列伪随机的移动事件-一个up事件,即点击屏幕,然后直线运动,最后抬起这种运动。
- --pct-trackball 设置轨迹球事件百分比,这种事件类型是一个或者多个随机移动,包含点击事件,这里可以是曲线运动,不过现在手机很多不支持,这个参数不常用
- --pct-syskeys 设置系统物理按键事件百分比,比如home键,音量键,返回键,拨打电话键,挂电话键等
- --pct-nav 设置基本的导航按键事件百分比,比如输入设备上的上下左右四个方向键
- --pct-appswitch 设置monkey使用startActivity进行activity跳转事件的百分比,保证界面的覆盖情况
- --ptc-anyevent 设置其它事件百分比
- --ptc-majornav 设置主导航事件的百分比
- 保存dos窗口打印的monkey信息,在monkey命令后面补上输出地址,如adb shell monkey -p xxx.xxxx.xxx -v -v 100 > D:\monkey.txt;这样monkey测试结束后,所有打印的信息都会输出到这个文件里
- 通过adb bugreport 命令可以获取整个android系统在运行过程中所有app的内存使用情况,cpu使用情况,activity运行信息等,包括出现异常等信息。使用方法 adb bugreport > bugreport.txt ;这样在当前目录就会产生一个txt文件和一个压缩包,具体信息可在压缩包查看,txt文件只会记录压缩包的生成过程信息
- -f 加载monkey脚本文件进行测试,比如 adb shell monkey -f sdcard/monkey.txt -v -v 500
Monkey使用
1.进入adb目录
2.通过adb install apk名字
3.输入adb shell monkey -p xxx.xxxx.xxx -s 123123 --throttle 300 -v -v 20 > d:\monkey.txt,这里指定了seed值,每个事件之间休息300ms,执行了20个事件,然后将日志信息保存在了monkey.txt文件中
4.打开文件,查看信息如下:
Monkey: seed=123123 count=20 //本次事件序列seed值是指定的123123,方便出现bug后再复现 执行事件次数是20
:AllowPackage: com.android.mangodialog // 被测试的应用包名
:IncludeCategory: android.intent.category.LAUNCHER //启动的主activity的两种类别
:IncludeCategory: android.intent.category.MONKEY
// Selecting main activities from category android.intent.category.LAUNCHER
//   + Using main activity com.android.mangodialog.MainActivity (from package com.android.mangodialog) //该应用符合这种类别的activity
// Selecting main activities from category android.intent.category.MONKEY
// Seeded: 123123
// Event percentages://各种事件的百分比,不同厂家设备可能有所不同
//   0: 15.0%  //可通过--pct-touch 参数设置的事件的百分比 常用
//   1: 10.0%  //可通过--pct-motion 参数设置的事件的百分比 常用
//   2: 2.0%   //可通过--pct-pinchzoom 参数设置的事件的百分比
//   3: 15.0%  //可通过--pct-trackball 参数设置的事件的百分比
//   4: -0.0%
//   5: -0.0%
//   6: 25.0%  //可通过--pct-nav 参数设置的事件的百分比
//   7: 15.0%  //可通过--pct-majornav 参数设置的事件的百分比
//   8: 2.0%   //可通过--pct-syskeys 参数设置的事件的百分比 常用
//   9: 2.0%   //可通过--pct-appswitch 参数设置的事件的百分比 常用
//   10: 1.0%  //可通过--pct-flip 参数设置的事件的百分比
//   11: 13.0% //可通过--pct-anyevent 参数设置的事件的百分比
//启动应用的activity
:Switch: #Intent;action=android.intent.action.MAIN;category=android.intent.category.LAUNCHER;launchFlags=0x10200000;component=com.android.mangodialog/.MainActivity;end
    // Allowing start of Intent { act=android.intent.action.MAIN cat=[android.intent.category.LAUNCHER] cmp=com.android.mangodialog/.MainActivity } in package com.android.mangodialog
Sleeping for 300 milliseconds //设置的事件之间间隔300ms 下面就是执行点击事件
:Sending Key (ACTION_DOWN): 82    // KEYCODE_MENU
:Sending Key (ACTION_UP): 82    // KEYCODE_MENU
Sleeping for 300 milliseconds
:Sending Key (ACTION_DOWN): 23    // KEYCODE_DPAD_CENTER
:Sending Key (ACTION_UP): 23    // KEYCODE_DPAD_CENTER
Sleeping for 300 milliseconds
    // Allowing start of Intent { cmp=com.android.mangodialog/.MainActivity2 } in package com.android.mangodialog
:Sending Key (ACTION_DOWN): 22    // KEYCODE_DPAD_RIGHT
:Sending Key (ACTION_UP): 22    // KEYCODE_DPAD_RIGHT
Sleeping for 300 milliseconds
:Sending Key (ACTION_DOWN): 21    // KEYCODE_DPAD_LEFT
:Sending Key (ACTION_UP): 21    // KEYCODE_DPAD_LEFT
Sleeping for 300 milliseconds
:Sending Touch (ACTION_DOWN): 0:(1017.0,280.0)
:Sending Touch (ACTION_UP): 0:(1021.8751,281.12732)
Sleeping for 300 milliseconds
:Sending Touch (ACTION_DOWN): 0:(1005.0,1599.0)
:Sending Touch (ACTION_UP): 0:(994.4962,1589.7715)
Sleeping for 300 milliseconds
:Sending Key (ACTION_DOWN): 2    // KEYCODE_SOFT_RIGHT
:Sending Key (ACTION_UP): 2    // KEYCODE_SOFT_RIGHT
Sleeping for 300 milliseconds
:Sending Key (ACTION_DOWN): 20    // KEYCODE_DPAD_DOWN
:Sending Key (ACTION_UP): 20    // KEYCODE_DPAD_DOWN
Sleeping for 300 milliseconds
:Sending Key (ACTION_DOWN): 22    // KEYCODE_DPAD_RIGHT
:Sending Key (ACTION_UP): 22    // KEYCODE_DPAD_RIGHT
Sleeping for 300 milliseconds //轨迹球运动
:Sending Trackball (ACTION_MOVE): 0:(4.0,-5.0)//手机屏幕上的坐标
Events injected: 20 //monkey共执行了20次事件
:Sending rotation degree=0, persist=false
:Dropped: keys=0 pointers=0 trackballs=0 flips=0 rotations=0
//测试过程中的网络状态,花费了3064ms连接,既没有连接上手机网络,也没有连接上wifi
## Network stats: elapsed time=3064ms (0ms mobile, 0ms wifi, 3064ms not connected)

// Monkey finished //monkey测试结束
5.平时会使用比较复杂的参数去测试,如下
adb shell monkey -v -v -v -s 123123 --throttle 300 --pct-touch 40 --pct-motion 25 --pct-appswitch 25 --pct-syskeys 10 --pct-majornav 0 --pct-nav 0 --pct-trackball 0 --ignore-crashes --ignore-timeouts --ignore-native-crashes -p xxx.xxx.xxx 100000 > d:\monkey.txt
具体什么意思就不再一一解释了。
6.其实我们比较关注的是app在使用过程中出现的错误信息,像上面我们选择忽略掉错误情况,这样当monkey执行结束后,相关的信息会被写入到monkey文件中,但是错误信息比如crash,anr等信息会打印在dos窗口,这些错误信息会明确的指出哪里发生的错误;如果需要复现,我们可以把忽略参数去掉,然后通过相同的seed值再次进行monkey测试,直到发生错误跳出monkey测试,我们再查看,如下
public class MainActivity2 extends AppCompatActivity {

    @Override
    protected void onCreate(@Nullable Bundle savedInstanceState) {
        super.onCreate(savedInstanceState);
        setContentView(R.layout.act_main2);
        float s = 1/0;
    }
}
我这第二个activity的oncreate方法中写这个会报错的代码,然后在第一个activity的一个按钮中进行跳转进入这个activity,接下来进行monkey测试来复现这个bug
adb shell monkey -p xxx.xxx.xxx -s 123456 -v -v 2000 > d:\monkey.txt
我们看这个文件
:Sending Trackball (ACTION_MOVE): 0:(4.0,-3.0)
:Sending Trackball (ACTION_MOVE): 0:(-2.0,1.0)
:Sending Trackball (ACTION_DOWN): 0:(0.0,0.0)
:Sending Trackball (ACTION_UP): 0:(0.0,0.0)
Sleeping for 300 milliseconds
    // Allowing start of Intent { cmp=com.android.mangodialog/.MainActivity2 } in package com.android.mangodialog
** Monkey aborted due to error.

Events injected: 190
这里可以看到是当打开MainActivity2的时候monkey发生错误退出,只执行了190个事件。至于错误信息打印在了dos窗口。
这里我们也可以通过adb bugreport命令将手机运行日志导出来查看,这里面的信息更详细,包括出错信息。
//6.0及以下设备
adb bugreport > bugreport.txt
//7.0及以上设备
adb bugreport bugreport.zip
Monkey脚本
monkeyscript是monkey的脚本语言,能够被monkey识别的命令集合,可以实现一些固定的重复性动作。Monkey可以通过命令加载脚本来进行测试,简单方便。Monkey脚本如何编写,官网并没有介绍,我们只能通过Moneky源码去学习如何编写脚本,可参考Monkey-Github的MonkeySourceScript.java类
脚本格式如下:
type= raw events
count= 1
speed= 1.0
start data >>

LaunchActivity(pkg_name, cl_name) - 第一句到第三局就使用默认值,不需要改,其实这里设置是无效的,最终会采用命令行里的值;
- start data >> 表示开始执行下面所有的命令行
- LaunchActivity就是一个启动应用的命令
脚本命令
- LaunchActivity(pkg_name, cl_name): 启动应用,第一个参数是包名,第二个是启动的activity名
- DispatchPointer(downtime,eventTime,action,x,y,xpressure,size,metastate,xPrecision,yPrecision,device,edgeFlags) :向指定位置发送单个手势,相当于我们把手指按在某个点上;这个方法参数有12个,但是我们主要关注owntime,eventTime,action,x,y这么几个参数,x,y表示按下的坐标,可以通过上一篇文章UI Automator获取,这在你想测试点击某个具体view是很有用的
- DispatchPress(keycode): 向系统发送一个固定的按键事件;例如home键,back键;参数是按键值 ,按键值可查看keycode
- UserWait:让脚本的执行暂停一段时间,做一个等待操作
- RotateScreen(rotationDegree, persist): 翻转屏幕,第一个参数是旋转角度,第二个是旋转后是否停在当前位置
- Tap(x, y) :单击事件,点击屏幕,参数是点击坐标
- Drag(xStart, yStart, xEnd, yEnd) :在屏幕上滑动,坐标是从哪一点滑到哪一点
- LongPress(): 长按2s
- ProfileWait(): 等待5s
- PressAndHold(x, y, pressDuration) :模拟长按
- PinchZoom(x1Start, y1Start, x1End, y1End, x2Start, y2Start, x2End, y2End, stepCount): 模拟缩放
- DispatchString(input): 输入字符串
- RunCmd(cmd) :执行shell命令,比如截图 screencap -p /data/local/tmp/tmp.png
- DispatchFlip(true/false) :打开或者关闭软键盘
- UserWait(sleepTime) :睡眠指定时间
- DeviceWakeUp() :唤醒屏幕
编写脚本
type= raw events
count= 1
speed= 1.0
start data >>

LaunchActivity(com.android.mangodialog,com.android.mangodialog.MainActivity);
UserWait(1000);
# 按下
DispatchPointer(0,0,0,400,500,0,0,0,0,0,0,0)
# 抬起
DispatchPointer(0,0,1,400,500,0,0,0,0,0,0,0)
UserWait(1000);

Tab(500,300);
UserWait(1000);

DispatchPress(KEYCODE_ENTER)
UserWait(1000);

DispatchPress(KEYCODE_BACK);
UserWait(1000);

RunCmd(screencap -p /sdcard/tmp.png);
UserWait(1000);

Drag(0, 0, 500, 500);
UserWait(1000);

RotateScreen(90,1)
UserWait(1000);

DispatchString(www.baidu.com);
UserWait(1000);

DispatchPress(KEYCODE_BACK);
UserWait(1000);- 脚本需要对照着MonkeySourceScript.java文件编写,这样才能知道方法需要多少个参数,参数有什么含义;同时要注意方法名是区分大小写的,其实最重要的是脚本的编写需要根据你的测试用例来写,一步步怎么操作就写上对应的方法
- 因为Monkey是运行在设备上的,所以需要将脚本先传到设备上,通过adb push d:\monkey.txt sdcard/monkey.txt 将文件推送到手机sd卡上
- 最后通过adb shell monkey -f sdcard/monkey.txt -v -v 1 执行脚本文件
Monkey Server
monkey server是官方文档中没有提到的一个隐藏功能,monkey其实是可以在设备上启动一个服务端,提供了远程访问设备并控制设备执行的能力。在monkey上面列出的参数中,我们可以看到有一个--port的参数,它提供的就是Monkey启动server,并控制设备执行的功能
- 启动Monkey Server:adb shell monkey --port 1080,开放设备的1080端口
- 连接Monkey Server:先输入 adb forward tcp:1080 tcp:1080,将本机端口(前)和设备端口(后)进行映射,再输入telnet 127.0.0.1 1080,这里是通过telnet连接本机的1080端口,就可连接到设备上的Monkey server,并且执行Server中的相关指令
Monkey Server命令
- key [down|up] keycode -- 指定Keycode的按键事件(分按下、弹起)
- touch [down|up|move] x y -- 指定坐标的触屏操作(分按下、弹起、移动)
- trackball dx dy -- 轨迹球操作
- tap x y -- 指定坐标的触屏操作
- flip [open|close] -- 调用软键盘
- wake -- 唤醒设备
- press keycode -- 指定Keycode的按键事件
- listvar -- 列出所有的系统变量
- getvar varname -- 获取给定系统变量值
- quit -- 退出当前连接,且不接受新的连接
- done -- 退出当前连接,但可以接受新的连接
- type -- 输入字符
命令执行成功会返回OK的响应,如果执行错误则返回error command;注意操作退出telnet前,需要执行done指令,否则再次连接,会报端口已占用的错误。只能重启设备以释放端口
server的相关命令在官网也没有介绍,也只能通过源码来分析,有一个文件README.NETWORK.txt进行了一些命令使用的介绍
SIMPLE PROTOCOL FOR AUTOMATED NETWORK CONTROL

The Simple Protocol for Automated Network Control was designed to be a
low-level way to programmability inject KeyEvents and MotionEvents
into the input system.  The idea is that a process will run on a host
computer that will support higher-level operations (like conditionals,
etc.) and will talk (via TCP over ADB) to the device in Simple
Protocol for Automated Network Control.  For security reasons, the
Monkey only binds to localhost, so you will need to use adb to setup
port forwarding to actually talk to the device.

INITIAL SETUP

Setup port forwarding from a local port on your machine to a port on
the device:

$ adb forward tcp:1080 tcp:1080

Start the monkey server

$ adb shell monkey --port 1080

Now you're ready to run commands

COMMAND LIST

Individual commands are separated by newlines.  The Monkey will
respond to every command with a line starting with OK for commands
that executed without a problem, or a line starting with ERROR for
commands that had problems being run.  For commands that return a
value, that value is returned on the same line as the OK or ERROR
response.  The value is everything after (but not include) the colon
on that line.  For ERROR values, this could be a message indicating
what happened.  A possible example:

key down menu
OK
touch monkey
ERROR: monkey not a number
getvar sdk
OK: donut
getvar foo
ERROR: no such var

The complete list of commands follows:

key [down|up] keycode

This command injects KeyEvent's into the input system.  The keycode
parameter refers to the KEYCODE list in the KeyEvent class
(http://developer.android.com/reference/android/view/KeyEvent.html).
The format of that parameter is quite flexible.  Using the menu key as
an example, it can be 82 (the integer value of the keycode),
KEYCODE_MENU (the name of the keycode), or just menu (and the Monkey
will add the KEYCODE part).  Do note that this last part doesn't work
for things like KEYCODE_1 for obvious reasons.

Note that sending a full button press requires sending both the down
and the up event for that key

touch [down|up|move] x y

This command injects a MotionEvent into the input system that
simulates a user touching the touchscreen (or a pointer event).  x and
y specify coordinates on the display (0 0 being the upper left) for
the touch event to happen.  Just like key events, touch events at a
single location require both a down and an up.  To simulate dragging,
send a "touch down", then a series of "touch move" events (to simulate
the drag), followed by a "touch up" at the final location.

trackball dx dy

This command injects a MotionEvent into the input system that
simulates a user using the trackball. dx and dy indicates the amount
of change in the trackball location (as opposed to exact coordinates
that the touch events use)

flip [open|close]

This simulates the opening or closing the keyboard (like on dream).

wake

This command will wake the device up from sleep and allow user input.

tap x y
The tap command is a shortcut for the touch command.  It will
automatically send both the up and the down event.

press keycode

The press command is a shortcut for the key command.  The keycode
paramter works just like the key command and will automatically send
both the up and the down event.

type string

This command will simulate a user typing the given string on the
keyboard by generating the proper KeyEvents.

listvar

This command lists all the vars that the monkey knows about.  They are
returned as a whitespace separated list.

getvar varname

This command returns the value of the given var.  listvar can be used
to find out what vars are supported.

quit

Fully quit the monkey and accept no new sessions.

done

Close the current session and allow a new session to connect

OTHER NOTES

There are some convenience features added to allow running without
needing a host process.

Lines starting with a # character are considered comments.  The Monkey
eats them and returns no indication that it did anything (no ERROR and
no OK).

You can put the Monkey to sleep by using the "sleep" command with a
single argument, how many ms to sleep.
Server命令使用
使用adb shell monkey --port 1080命令在设备端启动monkey server

这时候打开另一个dos窗口,输入adb forward tcp:1080 tcp:1080进行端口映射

在这个窗口继续输入telnet 127.0.0.1 1080连接到本机的这个端口,会进到如下窗口

然后输入上面提到的Server命令就可以了
其实monkey server也可以执行脚本,不过是.vbs格式的,感觉没有太大的优势,这里就不做过多叙述