从OC到swift的一些总结
最近工作不是很忙,我花了两个星期的时间学习了一些swift。虽然swift出来快两年了,但是我一直没有去学习。近来听好多朋友说,他们已经开始用swift开发了,我决定学习一下swift基础的东西,在这里列出我一些学习总结。我不善于写文章,我就大片的粘上代码好了,有OC基础的人,基本上一看就懂了。
swift几个诡异符号的意义
苹果总是能弄出一些与众不同的代码书写方式,比如oc中的字符串写法。果然swift也一样,我在写一些代码的时候总是弹出警告,点击修复,系统会帮我加上一个问好(?)或者叹号(!),我但是就有点蒙了,这是什么意思呢?我没有系统看过swift的东西,直接按照oc的基础自己琢磨着写,导致好多的坑。那么这两个符号到底什么意思呢?我开始在找资料,原来这里有大学问啊!我先告诉说答案吧,问号(?)表示可选值或显示拆包,叹号(!)表示隐式拆包。
一切的原因在于一个swift的一个新的类型:optional类型(可选值,可以有值,也可以没有值),这是oc没有的类型。在oc中声明一个变量,可以不用赋初始值,因为系统会给变量初值。在swift中,变量是没有默认值的,所以使用变量之前必须赋初始值。当在声明一个变量不想给初始值的时候,就可以声明一个optional类型,例如:
var delegate : XXXDelegate?在调用这个变量的时候,在后面也要加上“?”,如
self.delegate?.btnsAction(btn)这样的实质就是:当Optional没有值时,返回的nil其实就是Optional.None,即没有值。除了None以外,还有一个Some,当有值时就是被Some包装的真正的值,所以我们拆包的动作其实就是将Some里面的值取出来。当变量不可能为空的时候,就可以用隐式拆包,就是在变量后面跟”!“。比如声明的时候:
var delegate : XXXDelegate! 这样在调用的时候变量后面就什么都不用加了。声明的显示可选值,也可以用!的方式调用。补充一点,在oc中,nill表示的是指针,只有对象才可以用nill,而在swift中,nill表示没有值,Int,Bool等在没有值得时候也是nill。
相关链接:
http://blog.csdn.net/woaifen3344/article/details/30244201/
http://blog.csdn.net/zhangao0086/article/details/38640209
懒加载的写法
在oc中可以,可以重写get方法来实现懒加载。在swift中用关键字layz来实现懒加载。示例代码:
// 懒加载
       lazy var myTableView : UITableView = {

        var myTableView = UITableView.init(frame:CGRectMake(0, 64, self.view.bounds.width, self.view.bounds.height - 64 - 49), style: UITableViewStyle.Plain)
        myTableView.backgroundColor = kBorderLineColor();
        myTableView.tableFooterView = UIView.init()
        myTableView.delegate = self
        myTableView.dataSource = self

        //2.注册Cell
        myTableView.registerClass(UITableViewCell.self, forCellReuseIdentifier: ID)

        return myTableView

    }()//使用一个闭包来实例化该属性
属性的观察者(willSet/didSet)
willSet在新的值被设置之前调用
willSet观察器会将新的属性值作为常量参数传入,在willSet的实现代码中可以为这个参数指定一个名称,如果不指定则参数仍然可用,这时使用默认名称newValue表示。
didSet在新的值被设置之后立即调用
didSet观察器会将旧的属性值作为参数传入,可以为该参数命名或者使用默认参数名oldValue。
我们可以didSet方法里进行一些赋值后的操作,相当于oc中的重写set方法
var model : UserProfile = UserProfile(){
        didSet{
        nameL.text = model.name
            headerImageV.sd_setImageWithURL(NSURL.init(string: model.avatar_hd), placeholderImage: UIImage.init(named: "timeline_image_placeholder"))
        subL.text = model.userDescription
        }
    }
单例的写法
网上的swift单例有很多种写法,我还是在套用oc中的写法,换汤不换药
//单例
    class var sharedInstance: LCInterfaceManager {
        struct Static {
            static var onceToken: dispatch_once_t = 0
            static var instance: LCInterfaceManager? = nil
        }
        dispatch_once(&Static.onceToken) {
            Static.instance = LCInterfaceManager()
        }
        return Static.instance!
    }
相关链接:
http://www.cocoachina.com/swift/20151207/14584.html
协议的写法
这部分直接上代码了
//协议代理
protocol xxxViewDelegate{
    func btnsAction(btn:UIButton) -> Void
}
//声明代理
var delegate : LCProfileHeaderViewDelegate?
//调用
@objc private  func buttonAction(btn:UIButton) -> Void {
        self.delegate?.btnsAction(btn)
    }
//遵守协议,实现代理方法
// MARK: - xxxViewDelegate
extension xxxViewController:xxxDelegate{
    func btnsAction(btn: UIButton) {
        if btn.tag == 101 {
            let VC = LCFridensListVC.init()
            self.navigationController!.pushViewController(VC, animated: true)
        }
    }
}
闭包反向传值
子这里我不去讲解swift闭包写法的原理,大家可以去网上学习,教程很多。我要举一个运用闭包实现方向传值的例子,相当于oc之中的block用法。
需求:AVc跳转到BVc中,在BVc中设置AVc的背景色为随机色。
AVc中的代码
import UIKit

let ID = "Cell"
class  ViewController: UIViewController{

    override func viewWillAppear(animated: Bool) {
        super.viewWillAppear(true)

    }
    override func touchesBegan(touches: Set<UITouch>, withEvent event: UIEvent?) {
         weak var weakSelf = self
        let VC = LCSTestVC.init()
        VC.initBack { (changeToColor) in
            weakSelf?.view.backgroundColor = changeToColor
        }
      self.presentViewController(VC, animated: true) {}

    }
    override func viewDidLoad(){
        super.viewDidLoad()

}
    override func didReceiveMemoryWarning() {
        super.didReceiveMemoryWarning()
        // Dispose of any resources that can be recreated.
    }
}
BBC中的代码
import UIKit

class LCSTestVC: UIViewController {
    typealias changeLastVcBacgroundColor = (color:UIColor)->()
    var myFunc = changeLastVcBacgroundColor?()
    func initBack( mathFunction:(changeToColor:UIColor)->() ){
        myFunc = mathFunction
    }
    override func viewDidLoad() {
        super.viewDidLoad()
        self.view.backgroundColor = UIColor.blueColor()
    }
    override func touchesBegan(touches: Set<UITouch>, withEvent event: UIEvent?) {
        let r:CGFloat = CGFloat(CGFloat(random())/CGFloat(RAND_MAX))
        let g:CGFloat = CGFloat(CGFloat(random())/CGFloat(RAND_MAX))
        let b:CGFloat = CGFloat(CGFloat(random())/CGFloat(RAND_MAX))
        myFunc!(color: UIColor.init(red: r , green: g, blue: b, alpha: 1.0))
        self.dismissViewControllerAnimated(true) {
        }
    }
}
枚举的写法
enum buttonType : Int{
        case back = 1
        case search = 2
        case more = 3
    }
选择多个可选值的写法
let calendarUnit : NSCalendarUnit = [.Year , .Month , .Day ,.Hour, .Minute , .Second]swift工具类的写法
swift中没有宏的概念,那么怎么实现类似于oc中pch文件中的定义全局宏的方法呢?答案是可以利用全局函数。
import Foundation
import UIKit
let kScreenWidth = UIScreen.mainScreen().bounds.size.width
let kScreenHeight = UIScreen.mainScreen().bounds.size.height
func DLog(input:AnyObject, function:String = #function, line:Int = #line){
#if DEBUG
print("- : \(input)" )
#else
#endif
}
//大字
let kBigTextFont = UIFont.systemFontOfSize(16)
//常规
let kMidTextFont = UIFont.systemFontOfSize(14)
//小字
let kSmallTextFont = UIFont.systemFontOfSize(12)
//边框粗细
let kBorderLineThickness : CGFloat = 0.8
//cell边线粗细
let kBorderCellLineThickness : CGFloat = 8
//RGB
func RGBA (r:CGFloat, g:CGFloat, b:CGFloat, a:CGFloat) -> UIColor {
return UIColor (red: r/255.0, green: g/255.0, blue: b/255.0, alpha: a)
}重写系统答应print的内容
class AAA: NSObject {
    override var description: String{
        return "12345"
    }
}
swift与OC混编的总结
现在的swift开发多数会用到混编。swift和oc是通过桥接文件来实现的。无论是在oc创建的项目中还中创建swift文件,还是在swift文件中创建oc文件,第一次都会自动提示建立桥接文件。名字为:xxx-Bridging-Header.h,并且自动添加文件路径。如果是导入另一只中语言的第三方库,就不会自动生成桥接文件,这时候就需要自己建立一个桥接文件。第一步:新建一个”.h”文件,也就是新建中的”Header.h“文件,名字可以模仿系统的写法”xxx(demo名字)-Bridging-Header.h“;第二步,桥接文件路径,在设置Build Settings 中搜索Bridging,结果中Objective-C Brindging Header 中拖入文件路径(前面的可以写成$(SRCROOT)/,这样就会自动生成项目文件路径,不会因为换了电脑就找不到文件路径),编译一下,就可以了。
在oc项目中引用swift文件,只需导入头文件
#import "项目名字-Swift.h"这个文件是隐藏的,在工程中看不见。导入这个文件后就可以在oc使用swift写的类了。
在swift文件中引用oc的类,在桥接文件中引入需要引用oc的类的头文件,编译一下,就可以使用oc的类了。
多返回值函数的运用
swift的中的函数可以有多个返回值,具体的运用还没有比较好的列子。这里只是据下一多返回值函数的写法:
“`
private func createItem(frame:CGRect , topText:String , bottomText:String) ->(button:UIButton ,topLabel: UILabel , bottomLabel:UILabel){
let btn = UIButton.init(frame: frame)
let topL = UILabel.init()
topL.font = UIFont.boldSystemFontOfSize(16)
let bottomL = UILabel.init()
bottomL.font = kMidTextFont
bottomL.textColor = kMinBlackColor()
    topL.text = topText
    topL.sizeToFit()
    topL.frame.size.width = frame.size.width
    topL.textAlignment = NSTextAlignment.Center
    bottomL.text = bottomText
    bottomL.sizeToFit()

    topL.frame.origin.x = btn.frame.size.width/2 - topL.frame.size.width/2
    bottomL.frame.origin.x = btn.frame.size.width/2 - bottomL.frame.size.width/2

    topL.frame.origin.y = btn.frame.size.height/2 - topL.frame.size.height/2 - 4
    bottomL.frame.origin.y = btn.frame.size.height/2 + 4

    btn.addSubview(topL)
    btn.addSubview(bottomL)
    return (btn , topL , bottomL)
}
//调用
let itemsLeft = self.createItem(CGRectMake(0, 0,frame.size.width/3, frame.size.height), topText: “0”, bottomText: “微博”)
itemsLeft.button.tag = 100
itemsLeft.button.addTarget(self, action: #selector(LCProfileHeaderView.buttonAction(_:)), forControlEvents: UIControlEvents.TouchUpInside)
self.statusCountLabel = itemsLeft.topLabel
self.addSubview(itemsLeft.button)
“`
关于xib中自适应的总结
这部分跟swift没有什么关系,只是我以前一直在用代码的方式实现比如lable的大小的自适应。最近发现,其实xib中也可以做这些的。
需求:比如一个label后面跟着一个UIView,label的宽度随着字数的大小变换,这个功能是可以用xib实现的。
第一步,拖入控件,利用xib来控制好约束,这部分和平常xib的使用没有区别,不在讲述。
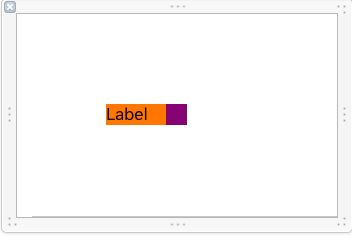
第二步,选中图中的label,操作如图:

第三步,保持选中label,操作

做完这些操作后,label的横向约束会变成虚线,大功告成。如果你的功能里有对最大宽度的控制,可以在layoutSubviews这个方法里用代码来控制。
目前我学习到的只有这些,以后有什么爬出的坑,再跟大家来分享吧。