SpringBoot图片上传与显示
文章目录
- 一. 前端发送文件上传的请求
- 二. 后台接收图片上传的请求
- 三. 对上传的图片进行前台显示
开发环境
Springboot版本, 2.0.1
jdk 1.8
文件上传的前端组件: WebUploader
一. 前端发送文件上传的请求
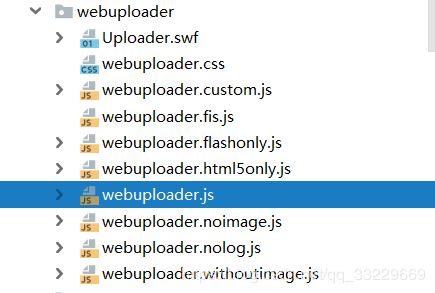
引入webuploader的资源到项目中, 资源的下载官方地址
http://fex.baidu.com/webuploader/download.html
 在页面中引入css和js的资源.
<link rel="stylesheet" type="text/css" href="webuploader文件夹/webuploader.css">


<script type="text/javascript" src="webuploader文件夹/webuploader.js">script>
在具体业务中的使用,js代码如下. 其中有auto属性,设置是否选择图片后, 自动提交, 这里选择的是true,代表选择图片后, 自动提交上传.
// 上传头像
var commonUploader = new $CommonUploader({      // 自己封装的uploader对象
    uploadBtnId: 'file',
    uploadBtnName: '浏览...',
    fileLimit: true,
    formData: {},
    extensions: 'gif,jpg,jpeg,bmp,png',
    mimeTypes: 'image/gif,image/jpg,image/jpeg,image/bmp,image/png',
    auto: true,                        // 是否添加后自动提交,默认是true
    uploadUrl: Feng.ctxPath+'/staffMember/filesUpload',   // 上传接口路径
    fileQueuedFn: function(file) {
        $('#fileName').text(file.name);
        $('#fileName').attr('title', file.name);
    },
    uploadBeforeSend: function(object, data) {  // 当某个文件的分块在发送前触发,主要用来询问是否要添加附带参数,大文件在开起分片上传的前提下此事件可能会触发多次。

    },
    //上传成功回调函数
    uploadSuccessFn: function (file, response) {
        if (response.code == 200) {
            Feng.success("上传成功!");
        }
        // 获取处理后的文件名
        var fileHandName = response.data;
        $("#handleFileName").val(fileHandName);
        // 原始的文件名
        $("#originalFilename").val(file.name);

        // 给图片预览赋值
        $("#staffPhoto").show().attr("src",Feng.ctxPath+'/upload/'+fileHandName)
    }
});

var webUploader = commonUploader.init();        // webUploader组件提供的uploader对象
$('#sendByHandle').on('click', function() {
    webUploader.upload();
});

webUploader.on('fileQueued', function( file ) {
    // 创建缩略图
    // 如果为非图片文件,可以不用调用此方法。
    // thumbnailWidth x thumbnailHeight 为 100 x 100
    webUploader.makeThumb( file, function( error, src ) {
        $("#staffPhoto").attr( 'src', src );
    }, 80, 100 );
});

$(function() {
    // 获取人员的图片地址
    var staffPhoto = $("#handleFileName").val();
    if (staffPhoto) {
        //给img标签的src赋值
        $("#staffPhoto").attr("src",Feng.ctxPath+'/upload/'+staffPhoto);
    }
});
html页面中的代码
@layout("/common/_container.html"){
<div class="ibox float-e-margins">
    <div class="ibox-content">
        <div class="form-horizontal" id="staffForm">


            <div class="row">
                <div class="col-sm-6 b-r">

                    <input type="hidden" value="${item.originalFilename!}" name="originalFilename" id="originalFilename" class="form-control">
                    <input type="hidden" value="${item.handleFileName}" name="handleFileName" id="handleFileName" class="form-control">

                    <div class="form-group">
                        <label class="col-sm-3 control-label">照片label>
                        <div class="col-sm-9">
                            <span id="file" class="upload-button">span><span id="fileName" class="upload-name text-ellipsis">span><br />
                            <img style="width:80px;height:100px;"  src="" id="staffPhoto" />
                        div>
                    div>
                div>

            div>
        div>
    div>
div>
<script src="${ctxPath}/static/modular/padmanage/staffMember/staffMember_info.js">script>
@}
二. 后台接收图片上传的请求
在某个Controller中 , 进行图片上传的接收. 存储的图片上传的路径为, 当前项目下的新建的upload目录.
  private Boolean haveCreatePath = false;
 @PostMapping("filesUpload")
    @ResponseBody
    public Object filesUpload(@RequestParam("file") MultipartFile[] file) {
        // 接收处理后的文件名
        String fileName ="";

        //判断file数组不能为空并且长度大于0
        if(file!=null&&file.length>0){
            //循环获取file数组中得文件
            for(int i = 0;i<file.length;i++){
                MultipartFile multipartFile = file[i];

                //判断文件是否为空
                if (!multipartFile.isEmpty()) {
                    try {
                        //上传文件的源文件名
                        String oldFileName = multipartFile.getOriginalFilename();

                        //处理后的文件名
                        fileName= StringUtils.substringBeforeLast(oldFileName, ".")+"-"+ FileNameGenerator.basedDateFormatMills()+"."+StringUtils.substringAfterLast(oldFileName,".");

                        // 存储在当前web服务路径下的upload路径
                        String destPath = request.getSession().getServletContext().getRealPath("")+"upload"+File.separator;

                        //判断该路径是否存在,如果不存在则创建该路径
                        if (!haveCreatePath){
                            File  destFile = new File(destPath);
                            destFile.mkdirs();
                            haveCreatePath = true;
                        }
                        // 文件最终保存的路径
                        String filePath = destPath + fileName;
                        //文件保存路径
                        //String filePath = govProperties.getFileUploadPath()+file.getOriginalFilename();
                        //转存文件
                        multipartFile.transferTo(new File(filePath));
                    } catch (Exception e) {
                        e.printStackTrace();
                        throw new ServiceException(BizExceptionEnum.UPLOAD_ERROR);
                    }
                }
            }
        }
        //返回前端data数据中存储修改后的文件名
        return new SuccessResponseData(fileName);
    }
三. 对上传的图片进行前台显示
在前台页面中,使用的是bootstraptable. 显示图片的代码如下.
使用formatter 进行图片的显示
StaffMember.initColumn = function () {
return [
{field: 'selectItem', chechbox: true},
{title: '图片', field: 'handleFileName', visible: true, align: 'center', valign: 'middle',
formatter: showPhoto },
];
};
function showPhoto(value, row, index){
if (row.handleFileName != null && row.handleFileName) {
var result = ' +Feng.ctxPath+'/upload/'+row.handleFileName+'">';
return result;
}
}
在后台中,写一个Controller, 用于接收显示图片的请求
代码如下
@Controller
@RequestMapping("/upload")
public class DownloadImgController {

    /**
     * 返回图片
     *
     * @author
     */
    @RequestMapping("/{upload}")
    public void renderPicture(@PathVariable("upload") String pictureId, HttpServletResponse response, HttpServletRequest resquest) {
        //文件夹获取路径
        String path = resquest.getSession().getServletContext().getRealPath("") +"upload"+ File.separator+ pictureId;
        try {
            //获取流
            byte[] bytes = FileUtil.toByteArray(path);
            //输出流
            response.getOutputStream().write(bytes);
        } catch (Exception e) {
            //如果找不到图片就返回一个默认图片
            try {
                response.sendRedirect(resquest.getContextPath()+"/static/img/user.png");
            } catch (IOException e1) {
                e1.printStackTrace();
            }
        }
    }
}