Python中scrapy爬虫框架的数据保存方式(包含:图片、文件的下载)
注意:1、settings.py中ITEM_PIPELINES中数字代表执行顺序(范围是1-1000),参数需要提前配置在settings.py中(也可以直接放在函数中,这里主要是放在settings.py中),同时settings.py需要配置开启
2、 process_item() 从spider中yield过来的item, 都要执行这个函数。会被多次调用
3、return item:如果后面还有操作需要用到item,那么在当前操作结束后必须return item供后面的操作使用!
一、scrapy自带的保存方式(图片,文档的下载)
需要在settings.py中配置:主要是开启
# Configure item pipelines
# See https://doc.scrapy.org/en/latest/topics/item-pipeline.html
ITEM_PIPELINES = {

    # 启用scrapy自带的图片下载ImagesPipeline(None:为关闭)
    'scrapy.pipelines.images.ImagesPipeline': None,

    # 启用scrapy自带的文件下载FilesPipeline
    # 'scrapy.pipelines.files.FilesPipeline': 2

    # 如果采用自定义的CustomImagesPipeline,需要将自带的ImagesPipeline设置为None。如下面的小说封面的下载和内容Mongodb的存储
    'NovelSpider.pipelines.CustomImagesPipeline': 1,
    'NovelSpider.pipelines.MongoPipeline': 2,
}
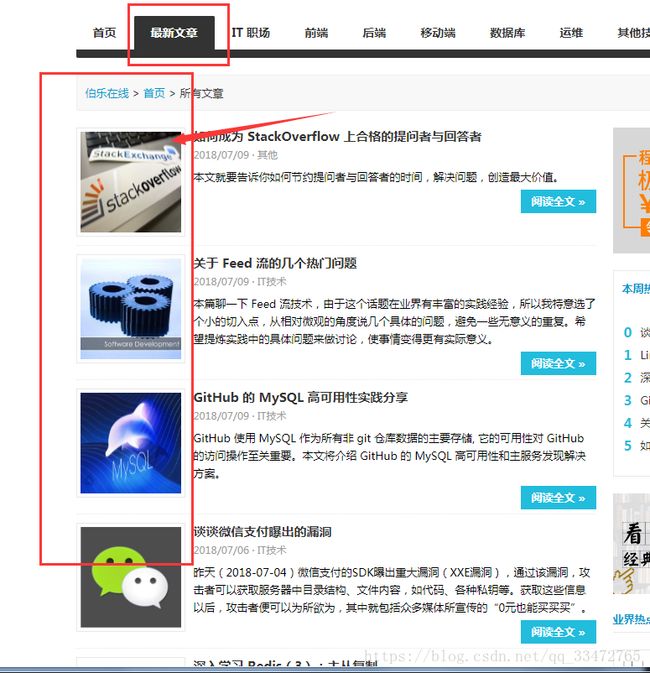
附加处理图片的示例代码:(主要是通过做的result结果查看数据!!)
如果需要这样的操作就就在settings.py中开启(示例代码是文章列表的图片!)
from scrapy.pipelines.images import ImagesPipeline
class JobbolePipeline(object):
    def process_item(self, item, spider):
        return item


# 定义处理图片的Pipeline
class ImagePipeline(ImagesPipeline):
    def item_completed(self, results, item, info):
        print('---',results)
        return item
        # 如果图片能够下载成功,说明这个文章是有图片的。如果results中不存在path路径,说明是没有图片的。
        # [(True, {'path': ''})]
        # if results:
        #     try:
        #         img_path = results[0][1]['path']
        #     except Exception as e:
        #         print('img_path获取异常,',e)
        #         img_path = '没有图片'
        # else:
        #     img_path = '没有图片'

        # 判断完成,需要将变量img_path重新保存到item中。
二、保存Json数据格式
直接使用cmd命令行(进入scrapy虚拟环境才行):scrapy crawl 项目名 -o 文件名.json -s FEED_EXPORT_ENCIDING=utf-8
自定义Json保存:
import json


class JsonPipeline(object):
    def __init__(self):
        self.file = open('文件名.json', 'wb')

    def process_item(self, item, spider):
        line = json.dumps(dict(item)) + "\n"
        self.file.write(line.encode('utf-8'))
        return item

    # def close_spider(self, spider):
    #     self.file.close()
在settings.py中配置:
ITEM_PIPELINES = {
    #'NovelSpider.pipelines.NovelspiderPipeline': 300,
    'NovelSpider.pipelines.JsonPipeline': 300,
    # 'NovelSpider.pipelines.MongoPipeline': 301,

    # 启用scrapy自带的图片下载ImagesPipeline
    #'scrapy.pipelines.images.ImagesPipeline': None,

    # 启用scrapy自带的文件下载FilesPipeline
    # 'scrapy.pipelines.files.FilesPipeline': None

    # 如果采用自定义的CustomImagesPipeline,需要将自带的ImagesPipeline设置为None。
    #'NovelSpider.pipelines.CustomImagesPipeline': 1,
    #'NovelSpider.pipelines.MongoPipeline': 2,
}
三、保存到Mongodb数据库
现在sesttings.py中配置,如图:
MONGOCLIENT = 'localhost'
#连接是的参数,novel为数据库的名(自己定义)
DB = 'novel'
class MongoPipeline(object):
    def __init__(self, client, db):
        self.client = pymongo.MongoClient(client)
        self.db = self.client[db]

    # from_crawler()作用就是从settings.py中读取相关配置,然后可以将读取结果保存在类中使用。
    @classmethod
    def from_crawler(cls, crawler):
        # 创建当前类的对象,并传递两个参数。
        obj = cls(
            client=crawler.settings.get('MONGOCLIENT', 'localhost'),
            db=crawler.settings.get('DB', 'test')
        )
        return obj

    def process_item(self, item, spider):
        #novel数据库名,保存方式是更新式(url字段更新),另一种存入方式覆盖式:self.db['数据库名'].insert_one(item)
        self.db['novel'].update_one({'url': item['url']}, {'$set': dict(item)}, True)
        # return item(如果后面还需要item就必须return)
配置settings.py文件:
ITEM_PIPELINES = {
    #'NovelSpider.pipelines.NovelspiderPipeline': 300,
    #'NovelSpider.pipelines.JsonPipeline': 300,
    'NovelSpider.pipelines.MongoPipeline': 301,

    # 启用scrapy自带的图片下载ImagesPipeline
    #'scrapy.pipelines.images.ImagesPipeline': None,

    # 启用scrapy自带的文件下载FilesPipeline
    # 'scrapy.pipelines.files.FilesPipeline': None

    # 如果采用自定义的CustomImagesPipeline,需要将自带的ImagesPipeline设置为None。
    #'NovelSpider.pipelines.CustomImagesPipeline': 1,
    #'NovelSpider.pipelines.MongoPipeline': 2,
}简单的方法:(省略了settings.py的配置Mongodb的参数和调用读取配置!),还是需要配置settings.py中的ITEM_PIPELINES如上述代码!
import pymongo

class JobsPipeline(object):
    def process_item(self, item, spider):
        # 参数1 {'zmmc': item['zmmc']}: 用于查询表中是否已经存在zmmc对应的documents文档。
        # 参数3 True: 更新(True)还是插入(False, insert_one())
        # 参数2 要保存或者更新的数据
        #示例代码“zmcc”字段,仅做参考!!!数据库名是job
        self.db['job'].update_one({'zmmc': item['zmmc']}, {'$set': dict(item)}, True)
        return item

    def open_spider(self, spider):
        self.client = pymongo.MongoClient('localhost')
        self.db = self.client['jobs']
四、保存到MySQL数据库
注意:MySQL数据库会出现异步写入,用来提高写入速度防止出现写入阻塞!
首先在MySQL数据库中创建对应的表,注意字段的设计!
导入:
import pymysql
#BolePipeline:自定义的!
class BolePipeline(object):
    def __init__(self):
        self.db = None
        self.cursor = None

    def process_item(self, item, spider):
        #数据库的名字和密码自己知道!!!bole是数据库的名字
        self.db = pymysql.connect(host='localhost', user='root', passwd='123456', db='bole')
        self.cursor = self.db.cursor()
        #由于可能报错所以在这重复拿了一下item中的数据,存在了data的字典中
        data = {
            "list_sort":item['list_sort'],
            "article_sort":item['article_sort'],
            "title":item['title'],
            "article_url":item['article_url'],
            "zan":item['zan'],
            "content": item['content']
        }
        #注意:MySQL数据库命令语句
        insert_sql = "INSERT INTO bole (list_sort, article_sort, title, article_url,zan, content) VALUES (%s,%s,%s,%s,%s,%s)"
        try:
            self.cursor.execute(insert_sql, (data['list_sort'], data['article_sort'], data['title'], data['article_url'],data['zan'], data['content']))
            self.db.commit()
        except Exception as e:
            print('问题数据跳过!.......',e)
            self.db.rollback()
        self.cursor.close()
        self.db.close()
        return item
在settings.py中配置:
ITEM_PIPELINES = {
    #'NovelSpider.pipelines.NovelspiderPipeline': 300,
    #'NovelSpider.pipelines.JsonPipeline': 300,
    #'NovelSpider.pipelines.MongoPipeline': 301,
    'NovelSpider.pipelines.BolePipeline': 301,
    # 启用scrapy自带的图片下载ImagesPipeline
    #'scrapy.pipelines.images.ImagesPipeline': None,
    # 启用scrapy自带的文件下载FilesPipeline
    # 'scrapy.pipelines.files.FilesPipeline': None
    # 如果采用自定义的CustomImagesPipeline,需要将自带的ImagesPipeline设置为None。
    #'NovelSpider.pipelines.CustomImagesPipeline': 1,
    #'NovelSpider.pipelines.MongoPipeline': 2,
}
简单方式:最后在settings.py中配置!
import pymysql

class HongxiuPipeline(object):
    #示例代码是保存小说信息
    # process_item() 从spider中yield过来的item, 都要执行这个函数。会被多次调用
    def process_item(self, item, spider):
        insert_sql = "INSERT INTO hx(title, author, tags, total_word_num, keep_num, click_num, info) VALUES (%s, %s, %s, %s, %s, %s, %s)"
        self.cursor.execute(insert_sql, (item['title'], item['author'], item['tags'], item['total_word_num'], item['keep_num'], item['click_num'], item['info']))
        self.connect.commit()

    # open_spider()和close_spider():只在爬虫被打开和关闭时,执行一次。
    def open_spider(self, spider):
        self.connect = pymysql.connect(
            host='localhost',
            user='root',
            port=3306,
            passwd='123456',
            db='hongxiu',
            charset='utf8'
        )
        self.cursor = self.connect.cursor()

    def close_spider(self, spider):
        self.cursor.close()
        self.connect.close()
五、保存Excel中(.csv格式)
cmd命令直接保存(注意:必须进入scrapy虚拟环境中!保存后表格中有空行!):
scrapy crawl 项目名 -o 文件名.csv -s FEED_EXPORT_ENCIDING=utf-8自定义创建表格(以保存招聘信息为例):
#excel保存
class Excel(object):
    #def __init__(self):
        #self.row = 1

    def creat_excel(self):
        # 1.创建workbook对象
        book = xlwt.Workbook(encoding='utf-8')
        # 2.创建选项卡
        # 此处选项卡名字为:职位简介
        sheet = book.add_sheet('职位简介')
        # 3.添加头
        # 第一个参数是行,第二个参数是列,第三个参数是列的字段名
        sheet.write(0, 0, '职位名称')
        sheet.write(0, 1, '工作地点')
        sheet.write(0, 2, '公司月薪')
        sheet.write(0, 3, '职位要求')

        return book, sheet


class PythonjobPipeline(object):
    print("---------开始保存!!")
    def __init__(self):
        self.row = 1
        obj = Excel()
        self.book, self.sheet = obj.creat_excel()

    def process_item(self, item, spider):
        self.sheet.write(self.row, 0, item['title'])
        print(item['title'])
        self.sheet.write(self.row, 1, item['addr'])
        self.sheet.write(self.row, 2, item['money'])
        self.sheet.write(self.row, 3, item['company_detail'])

        self.row += 1
        self.close_file(item)

    def close_file(self,item):
        self.book.save('职位简介.xls')
        return item
# Configure item pipelines
# See https://doc.scrapy.org/en/latest/topics/item-pipeline.html
ITEM_PIPELINES = {
    'scrapy.pipelines.files.FilesPipeline': None,
    'pythonjob.pipelines.PythonjobPipeline': 300,

}
六、自定义下载图片和文档并保存
首先:在settings.py中设置参数
# 配置图片的保存目录
IMAGES_STORE = 'pics'
# 在ImagesPipeline进行下载图片是,配置图片对应的Item字段
IMAGES_URLS_FIELD = 'pic_src'

FILES_STORE = 'novel'

FILES_URLS_FIELD = 'download_url'
图片下载保存:
导入:
from scrapy.http import Request
from scrapy.pipelines.images import ImagesPipeline
class CustomImagesPipeline(ImagesPipeline):
def get_media_requests(self, item, info):
# 从item中获取要下载图片的url,根据url构造Request()对象,并返回该对象
image_url = item['img_url'][0]
yield Request(image_url, meta={'item': item})
def file_path(self, request, response=None, info=None):
# 用来自定义图片的下载路径
item = request.meta['item']
url = item['img_url'][0].split('/')[5]
return '%s.jpg'%url
def item_completed(self, results, item, info):
# 图片下载完成后,返回的结果results
print(results)
return itemsettings.py中配置
# Configure item pipelines
# See https://doc.scrapy.org/en/latest/topics/item-pipeline.html
ITEM_PIPELINES = {
    # 'NovelSpider.pipelines.NovelspiderPipeline': 300,

    # 启用scrapy自带的图片下载ImagesPipeline
    'scrapy.pipelines.images.ImagesPipeline': None,

    # 启用scrapy自带的文件下载FilesPipeline
    # 'scrapy.pipelines.files.FilesPipeline':None,

    # 如果采用自定义的CustomImagesPipeline,需要将自带的ImagesPipeline设置为None。
    'NovelSpider.pipelines.CustomImagesPipeline': 1,
}
文件的下载保存(类比图片的下载保存)
#图片++++++++++++++++++++++++++++++++++++++++++++++++++++++++++
class CustomImagesPipeline(ImagesPipeline):
    def get_media_requests(self, item, info):
        # 从items中获取要下载图片的url, 根据url构造Requeset()对象, 并返回该对象
        # sort_title = item['sort_title']
        try:
            image_url = item['pic_src'][0]
            yield Request(image_url, meta={'item': item})
        except:
            image_url = 'https://www.qisuu.la/modules/article/images/nocover.jpg'
        yield Request(image_url, meta={'item': item})

    def file_path(self, request, response=None, info=None):
        item = request.meta['item']
        return '{}/{}.jpg'.format(item['sort'], item['novel_name'])

    def item_completed(self, results, item, info):

        print(results)
        return item

#文本++++++++++++++++++++++++++++++++++++++++++++++++++++++++++++++++++++++++++
class CustomFilesPipeline(FilesPipeline):
    def get_media_requests(self, item, info):

            download_url = item['download_url'][0]
            download_url = download_url.replace("'",'')
            print(download_url)
            yield Request(download_url, meta={'item':item})

    def file_path(self, request, response=None, info=None):
        item = request.meta['item']
       #创建sort_name文件,在里面保存novel_name文件
        return '%s/%s' % (item['sort'],item['novel_name'])

    def item_completed(self, results, item, info):
        print(results)
        return item
配置settings.py:
# Configure item pipelines
# See https://doc.scrapy.org/en/latest/topics/item-pipeline.html
ITEM_PIPELINES = {
   # 'qishutest.pipelines.QishutestPipeline': 300,
# 启用scrapy自带的图片下载ImagesPipeline
    'scrapy.pipelines.images.QishutestPipeline': None,

    # 启用scrapy自带的文件下载FilesPipeline
    'scrapy.pipelines.files.FilesPipeline': None,

    # 如果采用自定义的CustomImagesPipeline,需要将自带的ImagesPipeline设置为None。
    'qishutest.pipelines.CustomImagesPipeline':1,
    'qishutest.pipelines.CustomFilesPipeline':2,
}
