k8s单节点部署kudeam和dashboard(在线)
k8s单节点kudeam部署kubernetes
- 部署kubernetes master
- 部署kubernetes node
- 一键部署 Kubernetes Dashboard并集成Heapster、InfluxDB和Grafana
- 问题出现:
部署kubernetes master
- 下载相关资料
打开 k8s-deploy 查看源代码,或者直接运行下面命令clone。
git clone https://github.com/cookcodeblog/k8s-deploy.git
注意:这个项目是别人的,这里下载后.sh文件的类型为doc,我们需要把文件类型改为liux可执行文件类型
vi 文件名
按esc
:set ff #查看当前文本的模式类型,一般为dos,unix
:set ff=unix #设置为linux可执行文件
这里我已经修改好了放在同目录*
链接:https://pan.baidu.com/s/142TdV8b0a1TucSISagMz7Q
提取码:oaa6
- 克隆(或复制)相应目录到master机器上,以root用户运行chmod u+x .sh
一键部署kubernetes master:*
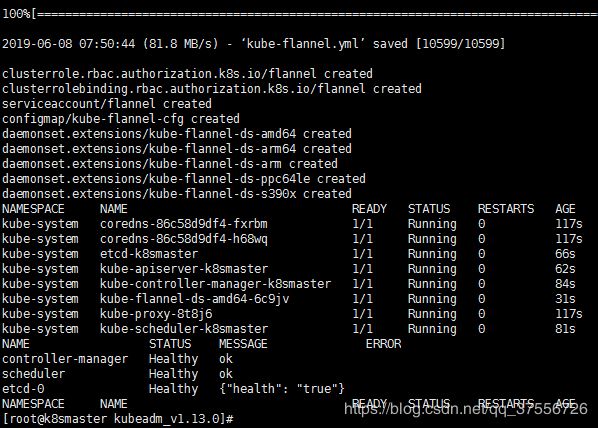
./kubeadm_init_master.sh
- 运行完后,需要复制第5步kubeadm init 的输出的 kubeadm join 的内容,在下面的“部署kubernetes node”时会用到。如下
部署kubernetes node
- 部署kubernetes node
*克隆(或复制)相应目录到node机器上,以root用户运行chmod u+x .sh 。
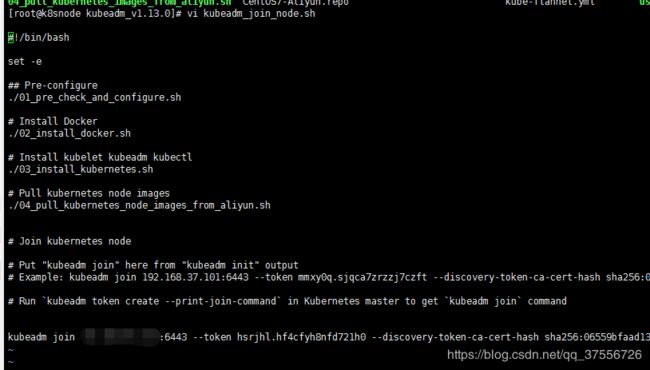
将上面kubeadm init 的输出中的kubeadm join 的内容放到kubeadm_join_node.sh的最后。vi kubeadm_join_node.sh后放到最后加入即可


- 运行./kubeadm_join_node.sh 部署kubernetes node,并将该节点加入kubernetes集群。
./kubeadm_join_node.sh
- 如果忘记了kubeadm join 的内容,可以在Kubernetes master上执行下面的命令重新获得:
kubeadm token create --print-join-command
一键部署 Kubernetes Dashboard并集成Heapster、InfluxDB和Grafana
- 一键部署Kubernetes Dashboard
在Kubernetes 1.7后,Kubernetes Dashboard的授权方式发生了很大变化,网络上查到的一些中文资料已经过时了。
根据自己的亲身实践,写了一键部署Kubernetes Dashboard脚本。
特点:
一键部署,避免踩坑 采用Kubernetes推荐的安装方法和访问方法 使用阿里云镜像仓库避免拉取不了gcr.io镜像问题 支持Kubernetes Dashboard v1.8.3 集成了Heapster v1.5.3、InfluxDB v1.3.3和Grafana v4.4.3 不需要修改API Server配置文件 - 安装步骤
克隆或复制 k8s_dashboard 目录到K8S master上,运行以下命令:
chmod u+x .sh
./deploy_k8s_dashboard.sh
安装脚本会生成一个Sample Service Account (admin-user) 的Token,需要从控制台日志中复制该token。 安装脚本会生成User Certificate,生成User Certificate时会提示输入一个导出证书用的密码。 需要将该证书(kubecfg) 保存到本地,并安装该证书到浏览器中,然后重启浏览器。 - 访问Dashboard
**在成功安装上面的证书后,通过浏览器访问:
https://:/api/v1/namespaces/kube-system/services/https:kubernetes-dashboard:/proxy/
可以通过运行kubectl cluster-info 来查看master-ip和apiserver-port。
输入上面的token就可以访问Dashboard了。
如果不安装证书直接访问上面的地址会出现“403 system:anonymous”的错误。
网上说的可以通过–anonymous-auth=false 参数设置,亲测在过一段时间后会导致API
Server无法访问,并且设置后仍然会遇到“401 Unauthorized”的错误。
网上说的通过basic_auth_file方法来访问方法需要明文写死用户名密码,也不推荐使用。 正确的做法应该是:浏览器安装用户证书
- Service Account Token。 另外,Kubernetes官方不推荐使用NodePort和kubectl proxy方法访问,因为有安全风险。
(4)如果token忘记了,可以运行下面命令来获取admin-user的Service Account的token:
kubectl -n kube-system describe secret $(kubectl -n kube-system get
secret | grep admin-user | awk ‘{print $1}’)
(5)监控Kubernetes集群 在Kubernetes Dashboard中监控 按照上面的步骤,打开Kubernetes Dashboard,选择Namespaces为“All namespaces”,打开Overview菜单,就可以看到Heapster采集的CPU usage和Memory usage指标。 在Grafana中监控 Kubernetes Dashboard中的Heapster监控比较简单原始,集成Grafana+InfluxDB后可以实现更强大的集群监控。 打开Grafana的Service URL, 比如:https://192.168.37.132:6443/api/v1/namespaces/kube-system/services/monitoring-grafana/proxy
可以通过运行kubectl cluster-info 查看Grafana的Service URL。
登录Grafana,缺省的用户名/密码是:admin/admin。
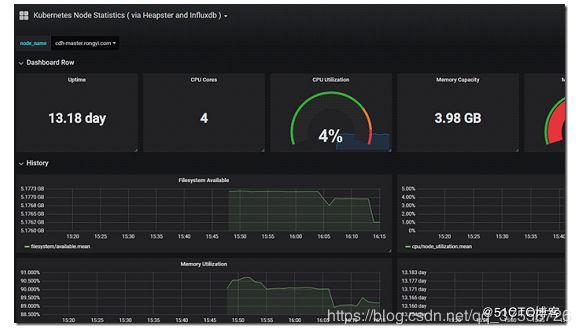
打开内置的Cluster的Grafana Dashboard,可以查看整个Kubernetes集群或指定的Kubernete节点的CPU和内存使用情况。**

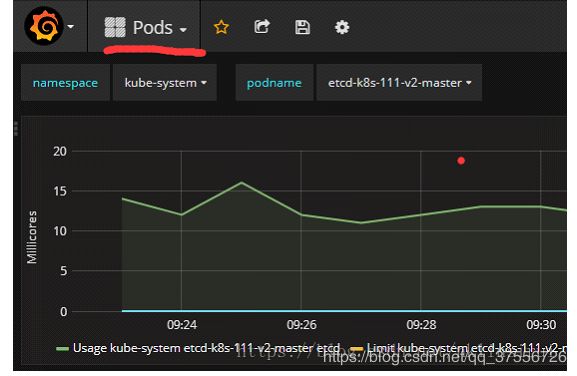
打开内置的Pods的Grafana Dashboard,可以查看指定Pod的CPU和内存使用情况。

问题出现:
⦁ 脚本中dashboard.yml文件下载不到这里将重新改脚本下载ymal文件
⦁ 访问出现403,然后安装证书即可
⦁ 访问不到试着:iptables -P FORWARD ACCEPT
⦁ 访问dashboard并没有现实Heapster,图形界面,排错如下:
1、 创建heapster时,查看日志总是下面的错误
kubectl logs heapster-f64999bc-25tvv -n kube-system E0326
06:25:05.009902 1 manager.go:101] Error in scraping containers
from kubelet:192.168.10.77:10255: failed to get all container stats
from Kubelet URL “http://192.168.10.77:10255/stats/container/”: Post
http://192.168.10.77:10255/stats/container/: dial tcp
192.168.10.77:10255: getsockopt: connection refused
2 .kubectl top 命令也获取不到想要的结果
[ryuser@cdh-master metrics]$ kubectl top node error: metrics not
available yet
解决办法:
#在heapster.yaml清单文件中进行如下修改
改后:
- –source=kubernetes:https://kubernetes.default?kubeletHttps=true&kubeletPort=10250&insecure=true
#这条修改在本次并没有加只供参考
原来:
- –sink=influxdb:http://monitoring-influxdb.kube-system.svc:8086
更改 - –sink=influxdb:http://monitoring-influxdb.kube-system.svc.cluster.local:8086
3.然后删除heapster重建
kubectl delete -f heapster.yaml kubectl apply -f heapster.yaml
4.再次查看日志
[ryuser@cdh-master metrics]$ kubectl logs -f heapster-5fcf457b-zq99c
-n kube-system 报错: 403 Forbidden", response: “Forbidden (user=system:serviceaccount:kube-system:heapster, verb=create,
resource=nodes, subresource=stats)”
解决:
查看ClusterRole: system:heapster的权限,发现的确没有针对Resource: nodes/stats 的create权限
[ryuser@cdh-master metrics]$ kubectl describe clusterrole
system:heapster 如下: Name: system:heapster Labels:
kubernetes.io/bootstrapping=rbac-defaults Annotations:
kubectl.kubernetes.io/last-applied-configuration:
{“apiVersion”:“rbac.authorization.k8s.io/v1",“kind”:“ClusterRole”,“metadata”:{“annotations”:{"rbac.authorization.kubernetes.io/autoupdate”…
rbac.authorization.kubernetes.io/autoupdate: true PolicyRule: Resources Non-Resource URLs Resource
Names Verbs --------- -----------------
-------------- ----- events [] [] [get list watch] namespaces [] []
[get list watch] nodes/stats [] []
[get list watch] nodes [] []
[get list watch] pods [] []
[get list watch] deployments.extensions [] []
[get list watch]
修改ClusterRole: system:heapster的权限
生成清单文件
kubectl get clusterrole system:heapster -o yaml > heapster_modify.yaml
修改文件,增加verbs:create权限,增加resources:nodes/stats,下面 # 注释的为增加的
vi heapster_modify.yaml
 apiVersion: rbac.authorization.k8s.io/v1 kind: ClusterRole metadata:   annotations:
    kubectl.kubernetes.io/last-applied-configuration: |
      {"apiVersion":"rbac.authorization.k8s.io/v1","kind":"ClusterRole","metadata":{"annotations":{"rbac.authorization.kubernetes.io/autoupdate":"true"},"creationTimestamp":"2019-02-12T10:41:33Z","labels":{"kubernetes.io/bootstrapping":"rbac-defaults"},"name":"system:heapster","resourceVersion":"70","selfLink":"/apis/rbac.authorization.k8s.io/v1/clusterroles/system%3Aheapster","uid":"c3bd303a-2eb2-11e9-9c98-005056be639a"},"rules":[{"apiGroups":[""],"resources":["events","namespaces","nodes","pods"],"verbs":["create","get","list","watch"]},{"apiGroups":["extensions"],"resources":["deployments"],"verbs":["get","list","watch"]}]}
    rbac.authorization.kubernetes.io/autoupdate: "true"   creationTimestamp: "2019-02-12T10:41:33Z"   labels:
    kubernetes.io/bootstrapping: rbac-defaults   name: system:heapster   resourceVersion: "4109335"   selfLink: /apis/rbac.authorization.k8s.io/v1/clusterroles/system%3Aheapster   uid: c3bd303a-2eb2-11e9-9c98-005056be639a rules:
- apiGroups:
  - ""   resources:
  - events
  - namespaces
  - nodes
  - pods
  - nodes/stats  # 增加   verbs:
  - create   #增加
  - get
  - list
  - watch
- apiGroups:
  - extensions   resources:
  - deployments   verbs:
  - get
  - list
  - watch
删除heapster重新部署
kubectl delete -f heapster.yaml
kubectl apply -f heapster.yaml
再次查看日志:
[ryuser@cdh-master metrics]$ kubectl logs -f heapster-5fcf457b-vhrxf
-n kube-system
这次没有报错了
kubectl top
[ryuser@cdh-master metrics]$ kubectl top nodes
NAME CPU(cores) CPU% MEMORY(bytes) MEMORY%
cdh-master.rongyi.com 158m 3% 2550Mi 69%
cdh-slave.rongyi.com 79m 1% 2386Mi 64%
cdh-slave2.rongyi.com 820m 41% 3136Mi 84%
[ryuser@cdh-master metrics]$ kubectl top pods
NAME CPU(cores) MEMORY(bytes)
curl-66959f6557-bvn9r 0m 0Mi
dep-httpd-5b774f45df-vtv59 0m 21Mi
dep-httpd-5b774f45df-wd5kf 0m 15Mi
myapp-0 0m 1Mi
myapp-1 0m 3Mi
myapp-2 0m 1Mi
myapp-3 0m 1Mi
myapp-4 0m 1Mi
pod-demo 499m 138Mi
(4)另外还有一个问题,就是grafana,dashboard没有图片信息,因为是不显示数据。 经过上面的折腾有数据了。因为他们都依赖于Heapster 、InfluxDB和Grafana,需要先删除再次启动这时看到效果了


