Linux下部署Disconf(分布式配置中心)
前置环境需要的配置:
- MySQL安装:https://blog.csdn.net/qq_37598011/article/details/93489404
- Zookeeper安装:https://blog.csdn.net/qq_37598011/article/details/88980317
- Nginx安装:https://blog.csdn.net/qq_37598011/article/details/93497219
- Redis安装:https://blog.csdn.net/qq_37598011/article/details/93490113
- Tomcat安装:https://blog.csdn.net/qq_37598011/article/details/93502809
这里因为需要Maven和Git所以还需要安装这两个:
Maven
wget http://repos.fedorapeople.org/repos/dchen/apache-maven/epel-apache-maven.repo -O /etc/yum.repos.d/epel-apache-maven.repo
yum -y install apache-maven
Git
yum -y install gitOk~这两个装好了就可以到GitHub上拉去代码了。
部署Disconf
下载
这里需要三个文件夹war、resource、src
mkdir -p /usr/local/disconf/{resource,src,war}然后到disconf目录下
cd /usr/local/disconf/
从GitHub上拉去disconf的代码到src中
git clone https://github.com/knightliao/disconf.git
将/usr/local/disconf/src/disconf/disconf-web/profile/rd 路径下的配置文件拷贝到 /usr/local/disconf/resource中
cp /usr/local/disconf/src/disconf/disconf-web/profile/rd/* /usr/local/disconf/resource/然后到/usr/local/disconf/resource目录下
cd /usr/local/disconf/resource/
将application-demo.properties文件改名重命名为application.properties
mv application-demo.properties application.properties 修改配置文件
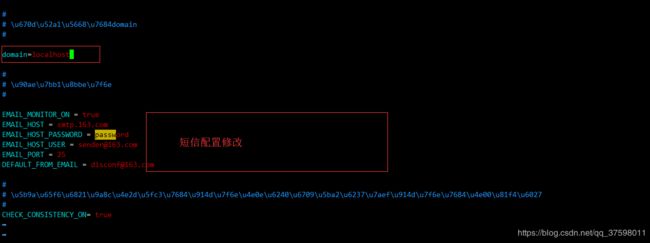
这里需要修改相应的4个配置文件(application.properties、zoo.properties、redis-config.properties 、jdbc-mysql.properties )
application.properties
vim application.properties
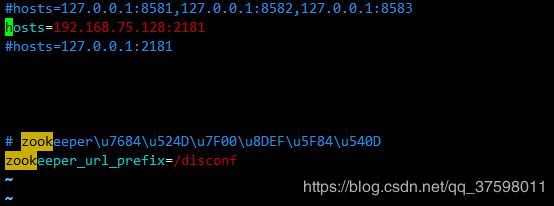
zoo.properties
vim zoo.properties这里我是单实例,如果要多实例参考:https://blog.csdn.net/qq_37598011/article/details/89319334
这里有个坑,hosts不能用127.0.0.1如果你是在本地测试这回导致zk实例为空!!!!
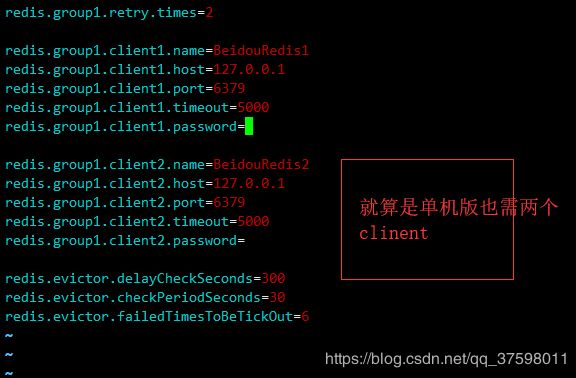
redis-config.properties
vim redis-config.properties jdbc-mysql.properties
vim jdbc-mysql.properties修改环境配置
这里需要把创建的配置文件的路径和war包的路径配置在环境变量中。
vim /etc/profile
需要修改的内容如下
ONLINE_CONFIG_PATH=/usr/local/disconf/resource
WAR_ROOT_PATH=/usr/local/disconf/war
export ONLINE_CONFIG_PATH
export WAR_ROOT_PATH
启动配置
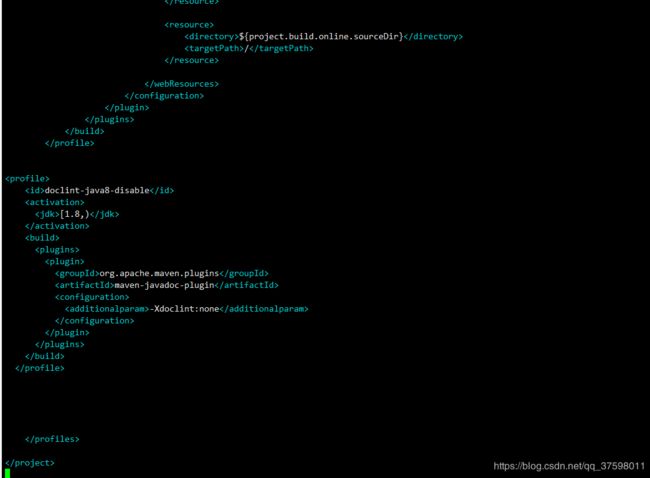
source /etc/profile除此之外还需要修改disconf-web下的pom文件(如果JDK的版本低于1.8,则此步骤不需要执行)
vim /usr/local/disconf/src/disconf/disconf-web/pom.xml 修改内容
    doclint-java8-disable

      [1.8,)


          org.apache.maven.plugins
          maven-javadoc-plugin

            -Xdoclint:none
构建
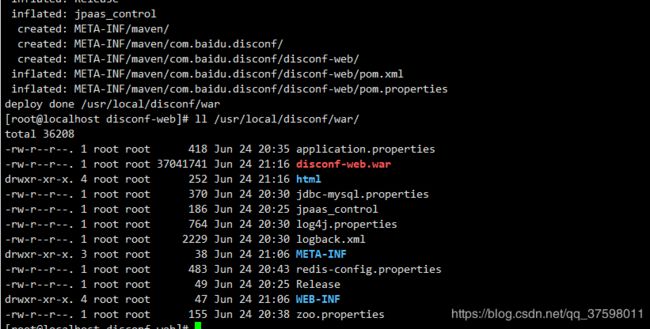
执行该命令(disconf-web下的deploy目录中的deploy.sh)
这块工程蛮大的可以边构建边修改Tomcat和Nginx的配置
sh /usr/local/disconf/src/disconf/disconf-web/deploy/deploy.sh Tomcat配置修改
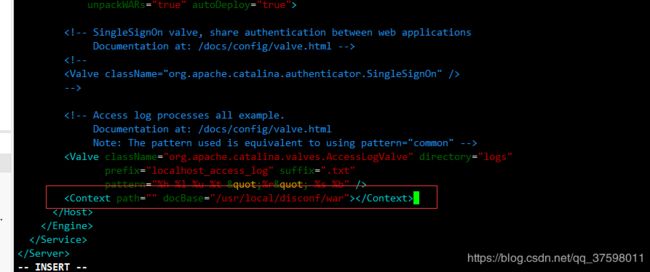
将构建时打成的war包部署到Tomcat中,需要修改Tomcat的server.xml文件
先到Tomcat的配置目录,再通过vim进行修改
修改的内容如下
然后在disconf-web工程构建完成后别忘了重启(bin目录下)
./shutdown.sh
./startup.sh
Nginx配置修改
修改Nginx的配置文件
vim /usr/local/nginx/conf/nginx.conf我的配置文件如下
#user  nobody;
worker_processes  1;

#error_log  logs/error.log;
#error_log  logs/error.log  notice;
#error_log  logs/error.log  info;

#pid        logs/nginx.pid;


events {
    worker_connections  1024;
}


http {
    include       mime.types;
    default_type  application/octet-stream;

    #log_format  main  '$remote_addr - $remote_user [$time_local] "$request" '
    #                  '$status $body_bytes_sent "$http_referer" '
    #                  '"$http_user_agent" "$http_x_forwarded_for"';

    #access_log  logs/access.log  main;

    sendfile        on;
    #tcp_nopush     on;

    #keepalive_timeout  0;
    keepalive_timeout  65;

    #gzip  on;


    upstream disconf {
	    server 127.0.0.1:8080; #Tomcat的IP和端口号
	}

    server {
        listen       8085;
        server_name  localhost; #这块要和application.properties中的domain属性相同
	access_log /usr/local/disconf/access.log;
        error_log /usr/local/disconf/error.log;

        #charset koi8-r;

        #access_log  logs/host.access.log  main;

        location / {
                root /usr/local/disconf/war/html;   #html所在的路径
        	if ($query_string) {
           	 expires max;
       		 }
        }

    location ~ ^/(api|export) {
        proxy_pass_header Server;
        proxy_set_header Host $http_host;
        proxy_redirect off;
        proxy_set_header X-Real-IP $remote_addr;
        proxy_set_header X-Scheme $scheme;
        proxy_pass http://disconf;
    }

        #error_page  404              /404.html;

        # redirect server error pages to the static page /50x.html
        #
        error_page   500 502 503 504  /50x.html;
        location = /50x.html {
            root   html;
        }

        # proxy the PHP scripts to Apache listening on 127.0.0.1:80
        #
        #location ~ \.php$ {
        #    proxy_pass   http://127.0.0.1;
        #}

        # pass the PHP scripts to FastCGI server listening on 127.0.0.1:9000
        #
        #location ~ \.php$ {
        #    root           html;
        #    fastcgi_pass   127.0.0.1:9000;
        #    fastcgi_index  index.php;
        #    fastcgi_param  SCRIPT_FILENAME  /scripts$fastcgi_script_name;
        #    include        fastcgi_params;
        #}

        # deny access to .htaccess files, if Apache's document root
        # concurs with nginx's one
        #
        #location ~ /\.ht {
        #    deny  all;
        #}
    }


    # another virtual host using mix of IP-, name-, and port-based configuration
    #
    #server {
    #    listen       8000;
    #    listen       somename:8080;
    #    server_name  somename  alias  another.alias;

    #    location / {
    #        root   html;
    #        index  index.html index.htm;
    #    }
    #}


    # HTTPS server
    #
    #server {
    #    listen       443 ssl;
    #    server_name  localhost;

    #    ssl_certificate      cert.pem;
    #    ssl_certificate_key  cert.key;

    #    ssl_session_cache    shared:SSL:1m;
    #    ssl_session_timeout  5m;

    #    ssl_ciphers  HIGH:!aNULL:!MD5;
    #    ssl_prefer_server_ciphers  on;

    #    location / {
    #        root   html;
    #        index  index.html index.htm;
    #    }
    #}

}
重启Nginx
cd /usr/local/nginx/sbin
./nginx -s reload
这时候已经可以访问静态页面了,但是MySQL还没导入。
初始化数据库
先进到/usr/local/disconf/src/disconf/disconf-web/sql目录下
cd /usr/local/disconf/src/disconf/disconf-web/sql执行以下几条命令,要按照顺序
mysql -h127.0.0.1 -uroot -p'123456' < 0-init_table.sql

mysql -h127.0.0.1 -uroot -p'123456' disconf < 1-init_data.sql

mysql -h127.0.0.1 -uroot -p'123456' disconf < 201512/20151225.sql

mysql -h127.0.0.1 -uroot -p'123456' disconf < 20160701/20160701.sql
OK~~~
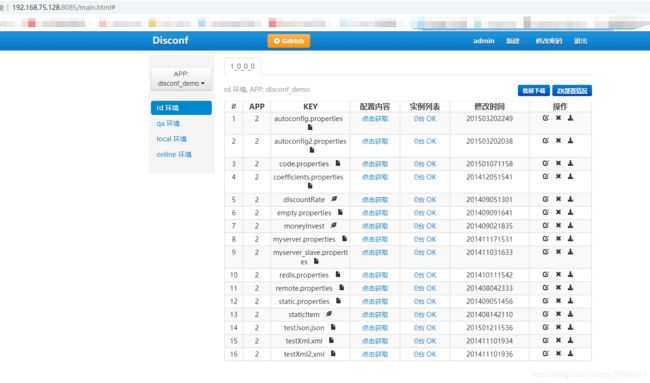
http://192.168.75.128:8085/login.html
可以用admin登录,账号密码都是。
OK~~~整个disconf配置中心就已经部署好了
参考
官网地址:https://disconf.readthedocs.io/zh_CN/latest/index.html
GitHub地址:https://github.com/knightliao/disconf/blob/master/docs/source/index.rst


