SpringBoot入门 - web工程 - 获取后台返回字符串 对象 及json数据
下面讲解springboot-web工程 如何跳转到一个页面 和 获取一个后台返回的字符串,对象,以及json数据...
2.导入依赖
    org.springframework.boot
    spring-boot-starter-web


    javax.servlet
    javax.servlet-api
    provided


    javax.servlet
    jstl


    org.springframework.boot
    spring-boot-starter-tomcat
    provided


    org.apache.tomcat.embed
    tomcat-embed-jasper
    provided


    junit
    junit
    4.11
    test
温馨小提示:这里我是多模块项目
我是在外面引入的 SpringBoot所需依赖
            org.springframework.boot
            spring-boot-dependencies
            2.0.5.RELEASE
            pom
            import
3. 配置application.properties对jsp支持-前后缀
# 页面默认前缀目录
spring.mvc.view.prefix=/WEB-INF/views/
# 响应页面默认后缀
spring.mvc.view.suffix=.jsp
# 自定义属性,可以在Controller中读取
application.hello=Hello Angel From application
4.编写jsp页面
<%@ page contentType="text/html;charset=UTF-8" language="java" %>


    user页面


    ${msg}
5.编写controller类
@Controller
public class WebController {

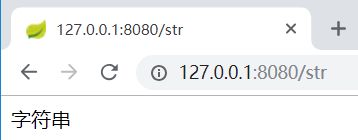
    @RequestMapping("/str")
    @ResponseBody
    public String json1(){
        return "字符串";
    }

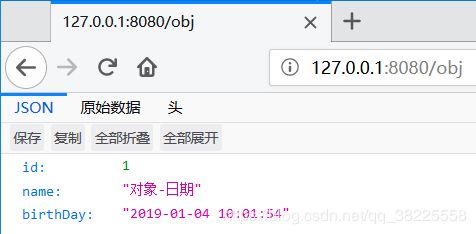
    @RequestMapping("/obj")
    @ResponseBody
    public Person json2(){
        return new Person(1L,"对象-日期",new Date());
    }

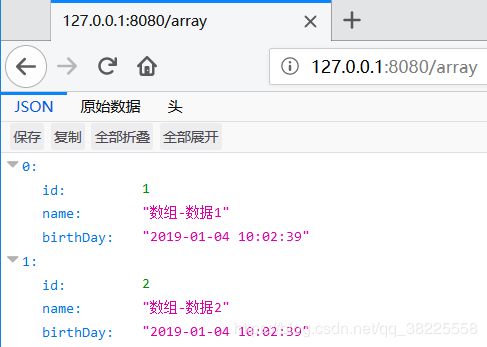
    @RequestMapping("/array")
    @ResponseBody
    public List json3(){
        return Arrays.asList(new Person(1L,"数组-数据1",new Date()),new Person(2L,"数组-数据2",new Date()));
    }

    @RequestMapping("/index")
    public String jsp(Model model){
        model.addAttribute("msg", "后台传的数据...");
        return "user/index";
    }

} 温馨小提示:官方推荐使用 @RestController=@Controller+@ResponseBody 如下使用
@RestController //@RestController=@Controller+@ResponseBody 官方推荐就使用 public class WebController2 { @RequestMapping("/str2") public String json1(){ return "字符串"; } @RequestMapping("/obj2") public Person json2(){ return new Person(1L,"对象-日期",new Date()); } @RequestMapping("/array2") public Listjson3(){ return Arrays.asList(new Person(1L,"数组-数据1",new Date()),new Person(2L,"数组-数据2",new Date())); } }
这里我用到的domain实体类
public class Person {

    private Long id;
    private String name;
    private Date birthDay;

    public Long getId() {
        return id;
    }

    public void setId(Long id) {
        this.id = id;
    }

    public String getName() {
        return name;
    }

    public void setName(String name) {
        this.name = name;
    }

    @JsonFormat(pattern = "yyyy-MM-dd hh:mm:ss",timezone = "GMT+8")
    public Date getBirthDay() {
        return birthDay;
    }

    public void setBirthDay(Date birthDay) {
        this.birthDay = birthDay;
    }

    public Person(Long id, String name, Date birthDay) {
        this.id = id;
        this.name = name;
        this.birthDay = birthDay;
    }


}
6.编写启动类
@SpringBootApplication
public class WebApplication {
    public static void main(String[] args) {
        SpringApplication.run(WebApplication.class);
    }
}
7.启动App并测试
注意:这里通过路径返回jsp页面好像有问题,看了一下资料,发现好像是springboot的版本问题,好像1.4版本以下可以用,官方推荐我们使用模板引擎技术,不推荐使用jsp
使用Freemaker模板跳转页面可参考:https://blog.csdn.net/qq_38225558/article/details/85761281
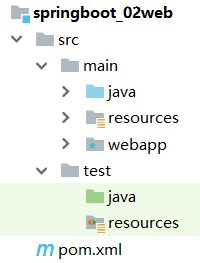
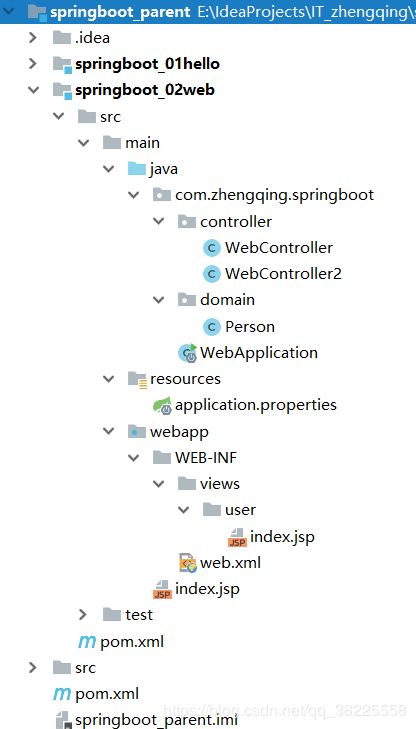
最后附上项目整体结构:
