java+maven集成极光推送服务
最近有不少想写想记的东西,可惜最近公司太忙,还有就是我比较懒,一到家里就不行动了。行了,今天主要是集成极光服务的及时通讯功能,直接记下来好了 我的JAVA项目主要是需要集成极光的推送消息给android的方,所以可能我只会介绍怎么给极光推送。
第一步你需要到极光的的官网
极光官网
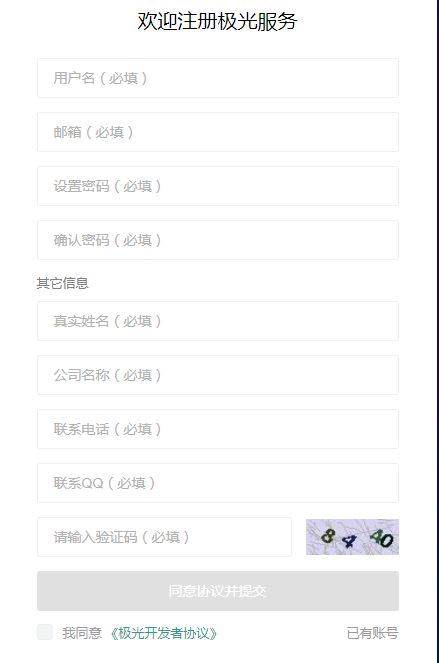
去注册账号
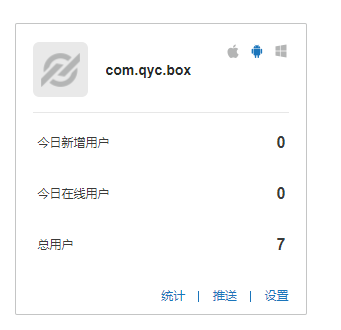
之后创建一个应用
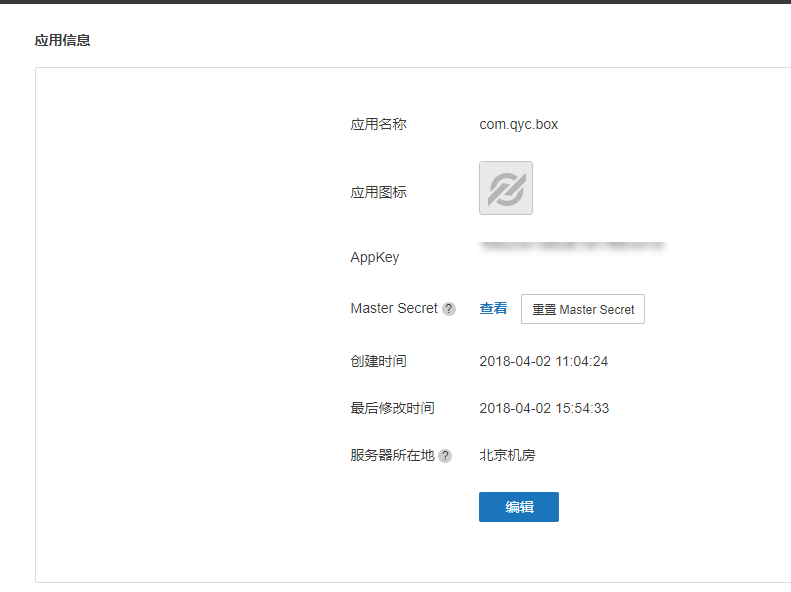
到应用下找到
我们需要的是appkey和secret这两个ID来进行推送和接收消息的
接下来就是引包的工作了
    cn.jpush.api
    jpush-client
    3.2.17


    cn.jpush.api
    jiguang-common
    1.0.3


   io.netty
   netty-all
   4.1.6.Final
   compile


   com.google.code.gson
   gson
   2.3


   org.slf4j
   slf4j-api
   1.7.7
之后我们需要继承极光的servlet
package com.bing.Jdpush.Servlet;

import javax.servlet.http.HttpServlet;
import javax.servlet.ServletException;
import javax.servlet.http.HttpServlet;
import javax.servlet.http.HttpServletRequest;
import javax.servlet.http.HttpServletResponse;

import com.bing.Jdpush.Jdpush;
import com.sun.org.apache.xml.internal.serializer.utils.Utils;

import java.io.IOException;


/**
 * Created by JiangNan on 2018/4/3.
 */
public class JiGuangServlet extends HttpServlet {
    private static final long serialVersionUID = 1L;

    private static final String appKey ="";
    private static final String masterSecret = "";
    private static final String message = "辛勤的老师给你布置了一点作业,请查看";
    public JiGuangServlet() {
        super();
        // TODO Auto-generated constructor stub
    }

    /**
     * @see HttpServlet#doGet(HttpServletRequest request, HttpServletResponse response)
     */
    protected void doGet(HttpServletRequest request, HttpServletResponse response) throws ServletException, IOException {
        Jdpush.testSendPush(appKey,masterSecret,message);
        System.out.println("sucess");
    }

    /**
     * @see HttpServlet#doPost(HttpServletRequest request, HttpServletResponse response)
     */
    protected void doPost(HttpServletRequest request, HttpServletResponse response) throws ServletException, IOException {
        // TODO Auto-generated method stub
    }
}
之后就是工具类来支持外部调用
package com.bing.Jdpush;

import cn.jiguang.common.resp.APIConnectionException;
import cn.jiguang.common.resp.APIRequestException;
import org.slf4j.Logger;
import org.slf4j.LoggerFactory;

import cn.jpush.api.JPushClient;
import cn.jpush.api.push.PushResult;
import cn.jpush.api.push.model.Message;
import cn.jpush.api.push.model.Options;
import cn.jpush.api.push.model.Platform;
import cn.jpush.api.push.model.PushPayload;
import cn.jpush.api.push.model.audience.Audience;
import cn.jpush.api.push.model.audience.AudienceTarget;
import cn.jpush.api.push.model.notification.AndroidNotification;
import cn.jpush.api.push.model.notification.IosNotification;
import cn.jpush.api.push.model.notification.Notification;

public class Jdpush {
    protected static final Logger LOG = LoggerFactory.getLogger(Jdpush.class);

    // demo App defined in resources/jpush-api.conf

    public static final String TITLE = "江南";
    public static final String ALERT = "祝大家新春快乐";
    public static final String MSG_CONTENT = "新春快乐";
    public static final String REGISTRATION_ID = "0900e8d85ef";
    public static final String TAG = "tag_api";

    public  static JPushClient jpushClient=null;

    public static void testSendPush(String appKey ,String masterSecret,String message) {
        jpushClient = new JPushClient(masterSecret, appKey, 3);

        // HttpProxy proxy = new HttpProxy("localhost", 3128);
        // Can use this https proxy: https://github.com/Exa-Networks/exaproxy


        // For push, all you need do is to build PushPayload object.
        //PushPayload payload = buildPushObject_all_all_alert();
        //生成推送的内容,这里我们先测试全部推送
        PushPayload payload=buildPushObject_android_tag_alertWithTitle(message);


        try {
            System.out.println(payload.toString());
            PushResult result = jpushClient.sendPush(payload);
            System.out.println(result+"................................");

            LOG.info("Got result - " + result);

        } catch (APIConnectionException e) {
            LOG.error("Connection error. Should retry later. ", e);

        } catch (APIRequestException e) {
            LOG.error("Error response from JPush server. Should review and fix it. ", e);
            LOG.info("HTTP Status: " + e.getStatus());
            LOG.info("Error Code: " + e.getErrorCode());
            LOG.info("Error Message: " + e.getErrorMessage());
            LOG.info("Msg ID: " + e.getMsgId());
        }
    }

    public static PushPayload buildPushObject_all_all_alert() {
        return PushPayload.alertAll(ALERT);
    }

    public static PushPayload buildPushObject_all_alias_alert() {
        return PushPayload.newBuilder()
                .setPlatform(Platform.all())//设置接受的平台
                .setAudience(Audience.all())//Audience设置为all,说明采用广播方式推送,所有用户都可以接收到
                .setNotification(Notification.alert("辛勤的老师刚刚为您布置了一点点作业,请注意查收"))
                .build();
    }

    public static PushPayload buildPushObject_android_tag_alertWithTitle(String message) {
        return PushPayload.newBuilder()
                .setPlatform(Platform.android())
                .setAudience(Audience.all())
                .setNotification(Notification.android(message, "JiangNan", null))
                .build();
    }

    public static PushPayload buildPushObject_android_and_ios() {
        return PushPayload.newBuilder()
                .setPlatform(Platform.android_ios())
                .setAudience(Audience.tag("tag1"))
                .setNotification(Notification.newBuilder()
                        .setAlert("alert content")
                        .addPlatformNotification(AndroidNotification.newBuilder()
                                .setTitle("Android Title").build())
                        .addPlatformNotification(IosNotification.newBuilder()
                                .incrBadge(1)
                                .addExtra("extra_key", "extra_value").build())
                        .build())
                .build();
    }

    public static PushPayload buildPushObject_ios_tagAnd_alertWithExtrasAndMessage() {
        return PushPayload.newBuilder()
                .setPlatform(Platform.ios())
                .setAudience(Audience.tag_and("tag1", "tag_all"))
                .setNotification(Notification.newBuilder()
                        .addPlatformNotification(IosNotification.newBuilder()
                                .setAlert(ALERT)
                                .setBadge(5)
                                .setSound("happy")
                                .addExtra("from", "JPush")
                                .build())
                        .build())
                .setMessage(Message.content(MSG_CONTENT))
                .setOptions(Options.newBuilder()
                        .setApnsProduction(true)
                        .build())
                .build();
    }

    public static PushPayload buildPushObject_ios_audienceMore_messageWithExtras() {
        return PushPayload.newBuilder()
                .setPlatform(Platform.android_ios())
                .setAudience(Audience.newBuilder()
                        .addAudienceTarget(AudienceTarget.tag("tag1", "tag2"))
                        .addAudienceTarget(AudienceTarget.alias("alias1", "alias2"))
                        .build())
                .setMessage(Message.newBuilder()
                        .setMsgContent(MSG_CONTENT)
                        .addExtra("from", "JPush")
                        .build())
                .build();
    }

}buildPushObject_android_tag_alertWithTitle这个方法请大家根据自己的情况来进行自由的更改
之后就可以直接根据我们的两个参数进行消息的推送了
package com.bing.controller;

import cn.jiguang.common.ClientConfig;
import cn.jiguang.common.resp.APIConnectionException;
import cn.jiguang.common.resp.APIRequestException;
import cn.jpush.api.JPushClient;
import cn.jpush.api.push.PushResult;
import cn.jpush.api.push.model.PushPayload;
import com.bing.Jdpush.Jdpush;
import com.bing.constant.ErrorEnum;
import com.bing.constant.ResultModel;
import com.bing.util.PropertiesUtil;
import com.google.gson.Gson;
import com.google.gson.GsonBuilder;
import org.apache.commons.logging.Log;
import org.apache.commons.logging.LogFactory;
import org.springframework.stereotype.Controller;
import org.springframework.web.bind.annotation.RequestMapping;
import org.springframework.web.bind.annotation.RequestMethod;
import org.springframework.web.bind.annotation.ResponseBody;

/**
 * Created by JaingNan on 2018/4/9.
 */
@Controller
@RequestMapping(value = "/Jdpush")
public class JiGuangController {

    private static final Log log = LogFactory.getLog(JiGuangController.class);

    private static final Gson gson = new GsonBuilder().serializeNulls().create();

    private final static String appkey = PropertiesUtil.getPropertiesValue("Jdpush","appkey");
    private final static String masterSecret = PropertiesUtil.getPropertiesValue("Jdpush","masterSecret");
    private final static String message = PropertiesUtil.getPropertiesValue("Jdpush","message");

    /**
     * 向所有人推送消息
     * @param
     * @return
     */
    @RequestMapping(method = RequestMethod.GET, produces = "application/json;charset=UTF-8", value = "/message")
    public @ResponseBody String message(String message) {
        ResultModel resultModel = new ResultModel();
        try{
            Jdpush.testSendPush(appkey,masterSecret,message);
            resultModel.setError(200);
            resultModel.setErrorCode(ErrorEnum.LLB_IM_SUCCESS.getErrCode());
            resultModel.setMsg(ErrorEnum.LLB_IM_SUCCESS.getErrMsg());
        }catch (Exception e){
            resultModel.setError(500);
            resultModel.setErrorCode(ErrorEnum.LLB_IN_ERROR.getErrCode());
            resultModel.setMsg(ErrorEnum.LLB_IN_ERROR.getErrMsg());
        }

        return gson.toJson(resultModel);
    }
}
在这里我是听过工具类的来进行配置文件读取的形势来进行参数的填充,便于后期维护嘛。
工具类
package com.bing.util;

import java.io.InputStream;
import java.util.Properties;

/**
 * Created by JiangNan on 2018/4/3.
 */
public class PropertiesUtil {
    public static String getPropertiesValue(String fileName, String keyName) {
        // 加载配置文件
        Properties props = new Properties();

        InputStream in = ResourcePropertiesUtils.class.getResourceAsStream("/"+fileName+".properties");
        try {
            props.load(in);
        } catch (Exception e) {
            e.printStackTrace();
        }
        return props.getProperty(keyName);
    }
}
配置文件(Jdpush.properties)
appkey=you appkey
masterSecret= you masterSecret
message=辛勤的老师给你布置了一点作业,请查看!
这样就可以直接通过GET的形势进行访问了


