首先你需要一台Lunix主机——一台连上外网的Lunix的电脑。
我在CONOHA买的VPS,相同配置下,性价比比DO和VULTR好那么一丢丢。
CONOHA主机购买地址
买到主机后的配置我就pass不写了,直接来说在终端状态下,然后搭建Hexo+Gitlab博客
安装请时刻注意自己在什么目录下!我是在root用户下完成的!因为node安装需要高级权限。
1.安装Node.js
- 下载
找到最新的下载地址,用wget命令下载到本地
wget https://nodejs.org/dist/v4.4.4/node-v4.4.4-linux-x64.tar.xz
解压命令,是xz文件。SO
  xz -d node-v4.4.4-linux-x64.tar.xz
  tar -xvf node-v4.4.4-linux-x64.tar
或者
tar -xvJf node-v4.4.4-linux-x64.tar.xz
文件就被解压到当前文件夹下了
 mv  node-v4.4.4-linux-x64 node-v4.4.4
 mv  node-v4.4.4 /usr/local/node
- 配置环境变量
# 编辑 /etc/profile (使用vim)
vim /etc/profile
# 在底部添加 PATH 变量
export PATH=$PATH:/usr/local/node/bin
# 保存退出,先按exit键,再按shift+:
wq
# 最后保存并使其生效即可
source /etc/profile
2.安装Hexo
这里我是在 /User/Zing目录下操作的!Zing是我的用户名!
# 创建目录
mkdir hexo
# 切换目录
cd hexo
# 安装Git(已安装可跳过)
yum install git-core
# 安装 Hexo
npm install -g hexo-cli
# 初始化 Hexo
hexo init
- 安装插件
npm install hexo-generator-index --save
npm install hexo-generator-archive --save
npm install hexo-generator-category --save
npm install hexo-generator-tag --save
npm install hexo-server --save
npm install hexo-deployer-git --save
npm install hexo-deployer-heroku --save
npm install hexo-deployer-rsync --save
npm install hexo-deployer-openshift --save
npm install hexo-renderer-marked --save
npm install hexo-renderer-stylus --save
npm install hexo-generator-feed --save
npm install hexo-generator-sitemap --save
- 修改Hexo配置文件
提示:key对应没有值的时候,冒号后面一定要有空格!否则会报错
例如: timezone:会报错,timezone: 则不会。
# Hexo Configuration
## Docs: https://hexo.io/docs/configuration.html
## Source: https://github.com/hexojs/hexo/

# Site 站点信息设置
title: Zing's Blog #站名
subtitle: 不忘初心 方得始终 #副标题
description: #站描述
author: Zing #作者
language: zh-CN #语言
timezone:

# URL 链接设置
## If your site is put in a subdirectory, set url as 'http://yoursite.com/child' and root as '/child/'
url: http://blog.prozin.xyz
root: /
permalink: :year/:month/:day/:title/
permalink_defaults:

# Directory 文件目录
source_dir: source
public_dir: public
tag_dir: tags
archive_dir: archives
category_dir: categories
code_dir: downloads/code
i18n_dir: :lang
skip_render:

# Writing 文章
new_post_name: :title.md # File name of new posts
default_layout: post
titlecase: false # Transform title into titlecase
external_link: true # Open external links in new tab
filename_case: 0
render_drafts: false
post_asset_folder: false
relative_link: false
future: true
highlight:
  enable: true
  line_number: true
  auto_detect: true
  tab_replace:

# Category & Tag
default_category: uncategorized
category_map:
tag_map:

# Date / Time format 日期
## Hexo uses Moment.js to parse and display date
## You can customize the date format as defined in
## http://momentjs.com/docs/#/displaying/format/
date_format: YYYY-MM-DD
time_format: HH:mm:ss

# Pagination 分页
## Set per_page to 0 to disable pagination
per_page: 20
pagination_dir: page

# Extensions 扩展
## Plugins: https://hexo.io/plugins/
## Themes: https://hexo.io/themes/
theme: landscape

# Deployment 这里设置了Git获
#这里一定要注意不要写错了,否则部署到Github上会出问题
## Docs: https://hexo.io/docs/deployment.html
deploy:
  type: git
  repo: [email protected]:mocorochio/micorochio.github.io.git
  branch: master
  message: '站点更新:{{now("YYYY-MM-DD HH/mm/ss")}}'
3.部署到GitHub
- 1.配置本机全局git环境(如果已经配置过请忽略)
首先请使用邮箱注册github账号,否则会影响下面操作,记住你注册的邮箱。
另外,请在VPS上设置你的git
  git config --global user.email "[email protected]"
  git config --global user.name "Your Name"
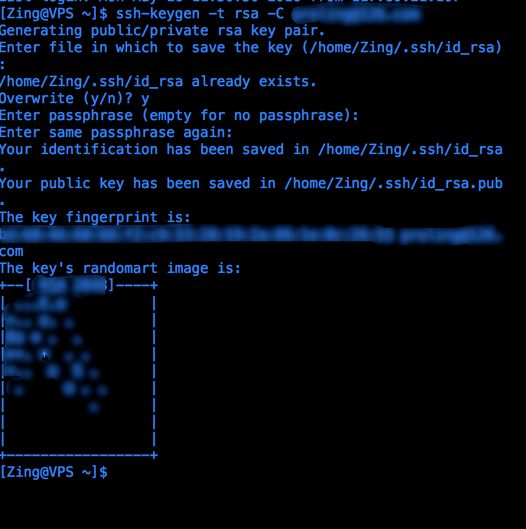
- 2.生成SSH秘钥
先确定你的VPS 有没有生成过ssh的key,
验证
less ~/.ssh/id_rsa.pub
如果报错
执行下面代码
# -C后面跟住你在github的用户名邮箱,这样公钥才会被github认可
 ssh-keygen -t rsa -C [email protected]
# 查看 公钥内容 稍后加入Github 账户的 sshkey中
 less ~/.ssh/id_rsa.pub
你会看到一堆代码
如果没有报错
# -C后面跟住你在github的用户名邮箱,这样公钥才会被github认可
 ssh-keygen -t rsa -C [email protected]
# 回车后,输入一个文件夹名字,存储新的SSH 秘钥
.ssh/github
# 查看 公钥内容 稍后加入Github 账户的 sshkey中
 less ~/.ssh/id_rsa.pub
当然,也有可能遇到这种情况,你可以选择覆盖(确认没有人使用当前的SSH秘钥),或者不覆盖 (如图)
- 3.创建博客工程
博客工程创建要注意!!!,看看 漠然 怎么说的
创建一个新项目,项目名称为 用户名.github.io ,比如我的Github用户名是mritd,则创建的项目名为 mritd.github.io
用户名是你的github用户名哦!千万别弄错了,不然访问不到的!

所以我的是[email protected]:mocorochio/micorochio.github.io.git
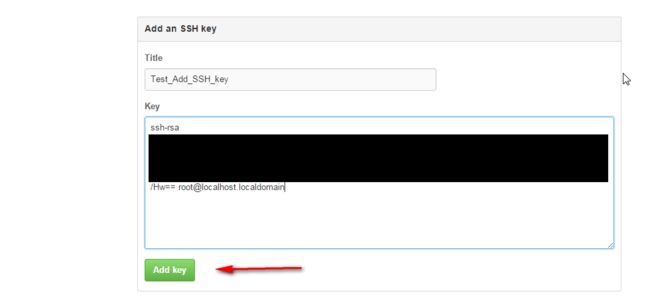
- 4.将ssh秘钥添加到github中
生成后,需要将秘钥放到github上去,登录你的github账号
进入秘钥设置面板:https://github.com/settings/ssh
在执行less ~/.ssh/id_rsa.pub你会看到一堆长密码

这一段密码全部复制到github上
- 5.配置Hexo,编译与部署
还记得我们在_config.yml里最后一段的配置吗?
# Deployment 这里设置了Git获
#这里一定要注意不要写错了,否则部署到Github上会出问题
## Docs: https://hexo.io/docs/deployment.html
deploy:
  type: git
  repo: [email protected]:mocorochio/micorochio.github.io.git
  branch: master
  message: '站点更新:{{now("YYYY-MM-DD HH/mm/ss")}}'
这里,repo就是你创建的博客工程
最后一步,编译,上传静态代码
# 编译
hexo generate
# 在主机的hexo目录下 执行以下命令将自动更新到Github
hexo d
4.修改主题和配置配置文件
- 4.1安装主题NexT
ps:我们现在在目录hexo下
git clone https://github.com/iissnan/hexo-theme-next themes/next
并在目录hexo下的_config.yml中
# 找到  theme:  修改后面的参数,默认是  landscape
theme: next
4.2配置主题
源码拷贝出来太多了,所以贴出next的使用说明供大家参考4.3找主题
https://hexo.io/themes/
访问:
看,现在通过 昵称.github.io可以访问静博客了
http://micorochio.github.io
最后感谢漠然-mrtid
本文参考了以下站点文章:
Github 搭建 Hexo 静态博客
Hexo 主题 next