该文章是一个系列文章,是本人在Android开发的漫漫长途上的一点感想和记录,我会尽量按照先易后难的顺序进行编写该系列。该系列引用了《Android开发艺术探索》以及《深入理解Android 卷Ⅰ,Ⅱ,Ⅲ》中的相关知识,另外也借鉴了其他的优质博客,在此向各位大神表示感谢,膜拜!!!另外,本系列文章知识可能需要有一定Android开发基础和项目经验的同学才能更好理解,也就是说该系列文章面向的是Android中高级开发工程师。
上一篇我们详细分析了Android事件体系。也从源码角度彻底了解了为何会有如此表现。不仅要知其然,更要知其所以然。那么本篇呢,我们依然是来自定义View。与上一番外篇不同的是本章的重点放在ViewGroup上。我们知道ViewGroup是View的子类,Android系统中有许多控件继承自ViewGroup的控件。比如我们常用的FrameLayout、LinearLayout、RelativeLayout等布局都是继承自ViewGroup。自定义ViewGroup难度比较大,是因为ViewGroup要管理子View的测量、布局等。关于View的测量、布局、绘制我们在Android开发之漫漫长途 Ⅴ——Activity的显示之ViewRootImpl的PreMeasure、WindowLayout、EndMeasure、Layout、Draw已经详细分析了。
注:我真是给自己挖了个大坑,关于自定义ViewGroup的实例我想了好久也找了好久。发现想要实现一个很有规范的自定义View是有一定代价的,这点你看看LinearLayout等系统本身的ViewGroup控件的源码就知道,他们的实现都很复杂。想选择一个较简单的把,又不想注水,较难的把,感觉又绕进了代码的死胡同。不能让读者对自定义ViewGroup的核心有个更清晰的认识。一直拖到今天,真是要对大家说抱歉。好了,这些“矫情”的话就不多说了,我们还是来看下面的实例把。
实现流式布局FlowLayout
我在拉勾网App上搜索公司或者职位的下方发现一个效果
拉勾网这些显示的具体数据怎么来的我们不讨论,我们试着来实现一下它的这个布局效果。
处于上方的Tag“猜你喜欢”、“热门公司”可以用一个TextView显示,我们忽略它。关键是下方的标签流式布局。我们就来分析它。
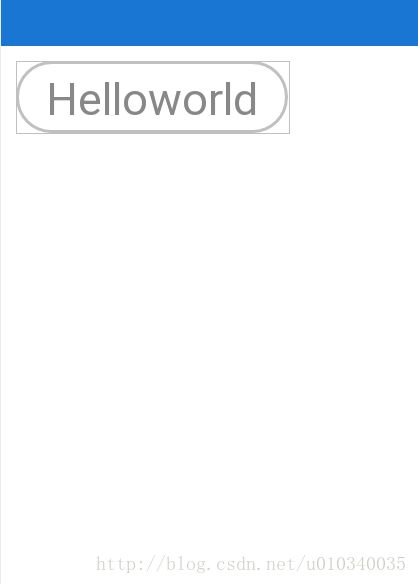
- 首先流式布局中的标签应该是个TextView,关于它下方的椭圆形边界,我们可以为其制定background
layout/tag_view.xml
drawable/tag_bg.xml
-
drawable/checked_bg.xml
drawable/normal_bg.xml
drawable/text_color.xml
上方布局可得到如下预览
至此我们的准备工作已经完毕。
- 自定义ViewGroup(重点)
上面我们已经得到了一个布局文件达到了我们流式布局中的子View的显示效果。那我们下面就来自定义ViewGroup来实现上述的流式布局。
① 首先继承自ViewGroup,继承自ViewGroup重写其构造函数以及onLayout方法,我们使用AndroidStudio提示就行了
public class MyTagFlowLayout extends ViewGroup {
  public MyTagFlowLayout(Context context) {
       this(context, null);
   }

   public MyTagFlowLayout(Context context, AttributeSet attrs) {
       this(context, attrs,0);
   }

   public MyTagFlowLayout(Context context, AttributeSet attrs, int defStyleAttr) {
       this(context, attrs,defStyleAttr,0);

   }

   @SuppressLint("NewApi")
   public MyTagFlowLayout(Context context, AttributeSet attrs, int defStyleAttr, int defStyleRes) {
       super(context, attrs, defStyleAttr, defStyleRes);

 @Override
    protected void onLayout(boolean changed, int l, int t, int r, int b) {

    }
}
② 初始化一些信息
//由上图可知,我们可将上面的流式布局分为三部分

//每一行的View 组成的List
 private List lineViews = new ArrayList<>();
 //每一行的高度 组成的List
 private List mLineHeight = new ArrayList();
 //所有的View
 private List> mAllViews = new ArrayList>();
 //适配器
 private MyTagAdapter mTagAdapter;
我们先搞定适配器,我们提供一个数组信息
//需要显示的数据
 private String[] mGuseeYourLoveVals = new String[]
            {"Android", "Android移动", "Java", "UI设计师", "android实习",
                    "android 移动","android安卓","安卓"};
适配器的实现十分简单,我们可以仿照Android系统自有的适配器
/**
    抽象类
*/
public abstract class MyTagAdapter {
    //数据
    private List mTagDatas;
    //构造函数
    public MyTagAdapter(T[] datas) {
        mTagDatas = new ArrayList(Arrays.asList(datas));
    }
    //获取总数
    public int getCount() {
        return mTagDatas == null ? 0 : mTagDatas.size();
    }
    //抽象方法 获取View 由子类具体实现如何获得View
    public abstract View getView(MyTagFlowLayout parent, int position, T t);
    //获取数据中的某个Item
    public T getItem(int position) {
        return mTagDatas.get(position);
    }
}
我们在MainActivity中调用如下语句
//MyTagFlowLayout使我们自定义的ViewGroup,目前该类还是默认实现
mGuseeYourLoveFlowLayout = (MyTagFlowLayout) findViewById(R.id.id_guess_your_love);
//指定适配器,我们这里使用了匿名内部类的方式指定
mGuseeYourLoveFlowLayout.setAdapter(new MyTagAdapter(mGuseeYourLoveVals)
{
    //获取LayoutInflater
    final LayoutInflater mInflater = LayoutInflater.from(MainActivity.this);
    //重点来了,我们在该匿名内部类中实现了MyTagAdapter的getView方法
    @Override
    public View getView(MyTagFlowLayout parent, int position, String s)
    {
        //在该方法中我们去加载了我们上面提到的layout/tag_view.xml,并返回TextView
        TextView tv = (TextView) mInflater.inflate(R.layout.tag_view,
                mGuseeYourLoveFlowLayout, false);
        tv.setText(s);
        return tv;
    }
});
其中MyTagFlowLayout的setAdapter方法如下,,我们一点点分析MyTagFlowLayout定义过程
public void setAdapter(MyTagAdapter adapter) {
    removeAllViews();//先清空MyTagFlowLayout下的所有View
    for (int i = 0; i < adapter.getCount(); i++) {
        //这里的tagView 就是刚才的TextView
        View tagView = adapter.getView(this, i, adapter.getItem(i));
        //添加View
        addView(tagView);
    }
}
此时我们的MyTagFlowLayout数据已经加载完毕,接下来就是显示,,显示才是重中之重
我们先来复习一下View的显示过程measure->layout->draw。那么显然我们这个要先measure,那就重写onMeasure方法把
    @Override
    protected void onMeasure(int widthMeasureSpec, int heightMeasureSpec) {
        //这里我们先获取父View给定的测量参数,注意这个父View代表的是MyTagFlowLayout的父View
        int sizeWidth = MeasureSpec.getSize(widthMeasureSpec);//获取父View传给MyTagFlowLayout的宽度
        int modeWidth = MeasureSpec.getMode(widthMeasureSpec);//获取父View传给MyTagFlowLayout的宽度测量模式
        int sizeHeight = MeasureSpec.getSize(heightMeasureSpec);//获取父View传给MyTagFlowLayout的高度
        int modeHeight = MeasureSpec.getMode(heightMeasureSpec);//获取父View传给MyTagFlowLayout的高度测量模式


        int width = 0;
        int height = 0;

        int lineWidth = 0;
        int lineHeight = 0;
        //得到所有的子View,在上一步的过程中我们已经添加的子View,按照上一步的数据,这里的cCount 应该是8
        int cCount = getChildCount();

        for (int i = 0; i < cCount; i++) {
            //循环得到每一个子View,这个的child指向的实际是我们上面添加TextView
            View child = getChildAt(i);
             //测量每一个子View,
            measureChild(child, widthMeasureSpec, heightMeasureSpec);
            //得到每一个子View的测量宽度和高度
            int childWidth = child.getMeasuredWidth();
            int childHeight = child.getMeasuredHeight();
            //如果当前行的宽度+将要添加的child的宽度 > MyTagFlowLayout的宽度-pading,说明当前行已经“满”了,这个“满”了意思是,当前行已经容纳不了下一个子View
            if (lineWidth + childWidth > sizeWidth - getPaddingLeft() - getPaddingRight()) {//"满"了需要换行
                width = Math.max(width, lineWidth);//MyTagFlowLayout的宽度取上一次宽度和当前lineWidth的最大值
                lineWidth = childWidth;//重置当前行的lineWidth
                height += lineHeight;//MyTagFlowLayout的高度增加
                lineHeight = childHeight;//重置当前行的lineHeight 为子View的高度
            } else {//没“满”,当前行可以容纳下一个子View
                lineWidth += childWidth;//当前行的宽度增加
                lineHeight = Math.max(lineHeight, childHeight);//当前行的高度取上一次高度和子View的高度的最大值
            }
            if (i == cCount - 1) {//如果当前View是最后的View
                width = Math.max(lineWidth, width);//MyTagFlowLayout的宽度取上一次宽度和当前lineWidth的最大值
                height += lineHeight;//MyTagFlowLayout的高度增加
            }
        }
        //设置MyTagFlowLayout的高度和宽度
        //如果是在XMl指定了MyTagFlowLayout的宽度,如 android:layout_width="40dp"那就使用指定的宽度,否则使用测量的宽度-padding,高度的设置与宽度雷同
        setMeasuredDimension(
                modeWidth == MeasureSpec.EXACTLY ? sizeWidth : width + getPaddingLeft() + getPaddingRight(),
                modeHeight == MeasureSpec.EXACTLY ? sizeHeight : height + getPaddingTop() + getPaddingBottom()
        );

    }
上面我们已经分析了onMeasure方法,measure是测量,后面的layout是布局,我们来看一下布局
@Override
protected void onLayout(boolean changed, int l, int t, int r, int b) {
    //先清除所有的List
    mAllViews.clear();
    mLineHeight.clear();
    lineViews.clear();

    //得到MyTagFlowLayout的宽度,这个我们已经在onMeasure方法中得到了
    int width = getWidth();
    //行宽和行高初始化为0
    int lineWidth = 0;
    int lineHeight = 0;
    //一样的得到所有子View的数量
    int cCount = getChildCount();

    for (int i = 0; i < cCount; i++) {
        //循环得到每一个子View,这个的child指向的实际是我们上面添加TextView
        View child = getChildAt(i);
        //View 可见性如果是View.GONE,则忽略它
        if (child.getVisibility() == View.GONE) continue;
        //得到子View的测量宽度和高度
        int childWidth = child.getMeasuredWidth();
        int childHeight = child.getMeasuredHeight();
        //如果当前行宽lineWidth + 当前子View的宽度 > MyTagFlowLayout的宽度-padding,那么我们该换行显示了
        if (childWidth + lineWidth > width - getPaddingLeft() - getPaddingRight()) {
            mLineHeight.add(lineHeight);//把当前行高lineHeight添加进表示当前所有行 行高表示的mLineHeight list中
            mAllViews.add(lineViews);//同样的加入mAllViews

            lineWidth = 0;//重置行宽
            lineHeight = childHeight;//重置行高
            lineViews = new ArrayList();//重置lineViews
        }

        lineWidth += childWidth;//当前行宽lineWidth 增加
        lineHeight = Math.max(lineHeight, childHeight );;//当前行高lineHeight 取前一次行高和子View的最大值
        lineViews.add(child);//把子View添加进表示当前所有子View的lineViews的list中

    }
    mLineHeight.add(lineHeight);//把当前行高lineHeight添加进表示当前所有行 行
    mAllViews.add(lineViews);//同样的加入mAllViews

    //获取PaddingTop
    int top = getPaddingTop();
    //获取所有行的数量
    int lineNum = mAllViews.size();

    for (int i = 0; i < lineNum; i++) {
        //循环取出每一行
        lineViews = mAllViews.get(i);
        //循环去除每一行的行高
        lineHeight = mLineHeight.get(i);
        //获取PaddingLeft
        int left = getPaddingLeft();


        for (int j = 0; j < lineViews.size(); j++) {
            //从每一行中循环取出子View
            View child = lineViews.get(j);
            if (child.getVisibility() == View.GONE) {
                continue;
            }
            //调用child的layout,这里实际上是调用TextView.layout
            child.layout(left, top, lc + child.getMeasuredWidth(), tc + child.getMeasuredHeight());

            left += child.getMeasuredWidth() ;//left递增
        }
        top += lineHeight;//top递增
    }

}
好了,我们来运行一下
效果并不像我们在文章开头给出的那样,,但是起码出来一个类似的了。下面要考虑的就是如何为这些子View添加合适的间距了。。我相信聪明的读者一定可以自行解决这个问题的。这里稍微提示一下间距->margin?? 如有疑问,请留言。
本篇总结
本篇文章我们初探了自定义ViewGroup的一些知识和思想,很遗憾,该篇文章中许多代码并不是最佳实践,希望各位读者雅正。而且关于View的事件问题,我找了好久实在找不出好的例子来这里分享给大家,如果大家有好的想法,请在评论区砸我吧,最好是把View的绘制体系和事件体系完美结合、简单明了、“活血化瘀”自定义ViewGroup的实例。。我在这里向被辜负期望的读者们道歉。最后附上这一篇以及上一篇自定义View的全部源码Github传送门
下篇预告
如果有人提供想法,那么下一篇我们还是来自定义ViewGroup,如果没有,(我的博客貌似一直很少人评论),我们就来稍微歇歇,,看看平常开发中经常遇到的内存泄漏及相关解决办法。
此致,敬礼


