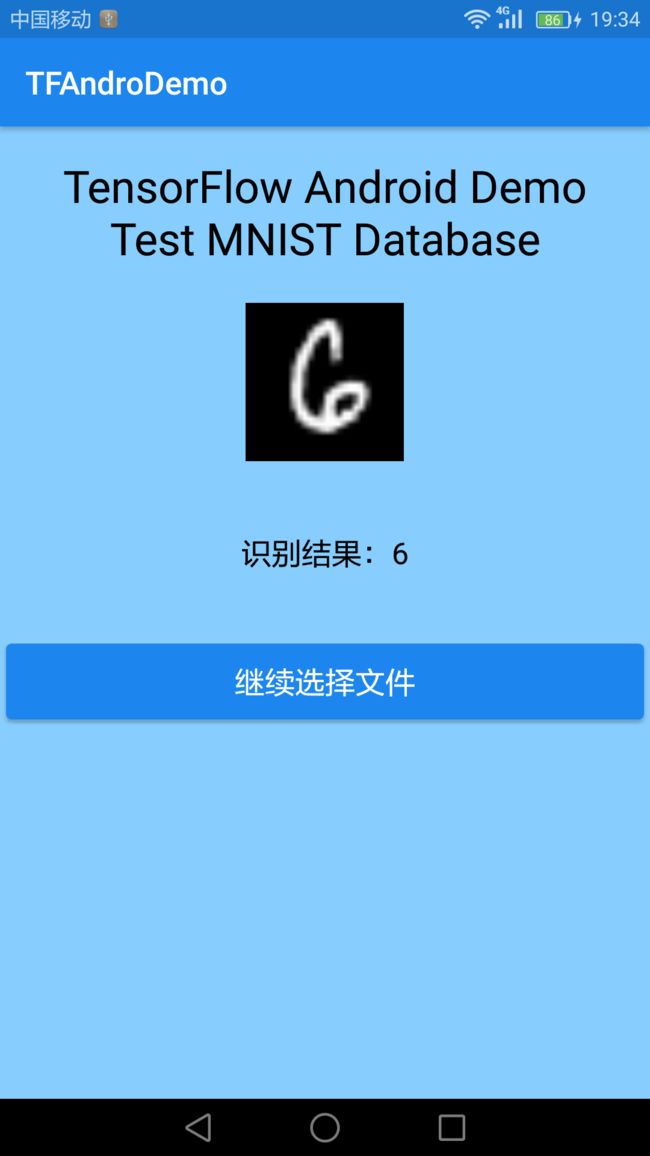
本文基于TensorFlow实现了MNIST手写数字识别,并将训练好的模型移植到了Android上。
环境配置
- TensorFlow 1.0.1
- Python2.7
- Android Studio 2.2
主要步骤
- 生成pb文件:使用TensorFlow Python API 构建并训练网络,最后将训练后的网络的拓扑结构和参数保存为pb文件。
- 构建jar包和so库:TensorFlow Android Inference Interface提供了名为org.tensorflow.contrib.android.TensorFlowInferenceInterface的Java类,使得开发者可以在Android平台上加载TensorFlow graphs,完成本地识别。
- 将pb文件、jar包以及so库引入Android工程中,并基于
TensorFlowInferenceInterface类完成识别。
移植过程
一、生成pb文件
pb文件中保存了网络的拓扑结构和参数。为了得到pb文件需要先基于TensorFlow Python API 构建并训练网络。
1. 给网络拓扑中的关键节点指定名称
网络的输入节点和输出节点在使用tf.placeholder定义的时候必须要通过name形参指定名称,便于在将模型移植到Android后可以通过名称来获取指定节点的值,或者给指定节点赋值。
x = tf.placeholder(tf.float32, [None, height, width], name='input')  #输入节点的名字这里取名为'input'
sofmax_out = tf.nn.softmax(logits,name="out_softmax") #输出节点
# keep_prob_placeholder这个节点也命名了,便于后期用于区分训练和测试。
keep_prob_placeholder = tf.placeholder(tf.float32, name='keep_prob_placeholder')
2. 将训练好后的网络模型保存为pb文件
这是通过convert_variables_to_constants(sess, input_graph_def, output_node_names,variable_names_whitelist=None)函数实现的,该函数的定义见这。
convert_variables_to_constants完成如下两件事情:(@mirosval的回答)
convert_variables_to_constants()
does two things:
It freezes the weights by replacing variables with constants
It removes nodes which are not related to feedforward prediction
from tensorflow.python.framework import graph_util

constant_graph = graph_util.convert_variables_to_constants(sess, sess.graph_def, ["out_softmax"])
with tf.gfile.FastGFile(pb_file_path,mode='wb') as f:
    f.write(constant_graph.SerializeToString())
二、构建jar包和so库
详细的构建过程可以参考官网:https://github.com/tensorflow/tensorflow/tree/r1.0/tensorflow/contrib/android
这里简要地总结一下主要步骤。
1. 安装 Bazel,Android NDK,Android SDK
- Bazel的安装参考官网
2. 下载TensorFlow源码,修改项目根目录下的WORKSPACE文件
本文下载的是TensorFlow 1.0.1。
修改WORKSPACE文件中的Android SDK和Android NDK的配置信息,其中的路径等信息根据之前的安装情况进行修改。
本文将WORKSPACE文件的配置修改如下:
# Uncomment and update the paths in these entries to build the Android demo.
android_sdk_repository(
    name = "androidsdk",
    api_level = 25,
    build_tools_version = "25.0.2",
    # Replace with path to Android SDK on your system
    path = "/home/tsiangleo/android_dev/tool/android-sdk-linux",
)

android_ndk_repository(
    name="androidndk",
    path="/home/tsiangleo/android_dev/tool/android-ndk-r13b",
    api_level=21)
3. 构建so库
在TensorFlow源码的根目录下执行如下命令,构建so库。
bazel build -c opt //tensorflow/contrib/android:libtensorflow_inference.so \
   --crosstool_top=//external:android/crosstool \
   --host_crosstool_top=@bazel_tools//tools/cpp:toolchain \
   --cpu=armeabi-v7a
构建成功后,可在如下目录找到so库。
bazel-bin/tensorflow/contrib/android/libtensorflow_inference.so
4. 构建jar包
在TensorFlow源码的根目录下执行如下命令,构建jar包。
bazel build //tensorflow/contrib/android:android_tensorflow_inference_java
构建成功后,可在如下目录找到jar包。
bazel-bin/tensorflow/contrib/android/libandroid_tensorflow_inference_java.jar
三、整合到Android Studio工程
以下操作针对Android Studio。
1.将pb文件放入Android项目中
打开 Project view ,app/src/main/assets。
若不存在assets目录,右键main->new->Directory,输入assets。
2.将jar包引入Android项目中
打开Project view,将jar包拷贝到app->libs下
选中jar文件,右键 add as library
3.将so库引入Android项目中
打开 Project view,将libtensorflow_inference.so文件拷贝到 app/src/main/jniLibs/armeabi-v7a下(若jniLibs/armeabi-v7a目录不存在,则先创建,方法同1。)。
4.基于TensorFlowInferenceInterface类,编写代码进行识别。
在TensorFlow1.0中,TensorFlowInferenceInterface类的定义为: https://github.com/tensorflow/tensorflow/blob/r1.0/tensorflow/contrib/android/java/org/tensorflow/contrib/android/TensorFlowInferenceInterface.java
该类的用法可参官网的TensorFlowImageClassifier示例。
下面以识别MNIST手写数字为例来介绍,具体代码见github。
(1)定义一些关键的常量
    public static final String MODEL_FILE = "file:///android_asset/mnist-tf1.0.1.pb"; //asserts目录下的pb文件名字
    public static final String INPUT_NODE = "input";       //输入节点的名称
    public static final String OUTPUT_NODE = "out_softmax";  //输出节点的名称
    public static final String KEEP_PROB_NODE = "keep_prob_placeholder"; // keep_prob节点的名称

    public static final int NUM_CLASSES = 10;   //输出节点的个数,即总的类别数。
    public static final int HEIGHT = 28;       //输入图片的像素高
    public static final int WIDTH = 28;        //输入图片的像素宽
(2)创建TensorFlowInferenceInterface对象并初始化
        //初始化TensorFlowInferenceInterface对象。
        TensorFlowInferenceInterface inferenceInterface = new TensorFlowInferenceInterface();

        //根据指定的MODEL_FILE创建一个本地的TensorFlow session
        inferenceInterface.initializeTensorFlow(context.getAssets(), MODEL_FILE);
(3)输入图片的像素点,得到分类结果
        // 输入数据pixelArray,pixelArray的数据类型是float[],存放了一张图片的像素点。
        inferenceInterface.fillNodeFloat(INPUT_NODE, new int[]{1, HEIGHT, WIDTH}, pixelArray);
        inferenceInterface.fillNodeFloat(KEEP_PROB_NODE,new int[]{1},new float[]{1.0f});

        //进行模型的推理
        inferenceInterface.runInference(new String[]{OUTPUT_NODE});

        //获取图片属于各个分类的概率,存放在outputs数组中。
        float[] outputs = new float[NUM_CLASSES];    //用于存储模型的输出数据
        inferenceInterface.readNodeFloat(OUTPUT_NODE, outputs); //获取输出数据
本文源码
网络模型的创建及训练
https://github.com/tsiangleo/TensorFlowMnist-
将训练好的模型移植到Android项目中
https://github.com/tsiangleo/TensorFlowMnistAndroidDemo
MNIST Android项目的运行效果如下:
参考文档
- https://github.com/tensorflow/tensorflow/tree/r1.0/tensorflow/contrib/android
- http://stackoverflow.com/questions/34343259/is-there-an-example-on-how-to-generate-protobuf-files-holding-trained-tensorflow
- 详解如何将TensorFlow训练的模型移植到Android手机
- 将TensorFlow的网络导出为单个文件
