ReactNative 整合极光推送jpush-react-native(Android端)
http://www.jianshu.com/p/cce27f16036d
一、证书
1、在苹果官网创建推送证书(生产和开发)
2、在极光推送官网中创建应用时需要配置证书(生产和开发)
二、安装(若参考上文已安装请忽略)
我的react-native版本是0.42.0
npm install jcore-react-native --save
npm install jpush-react-native --save
react-native link
三、配置
1、自动link(react-native link后)
(1)target ->Build Phases->Link Binary with Libraries 中加入库
libz.tbd
CoreTelephony.framework
Security.framework
CFNetwork.framework
CoreFoundation.framework
SystemConfiguration.framework
Foundation.framework
UIKit.framework
UserNotifications.framework
libresolv.tbd
(2)RCTJPushModule.xcodeproj 工程会自动添加到 Libraries 目录里面
(3)AppDelegate.m中增加了一些代码
(4)target ->BuildSetting->Header Search Paths中添加
$(SRCROOT)/../node_modules/jpush-react-native/ios/RCTJPushModule/RCTJPushModule

等等...
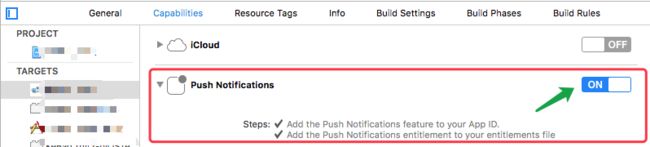
2、手动配置
(1)target ->Capabilities->Push Notifications
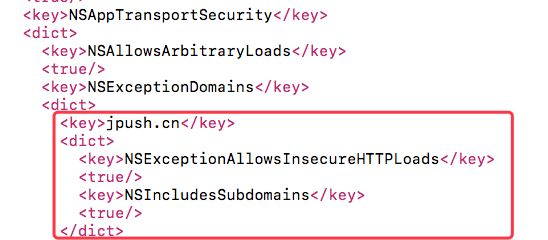
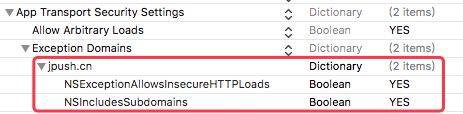
(2)在plist文件中NSAppTransportSecurity添加
jpush.cn
NSExceptionAllowsInsecureHTTPLoads
NSIncludesSubdomains
(3)AppDelegate.h
static NSString *appKey = @"你的appKey"; //填写appkey
static NSString *channel = @""; //填写channel 一般为nil
static BOOL isProduction = false; //填写isProdurion 平时测试时为false ,生产时填写true
(4)AppDelegate.m
********引入头文件
#import
#import "JPUSHService.h"
#ifdef NSFoundationVersionNumber_iOS_9_x_Max
#import
#endif
********添加@interface AppDelegate()
@interface AppDelegate()
@end
********didFinishLaunchingWithOptions方法中添加
if ([[UIDevice currentDevice].systemVersion floatValue] >= 10.0) {
JPUSHRegisterEntity * entity = [[JPUSHRegisterEntity alloc] init];
entity.types = UNAuthorizationOptionAlert|UNAuthorizationOptionBadge|UNAuthorizationOptionSound;
[JPUSHService registerForRemoteNotificationConfig:entity delegate:self];
}
else if ([[UIDevice currentDevice].systemVersion floatValue] >= 8.0) {
//可以添加自定义categories
[JPUSHService registerForRemoteNotificationTypes:(UNAuthorizationOptionBadge |
UNAuthorizationOptionSound |
UNAuthorizationOptionAlert)
categories:nil];
}
else {
//categories 必须为nil
[JPUSHService registerForRemoteNotificationTypes:(UNAuthorizationOptionBadge |
UNAuthorizationOptionSound |
UNAuthorizationOptionAlert)
categories:nil];
}
[JPUSHService setupWithOption:launchOptions appKey:appKey
channel:nil apsForProduction:isProduction];
********添加方法(如果已有请删除原有的)
- (void)application:(UIApplication *)application
didRegisterForRemoteNotificationsWithDeviceToken:(NSData *)deviceToken {
[JPUSHService registerDeviceToken:deviceToken];
}
//-----------------------------------------------------------------------
- (void)application:(UIApplication *)application didReceiveRemoteNotification:(NSDictionary *)userInfo {
// 取得 APNs 标准信息内容
[[NSNotificationCenter defaultCenter] postNotificationName:kJPFDidReceiveRemoteNotification object:userInfo];
}
//iOS 7 Remote Notification
- (void)application:(UIApplication *)application didReceiveRemoteNotification: (NSDictionary *)userInfo fetchCompletionHandler:(void (^) (UIBackgroundFetchResult))completionHandler {
[[NSNotificationCenter defaultCenter] postNotificationName:kJPFDidReceiveRemoteNotification object:userInfo];
}
// iOS 10 Support
- (void)jpushNotificationCenter:(UNUserNotificationCenter *)center willPresentNotification:(UNNotification *)notification withCompletionHandler:(void (^)(NSInteger))completionHandler {
// Required
NSDictionary * userInfo = notification.request.content.userInfo;
if([notification.request.trigger isKindOfClass:[UNPushNotificationTrigger class]]) {
[JPUSHService handleRemoteNotification:userInfo];
[[NSNotificationCenter defaultCenter] postNotificationName:kJPFDidReceiveRemoteNotification object:userInfo];
}
completionHandler(UNNotificationPresentationOptionAlert); // 需要执行这个方法,选择是否提醒用户,有Badge、Sound、Alert三种类型可以选择设置
}
// iOS 10 Support
- (void)jpushNotificationCenter:(UNUserNotificationCenter *)center didReceiveNotificationResponse:(UNNotificationResponse *)response withCompletionHandler:(void (^)())completionHandler {
// Required
NSDictionary * userInfo = response.notification.request.content.userInfo;
if([response.notification.request.trigger isKindOfClass:[UNPushNotificationTrigger class]]) {
[JPUSHService handleRemoteNotification:userInfo];
[[NSNotificationCenter defaultCenter] postNotificationName:kJPFDidReceiveRemoteNotification object:userInfo];
}
completionHandler(); // 系统要求执行这个方法
}
- (void)application:(UIApplication *)application didFailToRegisterForRemoteNotificationsWithError:(NSError *)error {
//Optional
NSLog(@"did Fail To Register For Remote Notifications With Error: %@", error);
}
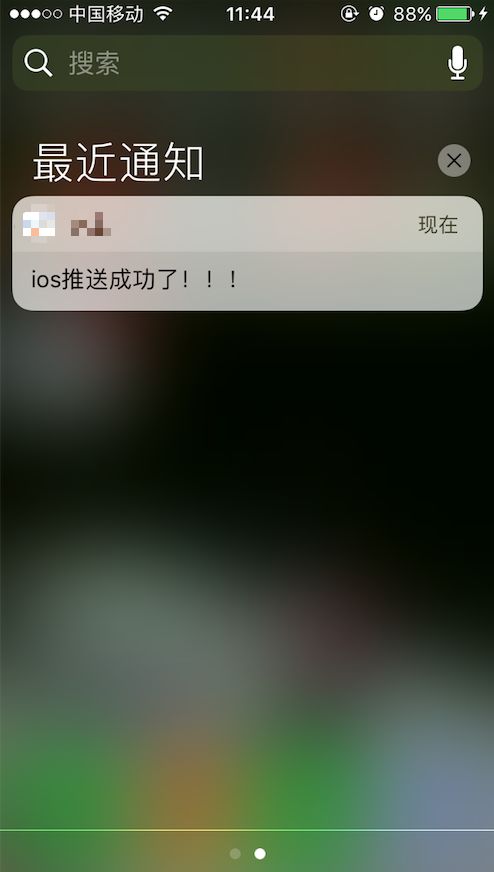
四、测试推送

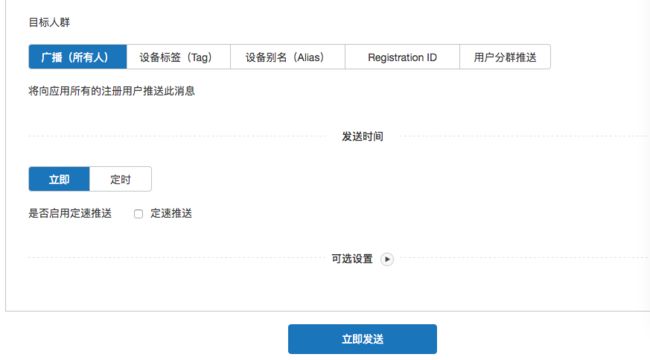

参考:
http://www.jianshu.com/p/e7f81b5e1807
补充:
"jcore-react-native":"^1.2.5",
"jpush-react-native":"^2.2.0",
最新版的jpush-react-native,react-native版本号0.52.0
最新版的jpush-react-native不需要手动配置这么多东西了,但是按照文档配置的ios端,推送发送不成功,也获取不到RegistrationID
解决方法:
在AppDelegate.m的didFinishLaunchingWithOptions方法中增加
JPUSHRegisterEntity * entity = [[JPUSHRegisterEntity alloc] init];
entity.types = UNAuthorizationOptionAlert|UNAuthorizationOptionBadge|UNAuthorizationOptionSound;
[JPUSHService registerForRemoteNotificationConfig:entity delegate:self];
